2020年7月31日星期五
A Dubby Sled and 5 other cool tools you need to know about...
from Stumpy Nubs https://www.youtube.com/watch?v=4XNh0v2GUJA
Don’t Mix Brands
Show notes coming soon.
The post Don’t Mix Brands appeared first on The Wood Whisperer.
from The Wood Whisperer https://ift.tt/2EAlDF3
Blacksmith Rivet Tool From Scrap High Carbon Steel
from Black Beard Projects https://www.youtube.com/watch?v=CAg9Dp0cvRs
STL221: Gary Rogowski admits woodworking is hard
Gary Rogowski joins Ben to answer listener questions on drying lumber, sharpening problems, sawing practice, and the feasibility to create a four legged piece without it rocking.
from FineWoodworking https://ift.tt/33eVcPA
from FineWoodworking https://ift.tt/33eVcPA
2020年7月30日星期四
Vlog 156: 22 projects in 7 days..
Video Notes: – 7 people in the house for 6 nights and 9 people in the house for 5 nights. So much fun spending time with family. – 22 projects made in one week. – Red paper wasps. 4 sings on 3 people in 3 days. Not fun. I’m on a wasp hunting rage.. – […]
The woodworking clamps you need
It’s true that you can’t have too many, but you can have too many useless ones. So here’s Megan Fitzpatrick's take on what clamps you need, in the order that she uses them most.
from FineWoodworking https://ift.tt/3156Rh8
from FineWoodworking https://ift.tt/3156Rh8
Brass Setup Bar Storage
I use my brass setup bars frequently at my router table, so here’s how I keep them within easy reach. I routed a dado slot for each bar into a scrap piece of 3/4″ plywood that’s large enough to fit the set with the bars spaced 1/2″ apart. The front-to-back measurement of each dado is a finger width less than the bar length, and the dadoes are about 1/16″ deeper than necessary so the bars are easy to insert and remove. When I screwed the completed tray to the bottom of the tabletop, I wedged a 1/4″ dowel at the back so the tray tilts backward slightly. This keeps the bars from vibrating out during routing or while I’m moving the table around the shop.
– Ray Brakke
Morrison, Colorado
The post Brass Setup Bar Storage appeared first on Woodworking | Blog | Videos | Plans | How To.
from Woodworking | Blog | Videos | Plans | How To https://ift.tt/2D2d45y
2020年7月29日星期三
Build a Puzzle Stool with a 3-Way Joint
from Popular Woodworking https://www.youtube.com/watch?v=WC8l0GzwHF4
Workshop Tip: Simple way to micro-adjust your rip fence
A block of wood and some playing cards help with tiny adjustments to the rip fence on your tablesaw.
from FineWoodworking https://ift.tt/311Qphw
from FineWoodworking https://ift.tt/311Qphw
How long does a freezer stay frozen with no power: experiments
from Matthias random stuff https://www.youtube.com/watch?v=iaKnR1Uz3bg
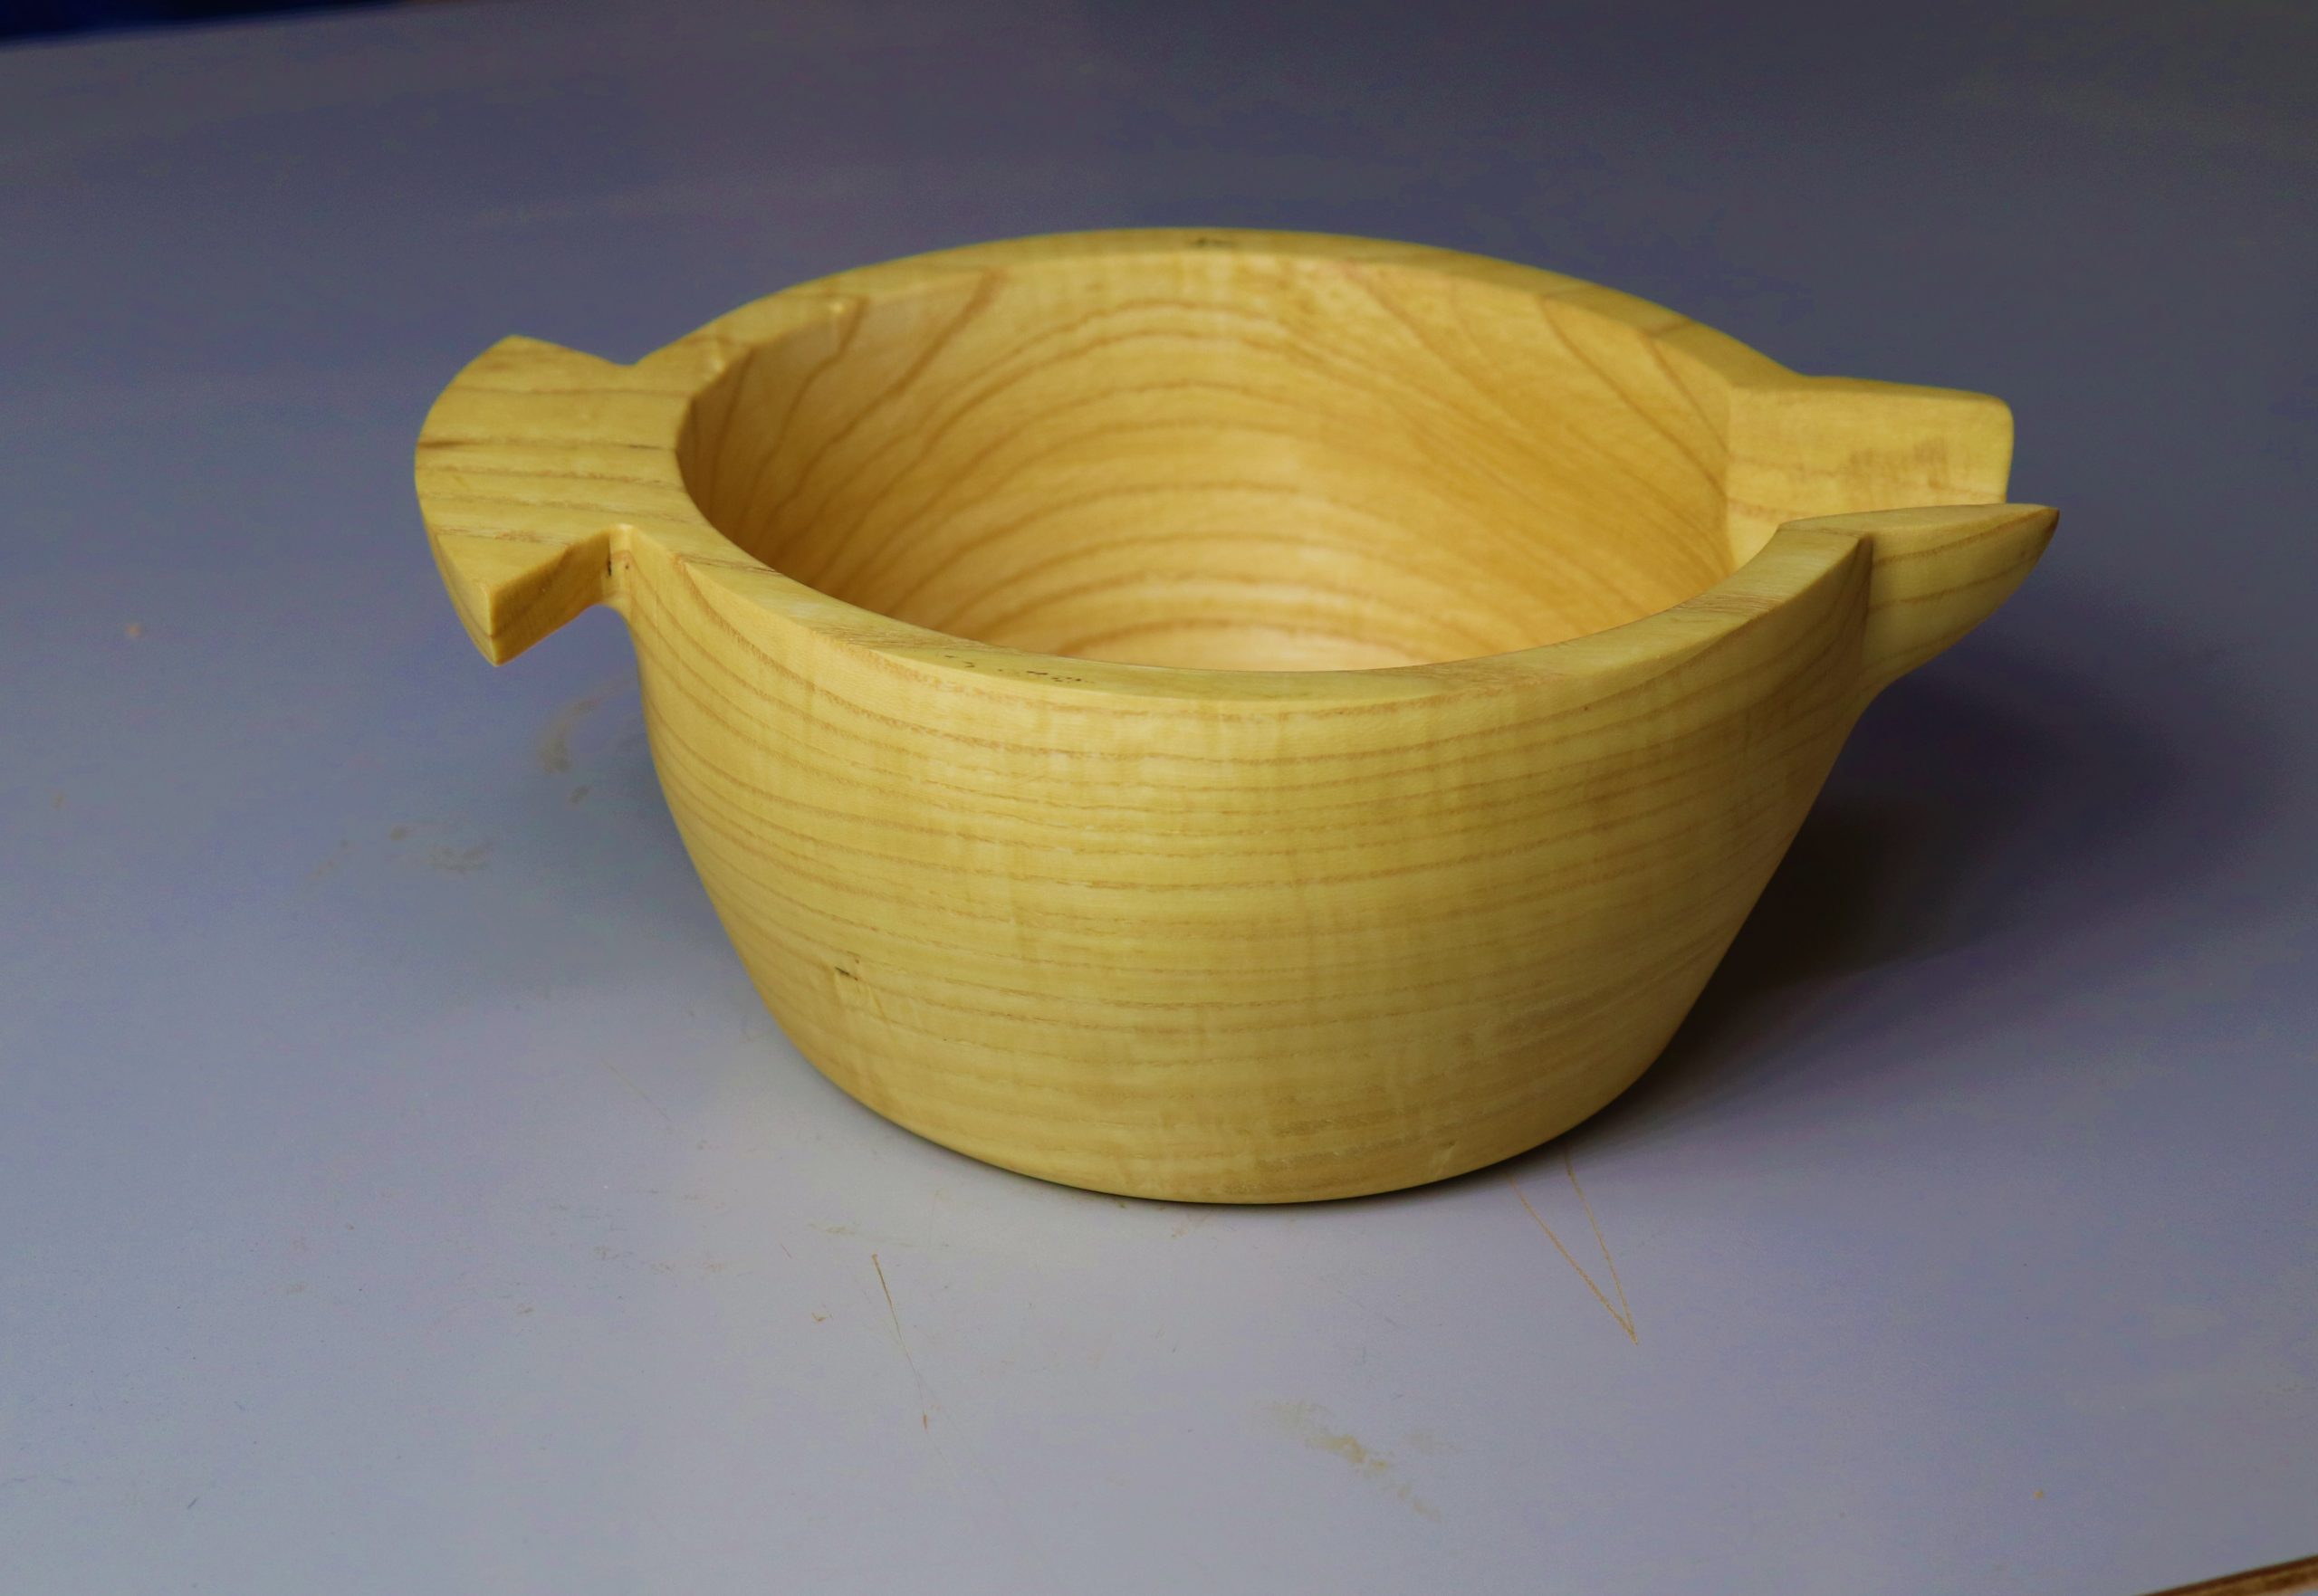
PROJECT: Carved Dough Bowls
Replicate this hard-working kitchen accessory from days of yore using your band saw and a power-carving tool. It’s a perfect excuse to head outdoors and let the chips fly.
The post PROJECT: Carved Dough Bowls appeared first on Woodworking | Blog | Videos | Plans | How To.
from Woodworking | Blog | Videos | Plans | How To https://ift.tt/31dbdTJ
Restoration Of Wooden Vase with a Huge Through Crack | AMAZING Restore Outcome
from UWOODWORKER https://www.youtube.com/watch?v=5zjUpytJpnY
2020年7月28日星期二
The Common Commode
 Last week, I built what I think was the fifth outhouse in my life. That seems like a lot of them. Outhouses were not something that I set out to become an expert on, but in life, as they say, stuff happens.
Even so, this should not come as a total surprise to me — family has a strong influence on our lives and my father, uncle and grandfather were all licensed plumbers. So as the saying goes: all you need to know to be a plumber is stuff flows downhill and payday is Friday.

I have not decided whether to add Outhouse Entrepreneur to my Linked In profile just yet. But if you have outhouse related questions, please feel free to ask.
Rob Johnstone, Woodworker’s Journal
![]()
Power Carving a Dough Bowl
![]()
July/August 2020 What’s in Store Roundup/strong>
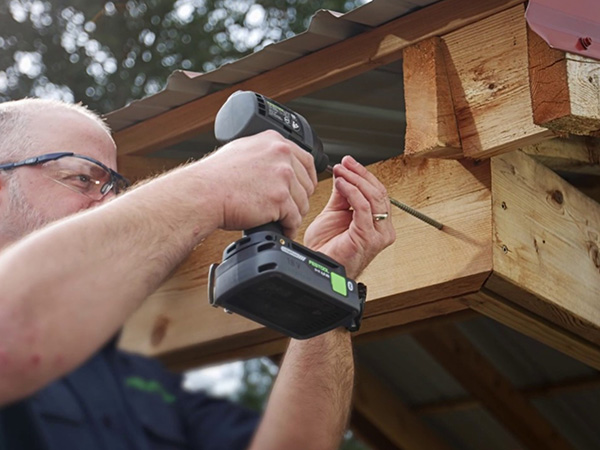
Take a closer look at the tools featured in the July/August 2020 What’s in Store, including offerings from Rockler, MAS Epoxy and Festool.
![]()
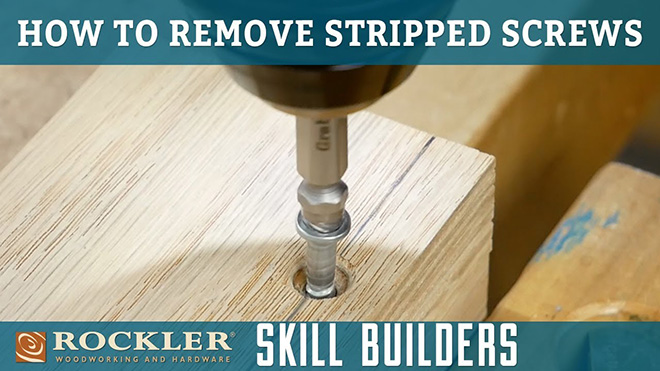
From Our Sponsor

| Removing stripped or damaged screws is a task that every woodworker will encounter sooner or later. Don’t let this scenario derail you from completing your projects as planned! Our video demonstrates how to use a screw extractor set to dislodge those troublesome screws quickly and effectively. |


Sale prices expire on 7/30/2020. Additional shipping charges will apply for select over-sized items, express orders, and orders to Alaska, Hawaii, Guam, Puerto Rico, and the Virgin Islands. This offer does not apply to international customers. This offer cannot be combined with other offers, applied to previous orders. Some offers available only online. Not all items available at retail stores. Offer not valid at Rockler’s independent resellers. Rockler Woodworking and Hardware reserves the right to limit quantities, correct errors or omissions and modify or end this promotion at any time.
The post The Common Commode appeared first on Woodworking | Blog | Videos | Plans | How To.
from Woodworking | Blog | Videos | Plans | How To https://ift.tt/2X7O8R4
Turn and Carve a Spouted Bowl
Creating a beautiful bowl with a spout and a handle is easier than you might think, and woodturners will wonder how you could turn a bowl with protruding adornments around the rim. This project requires a small amount of carving, but don’t let that scare you off. Even the most novice carver will find the carving aspects of this project accessible with a little care and patience.
Mount up a blank
The work starts at the lathe, with a bowl blank of whatever size you choose mounted using a faceplate. This one started as a 10” x 4” chunk of ash, but this article aims to teach a technique that can be used on any size bowl blank rather than to strictly focus on the dimensions of this piece.
Make it round
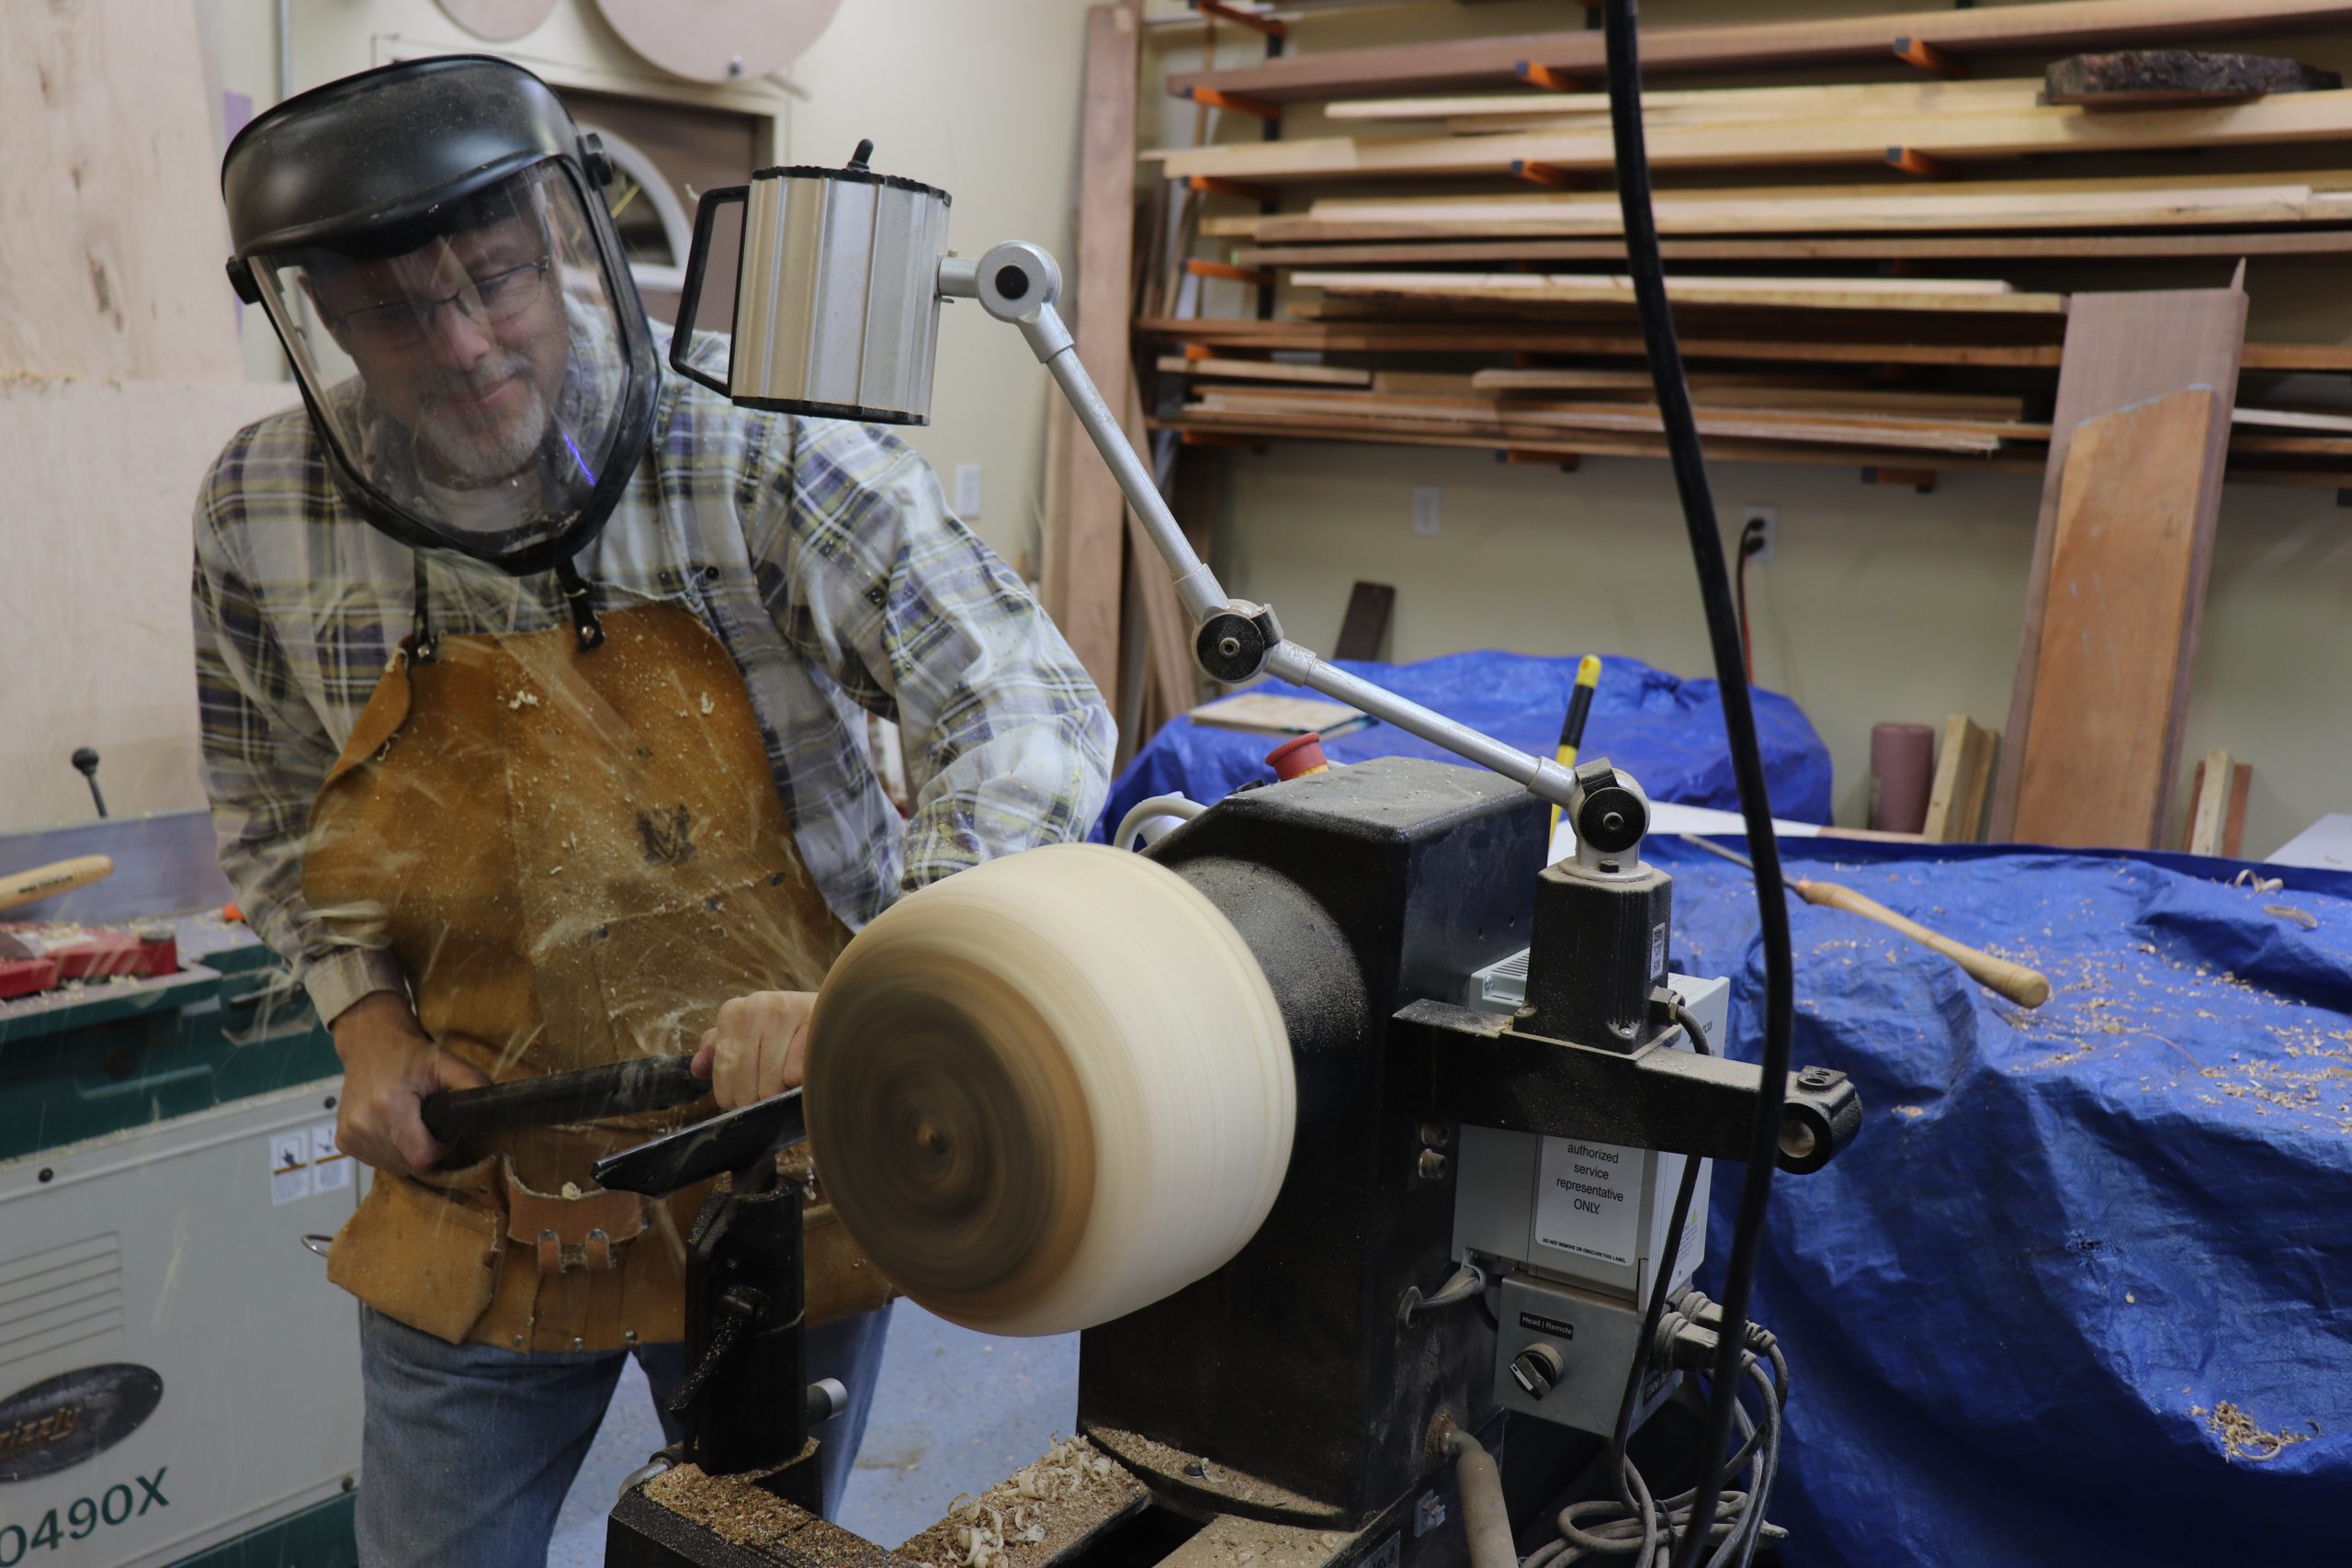
Begin by turning the blank round, as with any bowl turning project.
Mark your transition points
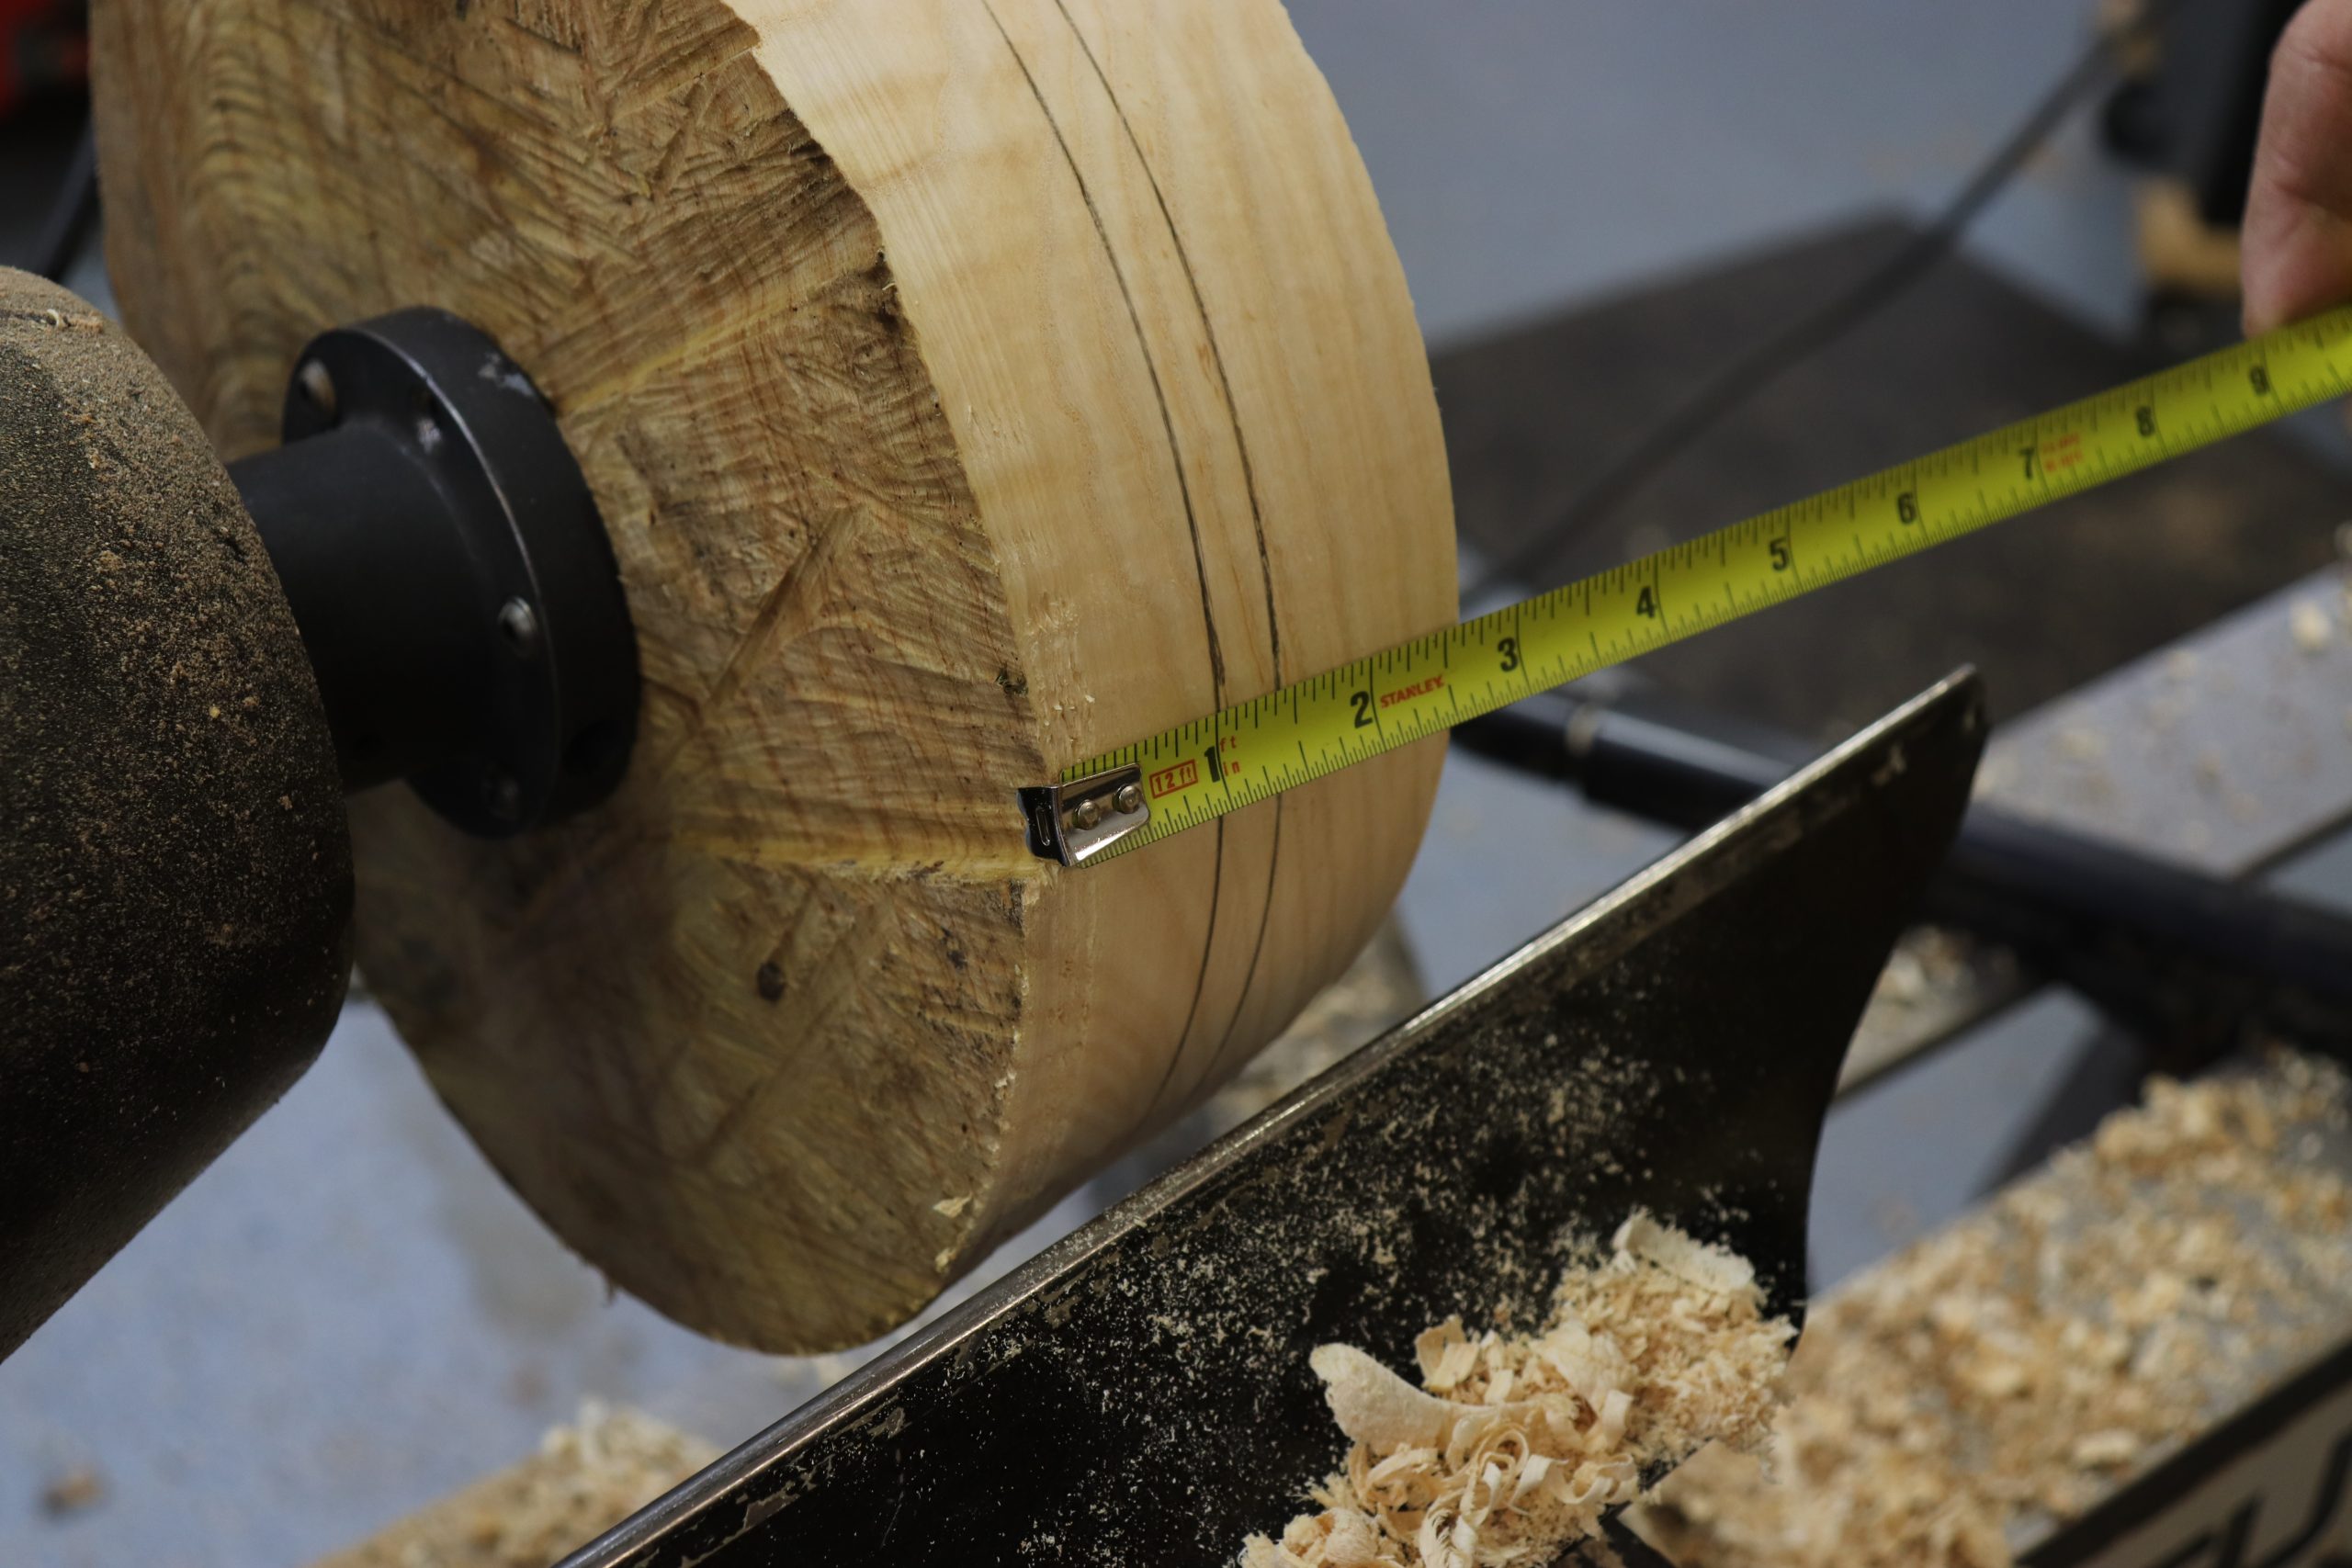
After the blank is round, mark two lines around the perimeter, one at 1” from the lowest point of the bowl’s top, and the next one 3/8” down from the first line.
Tapering cuts
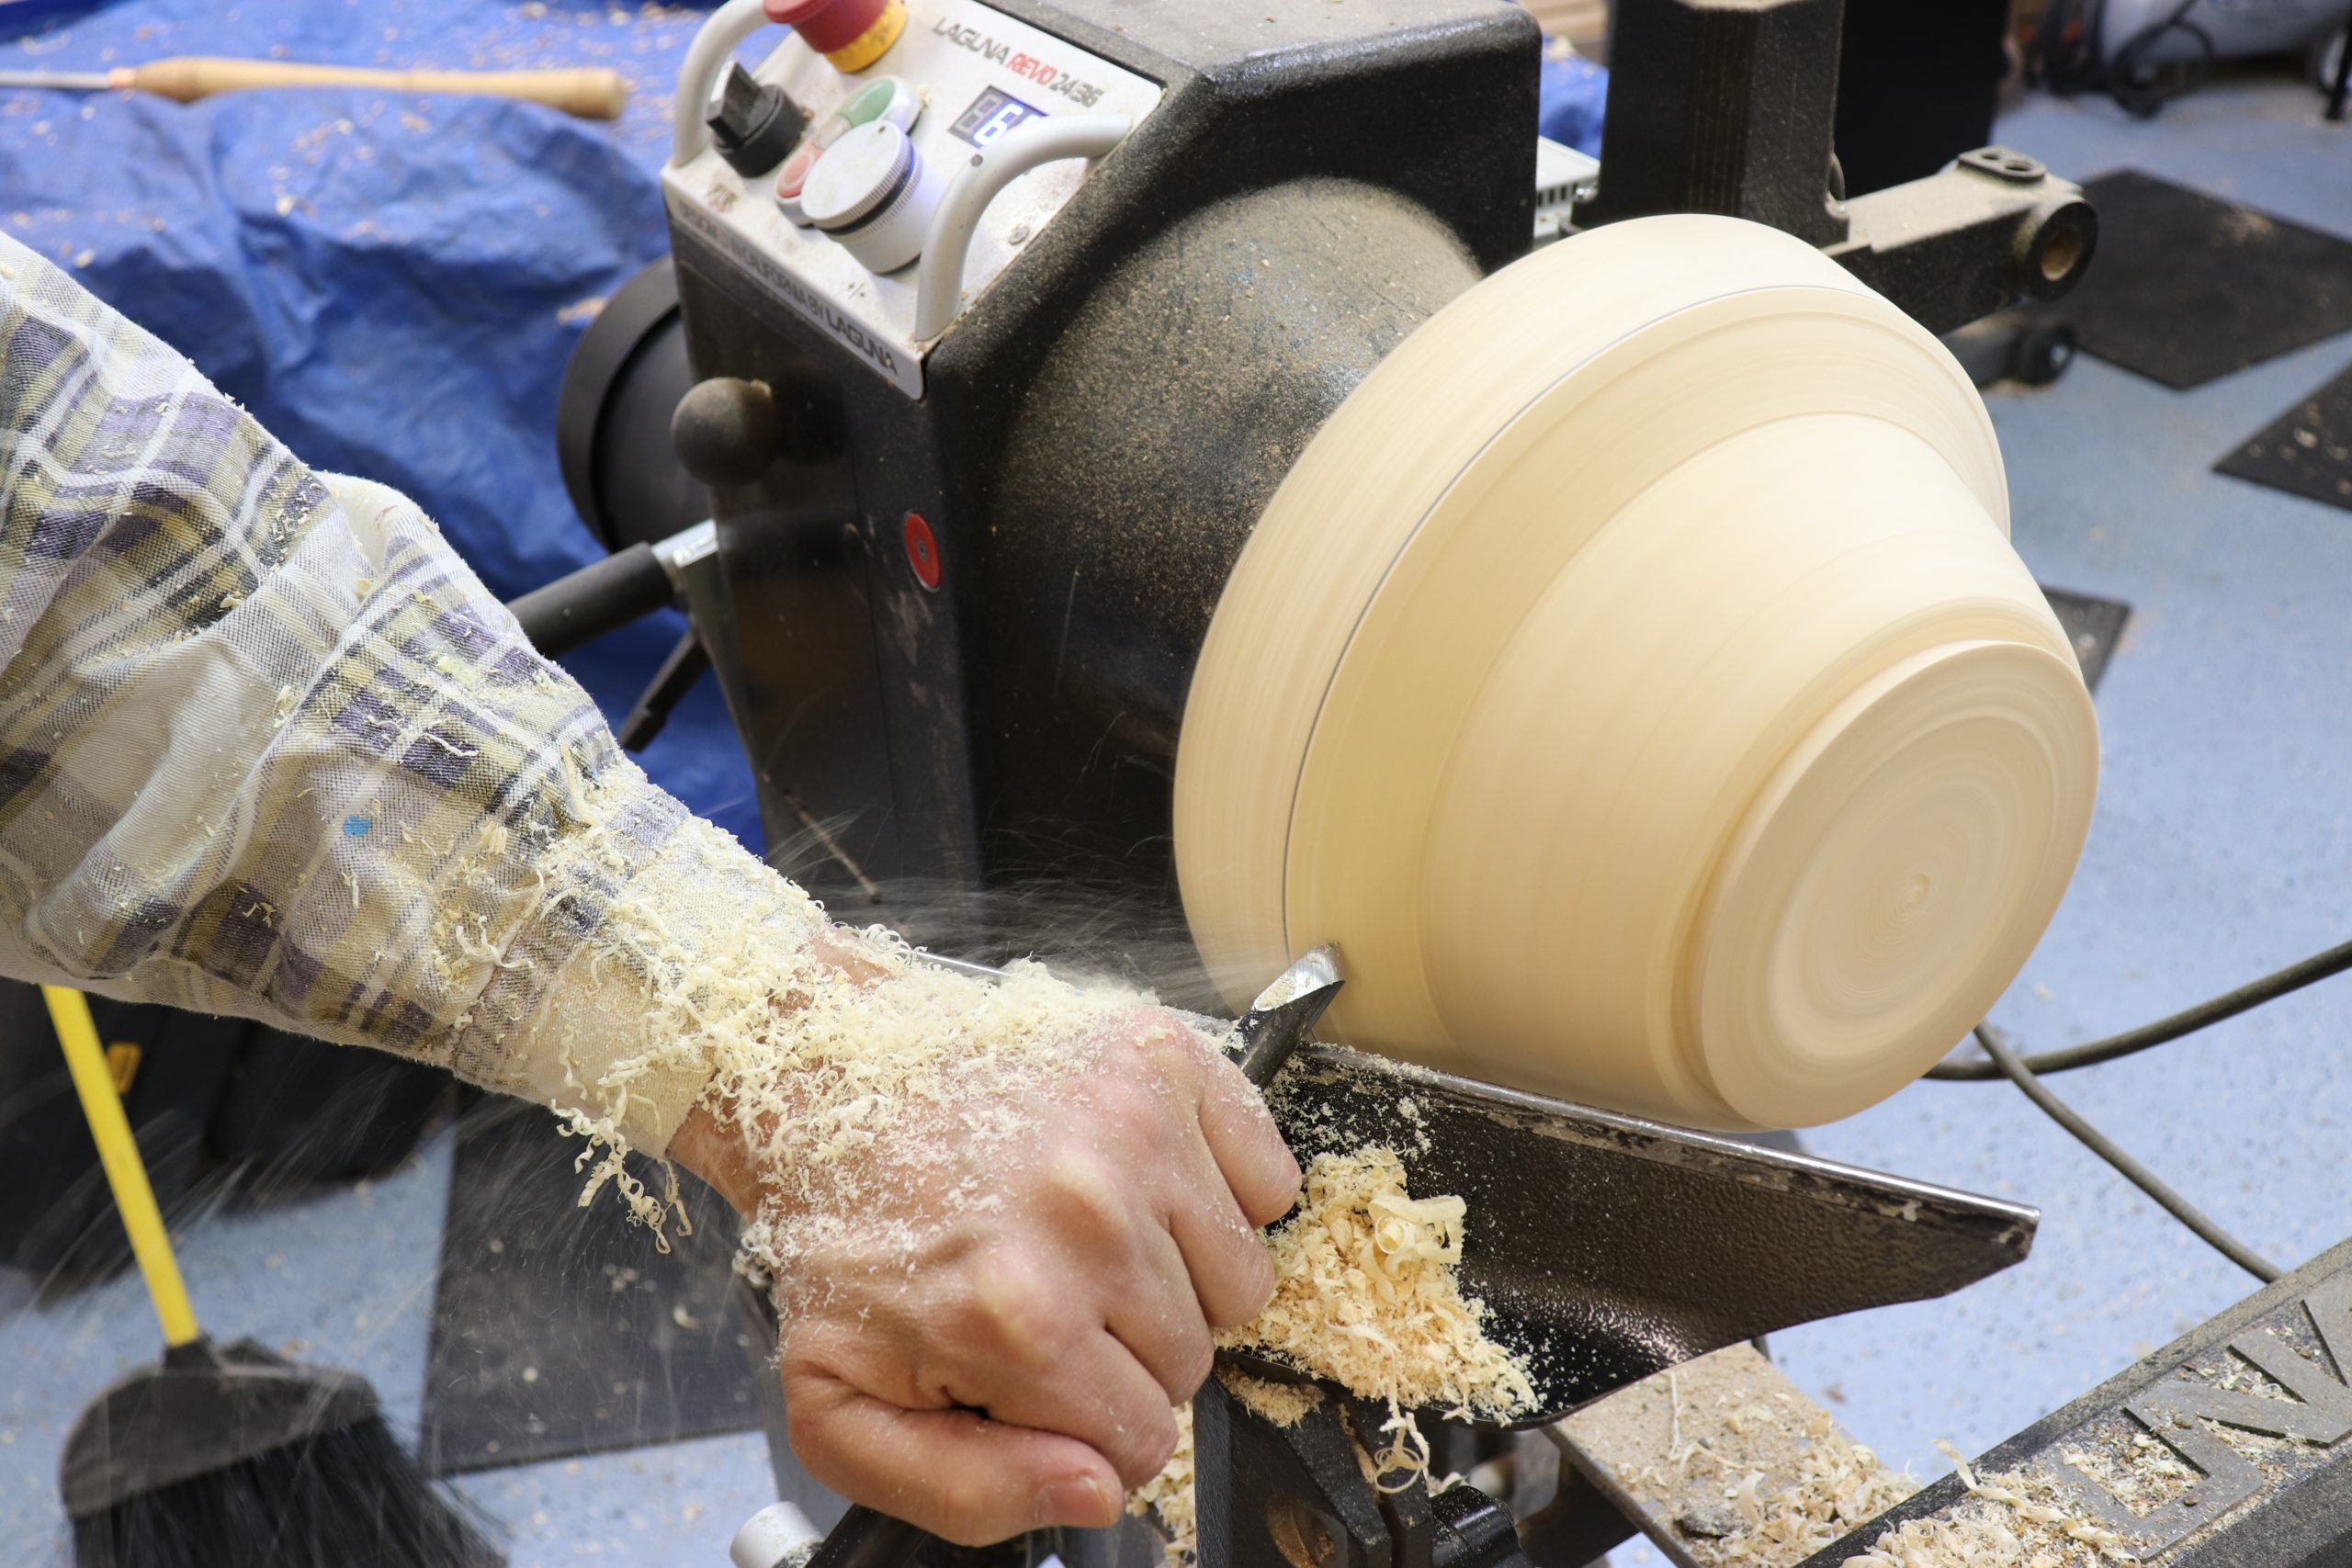
Using a bowl gouge, cut to the lower line, removing a 1” depth of material. Then taper from the upper line to the lower line as pictured. Turn a tenon onto the bottom of the bowl to be mounted in a four-jaw chuck.
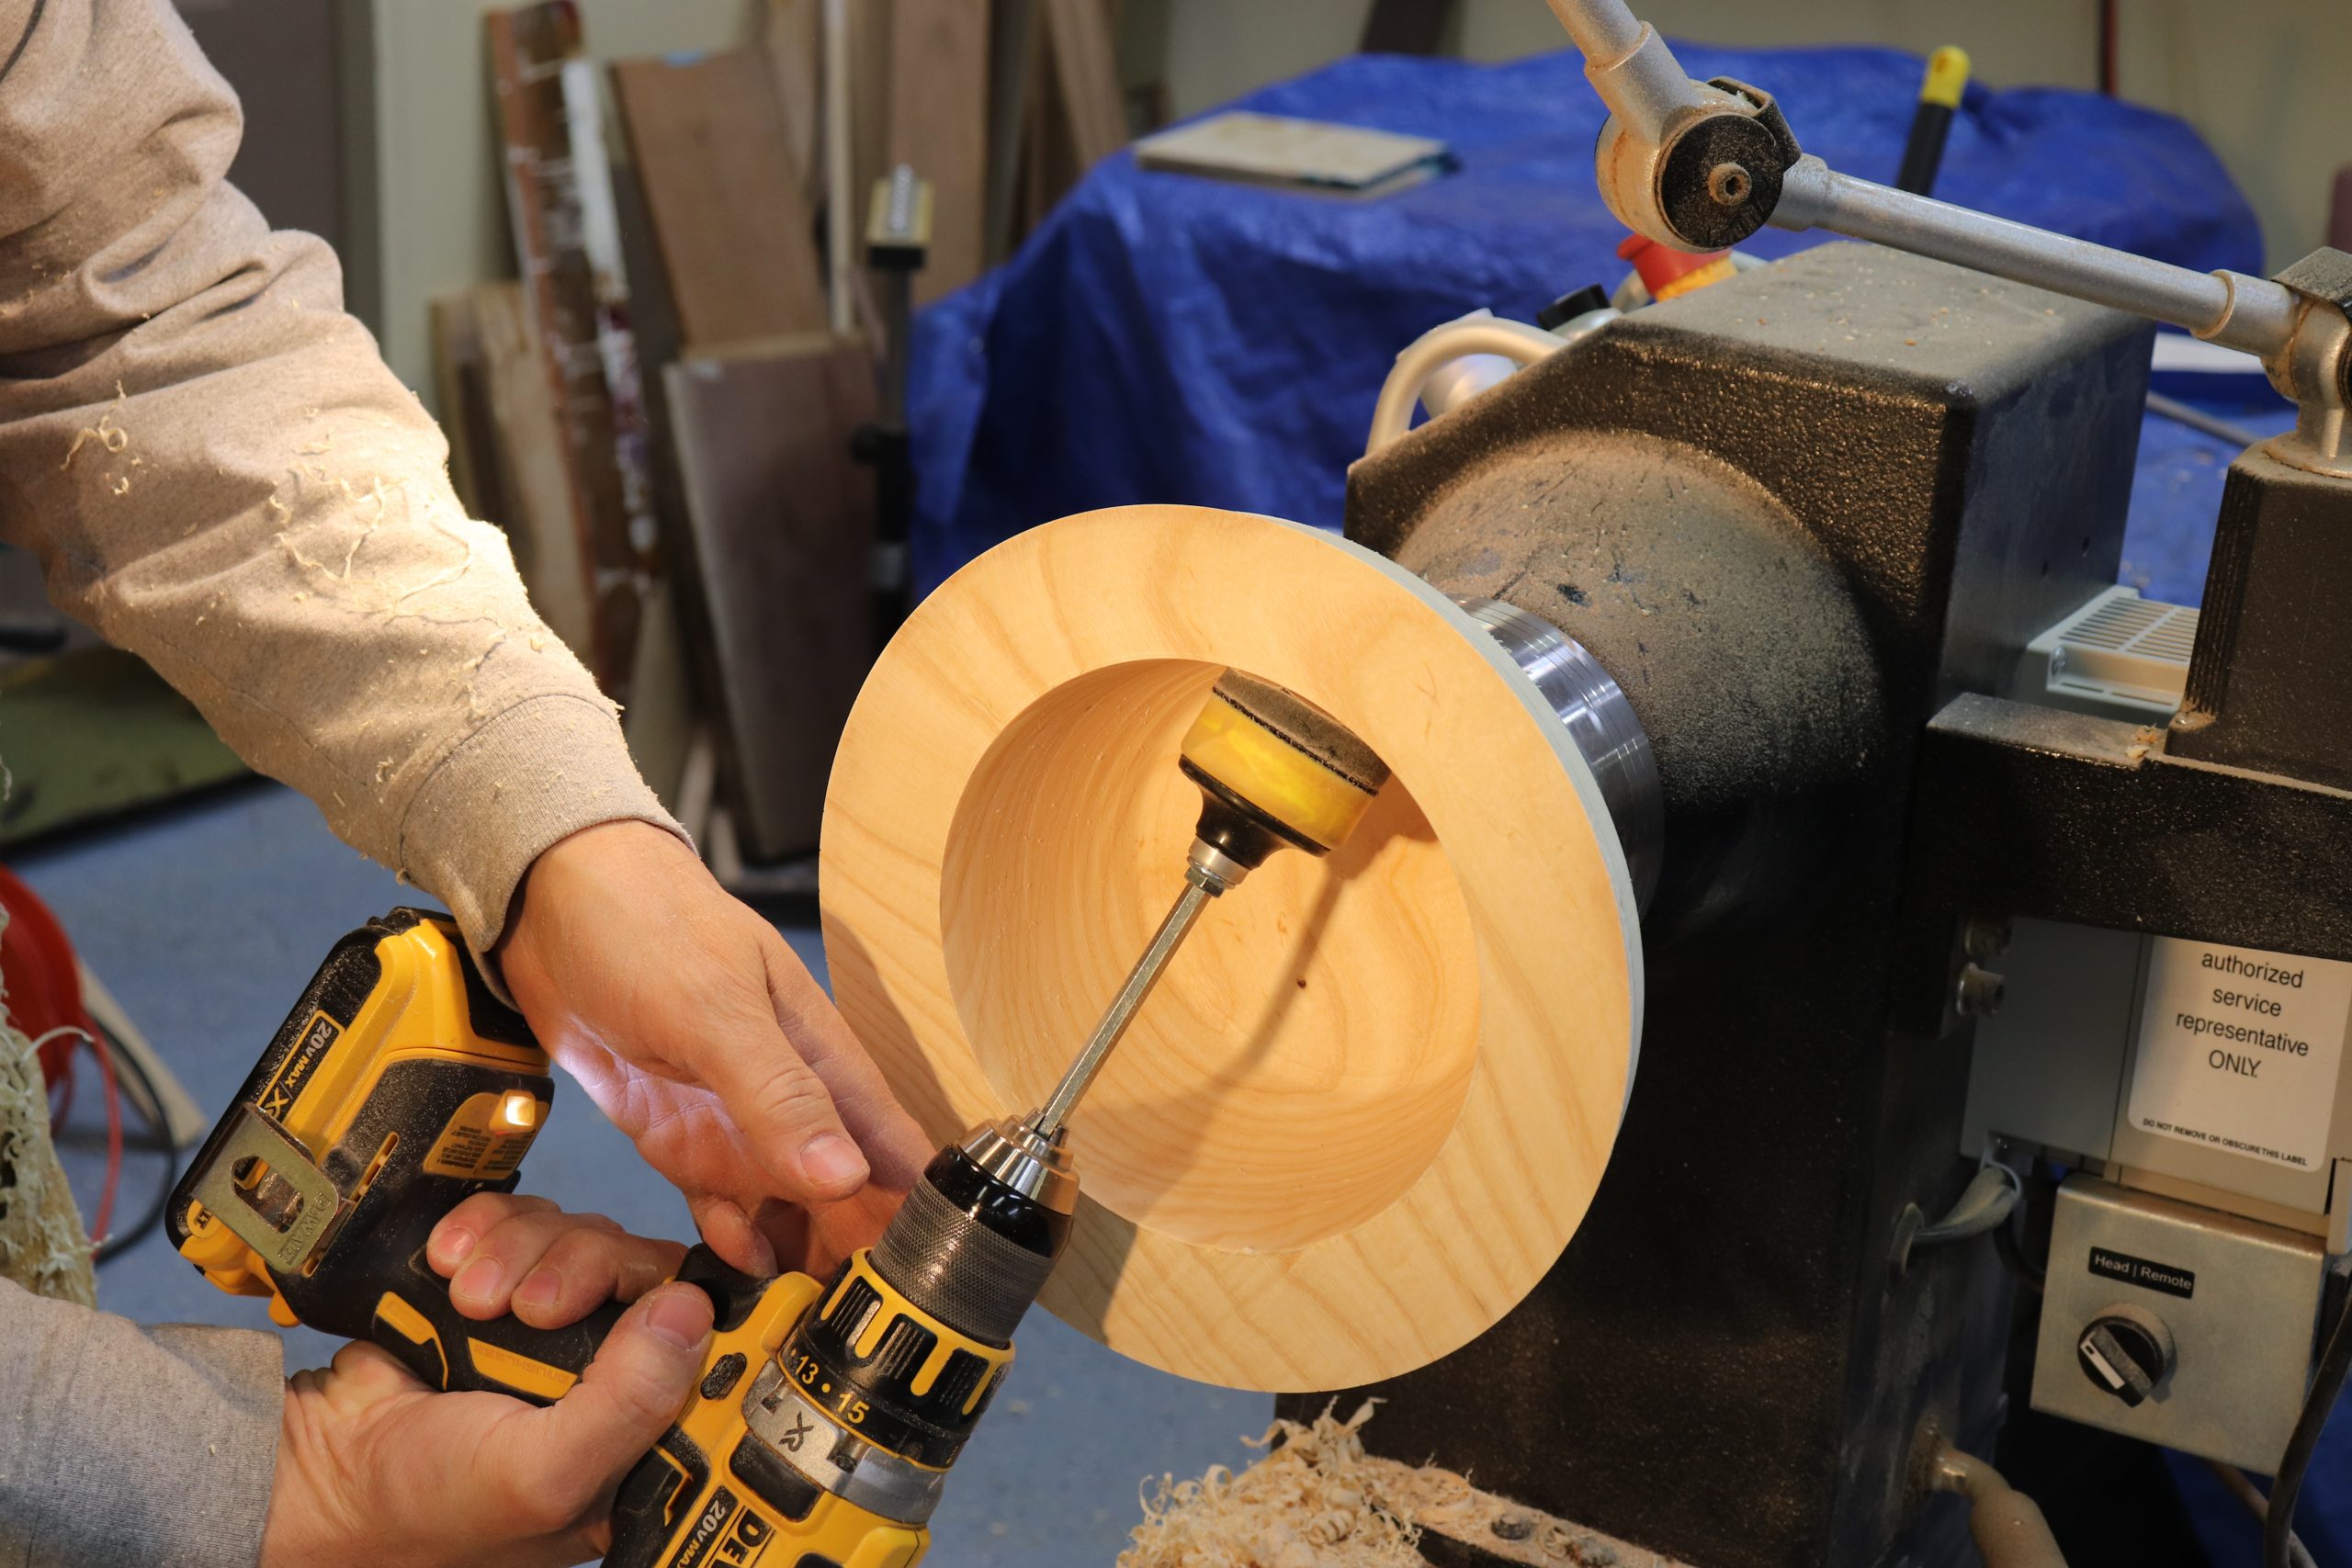
Chuck it up

Flip the bowl around and mount the tenon into a four-jaw chuck. Mark a line 1-1/2” from the outer rim. It’s critical that you remember to not base the inner wall line near the outer perimeter at the top of the bowl, because most of this material will be removed later.
For now, it will look like a bowl with a very thick rim. The 1-1/2” rim thickness represents 1” of the perimeter that will be used for the handle and spout and ½” of actual finished wall thickness.
Scoop out the inside
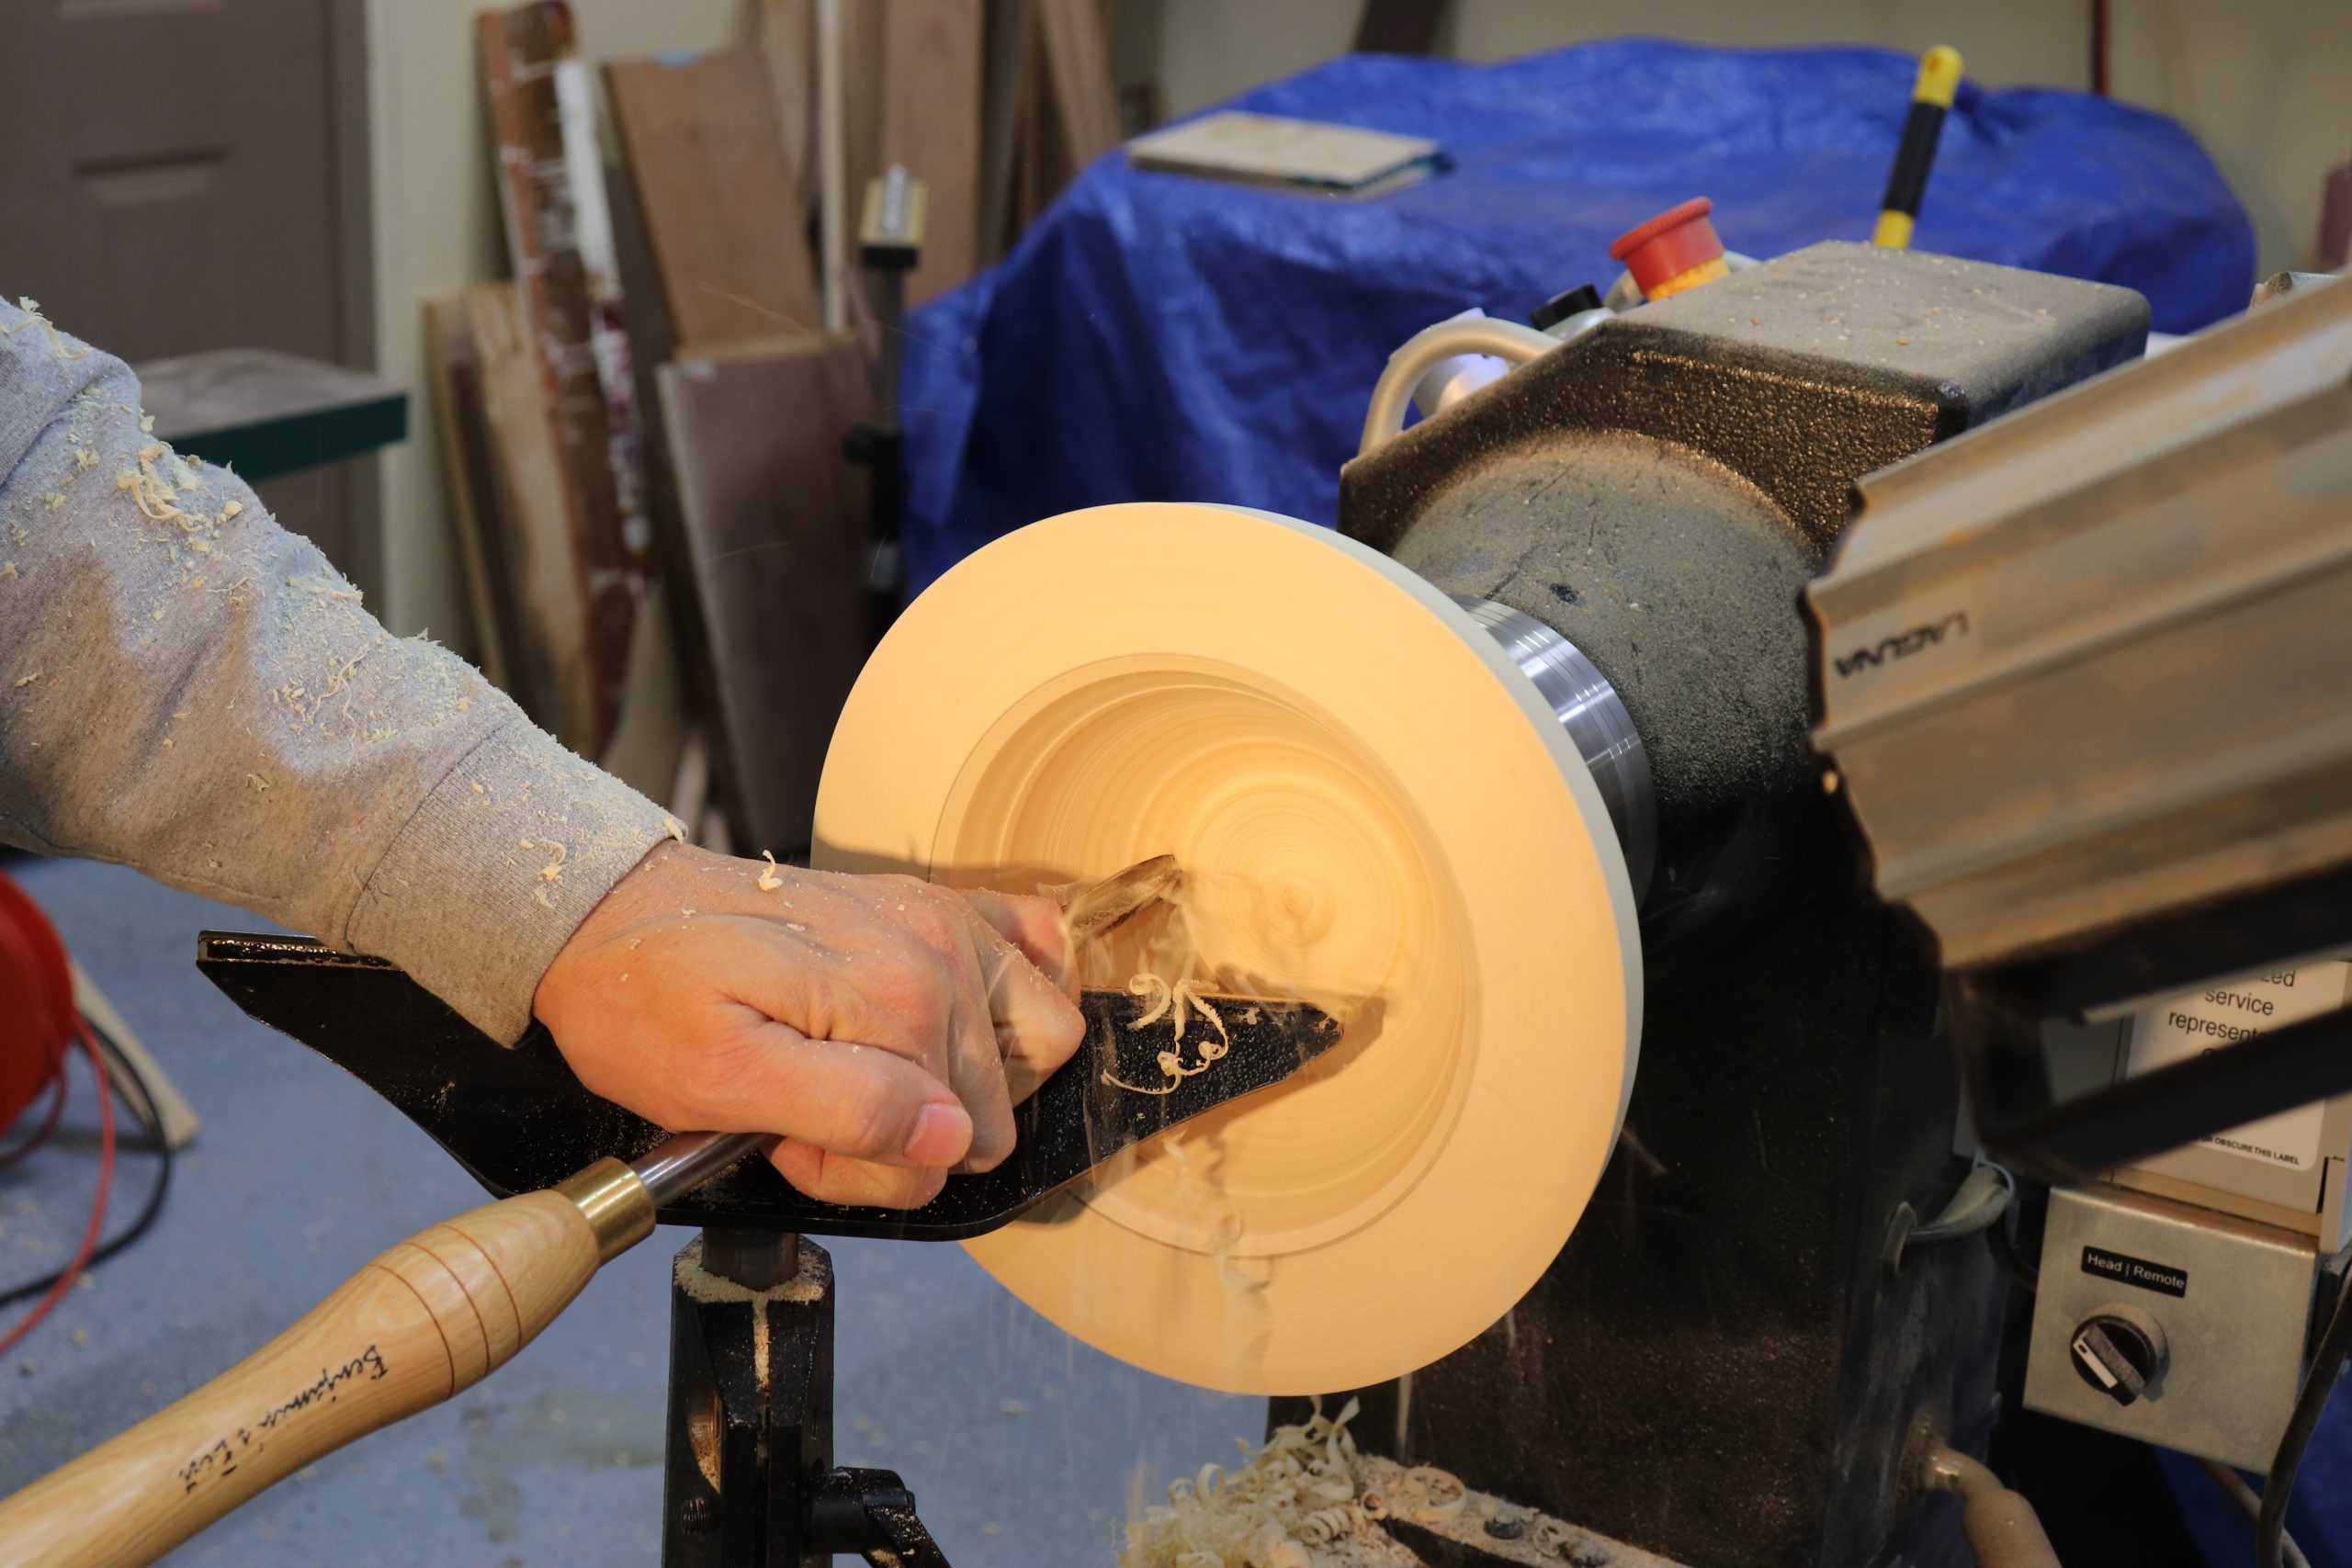
Remove waste from inside of the bowl, checking wall thickness from below the thick portion of the rim.
Power sanding
Sand the bowl, inside and out.
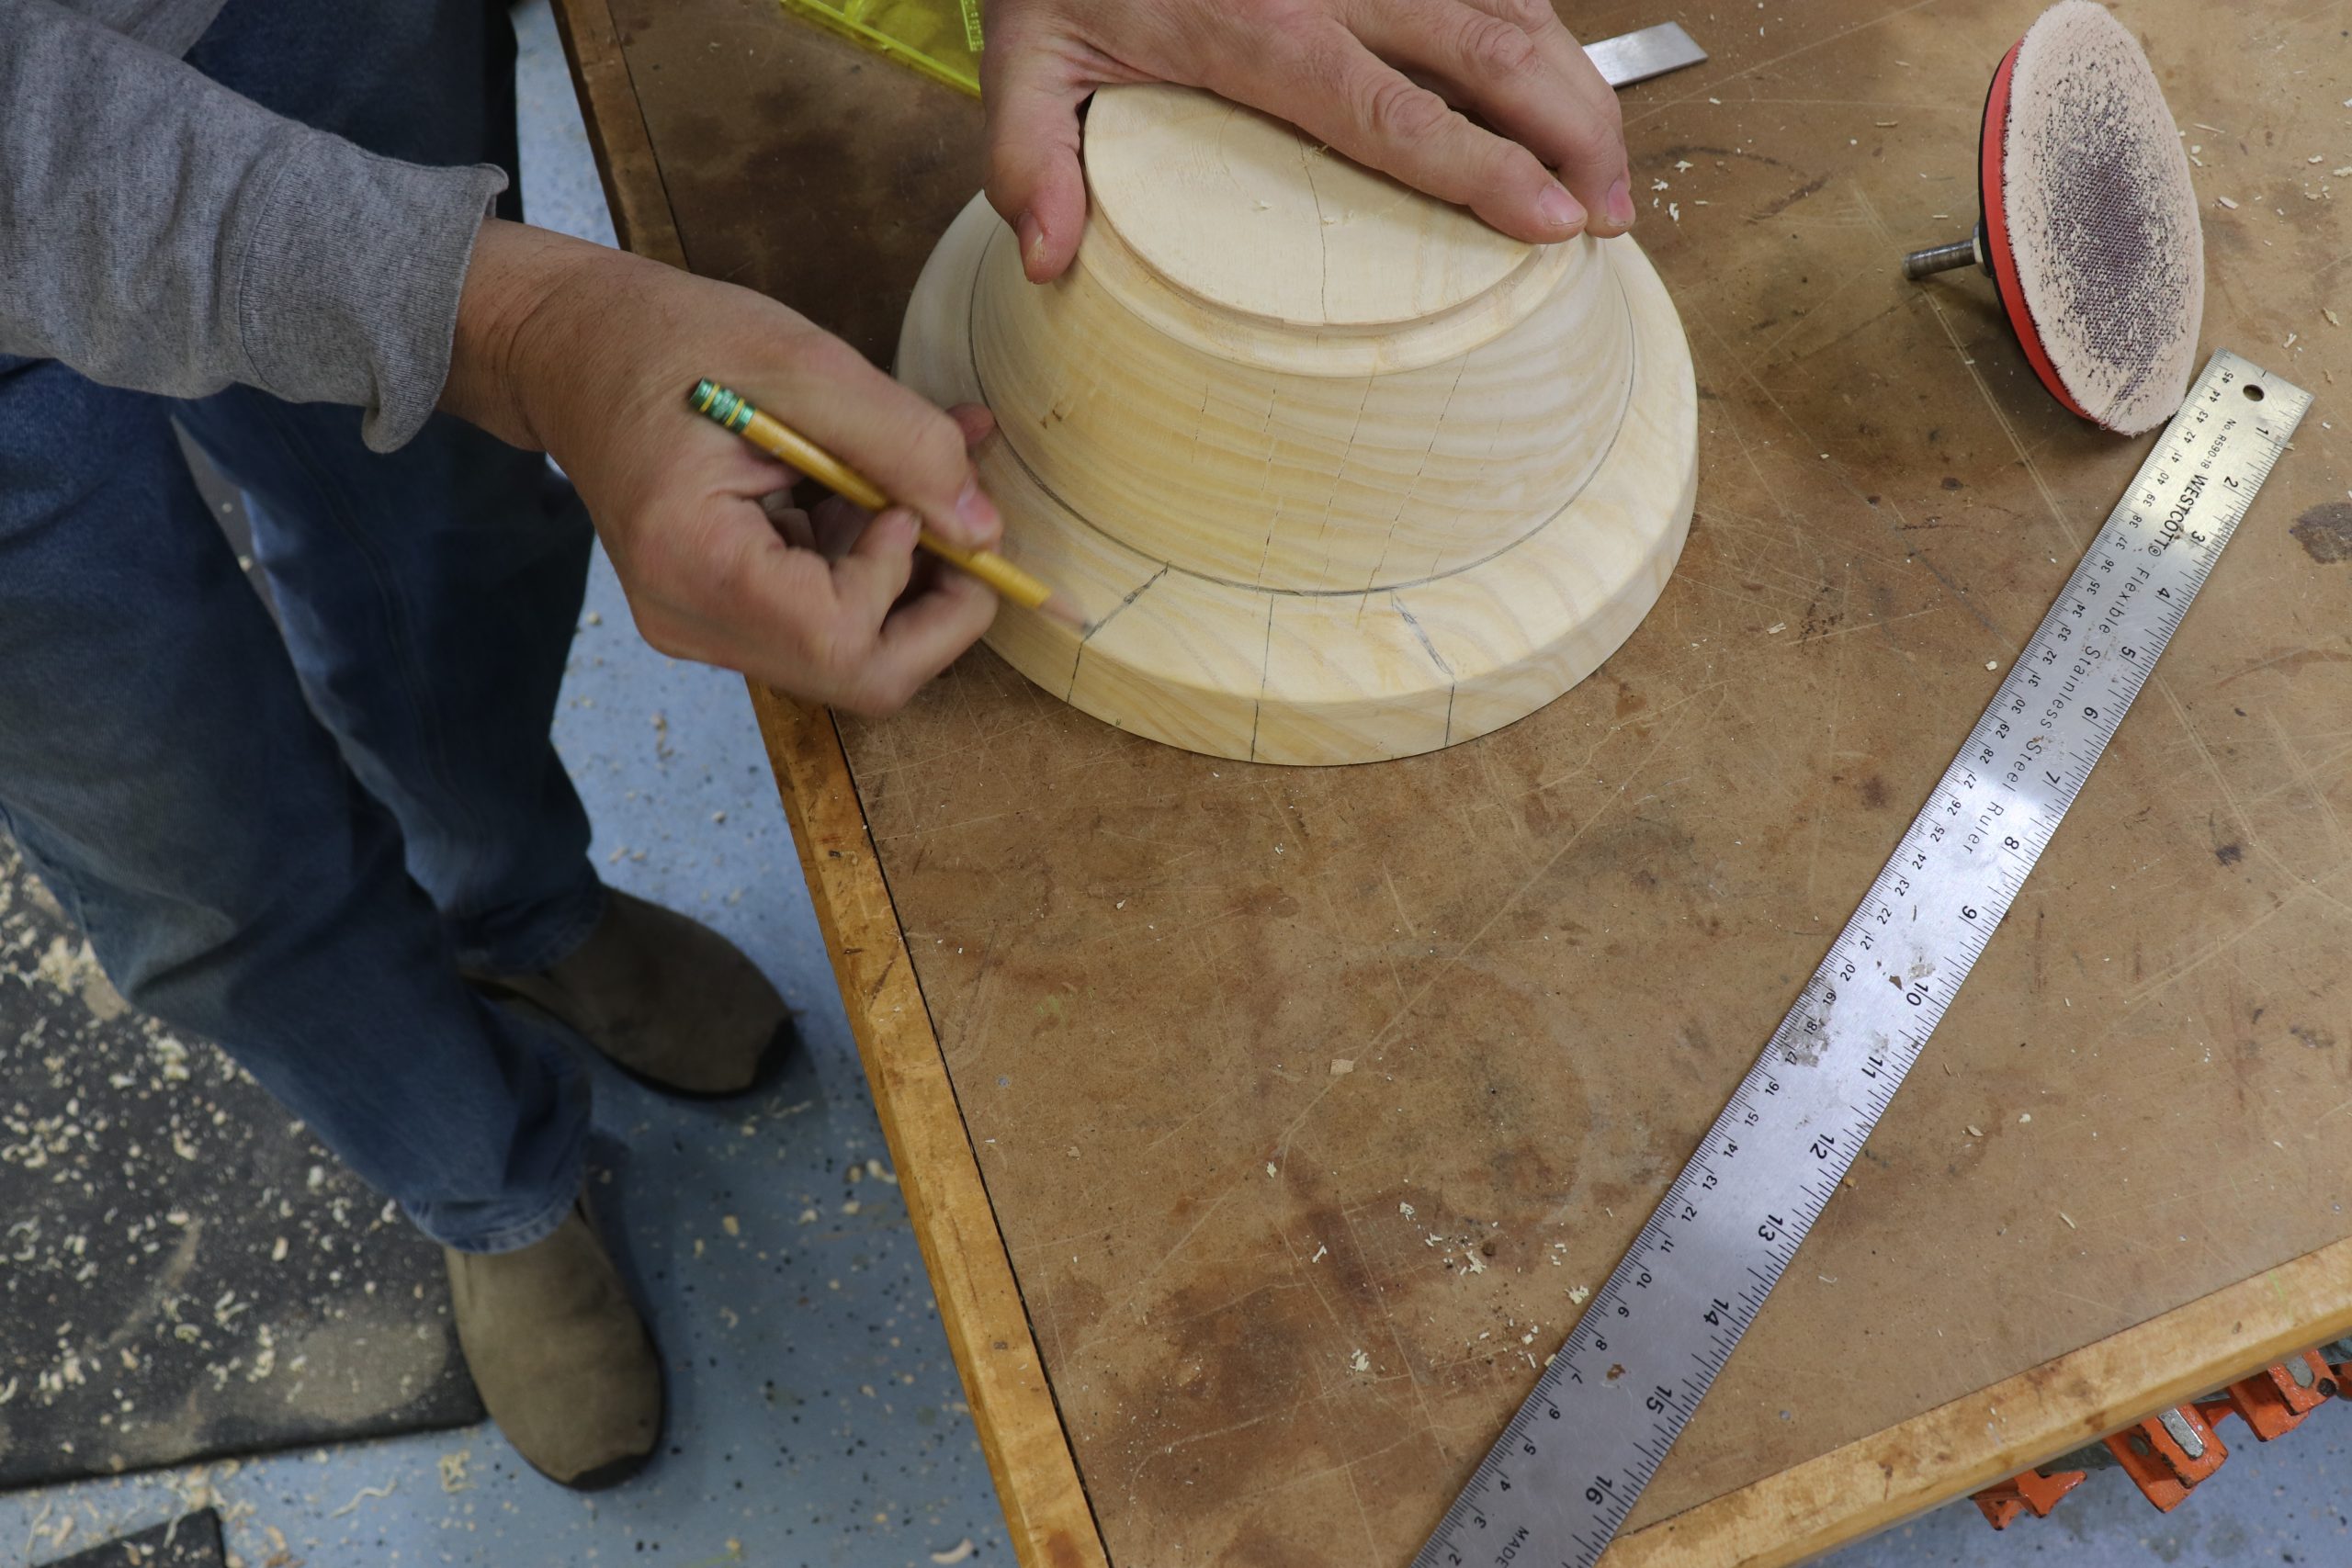
Establish a cut line
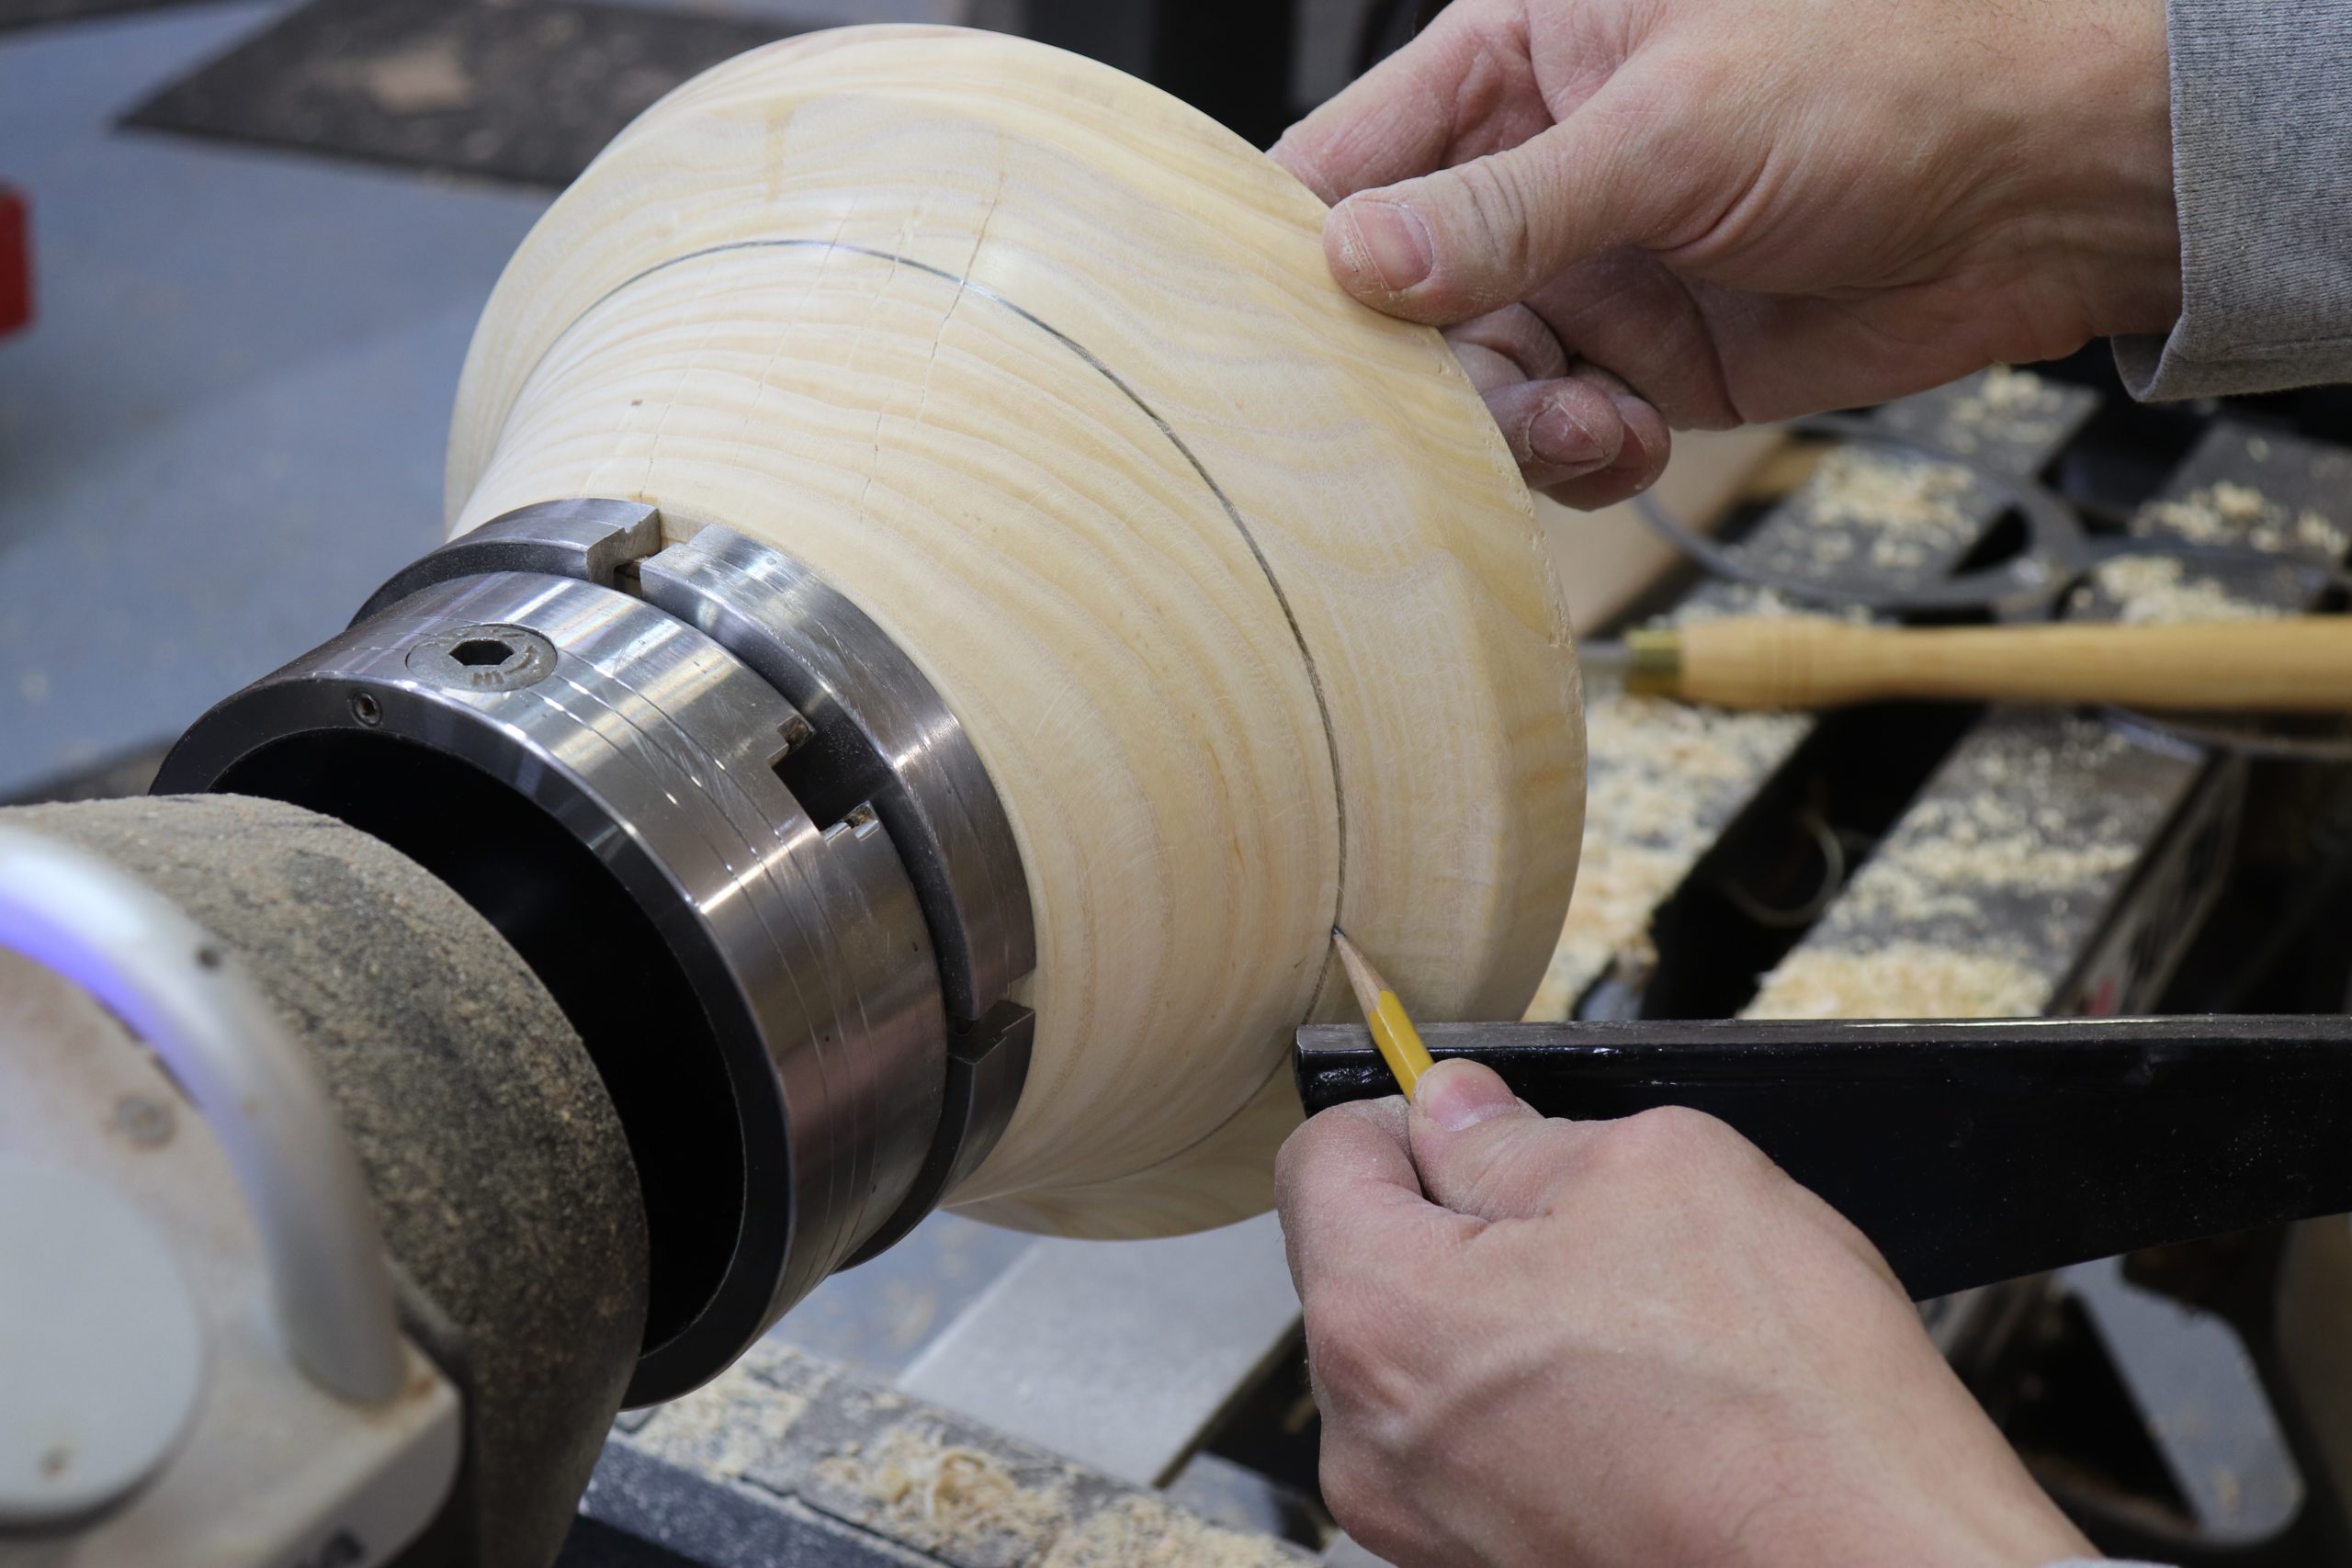
Mark a line around the perimeter of the bowl where the rim begins to flare.
Mark center line
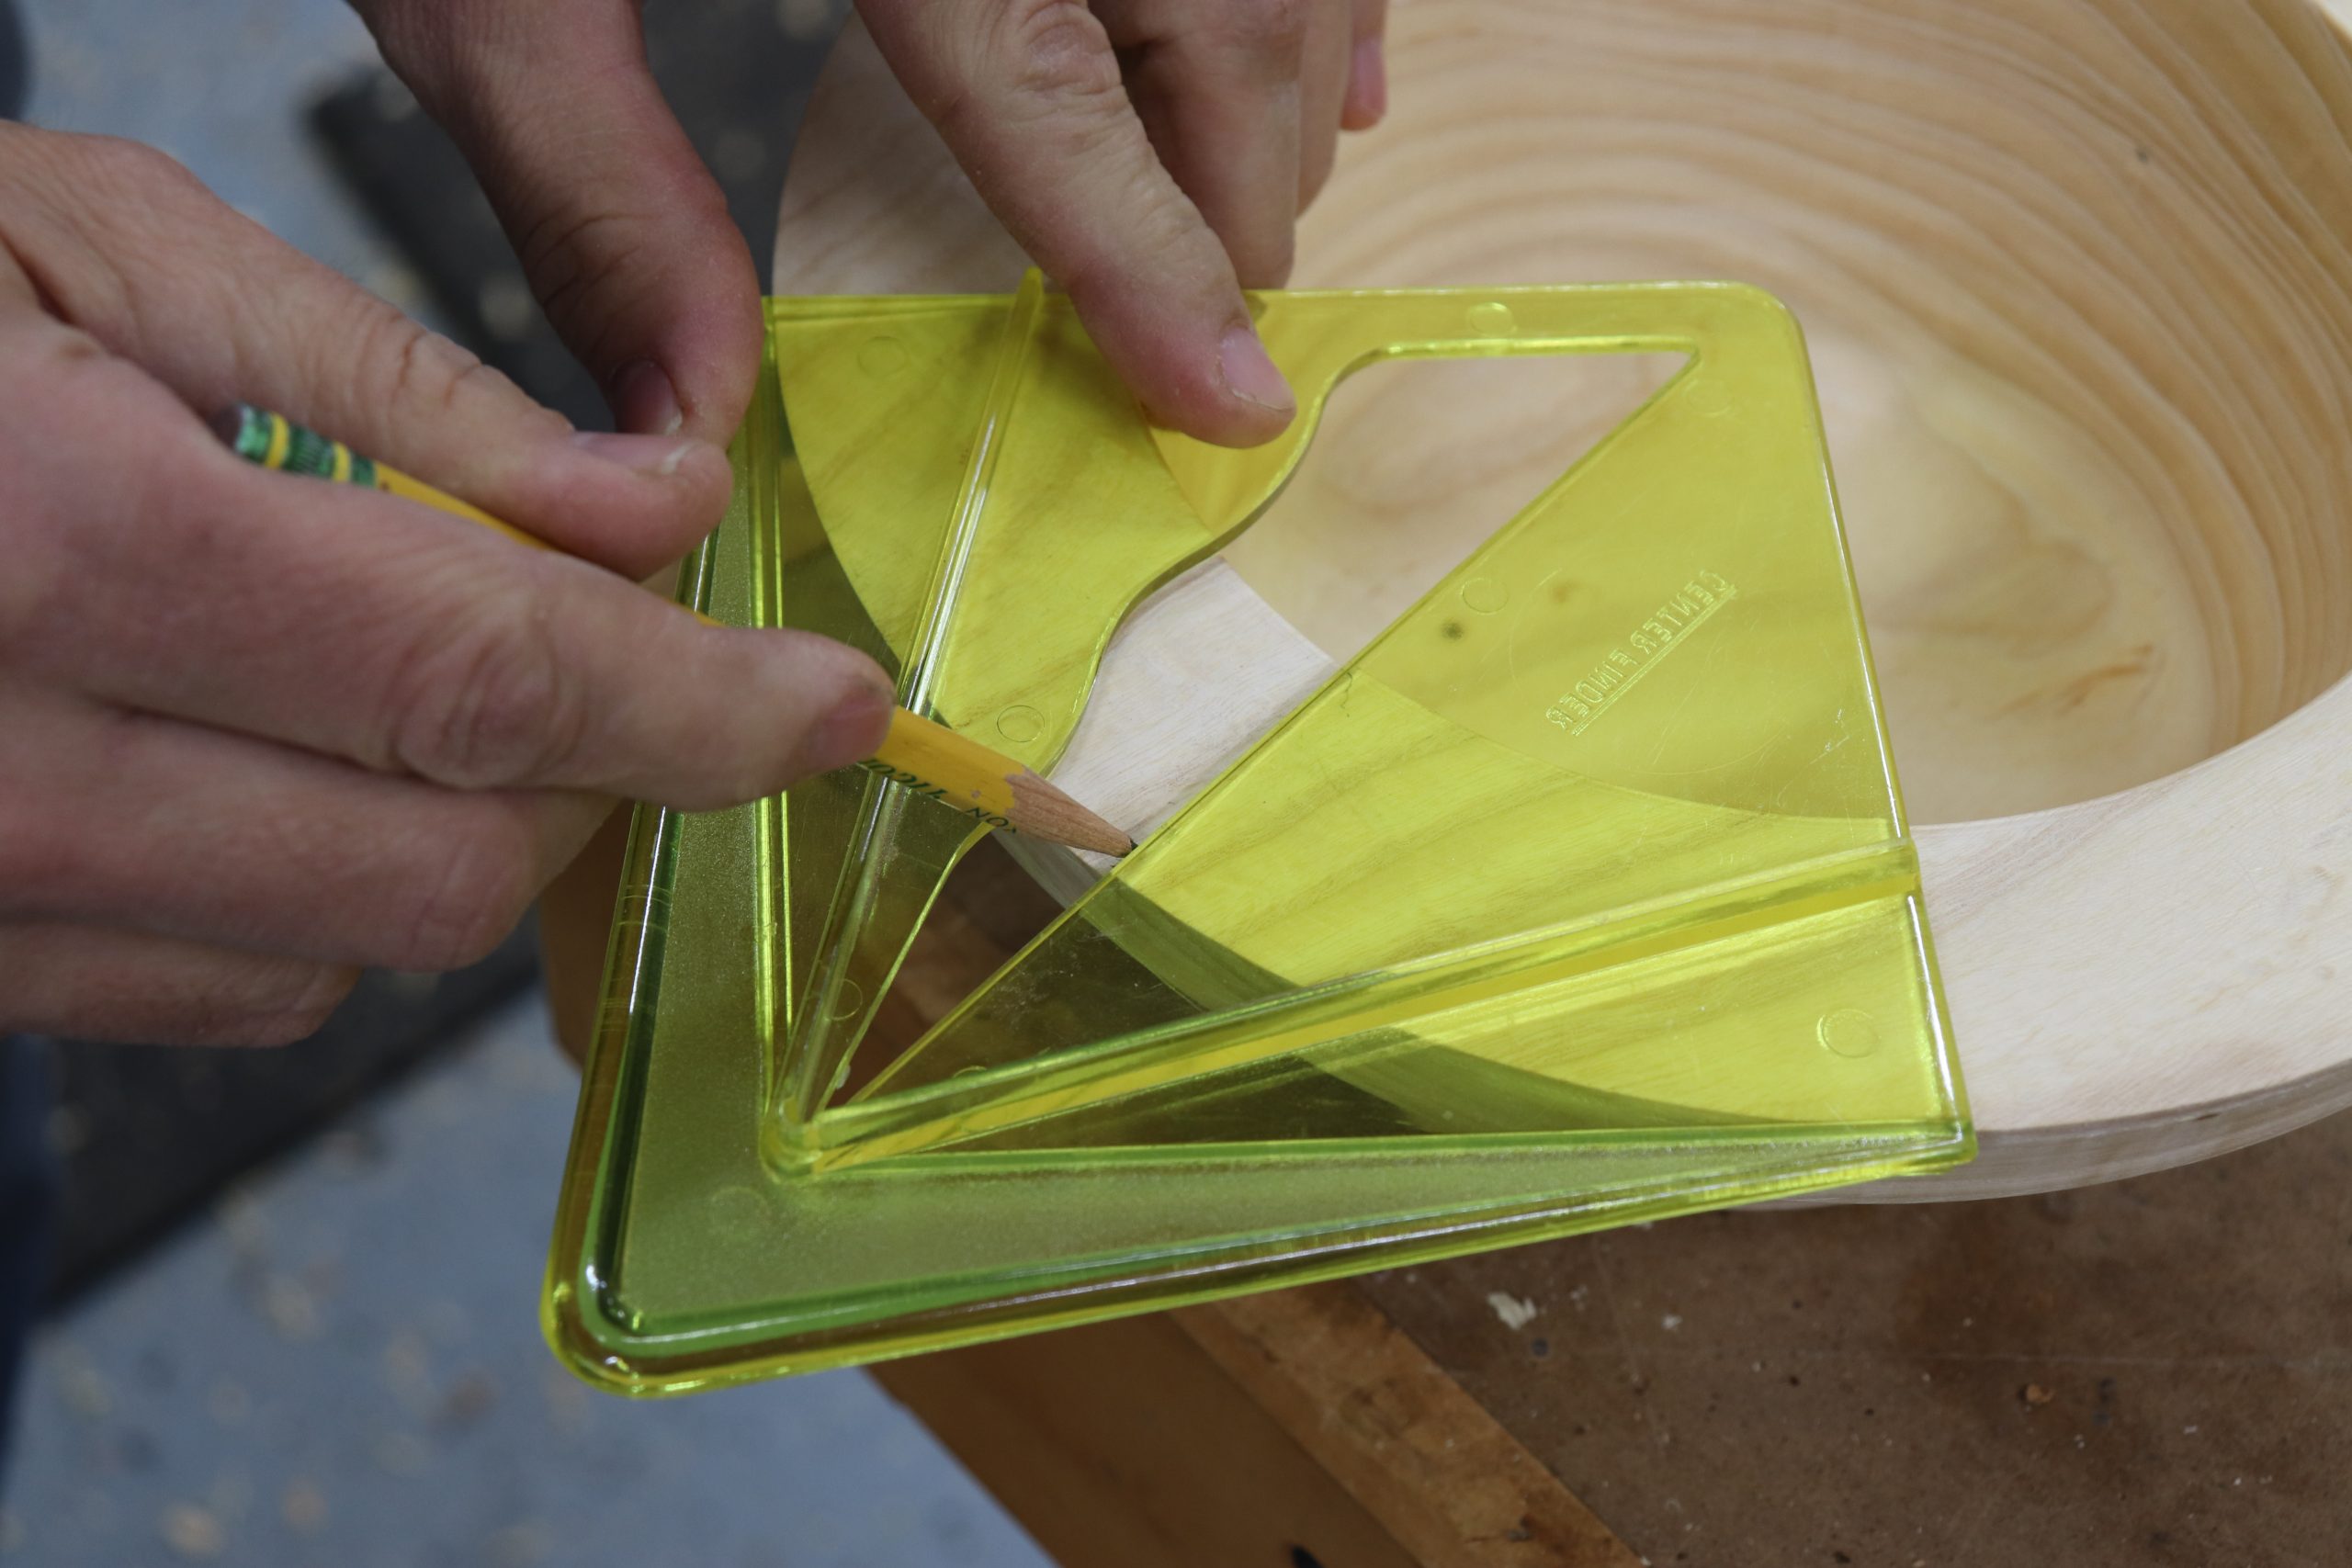
From the top of the bowl, mark a center line on one end using a center finder tool. It is important to mark this line on the end grain side of the bowl as this will provide much greater strength for the spout and handle.
Extend center line
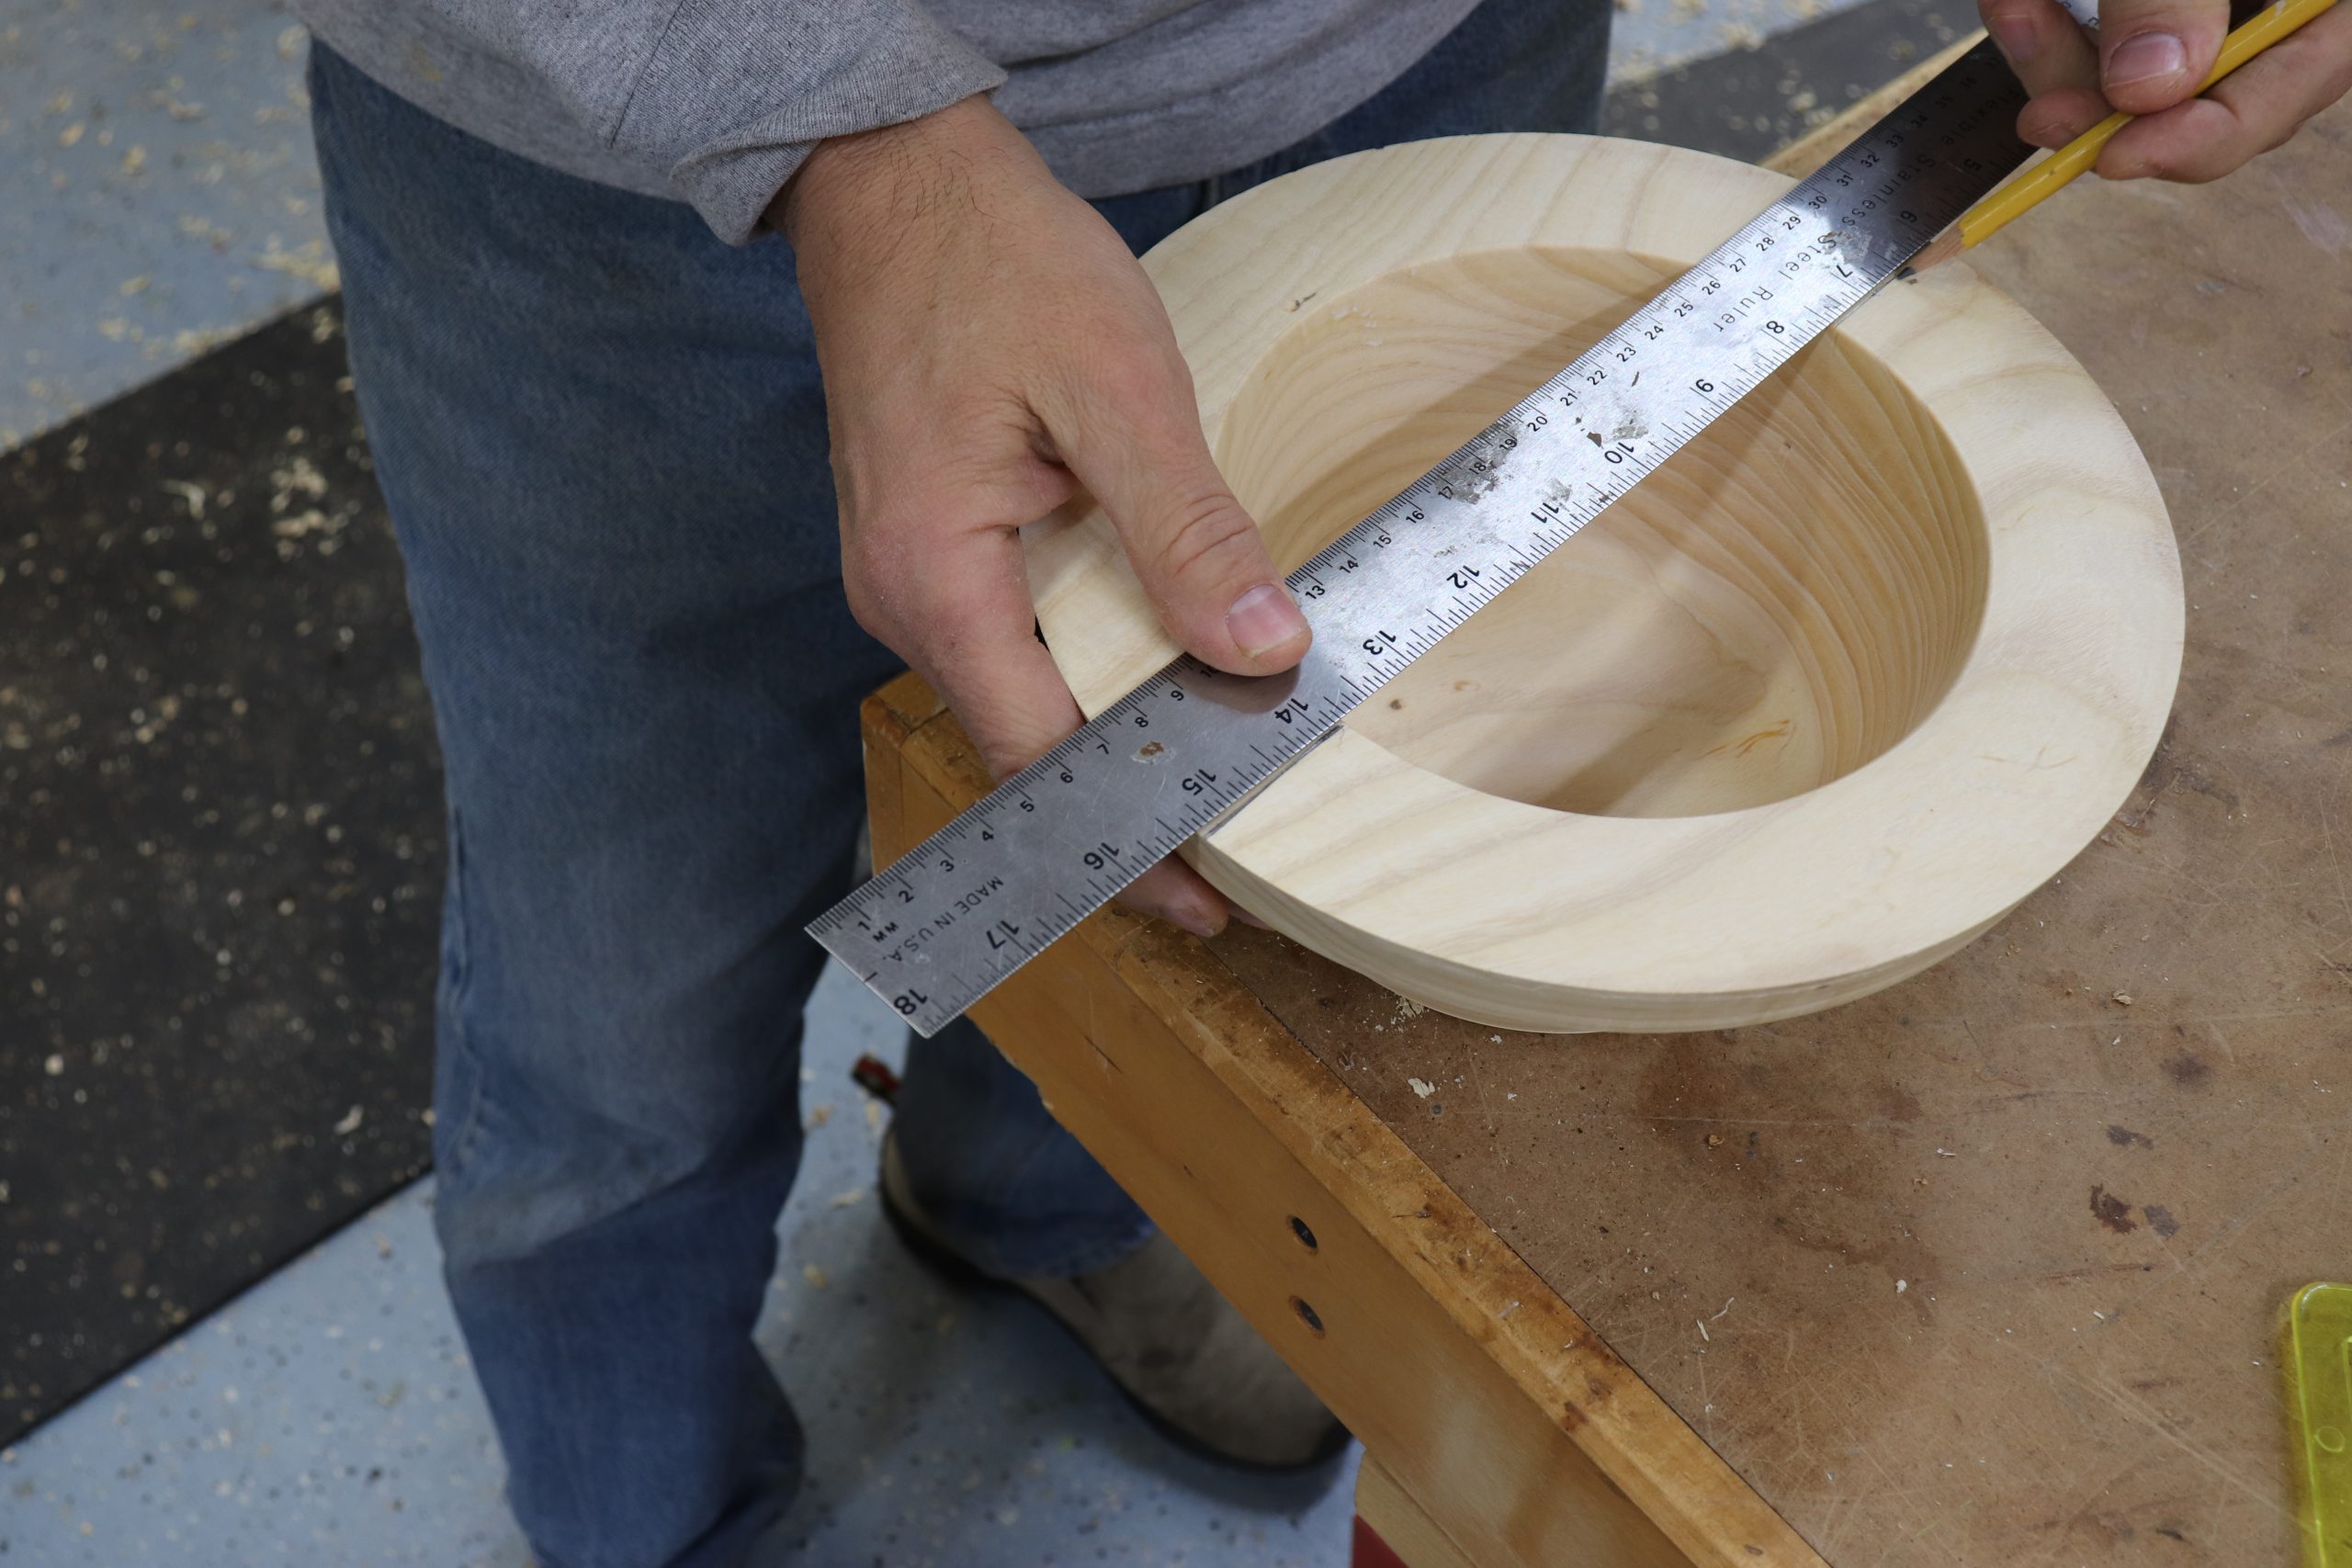
Use a ruler to extend the line across to the other side of the bowl.
Mark cut lines for spout and handle. Start by extending the centerline from the top of the rim back to your line outside the bowl where the rim starts to taper. Here’s where you can apply your creative eye and experiment with shapes for the spout and handle.
Here’s what I did:
For the spout, I started by making a mark 1” from each side of the centerline at the top of the bowl, making the top outside of the spout 2” wide. I drew lines at the bottom of the spout that was 1-1/4” from the centerline.
Then I marked a line that connected the two marks that I created, which tapered the spout from 2” at the front to 2-1/2” at the rear.
I marked the handle using a similar process, but on the handle, I started at 4” wide at the rim (2” mark from the center line in each direction), and tapered into 2-1/2” wide on the inner portion of the handle, making it look like a bird’s tail.
Remove waste
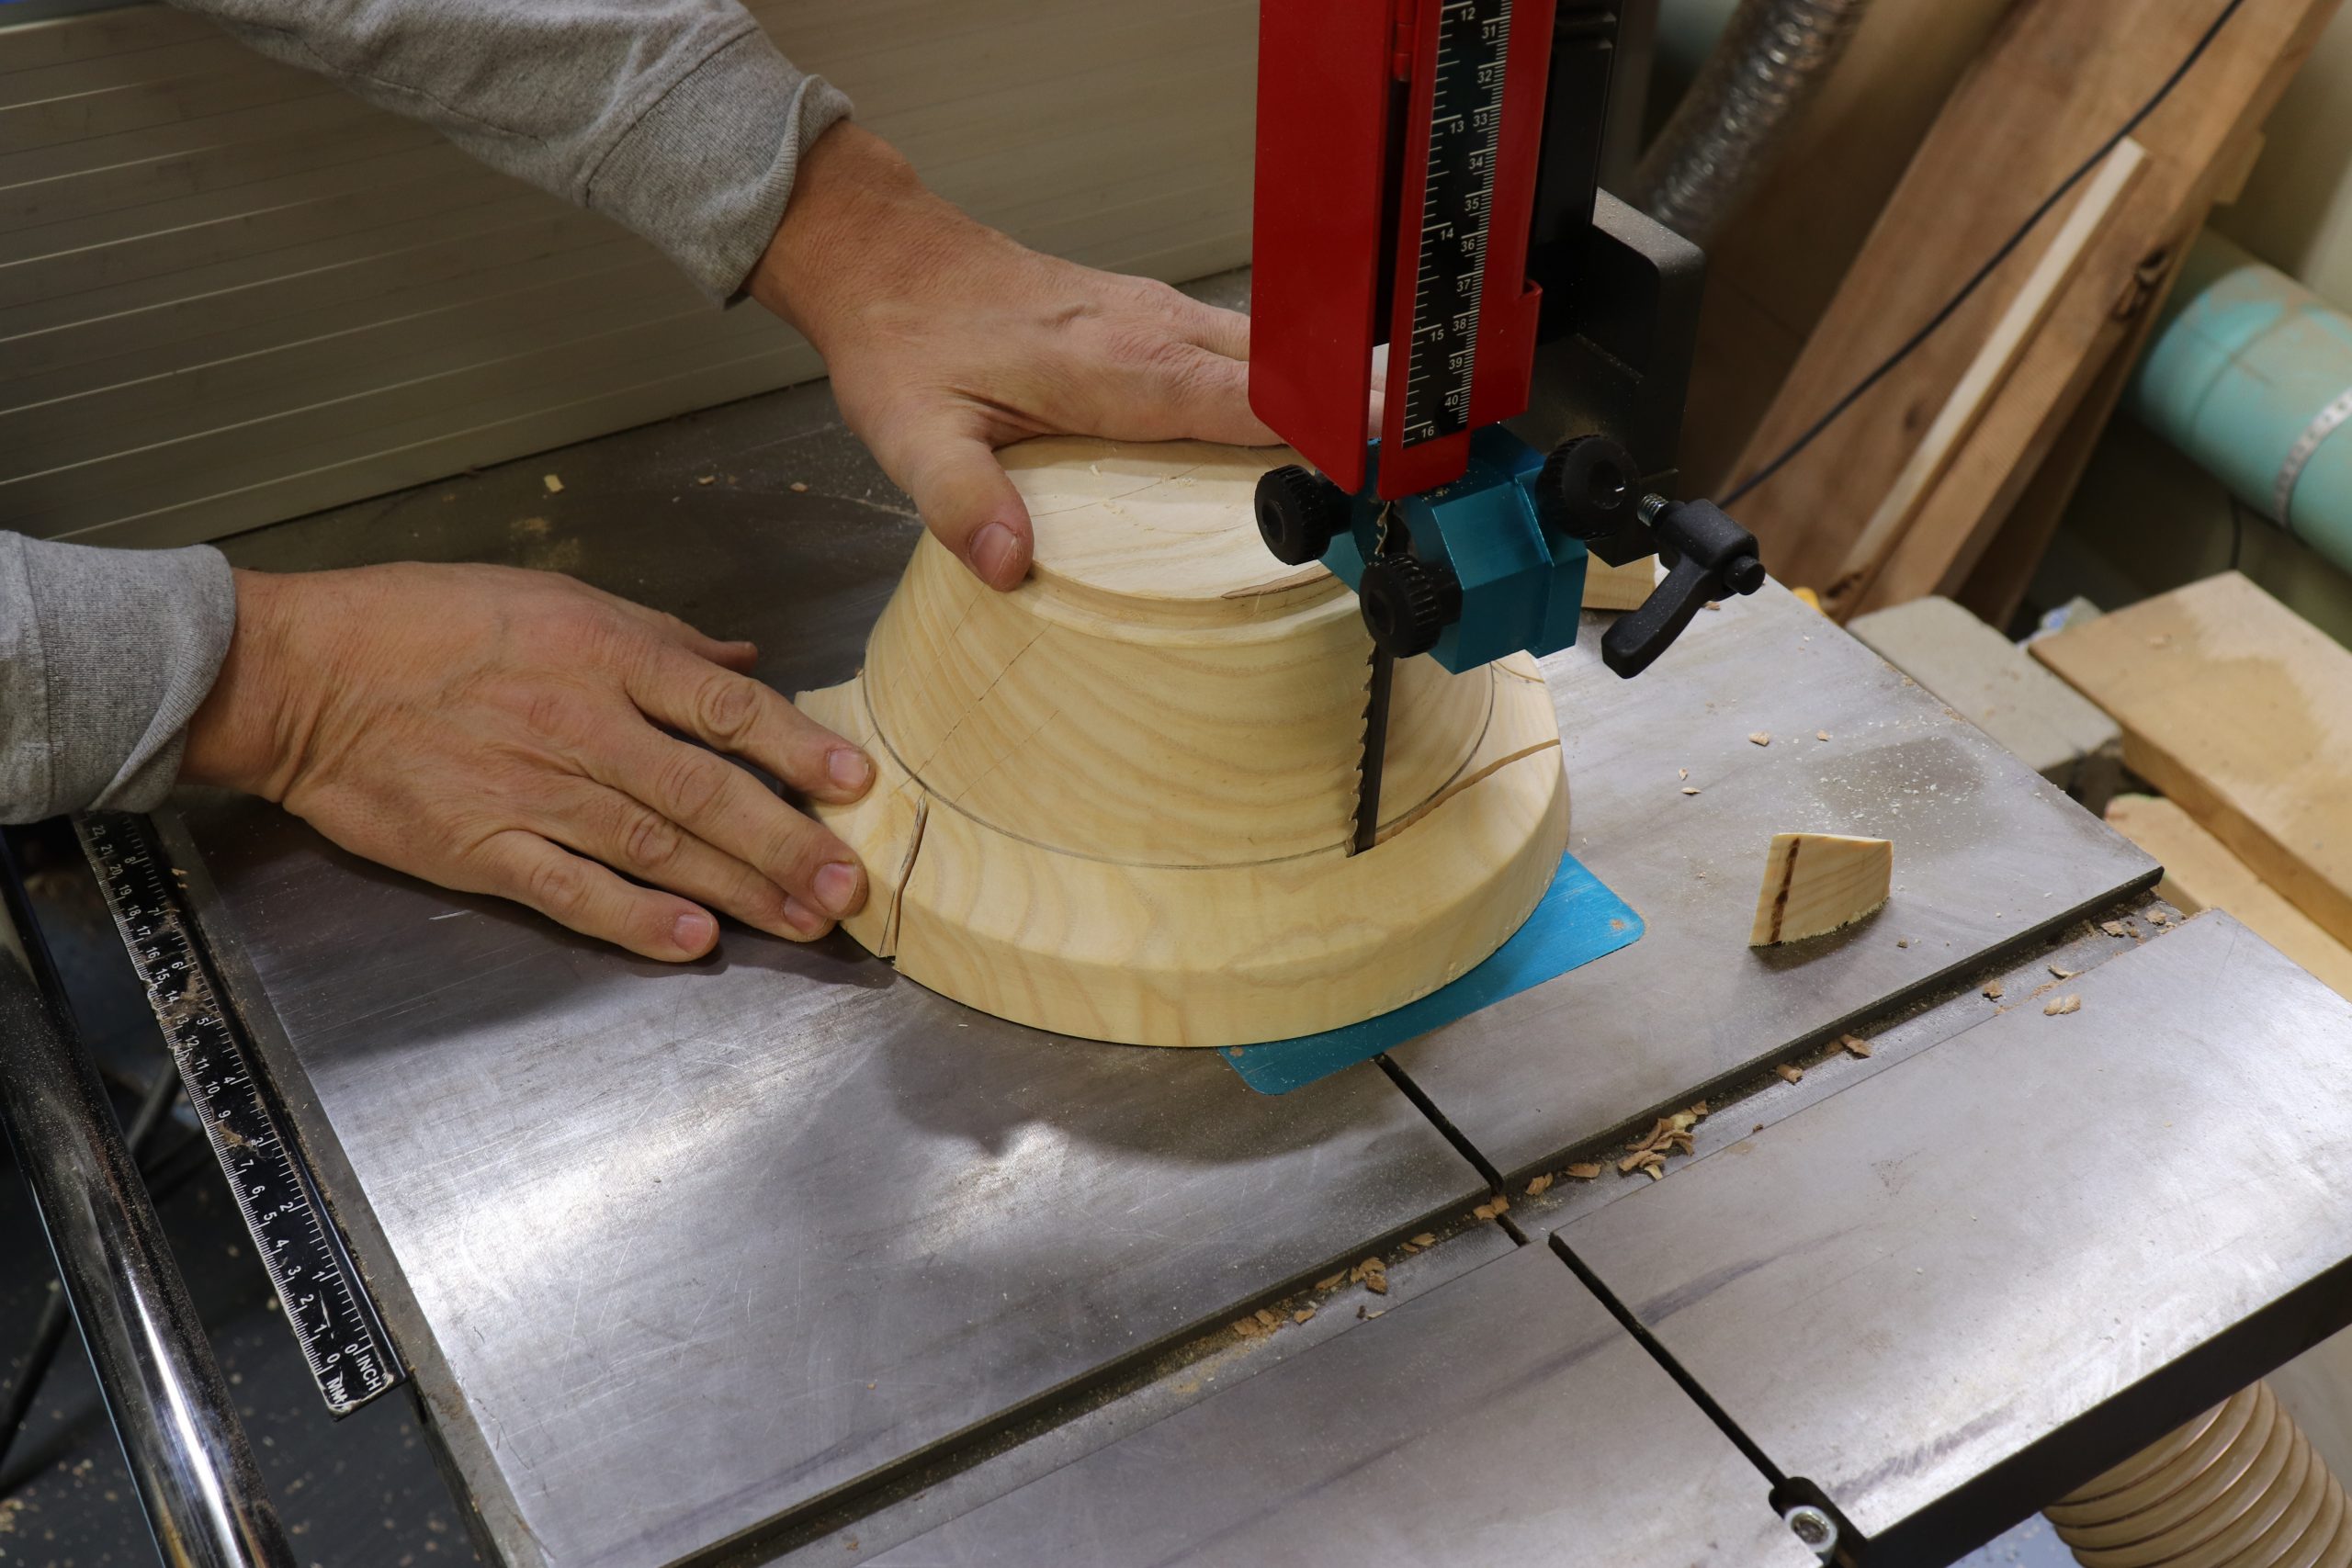
Place the bowl on your bandsaw table upside down, and carefully remove the waste, being careful not to cut into your spout or handle. Taking your time and cutting as close to the line as possible will save cleanup time later. A ½” 3 TPI blade works well for this cut.
Carving time
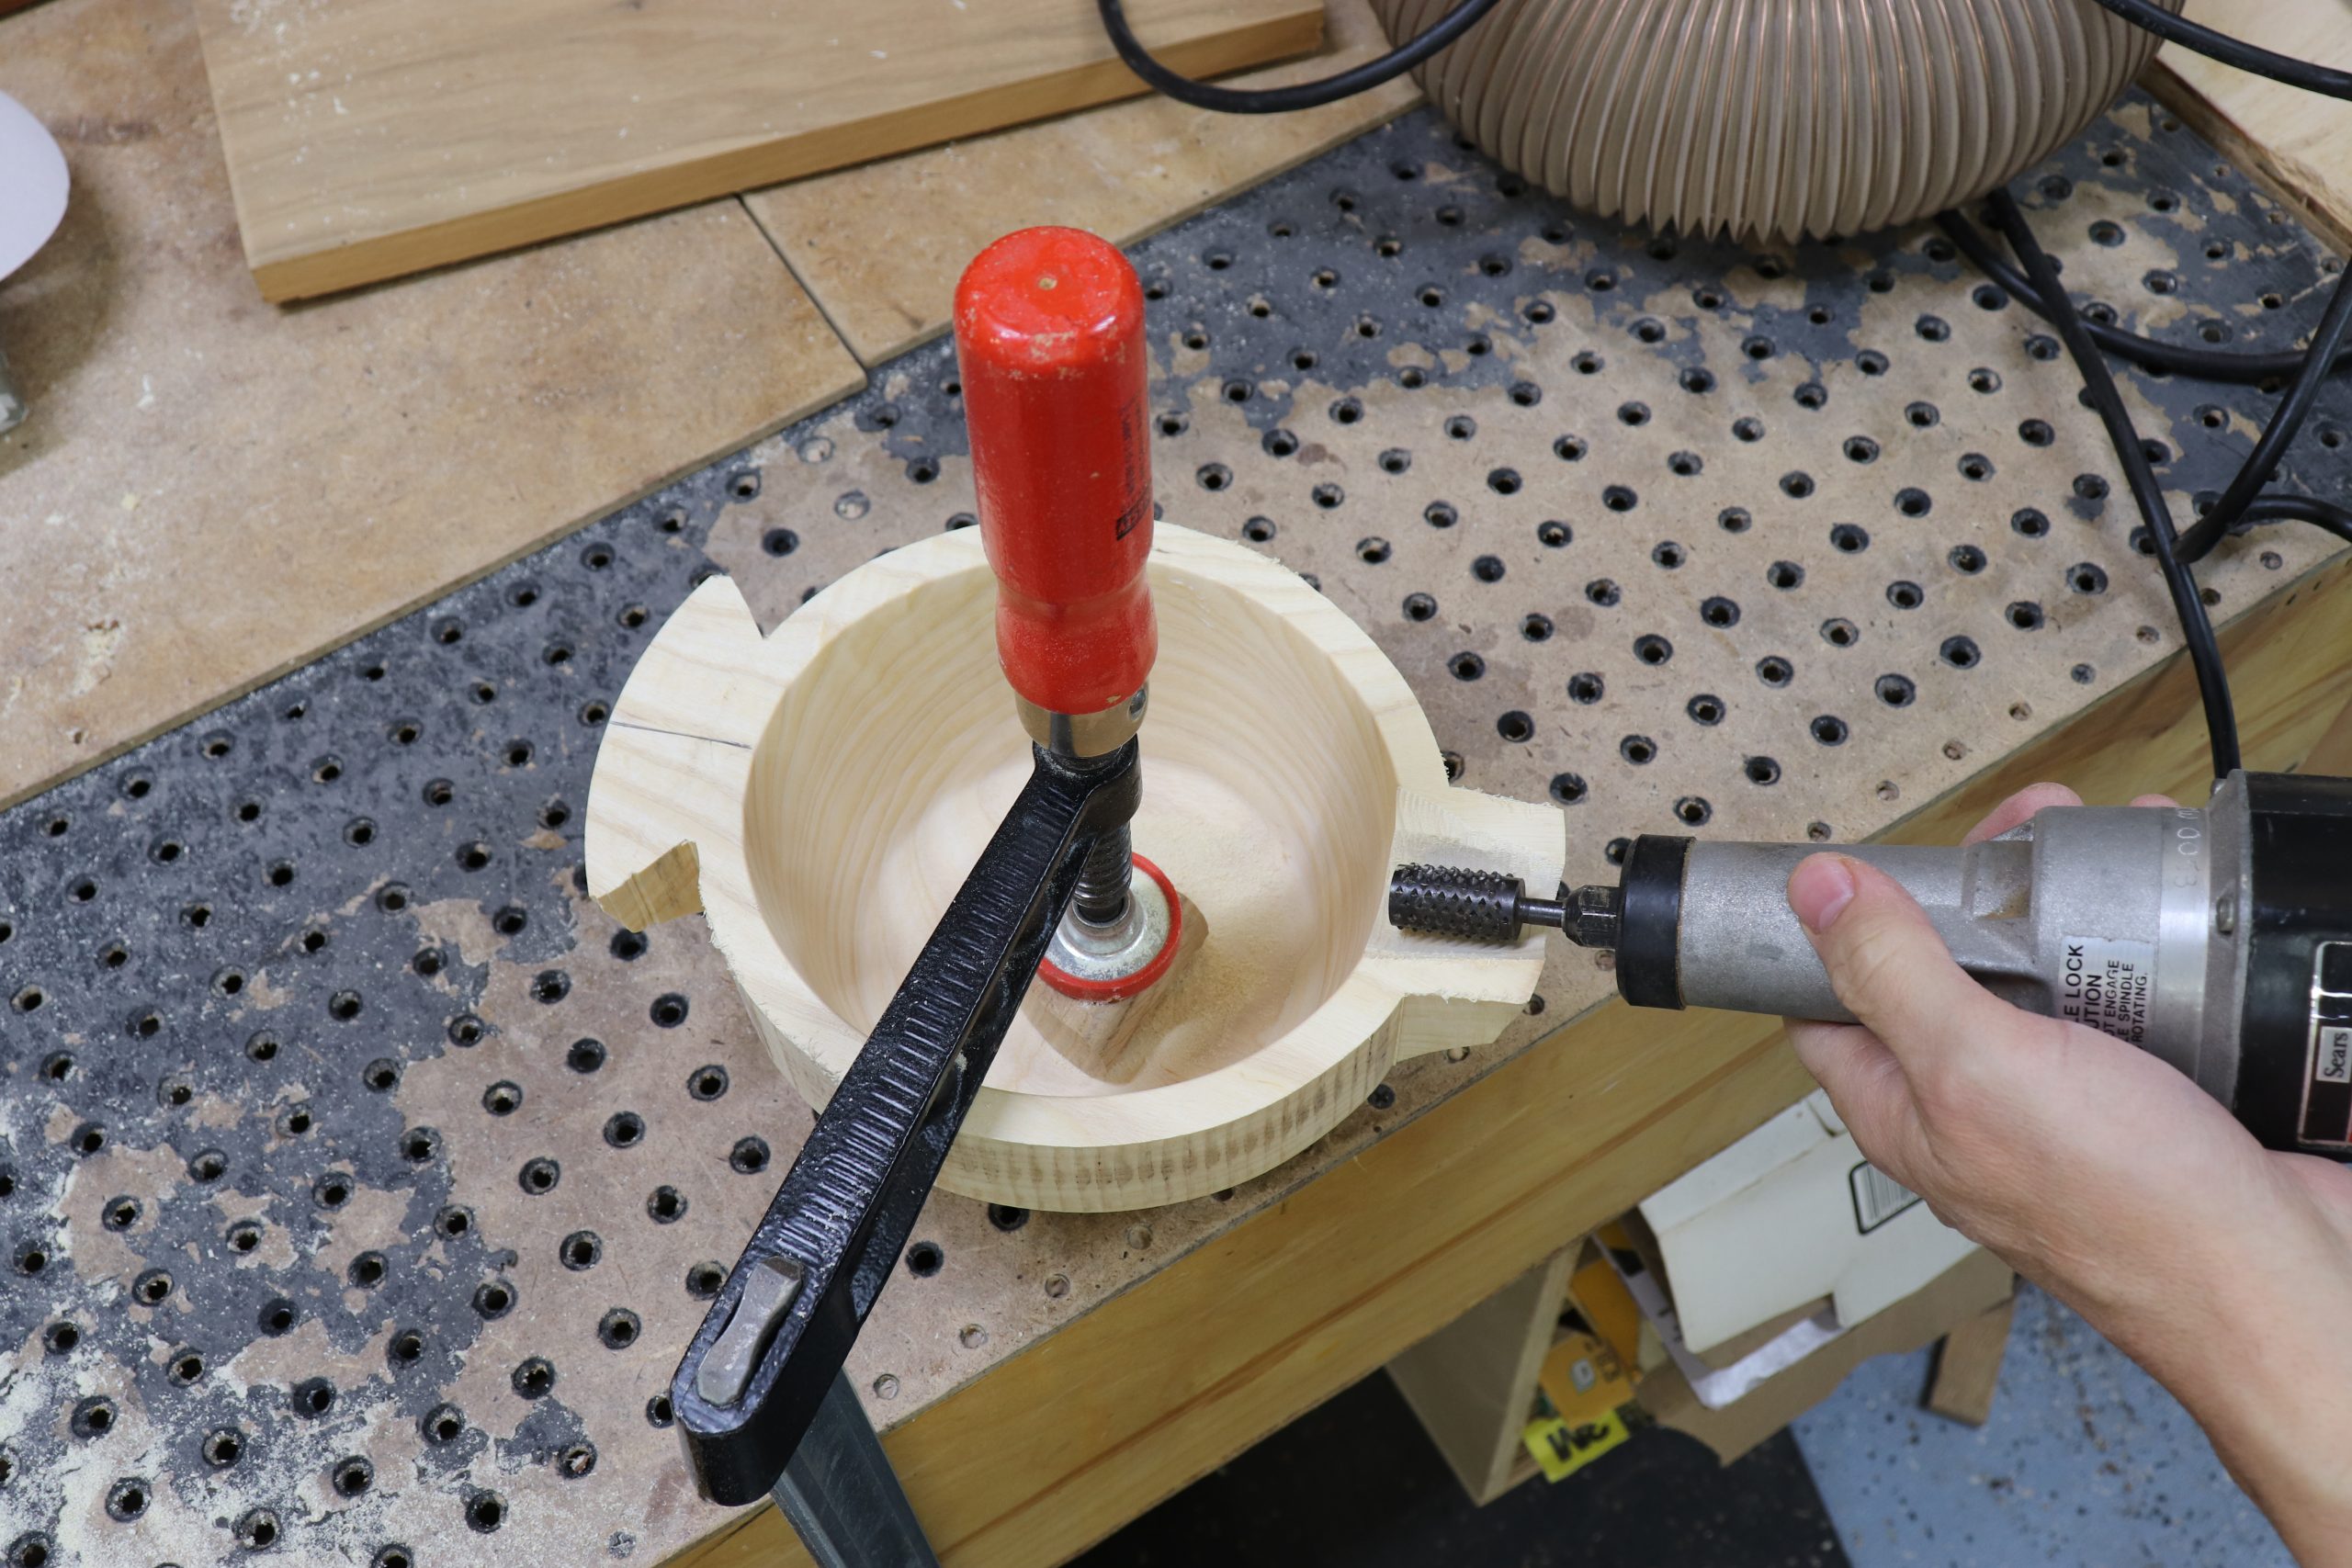
Using a die grinder (or traditional carving tools if you prefer) remove waste from the spout, leaving a final wall thickness of at least 3/8”. Be careful not to carve too thin if you are using a die grinder, as the rough surface will require a lot of cleanup and you don’t want to make the spout too fragile.
Shape the spout
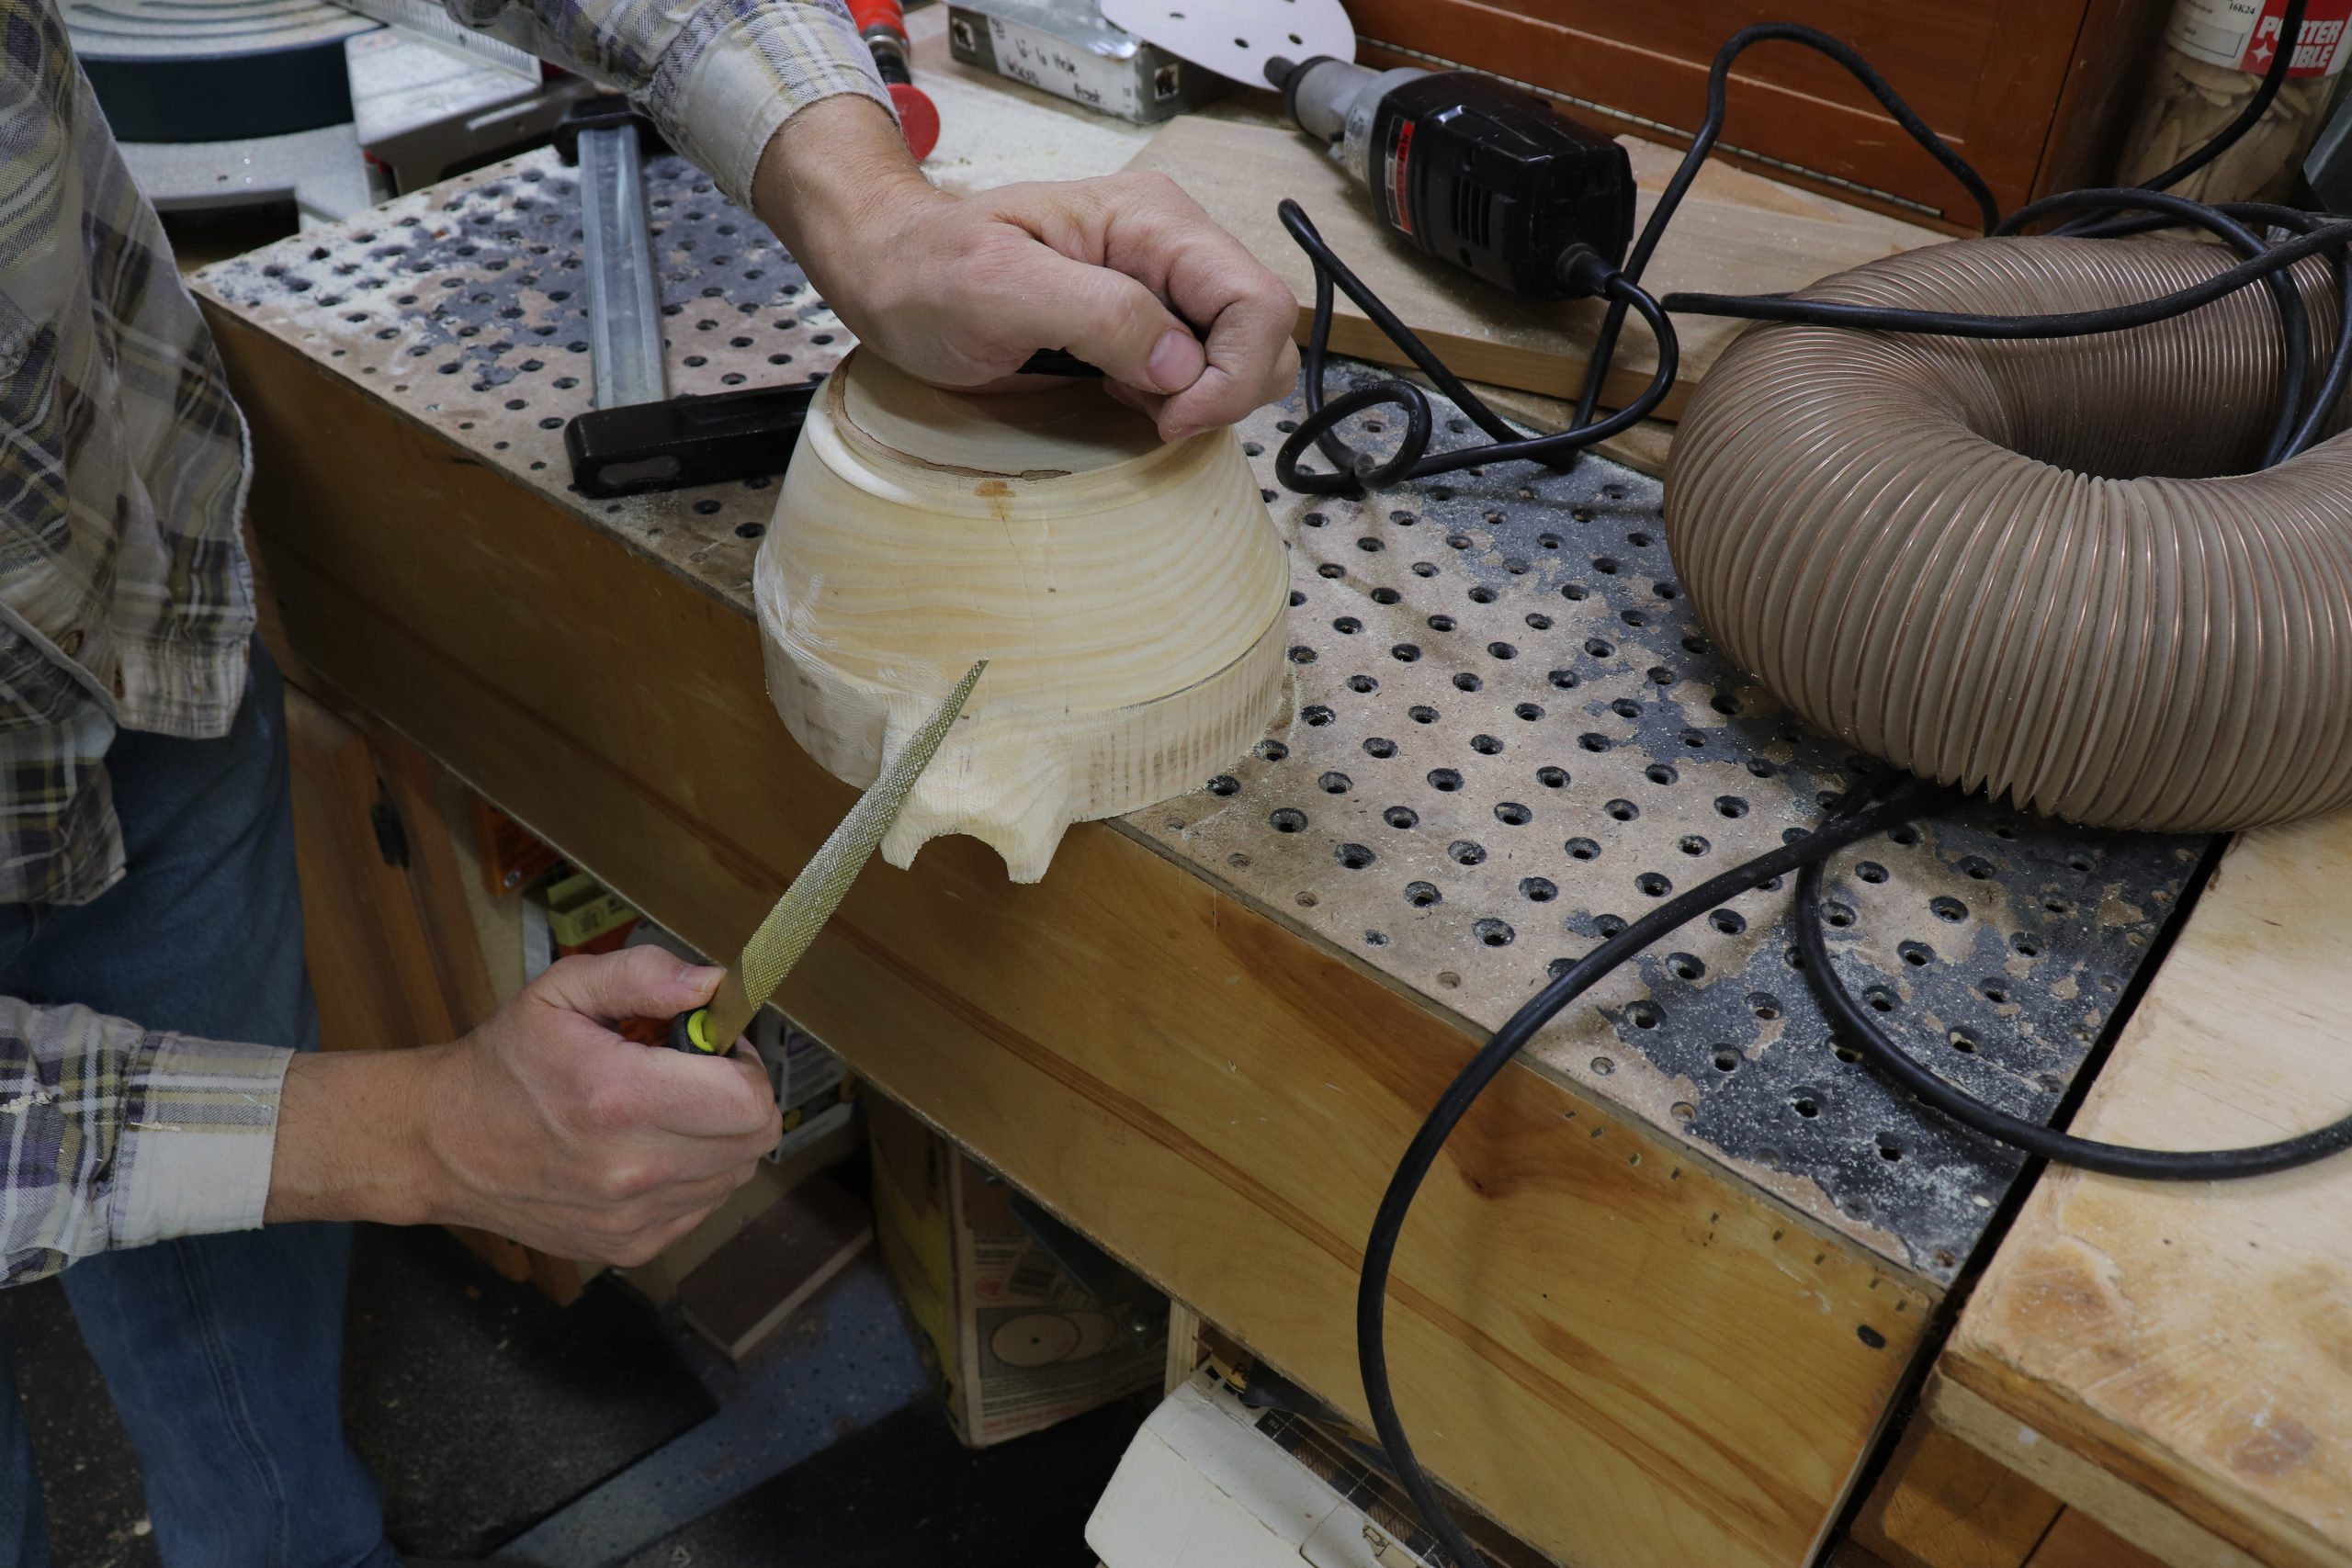
Using rasps, smooth out rough edges and taper to a pleasing shape.
Shape handle
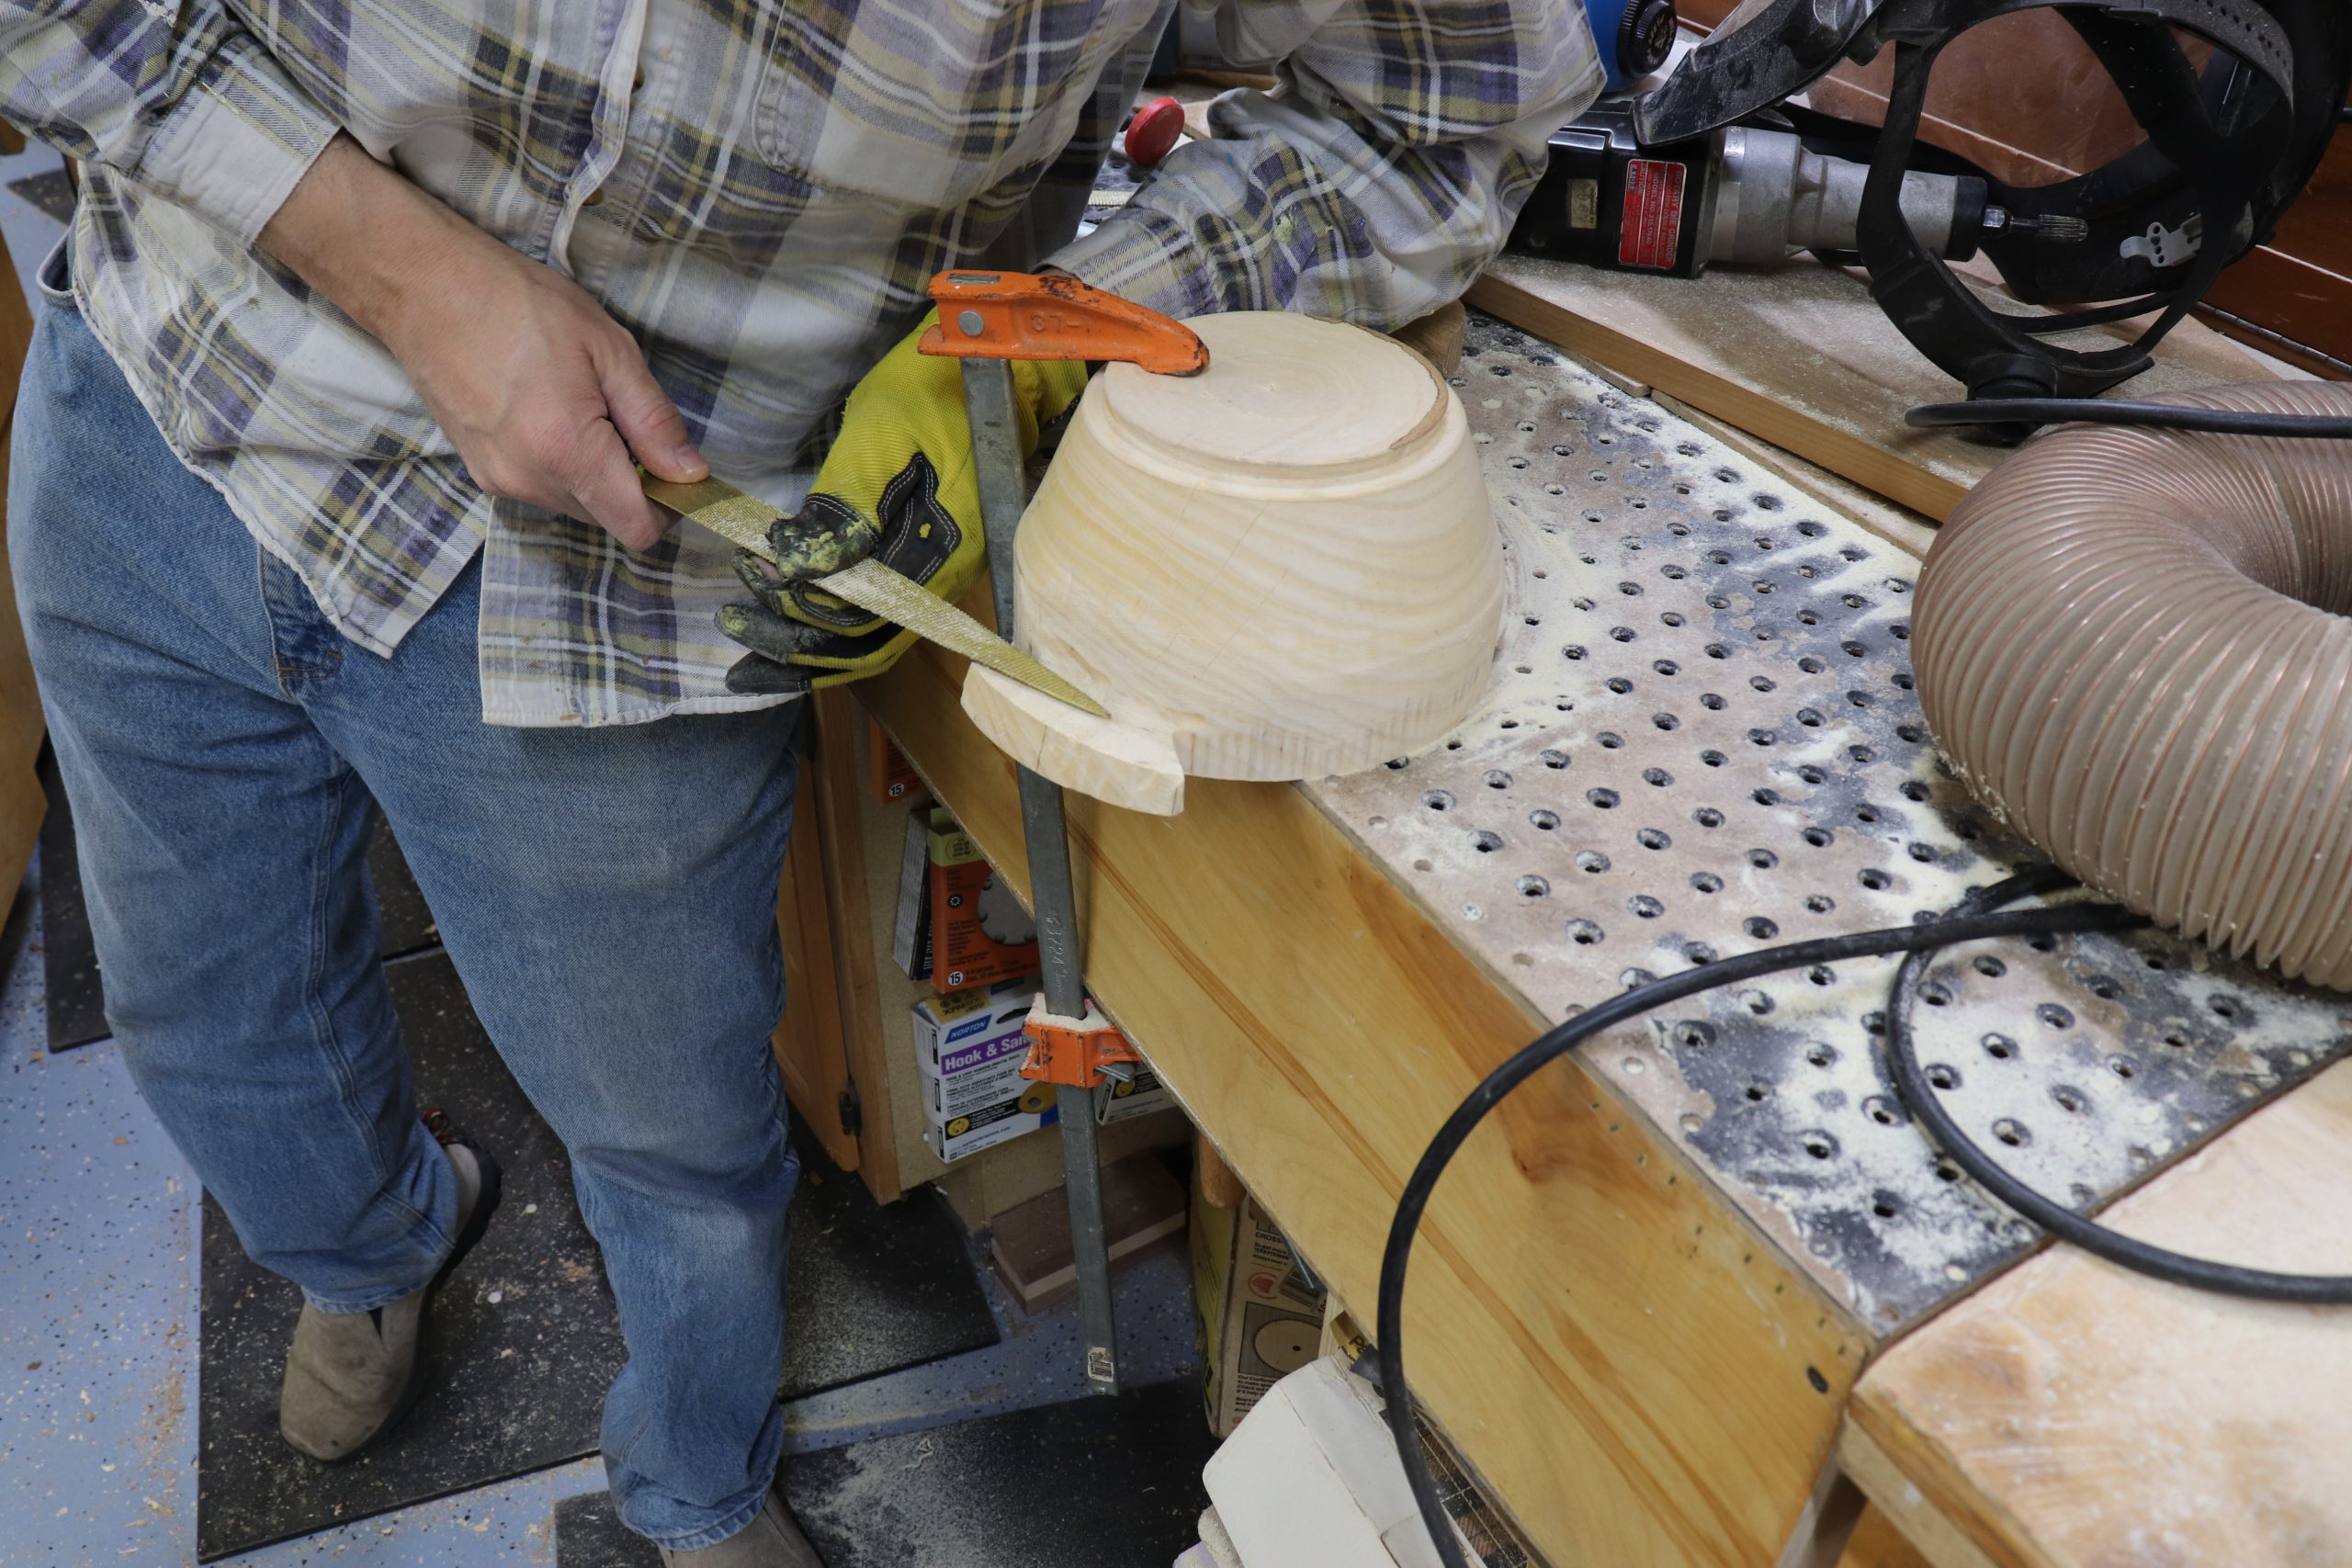
Undercutting the handle makes it easier to hold when using the finished bowl. You can remove a lot of waste with a die grinder to speed things along, and then shape things with a rasp as you get closer to your final dimensions.
Smooth the sidewalls
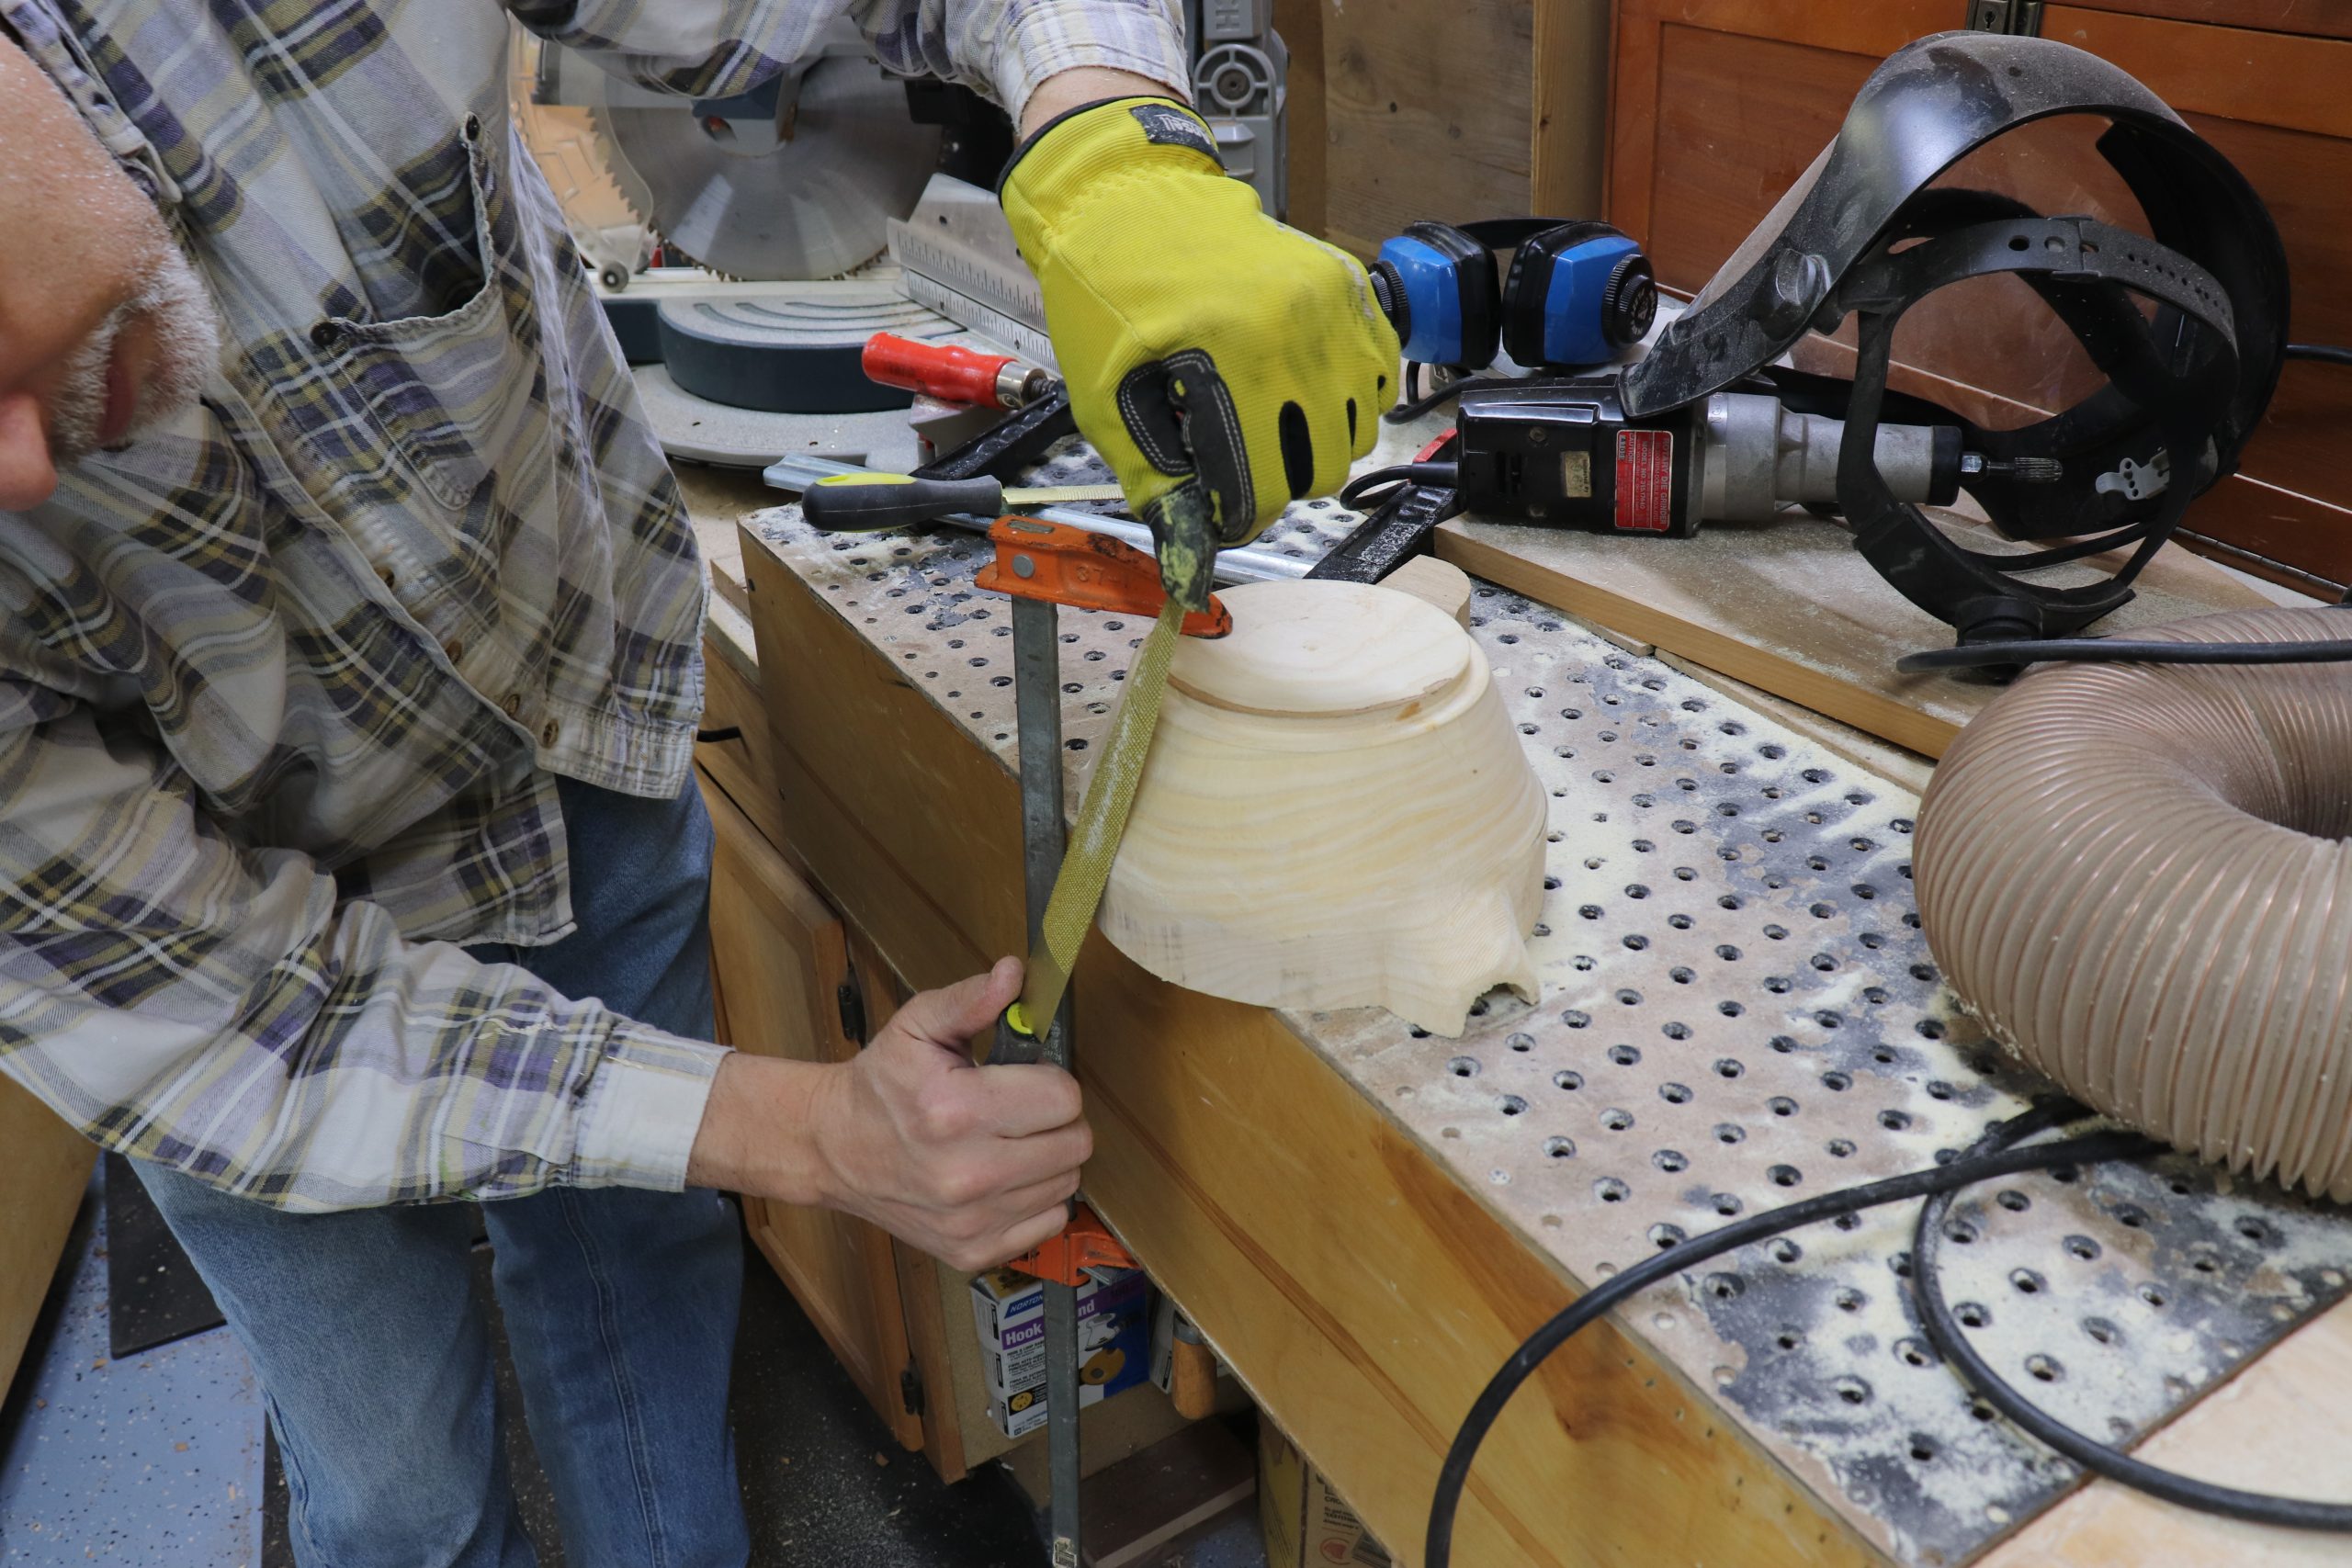
Use a rasp to smooth the transition where the rim was removed at the bandsaw. Use a broad sweeping motion and avoid adding flat spots to the bowl.
Remove tenon
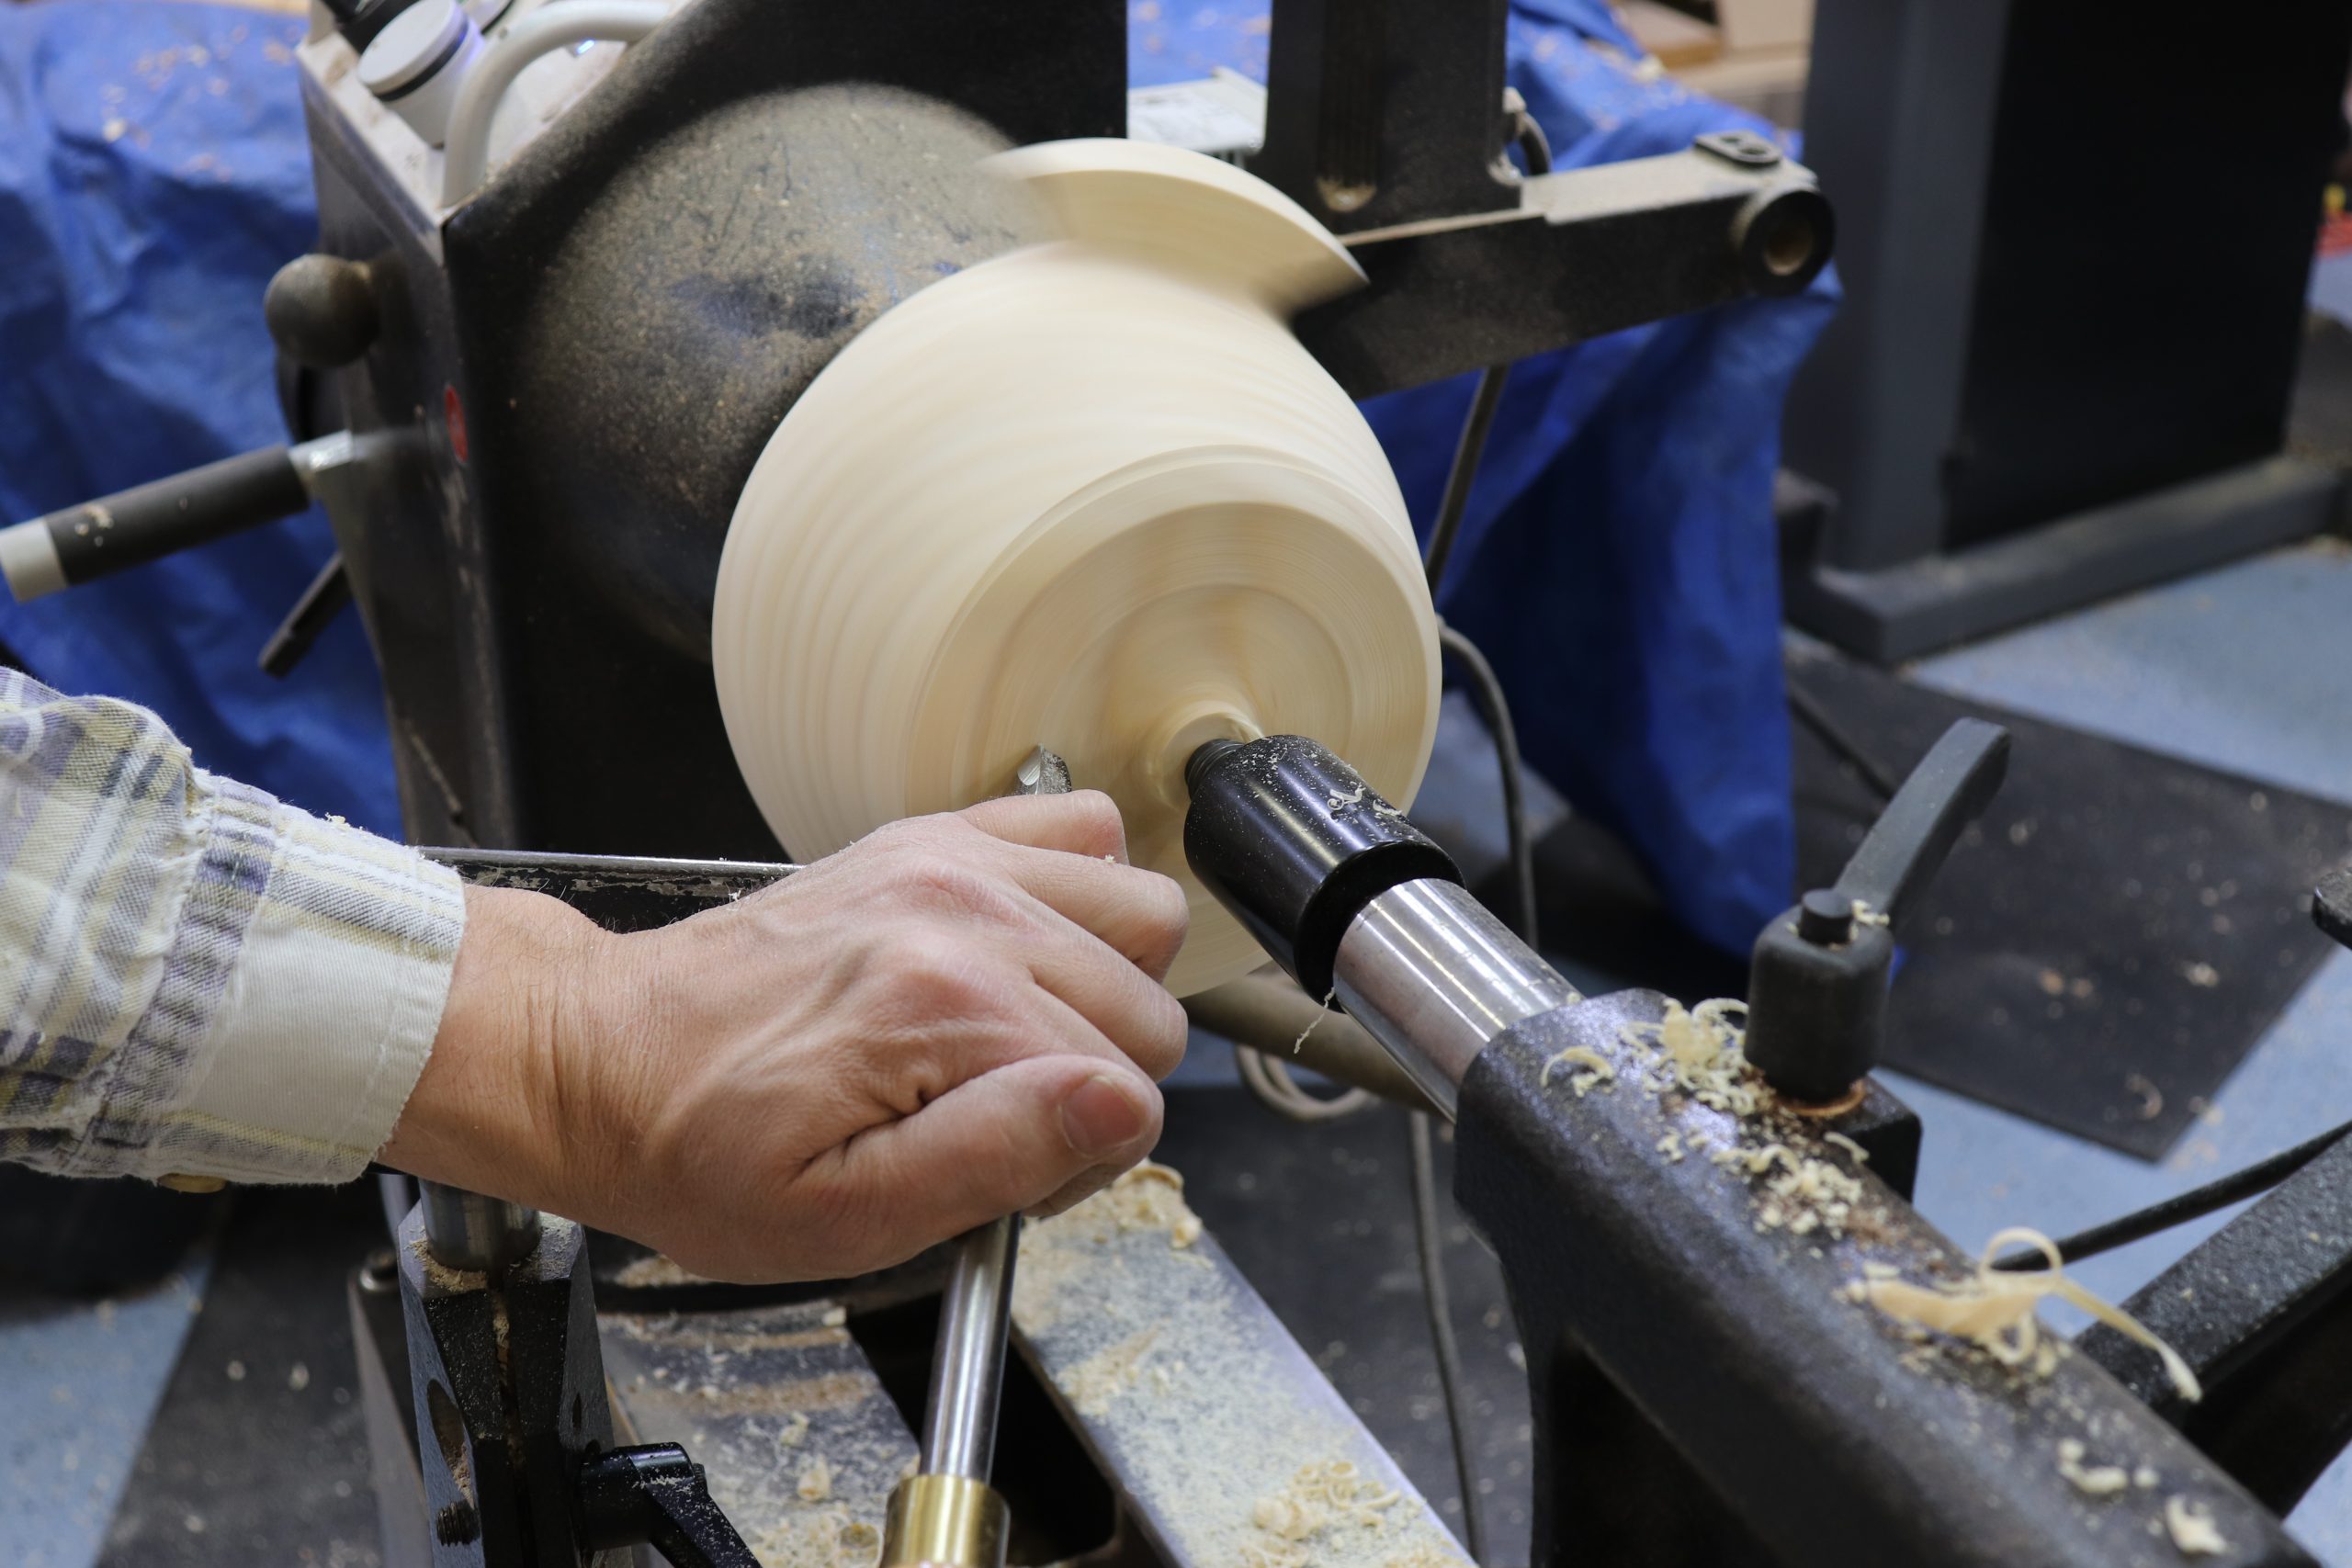
Remount the bowl on the lathe using a jam chuck or vacuum chuck and remove the tenon.
LOTS of sanding
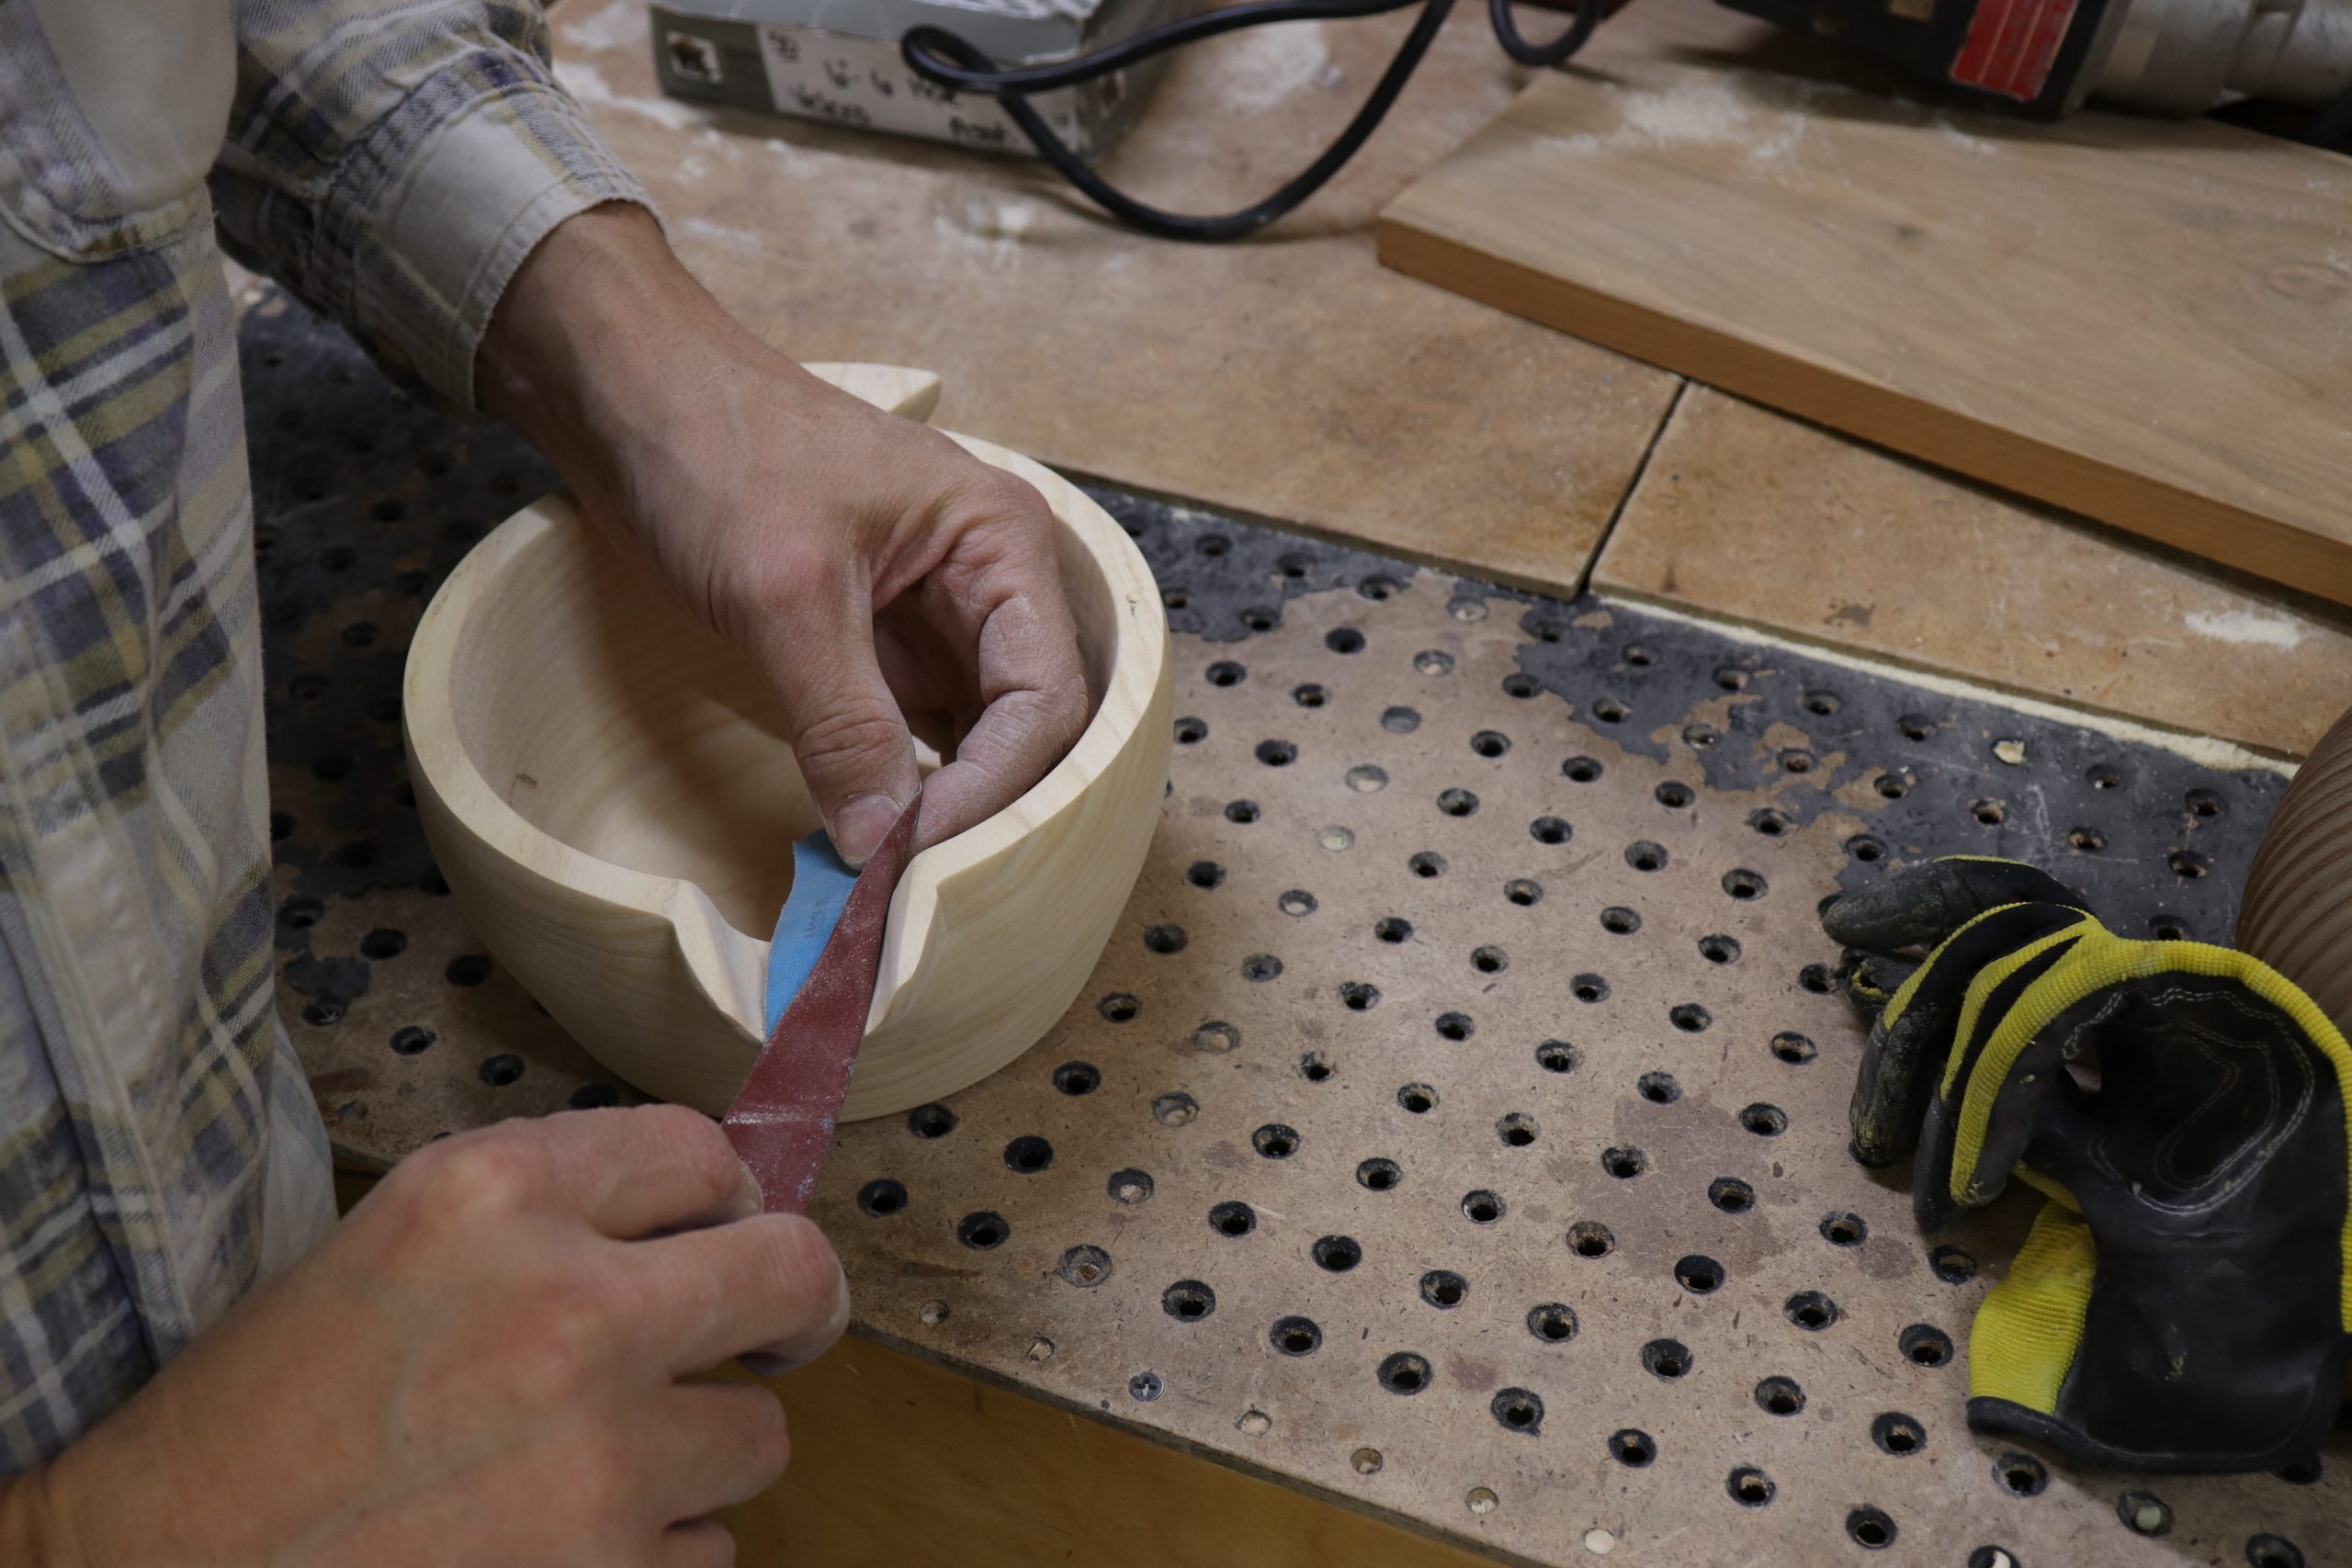
Rasps and die grinders leave many tool marks, so carefully sand everything using a random orbital sander for the body of the bowl, and hand sanding in areas that are hard to reach with power sanders.
Finish it up and use it proudly
If you want to hold the liquid in your spouted bowl, you will want to finish using epoxy. Check with the epoxy manufacturer to determine if their product is food safe. Otherwise, apply your finish of choice.
The post Turn and Carve a Spouted Bowl appeared first on WoodWorkers Guild of America.
from Blog – WoodWorkers Guild of America https://ift.tt/3f9Sw8d
Safety Measures Shared
Last week, Rob wondered what safety measures you practice when working on projects. Here are your many words to the wise. – Editor
“I have always tried to work safely in the shop, and a couple of years ago I took measures further by purchasing a SawStop cabinet saw. As I get older (64 now) I know that I will at some point start to lose a step here and there, so I wanted to ensure that a missed step didn’t include missing a finger. Any time that I use the miter saw, the last thing I do before pulling the trigger and lowering the blade is to mentally ask myself where my fingers are and then check to see that they are out of the danger zone. I have also informed my family that if they hear the saw running, they are not to enter the shop until it stops so as not to startle me and cause me to shift my attention away from the saw. My wife now makes it a point to knock and wait for me to answer before entering to make sure she doesn’t startle me and cause a mistake of any kind. When I’m in the shop she comes out a couple of times a day just to make sure I’m okay or to bring me a snack or just to say hello and see what I’m working on.” – Tom Atha
“Our efforts at safety in our private shops are pretty woeful, and the examples set by our ‘knowledgeable experts’ are often even worse. If I see the disclaimer ‘guards removed for clarity’ once per YouTube visit, I see it 10 times. What more did I see due to the guard being off the table saw? Show me the set up before turning on the saw and then replace the guard. My entire career was spent as an engineer and manager in the chemical industry. Due to some excellent managers who took time to educate me and being held to very high standards, I am very sensitive to safety practices. Our private woodworking practices in general fall far short of what is necessary.” – Jay Simmons
“I have Hello Kitty BAND-AIDS® for my shop crews when someone has a boneheaded moment. Ladders and step stools are a common safety topic for me. I usually include a talk about 5-gallon pails and how they are not a step stool. Electrical safety is also a big topic for me. Quarterly inspections are required by OSHA and are recommended for every home shop. Properly grounded tools and cords in good condition can be a life saver.” – Joe Mazanec
“I am 72 years old, and I’ve had pneumonia three times. I never realized how much damage you can do to yourself by not using breathing protection. Now I wear a mask in my shop, and I always turn on my ambient air filter. A word to the wise.” – Charles Bickerstaff
“I’ve been unable to return to my workshop since mid-June, and it’s killing me! Being a self-taught woodworker, for the most part, I was learning the intricacies of the use of a jack plane to plane parts of a table I’m building. By intricacies, I mean how to ensure that each edge is first flat and, secondly, square to the adjoining sides. I practiced this task for a few hours one afternoon and got tired, but I was satisfied that I had both learned how to do the task and had done it correctly. I would continue the project the next morning. Wrong! I awoke the next morning with my neck and upper trap muscles stiff as a board, and my neck hurt like heck! I had done everything right, except for using my legs properly to provide the momentum to the plane in my hands! I later saw a YouTube video by Rob Cosman, the Canadian woodworker, who in passing mentioned that one must propel the body forward by using primarily one’s legs. I knew that but didn’t think of it that fateful afternoon. A few months ago, I was working on one of my home’s interior walls and began to put in the 2×4 studs. I soon realized that I didn’t have the strength and stamina to drive the #8 size nails with a normal sized hammer into the yellow pine. A handyman told me the same day that is why he now uses screws, and not nails, to do home repairs. There ought to be a law preventing our getting old, don’t you think? We could all benefit from a comprehensive reminder on the proper use of our torso and limbs in our workshops to avoid injury (occupational therapy). This is especially important for hand tool woodworkers, but even power tool woodworkers must use hand tools to refine the surfaces of milled stock. My doctor prescribed physical therapy, and during my first visit, my physical therapist told me, ‘You’re the second woodworker I’ve seen today!’ Need I say more? Just one thing: Ouch!” – José E. Martínez
“ABSOLUTE rule in my shop: NOTHING moves until the table saw stops spinning. Even my grandchildren have learned this rule.” – E. Louis Fairbank
“It only needs a few near misses, such as kickback on the table saw, to make you realize that the workshop is a dangerous place. Like many woodworkers, the inconvenience of the blade cover on the table saw used to frustrate me. Recently I was at a wood store called Windsor Plywood where I noticed that they had a SawStop table saw. I asked the owner what prompted him to shell out for such an expensive saw. He put up his left hand and showed the fingers that were missing, and he is an experienced woodworker. It just so happened that my wife was with me, and when we got home she told me to buy a SawStop. I explained how expensive they are, and she said that unless I did, she would not go on supporting my woodworking hobby. I guess I am fortunate to have such a caring wife. So I purchased the Professional cabinet saw. Not only is this saw much safer but it is also quite the best saw I have ever had by a long way. I discovered that the quality of the saw itself promotes safer practices because it is so accurate that I don’t need to take any risks. However, I have triggered the brake cartridge once and it was because I was stupidly trying to cut corners. Fortunately, I just got a cut on the end of my finger. Trying to remove the brake cartridge from the saw blade and the expense of purchasing another brake cartridge and new blade was enough to make me change my ways. The other thing that my wife was concerned about was dust — a common workshop problem. I have the over-the-blade cover, and it is rare that I have to remove it for rip cuts due to the excellent design. If I have to remove it, I use the MicroJig GRR-ripper and the riving knife. I also try to incorporate dust collection into the jigs that I make, such as the crosscut sled on the table saw. I have just spent the last week improving dust collection in my shop where I can. I don’t have a central system — something I should have taken care of when I first built my shop nearly 20 years ago. Mind you, space is a challenge like in most shops.” – Graham Jones
“Several years ago I bought a good two-wheel hand truck. Great investment for moving all sorts of things around the shop and yard. I don’t lift and move things that killed my back; instead I shift them to the hand truck and use leverage and gravity.” – Robert
“I will never stop working in my shop. It’s what I look forward to each and every day. We have all made the sheet stock movers and rolling tables. But the one thing that I did do, that for me was a game-changer, was to buy a lifting table. This item lowers enough to put small items on and raises up high enough to rest against the tailgate of my pickup! It is worth its weight in gold. I can’t tell you how many times this device has saved my bacon — and of course, my back. As a tinkerer, I have thought of accessories to attach to it that will make it even more functional. Like everyone else I just need to find the time. When I do, I will share them!” – Dave Troncoso
“The biggest thing I have found is listening to that voice in my head when it asks, ‘Are you sure you want to do it that way? Really?’ With age and a few minor accidents, I now listen to myself.” – Walter Hayes
“I have so many tools in my shop that have really sharp edges/blades as well as a nifty chainsaw for outside maintenance. My operating ‘theory’ applies to all: if there is a task needing to be done, or a project I have planned, the first thing I assess before even heading out to work is how I’m feeling that day. Am I awake/alert/rested? There have been days when I would like to work on a project, but maybe am a bit tired from other tasks. That’s when I decide to wait for a better day. Nothing is more dangerous, in my opinion, than not being totally aware/alert when sharp blades are moving! It’s my simplest operational awareness.” – Paul Bailey
“I always appreciate reminders about being safe and am looking forward to reading the reader submissions. Here is mine. Thanks to 34 years in the Navy, my initial training and many operational experiences led to a good foundation of safety habits I now use in my woodshop. I’ve only been woodworking for a little less than two years, and I love it! I learned that having proper gear on first puts me in the right mindset and gives me good protection:
• Safety shoes so I never have to worry about jumping out of the way of a dropping a chisel or hammer.
• Prescription bifocal safety glasses. Got them from my regular eyeglass shop and worth every dime. This helps me see much more clearly than having safety glasses over my regular glasses. No fogging!
• Hearing protection. I already wear hearing aids from damage over years in the military. I don’t need to lose any more hearing. I use the earmuff type.
• GVS Eclipse P100 dust mask. They come in different sizes, so mine is just right to be comfortable to wear for long periods, and I can clean it. Again, military exposure to hazardous environments taught me to take sawdust warnings seriously.
• Last but not least is a rechargeable headlamp so I can see clearly, particularly when I need to operate certain power tools.
While these aren’t unusual items, I have personally experienced or witnessed the value of these items in a professional environment. Using safety gear and procedures is a sign of expertise and sets the example for others (including young ones). I’ve been to woodworking classes where I’m the only one with my mask on (pre-hunkering down). It’s not long before someone comes and asks me about mine.” – Sandy Adams
“Never, ever leave a chuck key in the chuck of your drill press or lathe. Make it a habit to always remove it, even if you have the next item to be chucked next to you. You’ll only need to forget once and you’ll remember the mistake forever. It happened to me when I was 18ish, and the near miss made me a believer forever. I’m now 75.” – John Frassica
“A few years ago, I mounted a track on the ceiling and bought a small electric hoist. It works well to lift those heavy or awkward pieces onto the bench. I also use it to dump the 55-gallon drum from the dust collector into plastic bags for disposal.” – Thomas Kelly
The post Safety Measures Shared appeared first on Woodworking | Blog | Videos | Plans | How To.
from Woodworking | Blog | Videos | Plans | How To https://ift.tt/3hFH71F
2020年7月27日星期一
Restoration Of Old Rusty 14" Cut off Machine || Repair LG 355 Model Chop saw
from Mistry MakeTool https://www.youtube.com/watch?v=hbAUY0vNZMQ
Retire your dusty belt sander! Cambered plane irons work!
from Stumpy Nubs https://www.youtube.com/watch?v=j7yL8ud03hk
Upgraded Safety for an Older Table Saw – Introducing Shark Guard
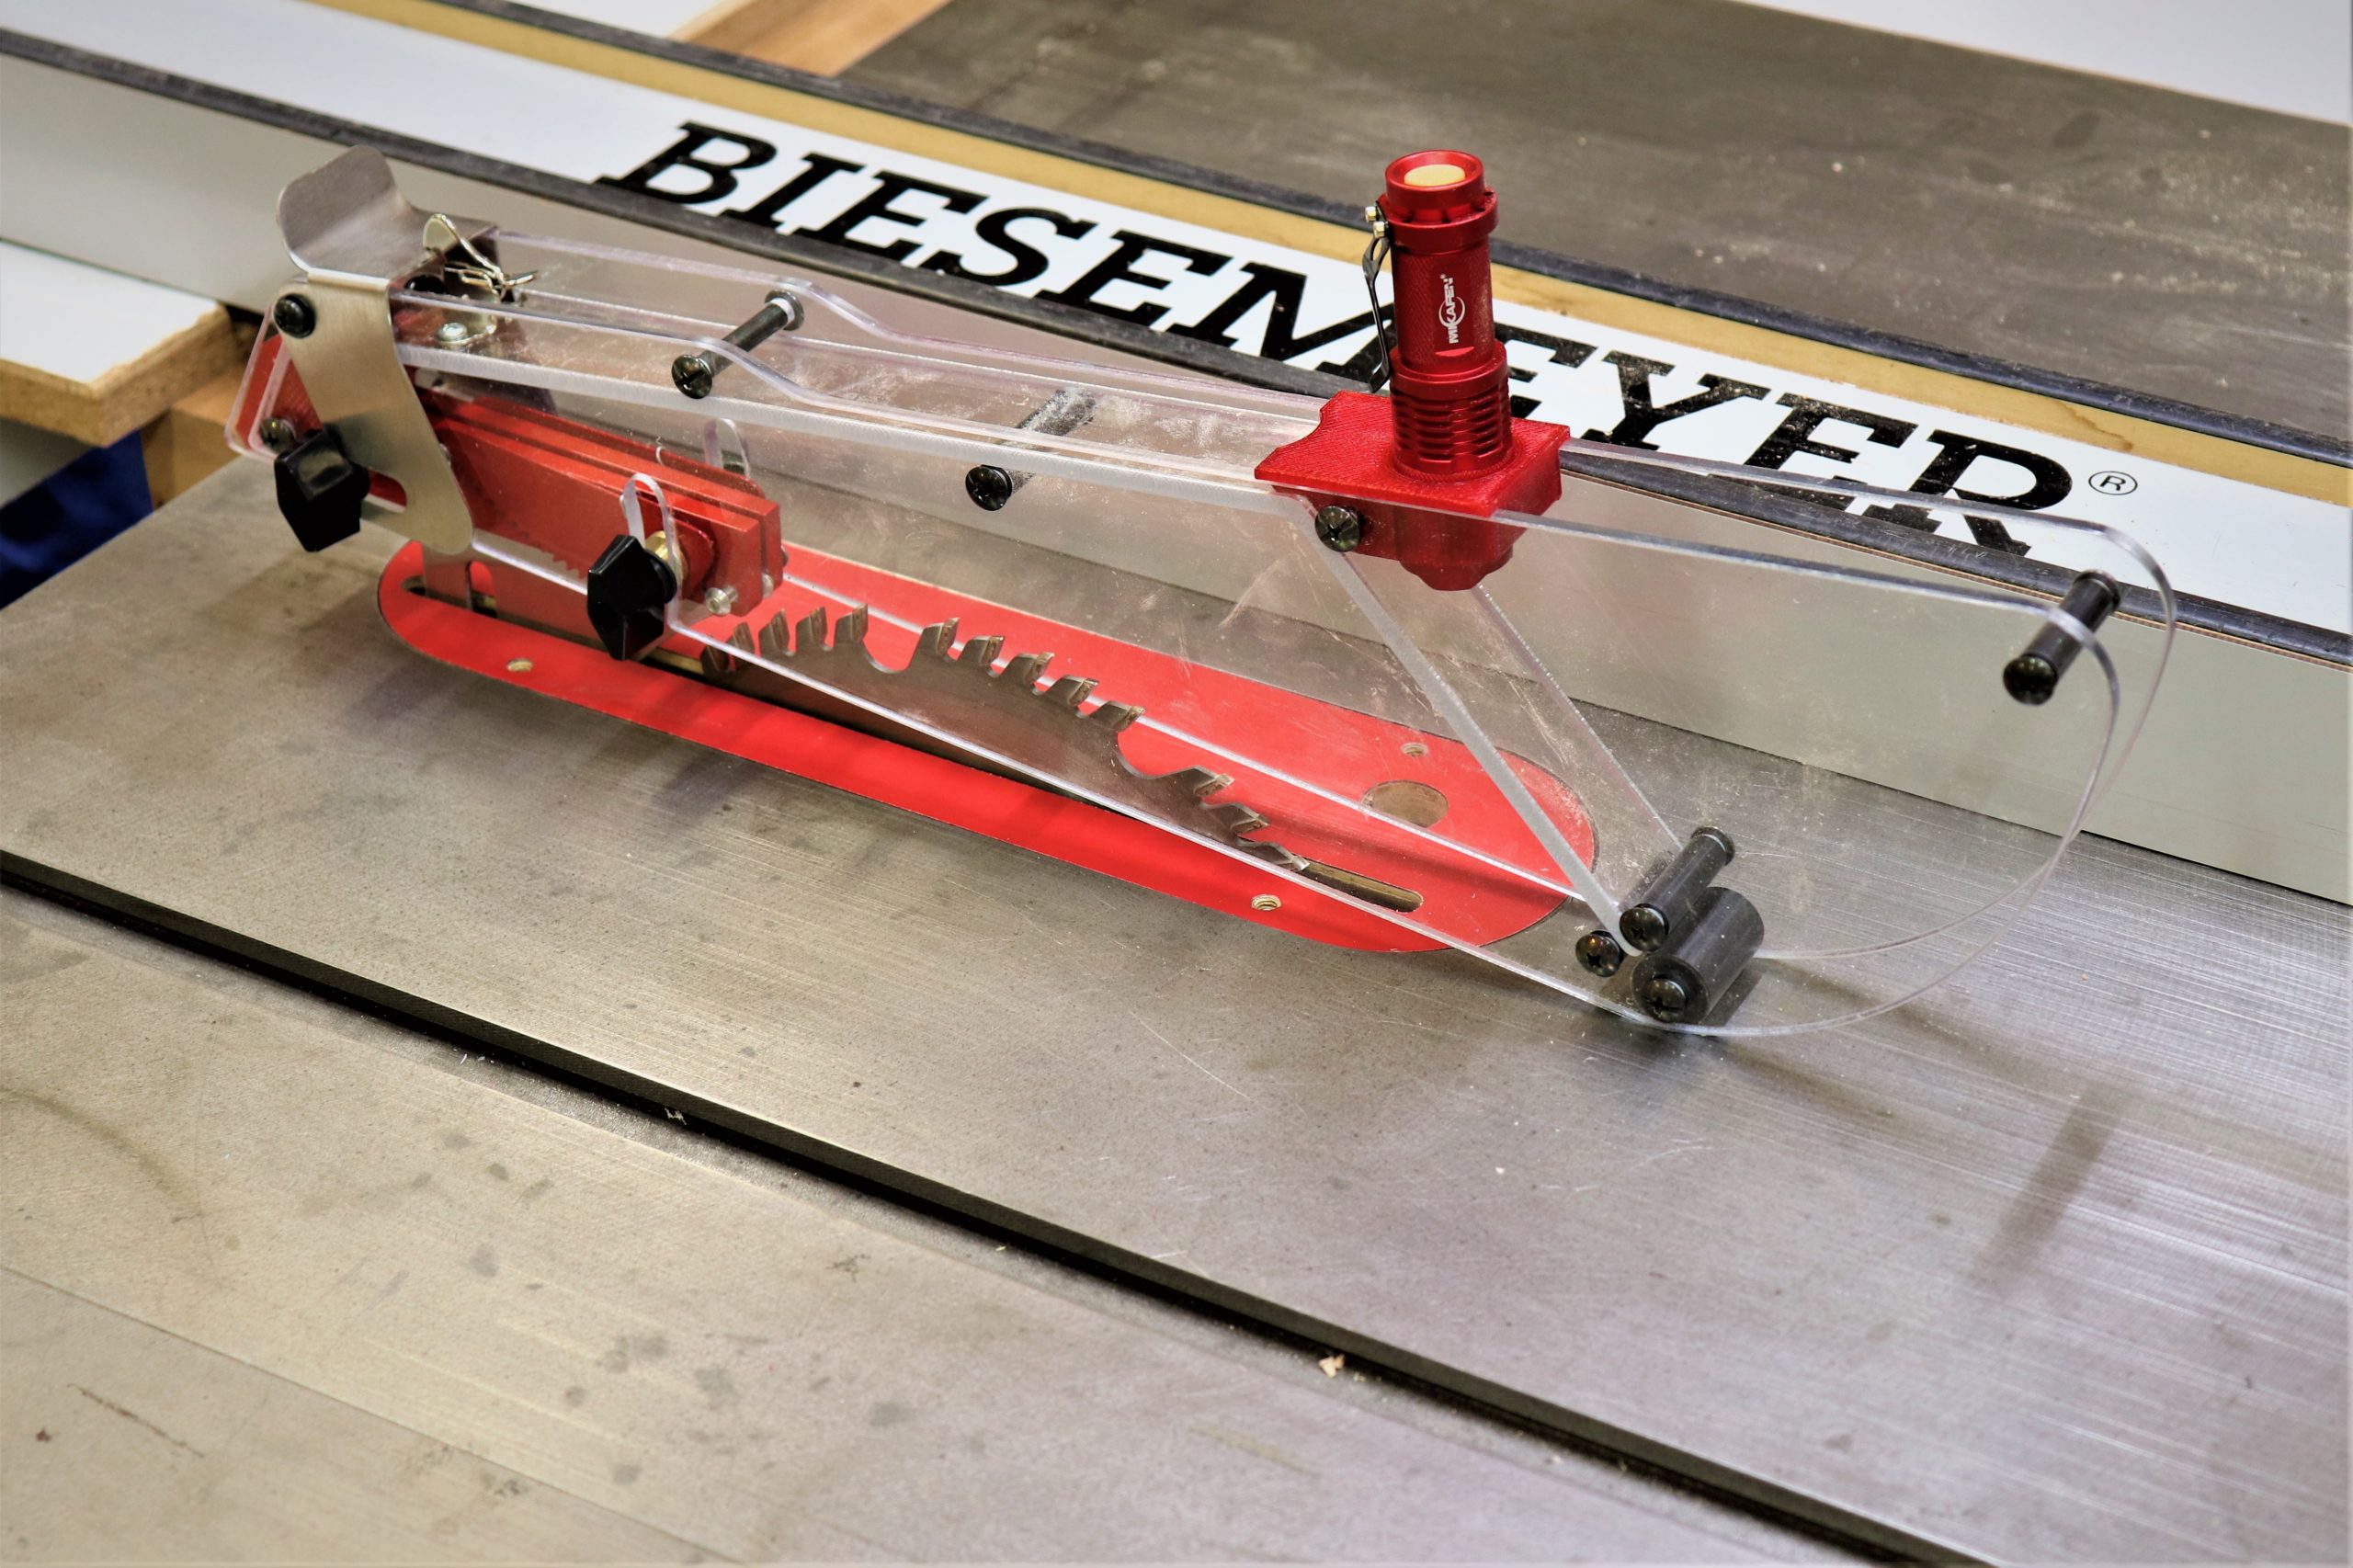
I’m always on the lookout for ways to improve safety and efficiency in my shop. My late 90’s Delta Unisaw came with an adequate stock blade guard for its time, but, like many saws from that era, it was tricky to remove, reinstall, and align with the blade.
The Shark Guard is designed to provide improved protection, along with simplifying the installation/removal process. As a bonus, it offers an optional dust collection shroud that can capture dust that evades the under-table collection on a table saw.
Easy Installation
The Shark Guard was simple to install, and within 30 minutes of opening the box, I was up and running. I just removed the mounting blocks for the stock blade guard and installed the single mounting block for the Shark Guard. A single mounting block simplifies the installation and removal, and the convenient hand lever means height adjustments can be made quickly without tools.
Construction
The Shark Guard is made using high-quality Lexan, with material that is 70% thicker than the stock guard on my saw. It is built with modularity in mind so that if there is ever damage to a component, it can be easily replaced. The modularity also allows for add-ons such as dust collection or an LED light, whether they are purchased with the unit upfront or added down the road.
Dust Collection
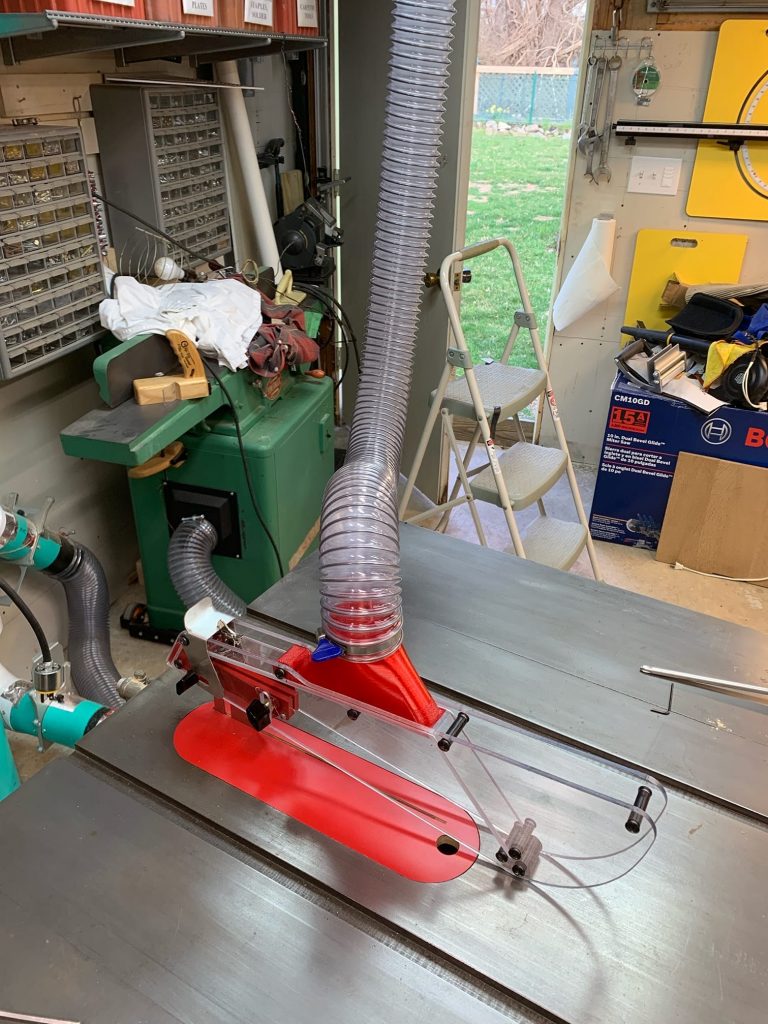
To get the Shark Guard’s full benefit, there are optional dust ports that can be added so that your dust collection system can pull directly from the blade guard housing. There are three standard sizes to choose from; 2-1/2″, 3″ or 4″. A dust port can be added to the Shark Guard in a few minutes by simply removing a few screws.
Optional LED light

To help you keep an eye on the blade, an optional LED light can be added to the front area of the blade guard. This is a neat feature and really lights up the area in front of the blade.
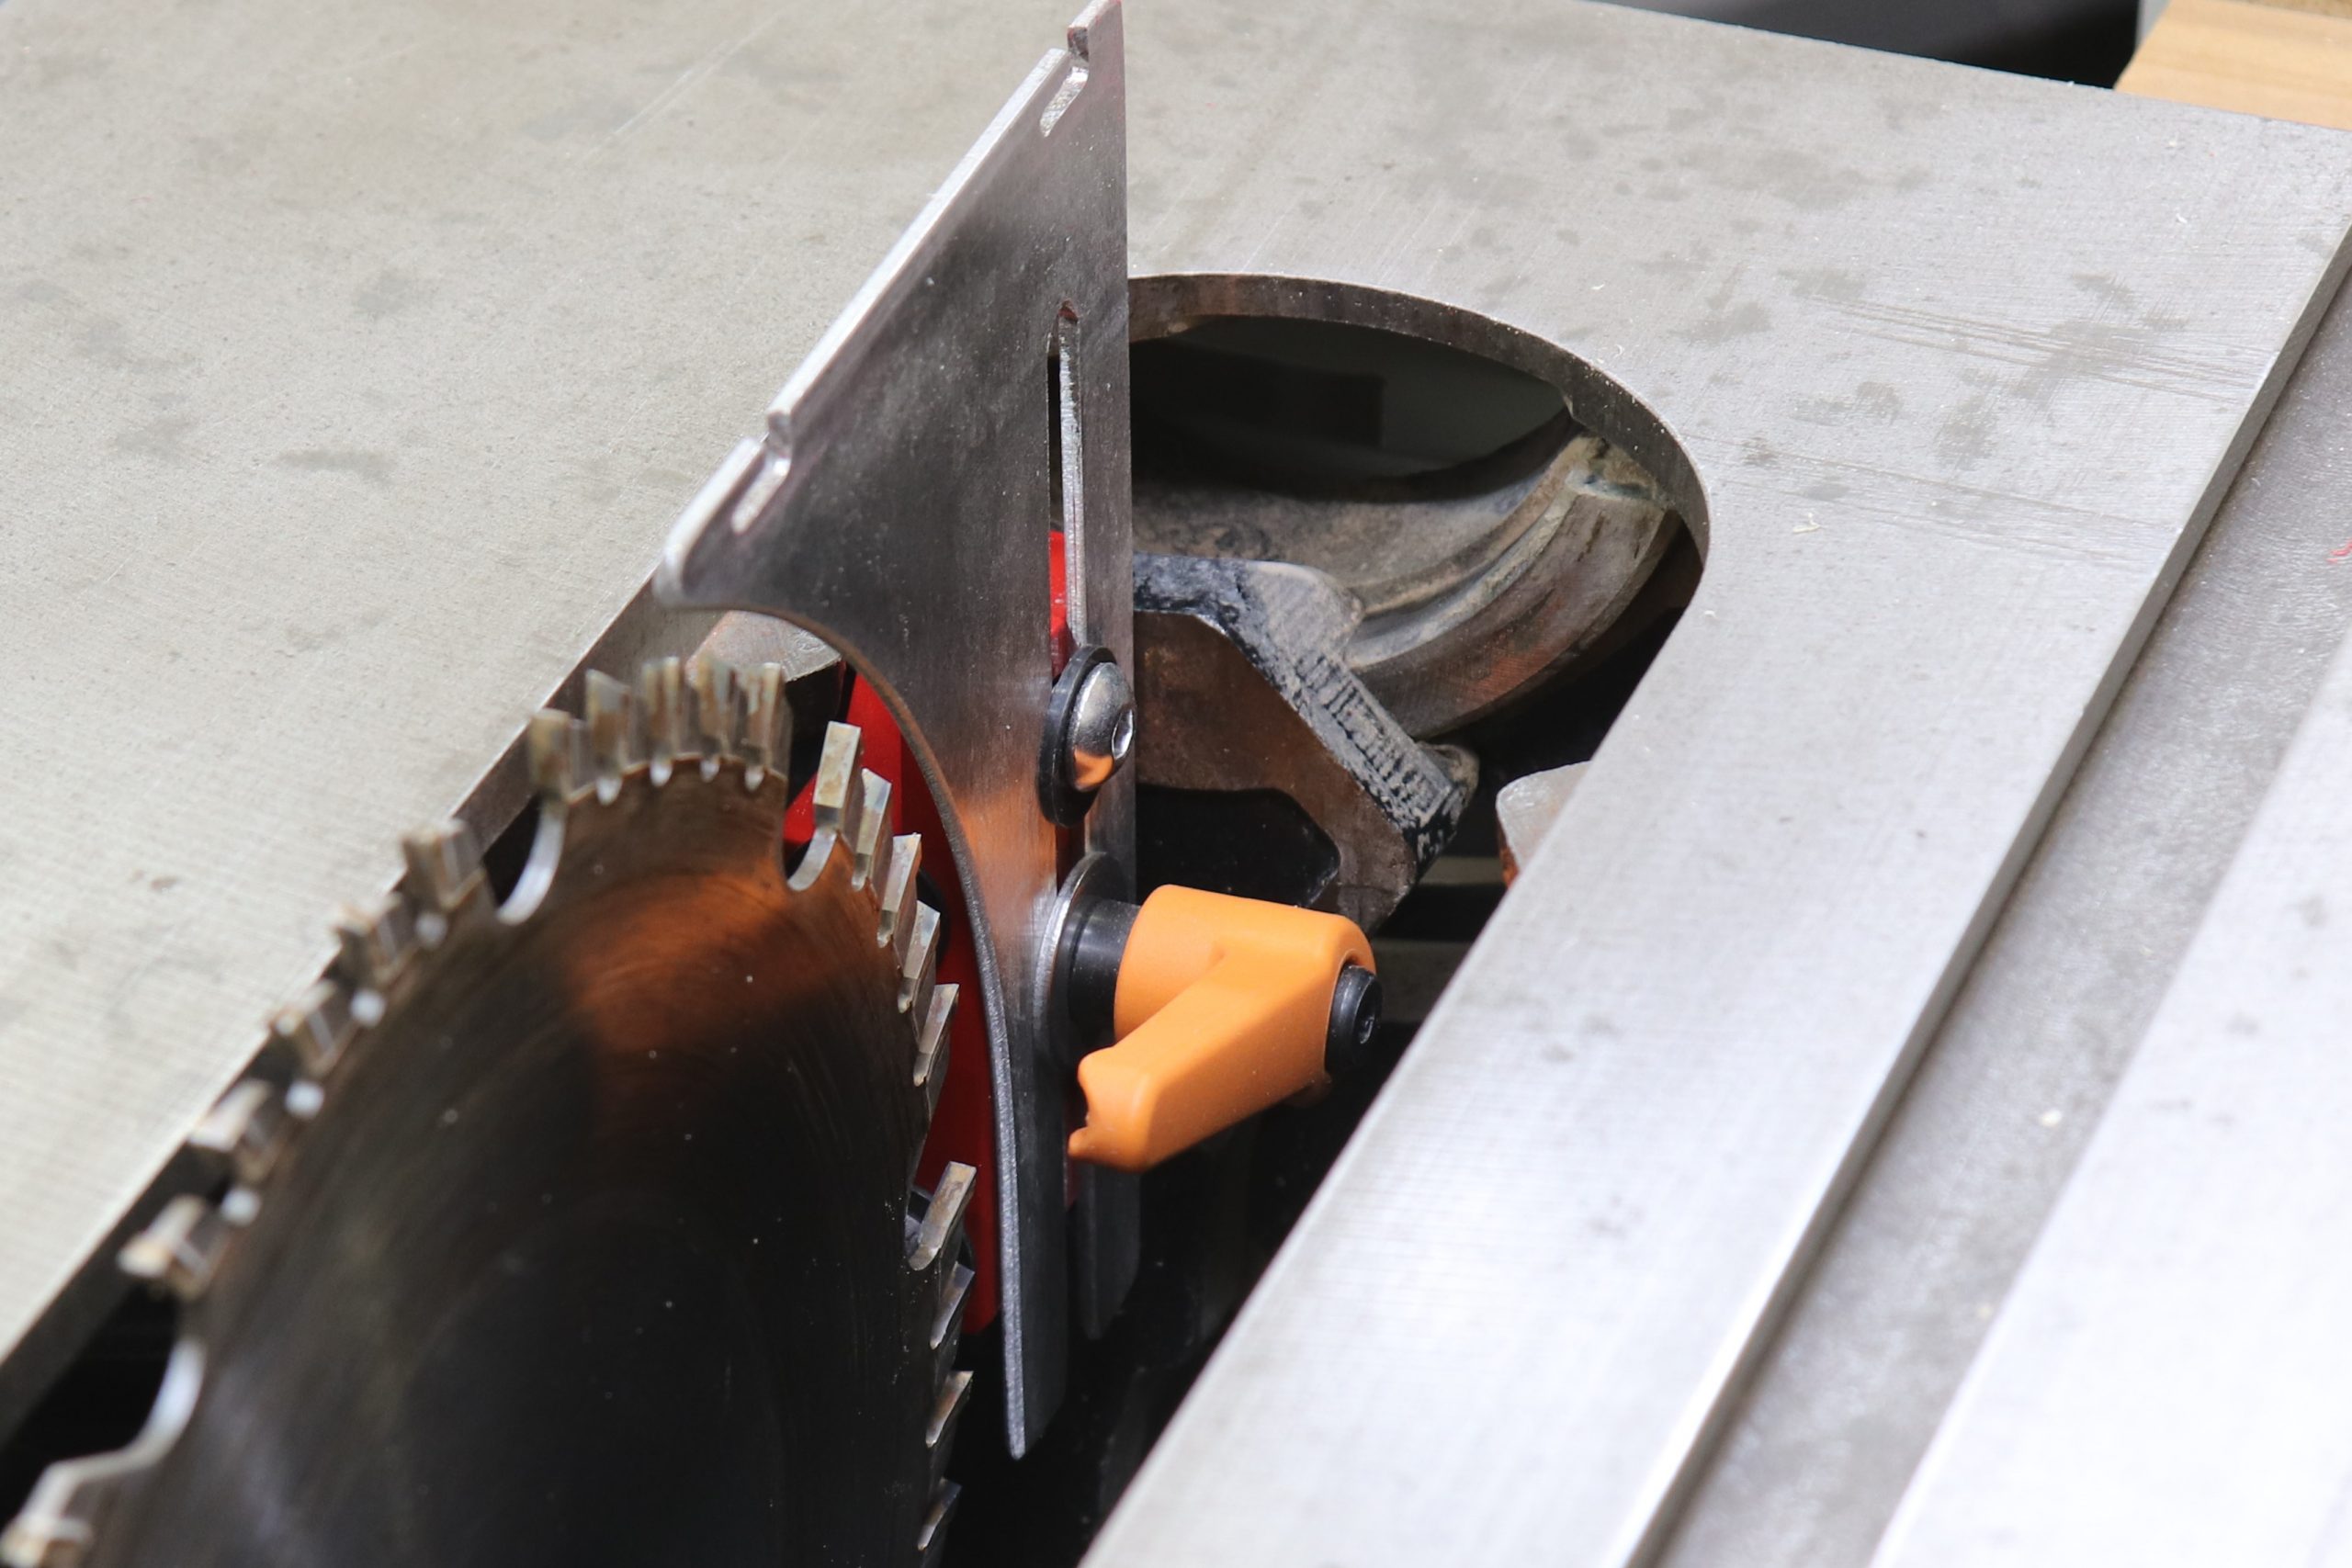
Manual riving knife
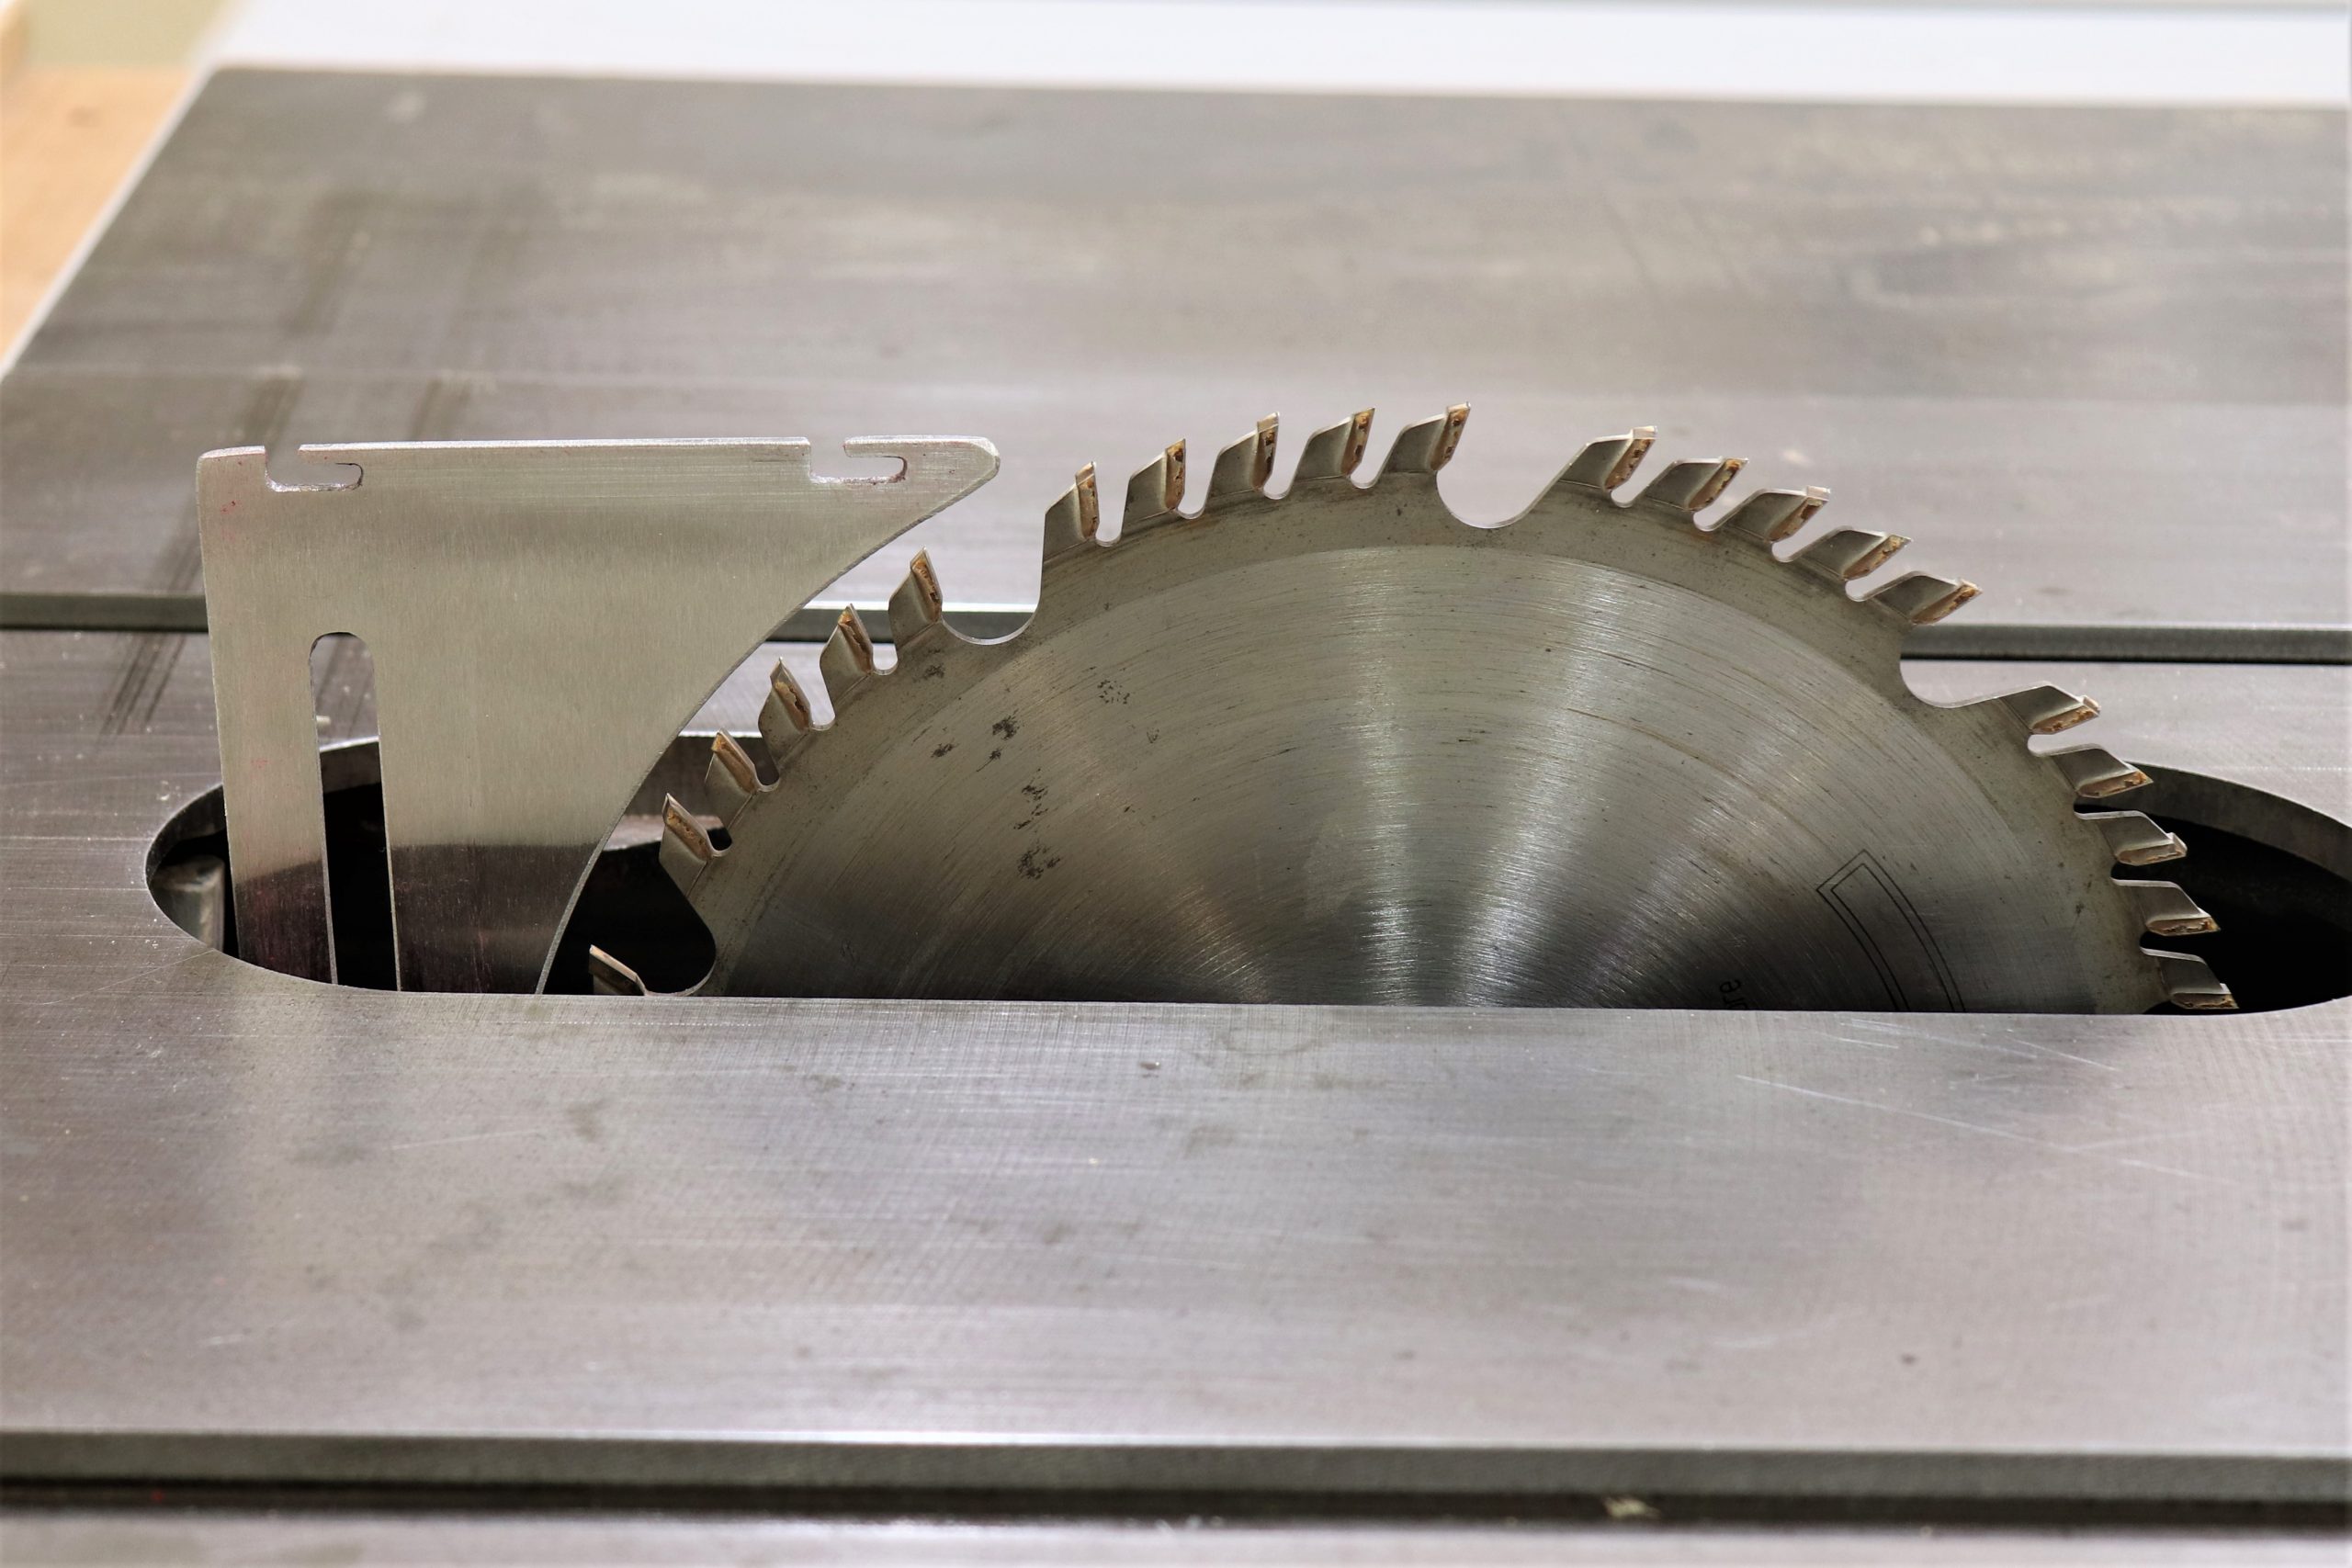
Riving knives are a great safety feature that sits directly behind the saw blade to prevent a workpiece from shifting into the blade and kicking back. A true riving knife maintains a consistent gap between it and the blade, moving with the blade as it raises, lowers, and tilts. Riving knives differ from a splitter, it doesn’t raise and lower with the blade, so when the blade is lowered, the gap between the blade and splitter increases. As the gap increases, so does the risk of kickback. Riving knives have been a required feature on any table saw sold in the US since 2008. Unfortunately, my saw is one of many saws still in service that do not have this feature in place.
While a true riving knife cannot be easily retrofitted, the Shark Guard provides the closest thing that I’ve seen, with what the company refers to as a “manual riving knife.” This feature shares some similarities to a true riving knife, including the ability to adjust the height and proximity to the blade and following the radius of a blade to maintain a consistent gap between the splitter and the blade. That can dramatically reduce the chance of kickback occurring because it supports the workpiece directly after passing the blade. The difference is that the height adjustments have to be made manually, compared to a true riving knife that moves with the blade.
There are different thicknesses of riving knifes available to accommodate various blade kerf sizes.
Using the Shark Guard
The Shark Guard has proven to be convenient to use. I can go through the entire process of removing the guard, making a height adjustment, and reinstalling the guard in less than 30 seconds. For the few times that I will have to make this adjustment throughout a typical project, I feel that an additional couple of minutes is well worth the additional safety.
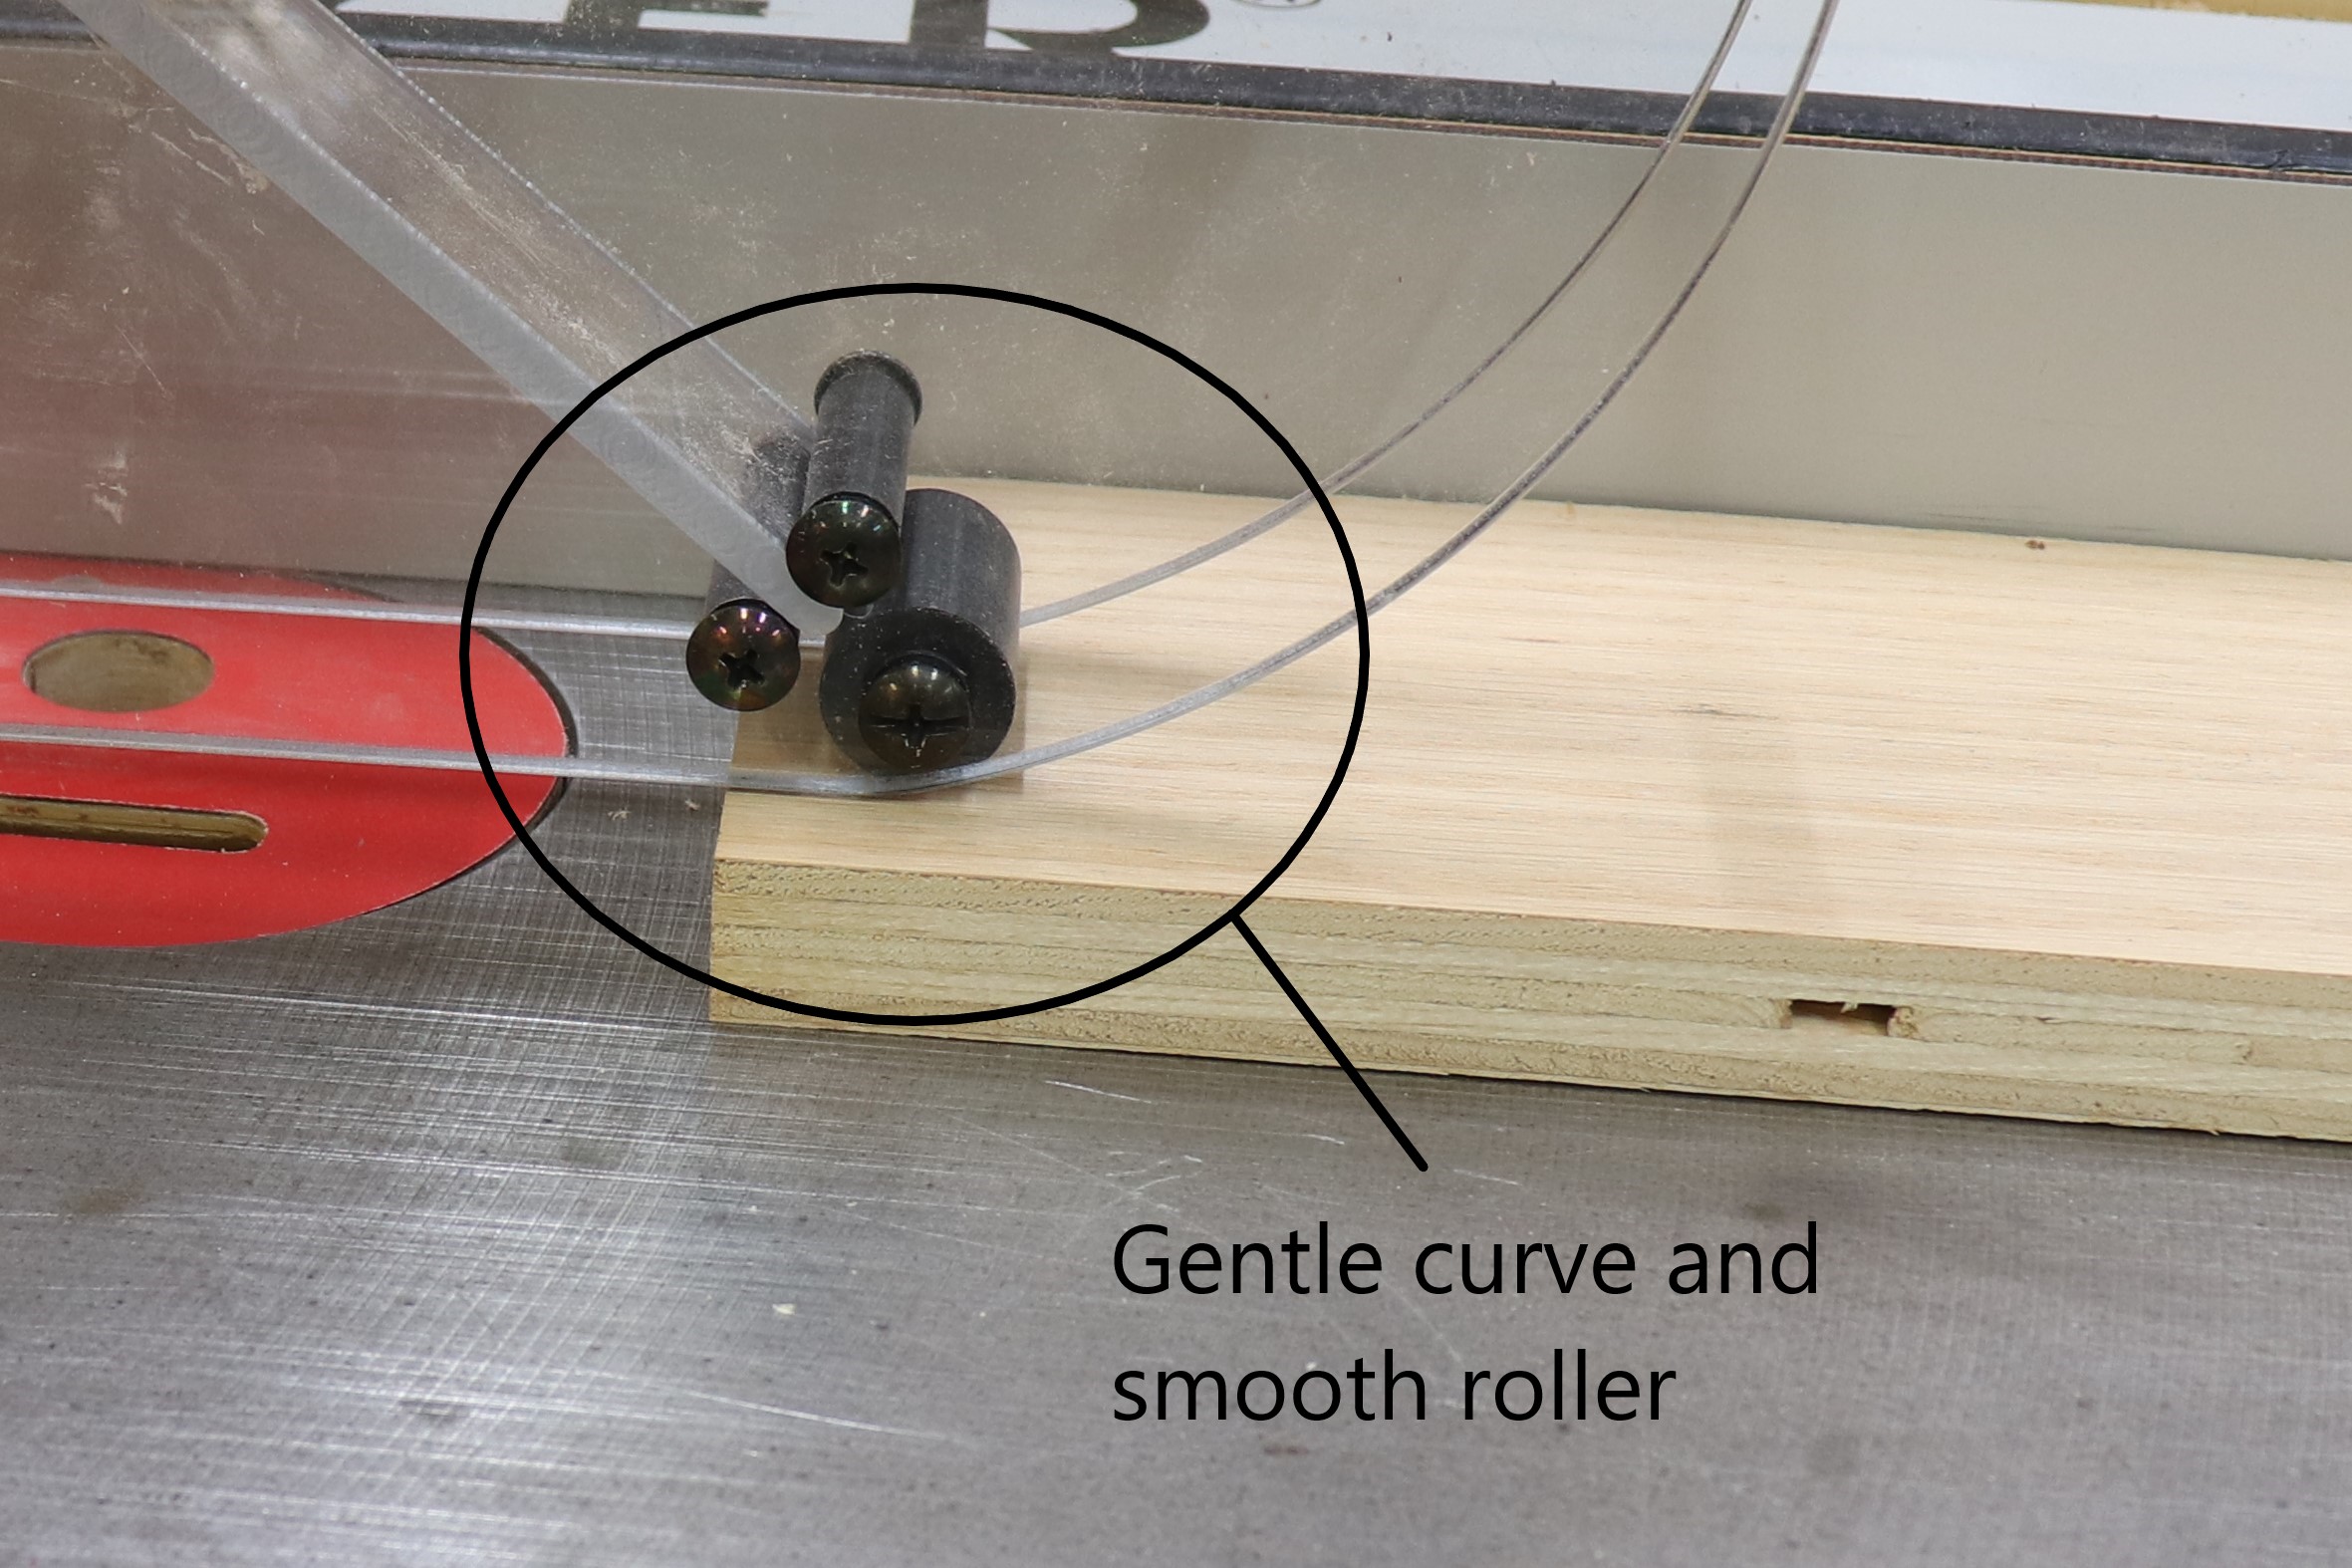
I have felt uncomfortable resistance from some older style stock guards when the workpiece reaches the blade guard, leading to unsafe actions to lift the guard. The Shark Guard has a thoughtful design in this area that I really like, which is the roller positioned near the front, along with the gentle slope of the lower front of the guard. This makes it very smooth and easy to feed stock through the saw, with no disruption as the workpiece ducks under the guard to approach the blade.
Conclusion
The Shark Guard comes in various configurations to fit most saws and dust collection systems and saw blades. If you can’t find your exact configuration on the Shark Guard web site, I would encourage you to pick up your phone and call, as you will find the level of service with the Shark Guard team to be impressive.
Source
Products shown:
Shark Guard Delta ARK package: $240
Light Kit: $40
Throat Plate: $30
Photos by author
The post Upgraded Safety for an Older Table Saw – Introducing Shark Guard appeared first on WoodWorkers Guild of America.
from Blog – WoodWorkers Guild of America https://ift.tt/30TSnAu
Smart shop layout
Get a peek into Vic Tesolin's mindset as he dreams up the layout of his new woodworking shop
from FineWoodworking https://ift.tt/3g4hNCb
from FineWoodworking https://ift.tt/3g4hNCb
2020年7月26日星期日
Epoxy resin ROUND Dining Table - Resin Art Table
from DIY Creators https://www.youtube.com/watch?v=YPCBYMcrGvY
I clever table saw push-block idea for cutting thin strips
from Stumpy Nubs https://www.youtube.com/watch?v=UIqsT2VESk4
Gathering Kitchen Island
Hi friends! We are starting on a new mini project to complete this summer. We are finishing up a 300 square foot (plus sleeping loft) cabin in remote Alaska. The cabin was shelled in with no flooring or trim, and an unfinished kitchen.
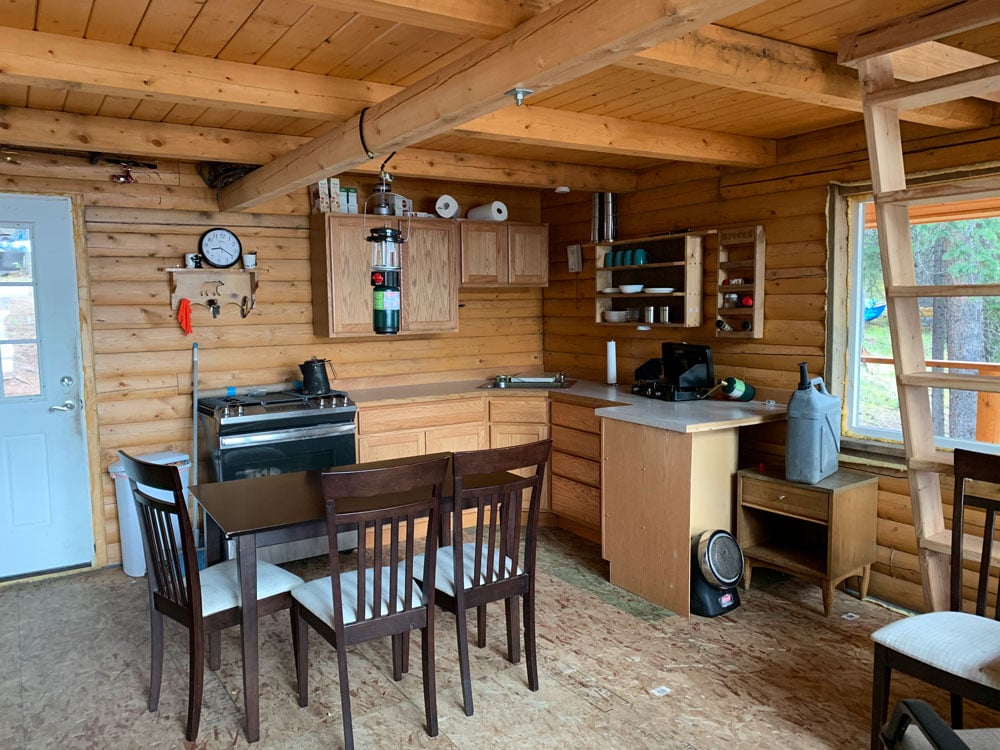
Before
The kitchen takes up half of the cabin. Half. So even though there was alot of good things about the existing kitchen, we decided to completely redo it so it could seat more people, have more storage, and be designed for gathering.
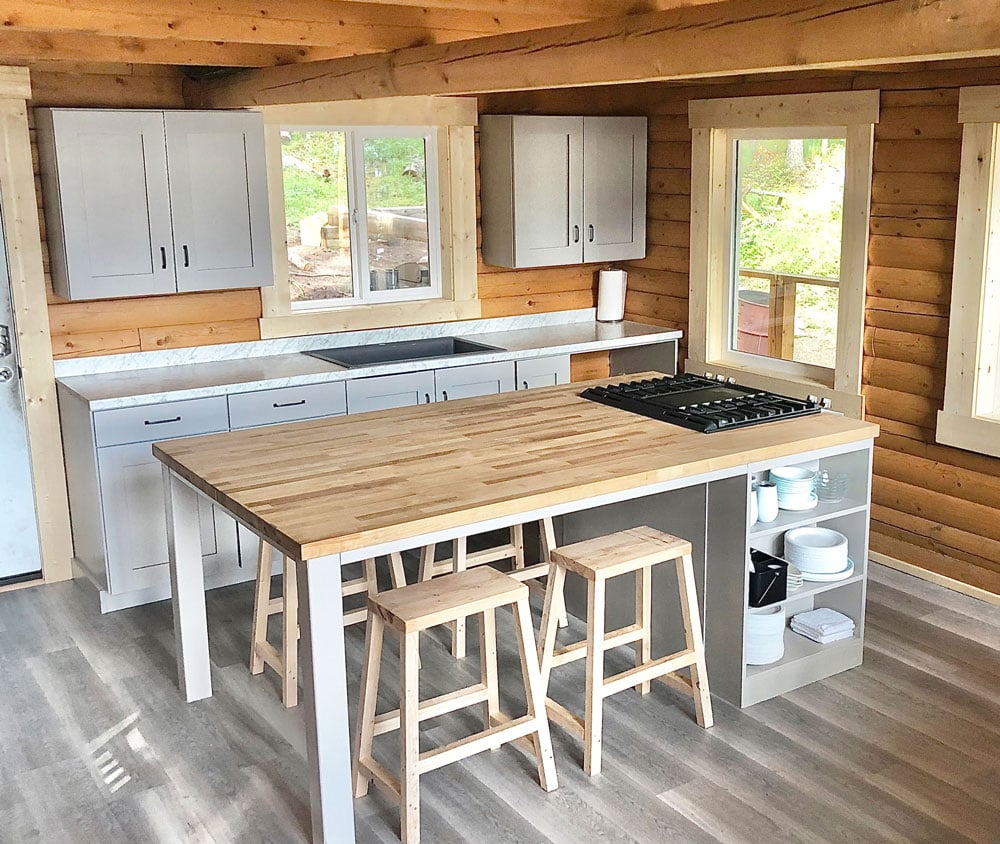
After
The new kitchen changed everything!
But the biggest difference maker was the kitchen island that we built.
More Seating on Multiple Sides
This island can comfortably seat up to six. I love seating on multiple sides - anymore, I try to avoid islands with seating on just one side. It's lonely eating shoulder to shoulder, all in a line.
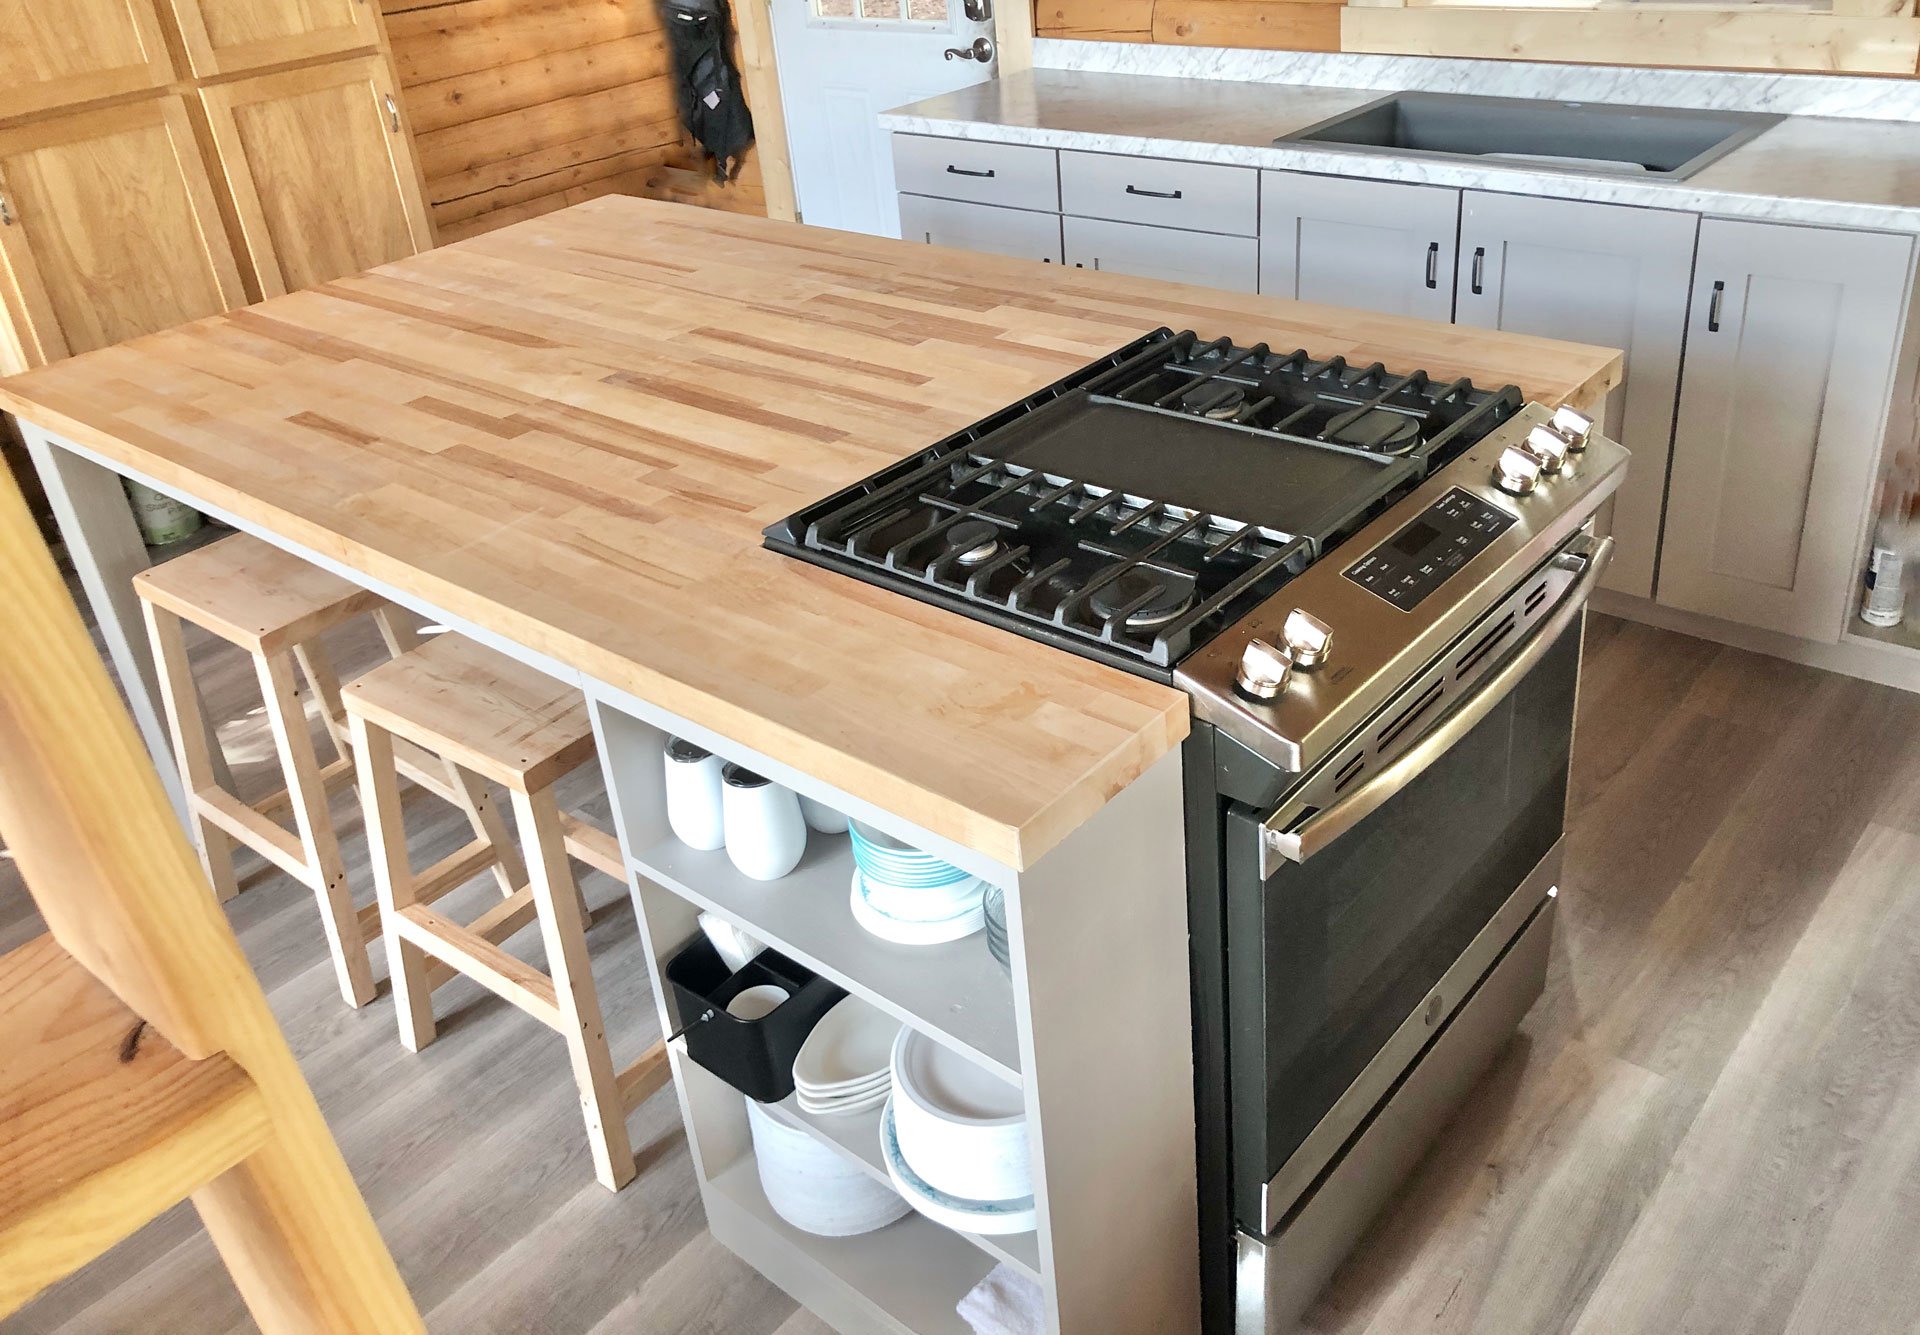
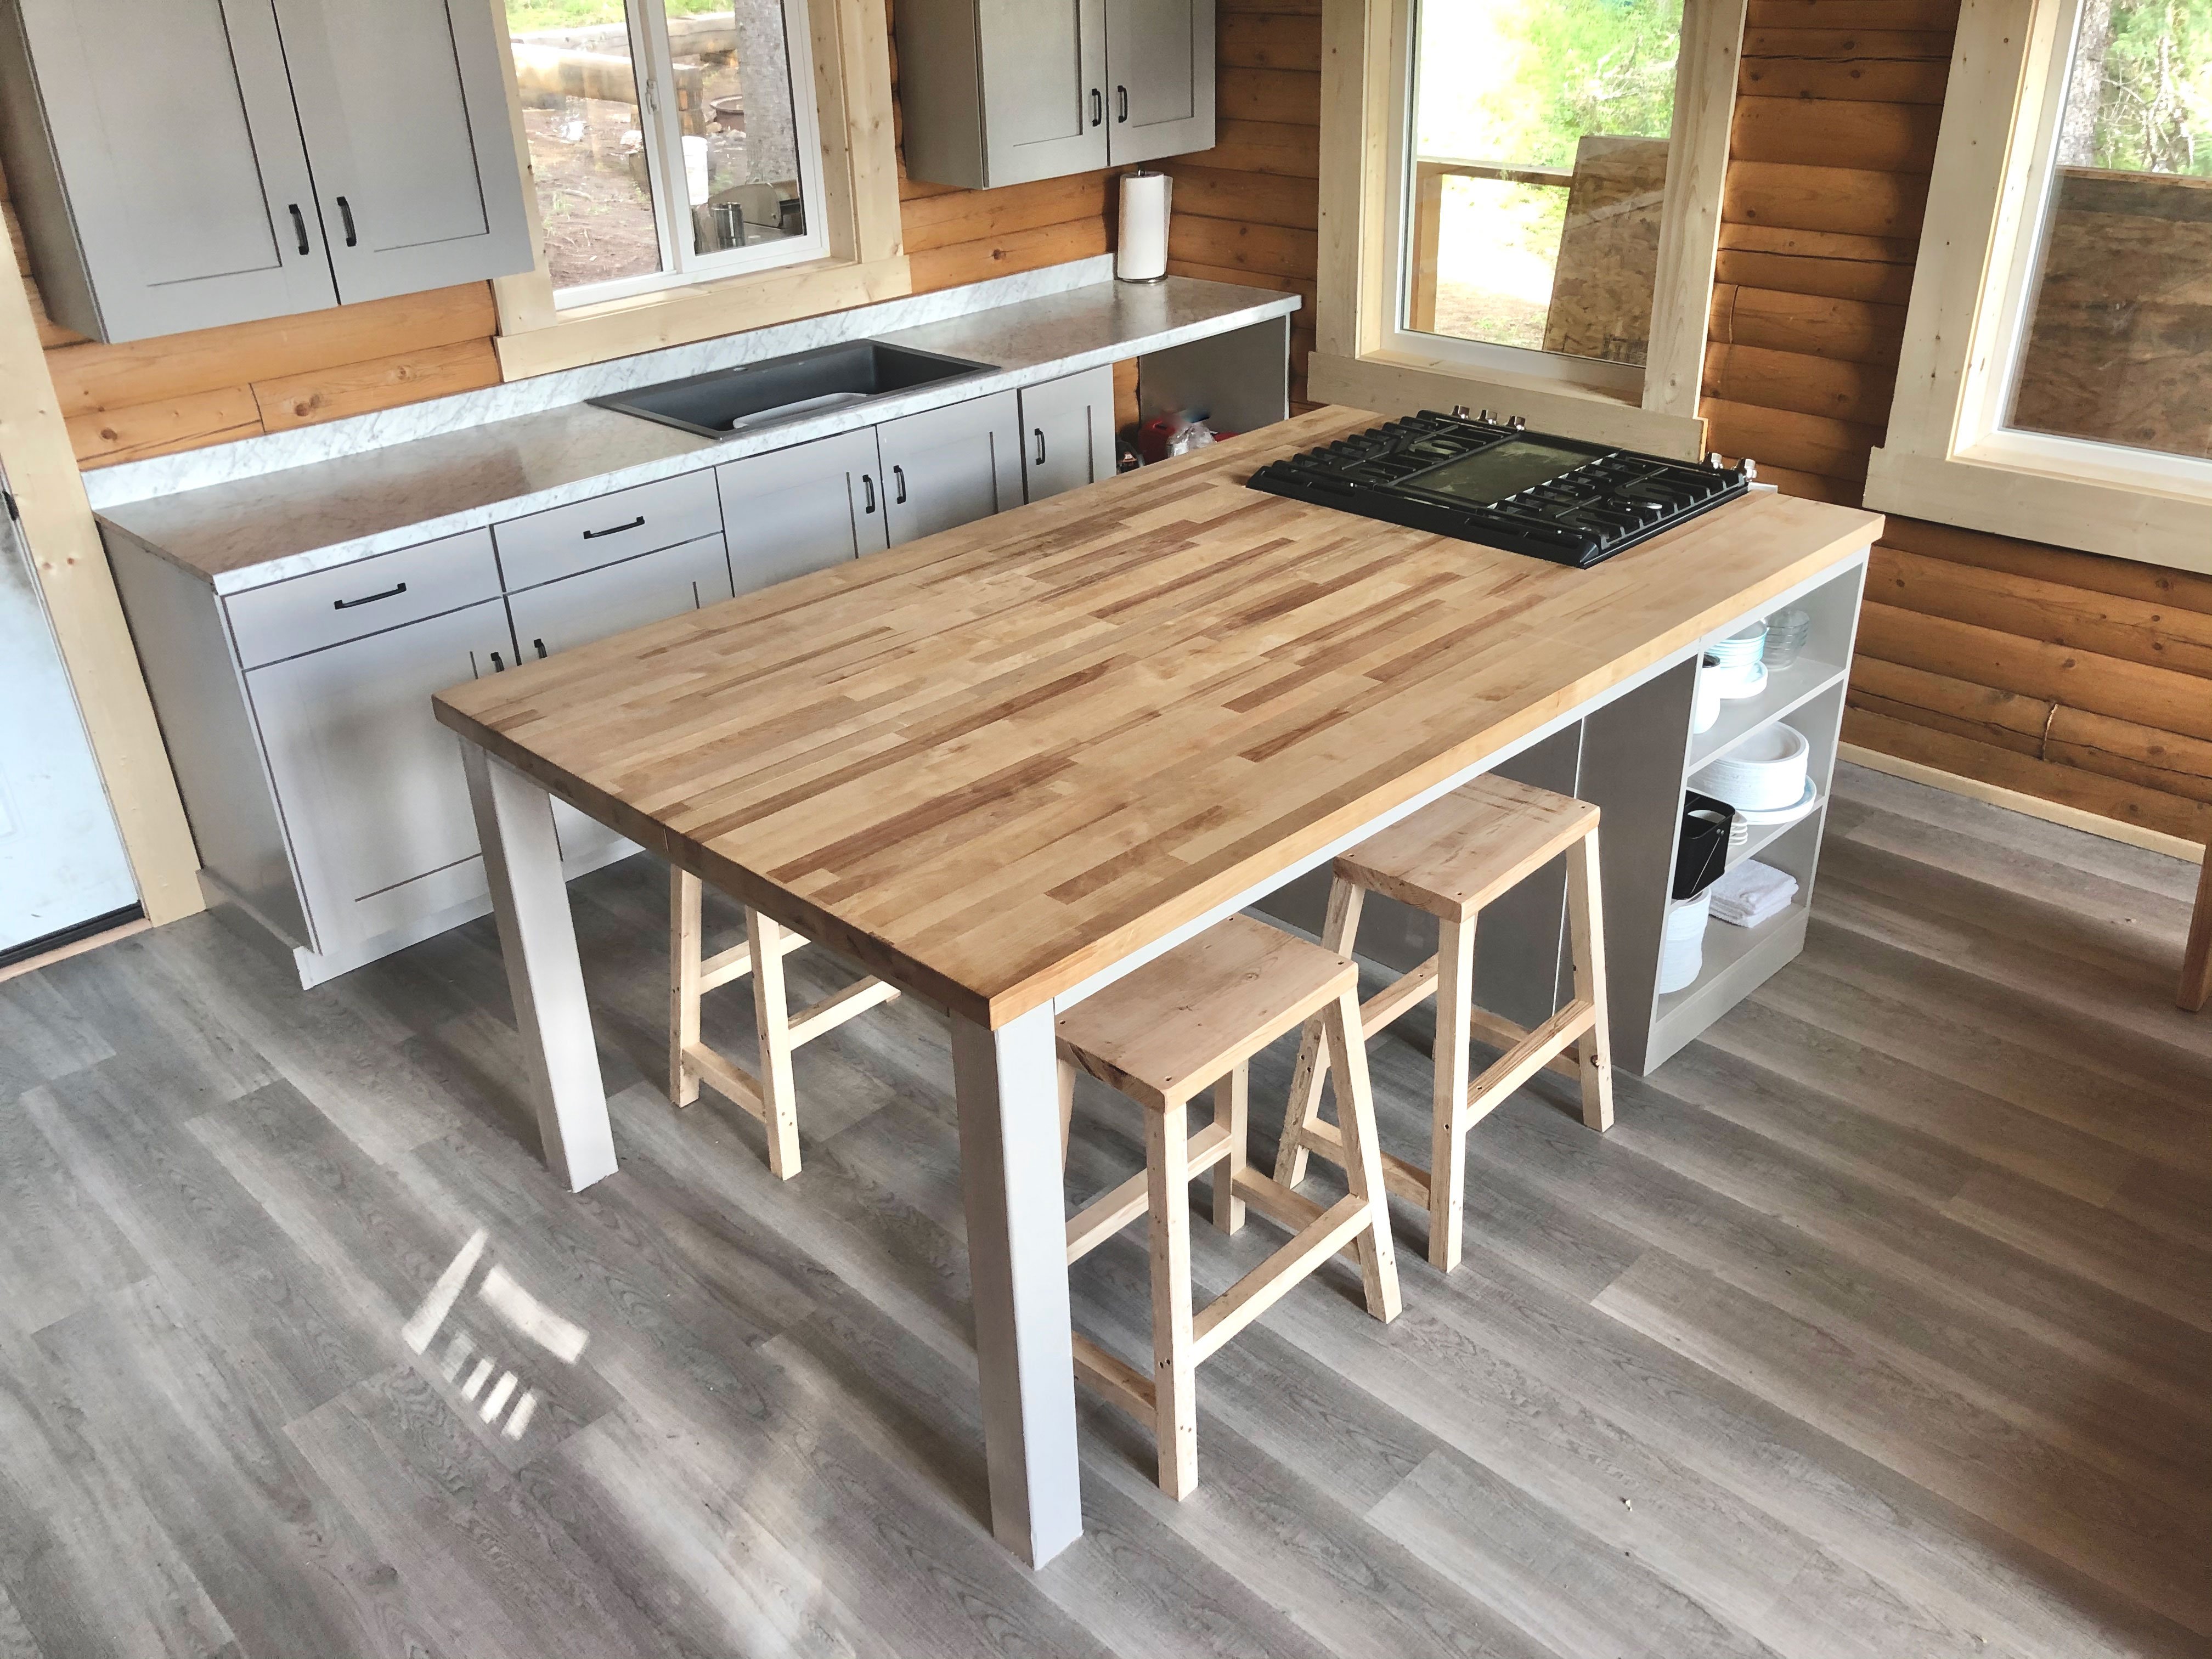
Cooking Not Against the Wall
I am a big fan of cooking in the island, because cooking is such a community thing. To talk and chop, to stir and laugh - all while enjoying the changing aromas of cooking, makes cooking about people, instead of a dreaded daily chore.
I also love that when I'm cooking, there's no traffic behind or beside me - it's a dedicated cooking center. This also improves safety, as the cooktop burners are not in the center of the island (close to people eating and using the island table area).
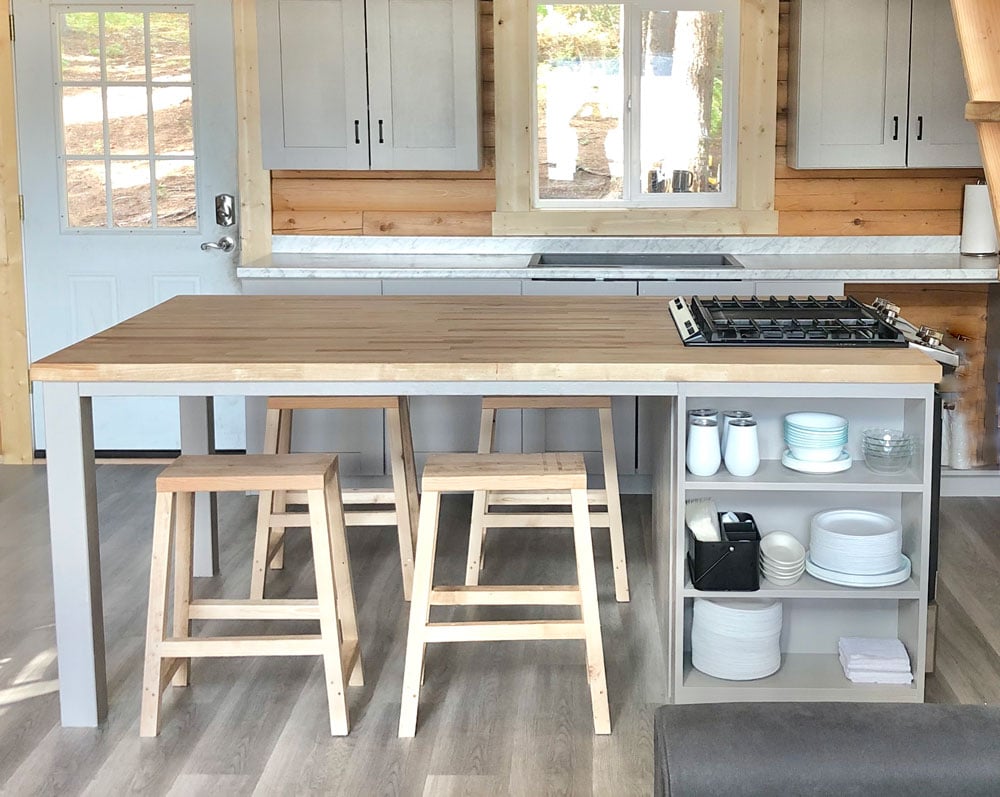
Easy Access Storage
We love that in this kitchen island we were able to add easy access storage on both sides of the range. On the hidden side, I stored all the spices, cooking towels, cooking utensils, oils, and mixing bowls. On the outward facing side, I stored all the dishes and napkins, so hungry guests can help themselves to plates and forks - without creating traffic inside the kitchen aisles.
We could go on and on about how much we love this kitchen island! We've used it already on a few trips, with multiple families, and it has not disappointed! I love that the kitchen ALWAYS looks this great - it's easy to clean and keep organized.
But this isn't just a blog post about showing and telling - I'm sharing the plans so you can build this exact kitchen island too!
How We Built This Kitchen Island
In this video, we show you the basics of building this kitchen island
And the free plans that we used are below.
from Recent Project Plans https://ift.tt/3jHpujW
Simple folding table with wooden hinges
from Laura Kampf https://www.youtube.com/watch?v=tQfZhdyXJ54
2020年7月24日星期五
Squirt Bottle Approach to Water-based Finishing
Water-based finish dries fast, so you need to apply it quickly when you are finishing large surfaces. I’ve found that a squirt bottle, paint roller and foam brush are the tools to use to speed things along. Fill the squirt bottle with strained finish, load the roller with finish, squirt finish on the wood surface and use the roller to even it out. Then “tip off” the finish with the foam brush to remove the texture from the roller head. Practice will teach you the correct amount of finish to squirt onto the wood.
The post Squirt Bottle Approach to Water-based Finishing appeared first on Woodworking | Blog | Videos | Plans | How To.
from Woodworking | Blog | Videos | Plans | How To https://ift.tt/39qNK4R
2020年7月23日星期四
Webinar: All About Spokeshaves with Peter Galbert
Sign up now! Join chairmaker Peter Galbert, Thursday, August 6, at 7 PM EST for a webinar on spokeshaves.
from FineWoodworking https://ift.tt/2WPnCvw
from FineWoodworking https://ift.tt/2WPnCvw
Wiring the Lights & Brakes - Urban Logging Trailer Build Pt 10
from Matthew Cremona https://www.youtube.com/watch?v=-8ZM8McpkvQ
Block Plane Dials in the Details
Mike Pekovich demonstrates how he uses his block plane to create roundovers and bullnose profiles, to make parts appear thinner or thicker, to exaggerate a curve, or even to make a straight edge appear curved.
from FineWoodworking https://ift.tt/2OMqNjj
from FineWoodworking https://ift.tt/2OMqNjj
2020年7月22日星期三
Fine Woodworking #284 – September/October 2020
Featuring Christian Becksvoort, Asa Christiana, Michael Pekovich, Steve Latta, David Johnson, and more.
from FineWoodworking https://ift.tt/2CtIWQp
from FineWoodworking https://ift.tt/2CtIWQp
PROJECT: Adjustable Mobile Desk
Here’s an easy-to-build solution for standing or sitting while working, crafting or taking a meal as you binge-watch your favorite shows.
The post PROJECT: Adjustable Mobile Desk appeared first on Woodworking | Blog | Videos | Plans | How To.
from Woodworking | Blog | Videos | Plans | How To https://ift.tt/30C6meb
Russ Filbeck gives back through woodworking
Russ Filbeck has been many things: submariner, woodworker, teacher, and philanthropist. In this interview, Russ shares his story, from how he started woodworking to his work helping President Carter raise money for his foundation, The Carter Center.
from FineWoodworking https://ift.tt/30zikp7
from FineWoodworking https://ift.tt/30zikp7
20 things I screwed up building wooden boxes
from Matthias random stuff https://www.youtube.com/watch?v=d5zWsyFluVc
2020年7月21日星期二
Why I won't buy ultra-fine diamond sharpening stones
from Stumpy Nubs https://www.youtube.com/watch?v=re2EwwNcufo
One on the Chin
Last week I got a text regarding my grandson: “Connor Mac at the ER … 7 stiches in his chin.” Such is life for a 7-year old. But as they say about the apple and the tree, I confess to having spent some time being repaired in various settings. Recently while working alone at my cabin, a ladder collapsed under me, and it was only with excellent luck that I did not end up seriously hurt. It was a foolish accident and 100% my fault. (Apparently I am no longer 25 … or even 50-years old.)
Which has brought a new perspective to my shop behavior. While I have always been pretty careful in terms of proper technique and safety gear, I am now spending a little more forethought on lifting, unloading and things like properly supporting my work. Perhaps a little late, but at least I am still in the game.
So what about you? Do you take precautions beyond typical shop safety? If so, what are they? Perhaps we can all benefit from your experience.
Rob Johnstone, Woodworker’s Journal
![]()
Why You Should Be Wet Sanding Your Woodturning Projects
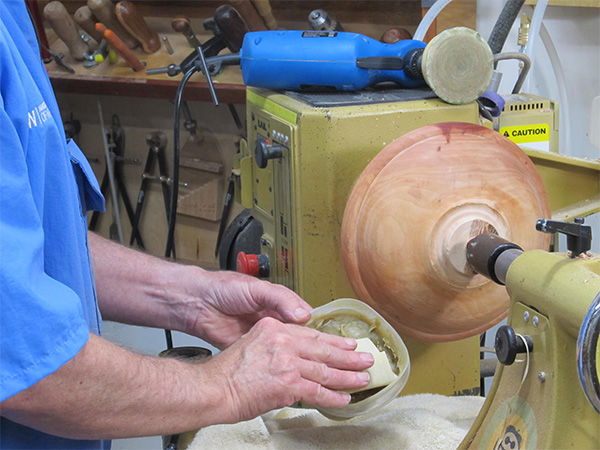
Adding wet-sanding to our arsenal can be a major benefit to our lungs. AAW’s Mike Peace explains the benefits of using lubricants when sanding turning projects.
![]()
Six Simple Wood Finishes
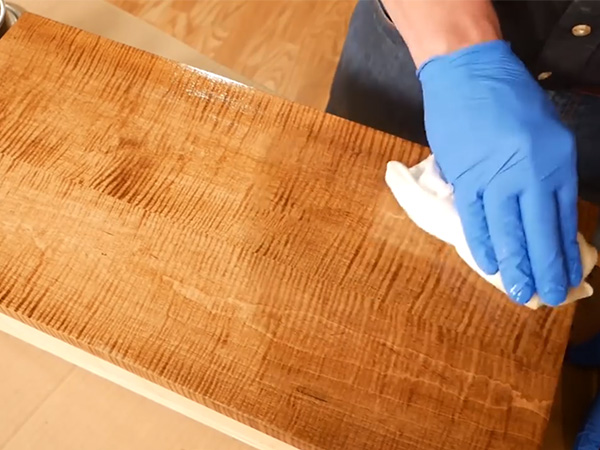
Six examples of simple finishes that anyone can use to enhance their next project.
![]()
From Our Sponsor
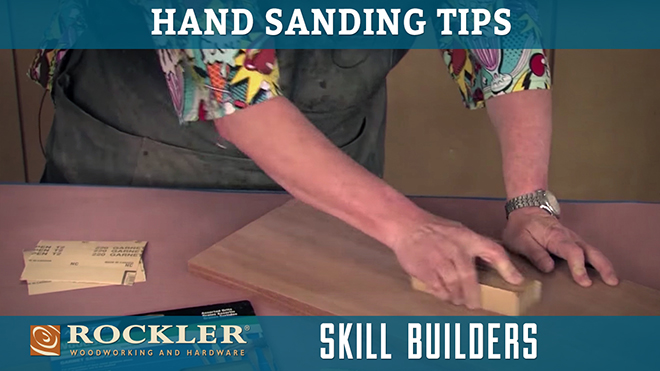
| The physical act of hand sanding is simple enough, but there’s a lot more to refining the sanding process, including grit progression and angle relative to the grain. Watch our Skill Builder video to familiarize yourself with the details and augment your own method. |


Sale prices expire on 7/30/2020. Additional shipping charges will apply for select over-sized items, express orders, and orders to Alaska, Hawaii, Guam, Puerto Rico, and the Virgin Islands. This offer does not apply to international customers. This offer cannot be combined with other offers, applied to previous orders. Some offers available only online. Not all items available at retail stores. Offer not valid at Rockler’s independent resellers. Rockler Woodworking and Hardware reserves the right to limit quantities, correct errors or omissions and modify or end this promotion at any time.
The post One on the Chin appeared first on Woodworking | Blog | Videos | Plans | How To.
from Woodworking | Blog | Videos | Plans | How To https://ift.tt/32J1uXo
订阅:
博文 (Atom)