Find the HOW TO app here https://ift.tt/MrVm3d0 Makers Central https://ift.tt/YCwciUK Stone Carving is easy! I used Blue Stone local to my area.. Give it a try!! I used typical masons chisels from the hardware store! support me here https://ift.tt/52RPG9g Merch https://imakeny.com
from jimmydiresta https://www.youtube.com/watch?v=lCNN_l0pjQU
2023年4月29日星期六
2023年4月28日星期五
Ahhh... the sounds of leather... a custom project! #diresta
Watch this leather working project, where I make a series of leather cases for my phone.
from jimmydiresta https://www.youtube.com/watch?v=112vSbnAeyg
from jimmydiresta https://www.youtube.com/watch?v=112vSbnAeyg
2023年4月25日星期二
WRONG!!! Don't "HIGH SIDE" - DO THIS! #diresta
Watch this quick bandsaw tip and learn how to effectively support a high side cut on your bandsaw.
from jimmydiresta https://www.youtube.com/watch?v=JxTxRaFXVDI
from jimmydiresta https://www.youtube.com/watch?v=JxTxRaFXVDI
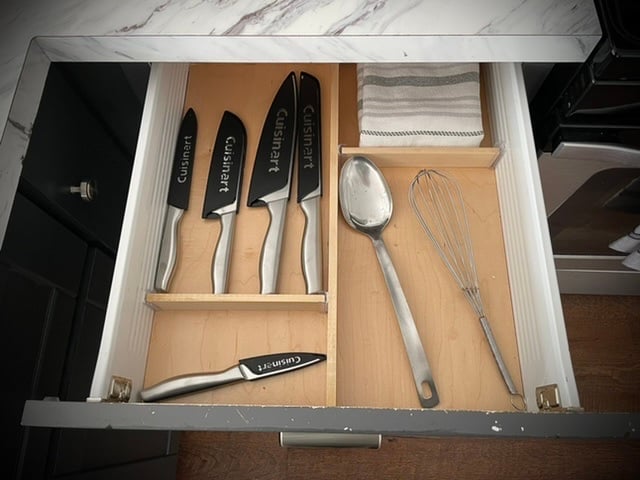
Stick-On Drawer Organizers - Cheap, Quick and Easy!
Why Stick-On Drawer Organizer?
- Quick and Easy - install right in your home with minimal tools in just minutes
- Removeable without damaging drawers
- Easy to reconfigure
- Cheap - about $5 for this drawer as shown
- Works with almost any drawer, including metal sides
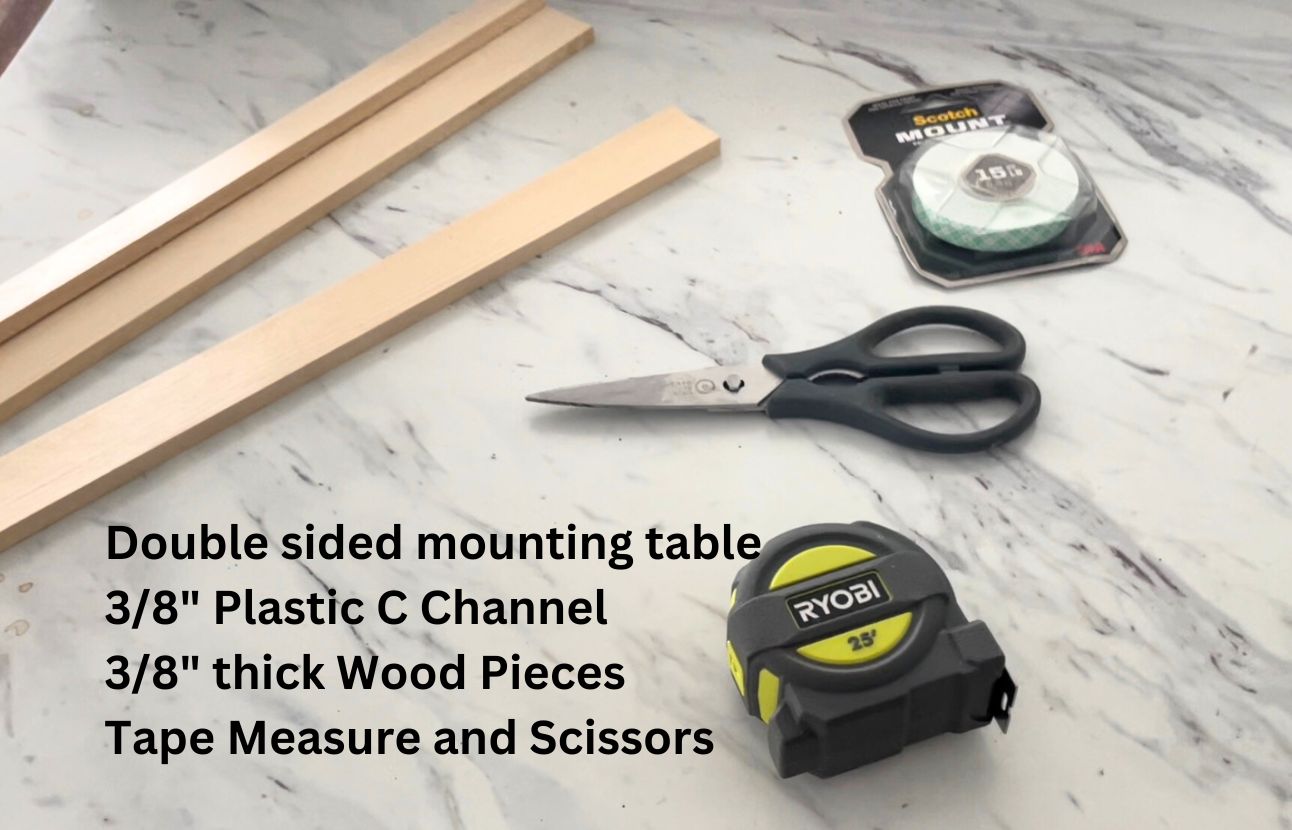
What You'll Need
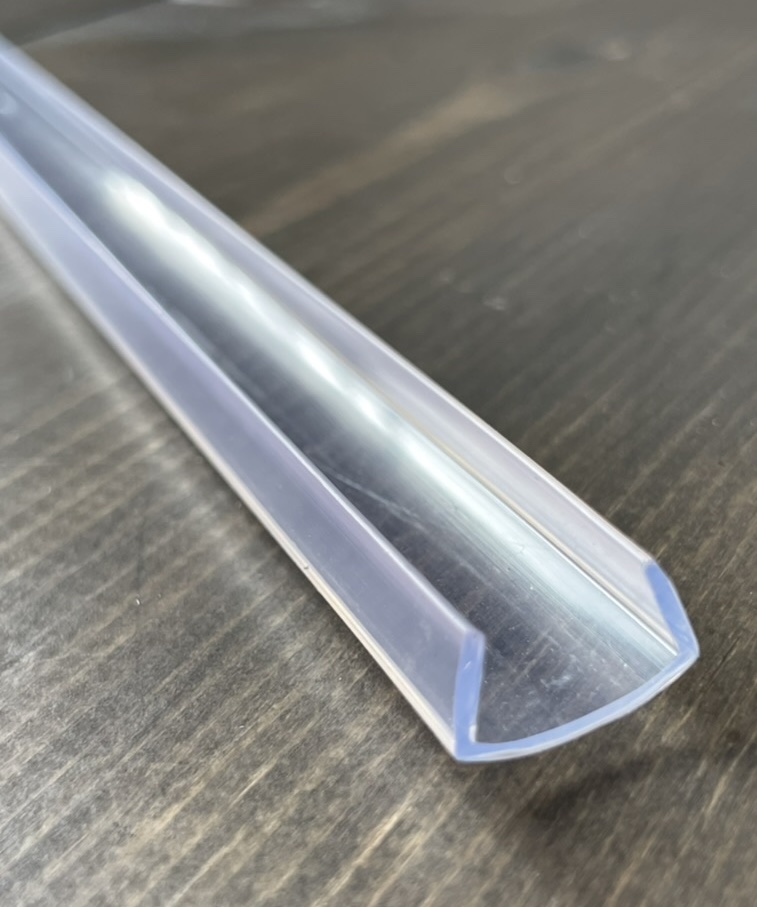
- 3/8" or 1/2" Plastic C Channel (available from Amazon here) - match board thickness
- 3/8" or 1/2" thick wood pieces, 2-1/2" width most popular but can do other widths for deeper or shallower dividers (available at Lowes nor Mendards) - match c-channel thickness
- Mounting tape, 1/2" width, I used this one
- Pruning Shears or Heavy Duty Scissors
- Measuring Tape
- Jigsaw or other saw for cutting wood to lengths
More About Choosing Wood
3/8" wood is what is shown in the photos and videos. I have also done 1/2". Both work just fine, really will depend on what wood is available to you.
The depth shown in these photos and video is 1-1/2" (may be referred to as 2" when buying but it is actual dimension of 1-1/2"). I like this shallow depth because it is easy to reach in small spaces if the depth is short. Avoid tall, narrow dividers that are hard to reach in.
For wood species, I used pine. There are other options, even softer wood like balsa, or more expensive hardwoods. All work just fine. You could even use hardwood plywood that is ripped into strips.
How Much Material Do I Need?
For my one drawer shown, I used right at 1 foot of c-channel and about 2 linear feet of wood board. My advice would be to purchase the pack of c-channel from Amazon, and then just cut and use it up as you go around the house, you'll be wanting to tackle all your drawers!
Planning?
This method is SO simple, I really liked just creating the dividers right in place, so I could section the drawer off with the contents available to measure and fit. This is the beauty of this method - just open a drawer, add a divider, and keep adding dividers until you are satisfied. And if you mess up, just unstick and restick it.
How to Make Your Own Stick On Drawer Dividers
Clear out the drawer and clean it well. The sides need to be cleaned so the mounting tape will stick.
Measure and mark where the first divider is to be placed.

Cut the C-channel with pruning shears or heavy duty scissors. The cut length should match the board width - in my example, I used 1-1/2" wide boards, so I cut my c-channel pieces 1-1/2" long. You'll need two c-channel pieces per divider.
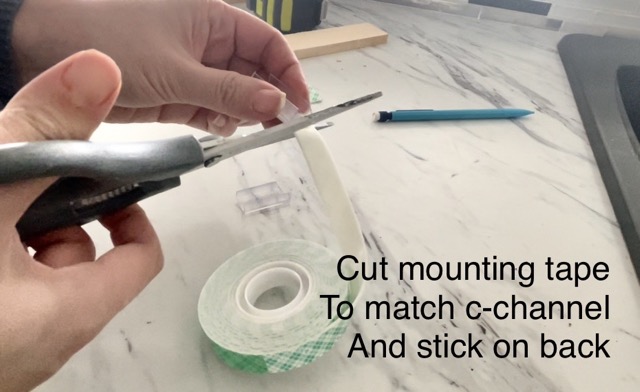
Cut the mounting tape to fit the backs of the channel and stick to backs.
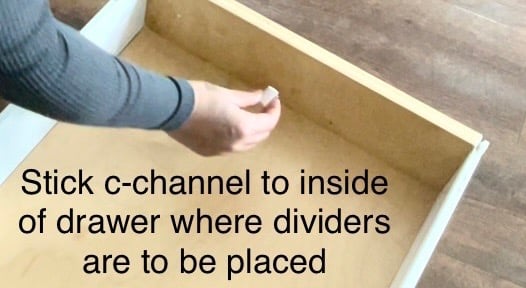
Stick the c-channel pieces inside the drawer. TIP: I measure out and marked the centers, making sure the mark would be visible when sticking the c-channel in place.
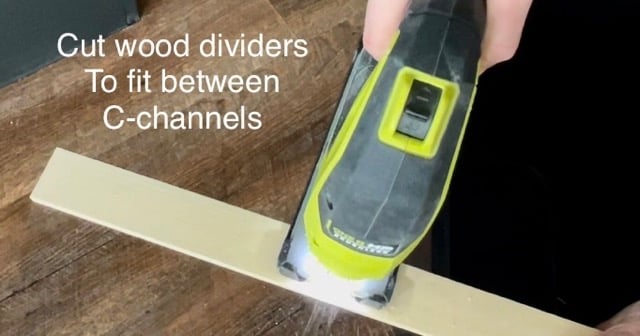
Measure inside the c-channel and cut wood pieces to fit, so the pieces fit snug but not too tight. I used a jigsaw to cut.
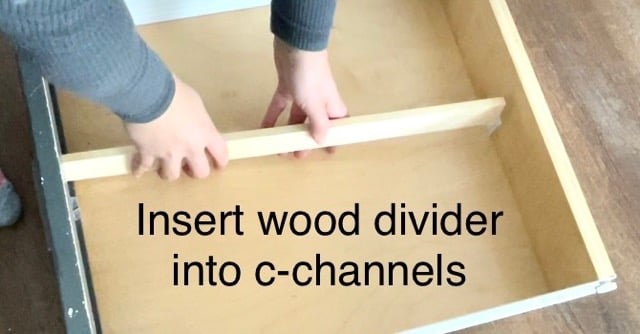
Insert the cut wood piece into the c-channels.
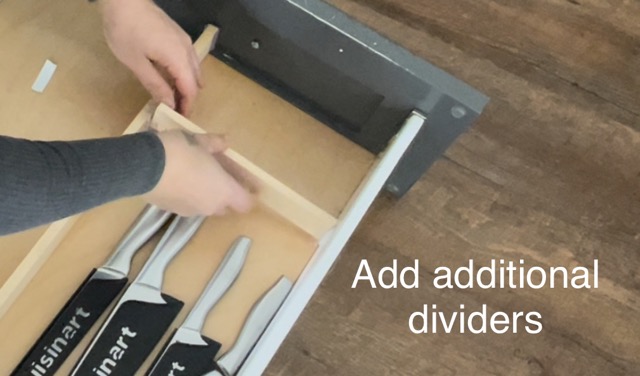
Repeat as desired - the more dividers you add in, the more stable the system will be.
Quick Video of Stick-On Drawer Organizers
Here's a 30 second video of my tackling a drawer. I do recommend the pruning shears instead of the scissors for cutting the c-channel, this was a much cleaner method of cutting it.
See Also: Metal C-Channel Drawer Organizers
This idea was built off my original metal C-Channel drawer organizer tutorial. The metal channel is harder to do, as you have to file down the metal pieces so there's no sharp edges, but it does produce a nice finished product.
from Recent Project Plans https://ift.tt/7yNKbac
2023年4月23日星期日
VERY SCARY!?! Bandsaw and round objects… is a DANGEROUS problem! #diresta
Please watch this Bandsaw workshop tip… working with round objects on the bandsaw can be a dangerous challenge.
from jimmydiresta https://www.youtube.com/watch?v=KnB3LkFRlkM
from jimmydiresta https://www.youtube.com/watch?v=KnB3LkFRlkM
2023年4月22日星期六
$5,000 TINY BBQ. Cooks 2 hotdogs
In this video I was commissioned to make 2 MINI double barrel Texas BBQ smokers for Adam Perry Lang. https://ift.tt/arGiqSn I use schedule 40 pipe 9" and 4" and my Lincon Electric Welders thank you https://ift.tt/HY0uCER https://ift.tt/HtFNQM0 https://ift.tt/MLEUVXn
from jimmydiresta https://www.youtube.com/watch?v=MDUEN7wlm-I
from jimmydiresta https://www.youtube.com/watch?v=MDUEN7wlm-I
2023年4月21日星期五
Dead Tree FUN! #diresta
Using a dead tree to build a swing… turned out great!
from jimmydiresta https://www.youtube.com/watch?v=jNFhqhz_kTA
from jimmydiresta https://www.youtube.com/watch?v=jNFhqhz_kTA
2023年4月20日星期四
Wood Lantern Tutorial
What Materials Do I Need?
To build these wood lanterns, you'll need pine or "whitewood" boards for the base, in 1x6, 1x8 or 1x10 sizes (depending on the size of lantern you are building).
For the 3/4" x 3/4" pieces, you can buy 3/4" square dowels online or at most home improvement stores. If you are building in bulk, it is much less expensive to take a wider width board, like a 1x8 or 1x12, and rip it into 3/4" strips. Ripping is not easy for this small of a piece, do not attempt without experience using a table saw.

Different Style Bases
This plan include three different style bases, for your personal preference. Use the cut list that matches your base to build your lantern.
from Recent Project Plans https://ift.tt/jVZQWXK
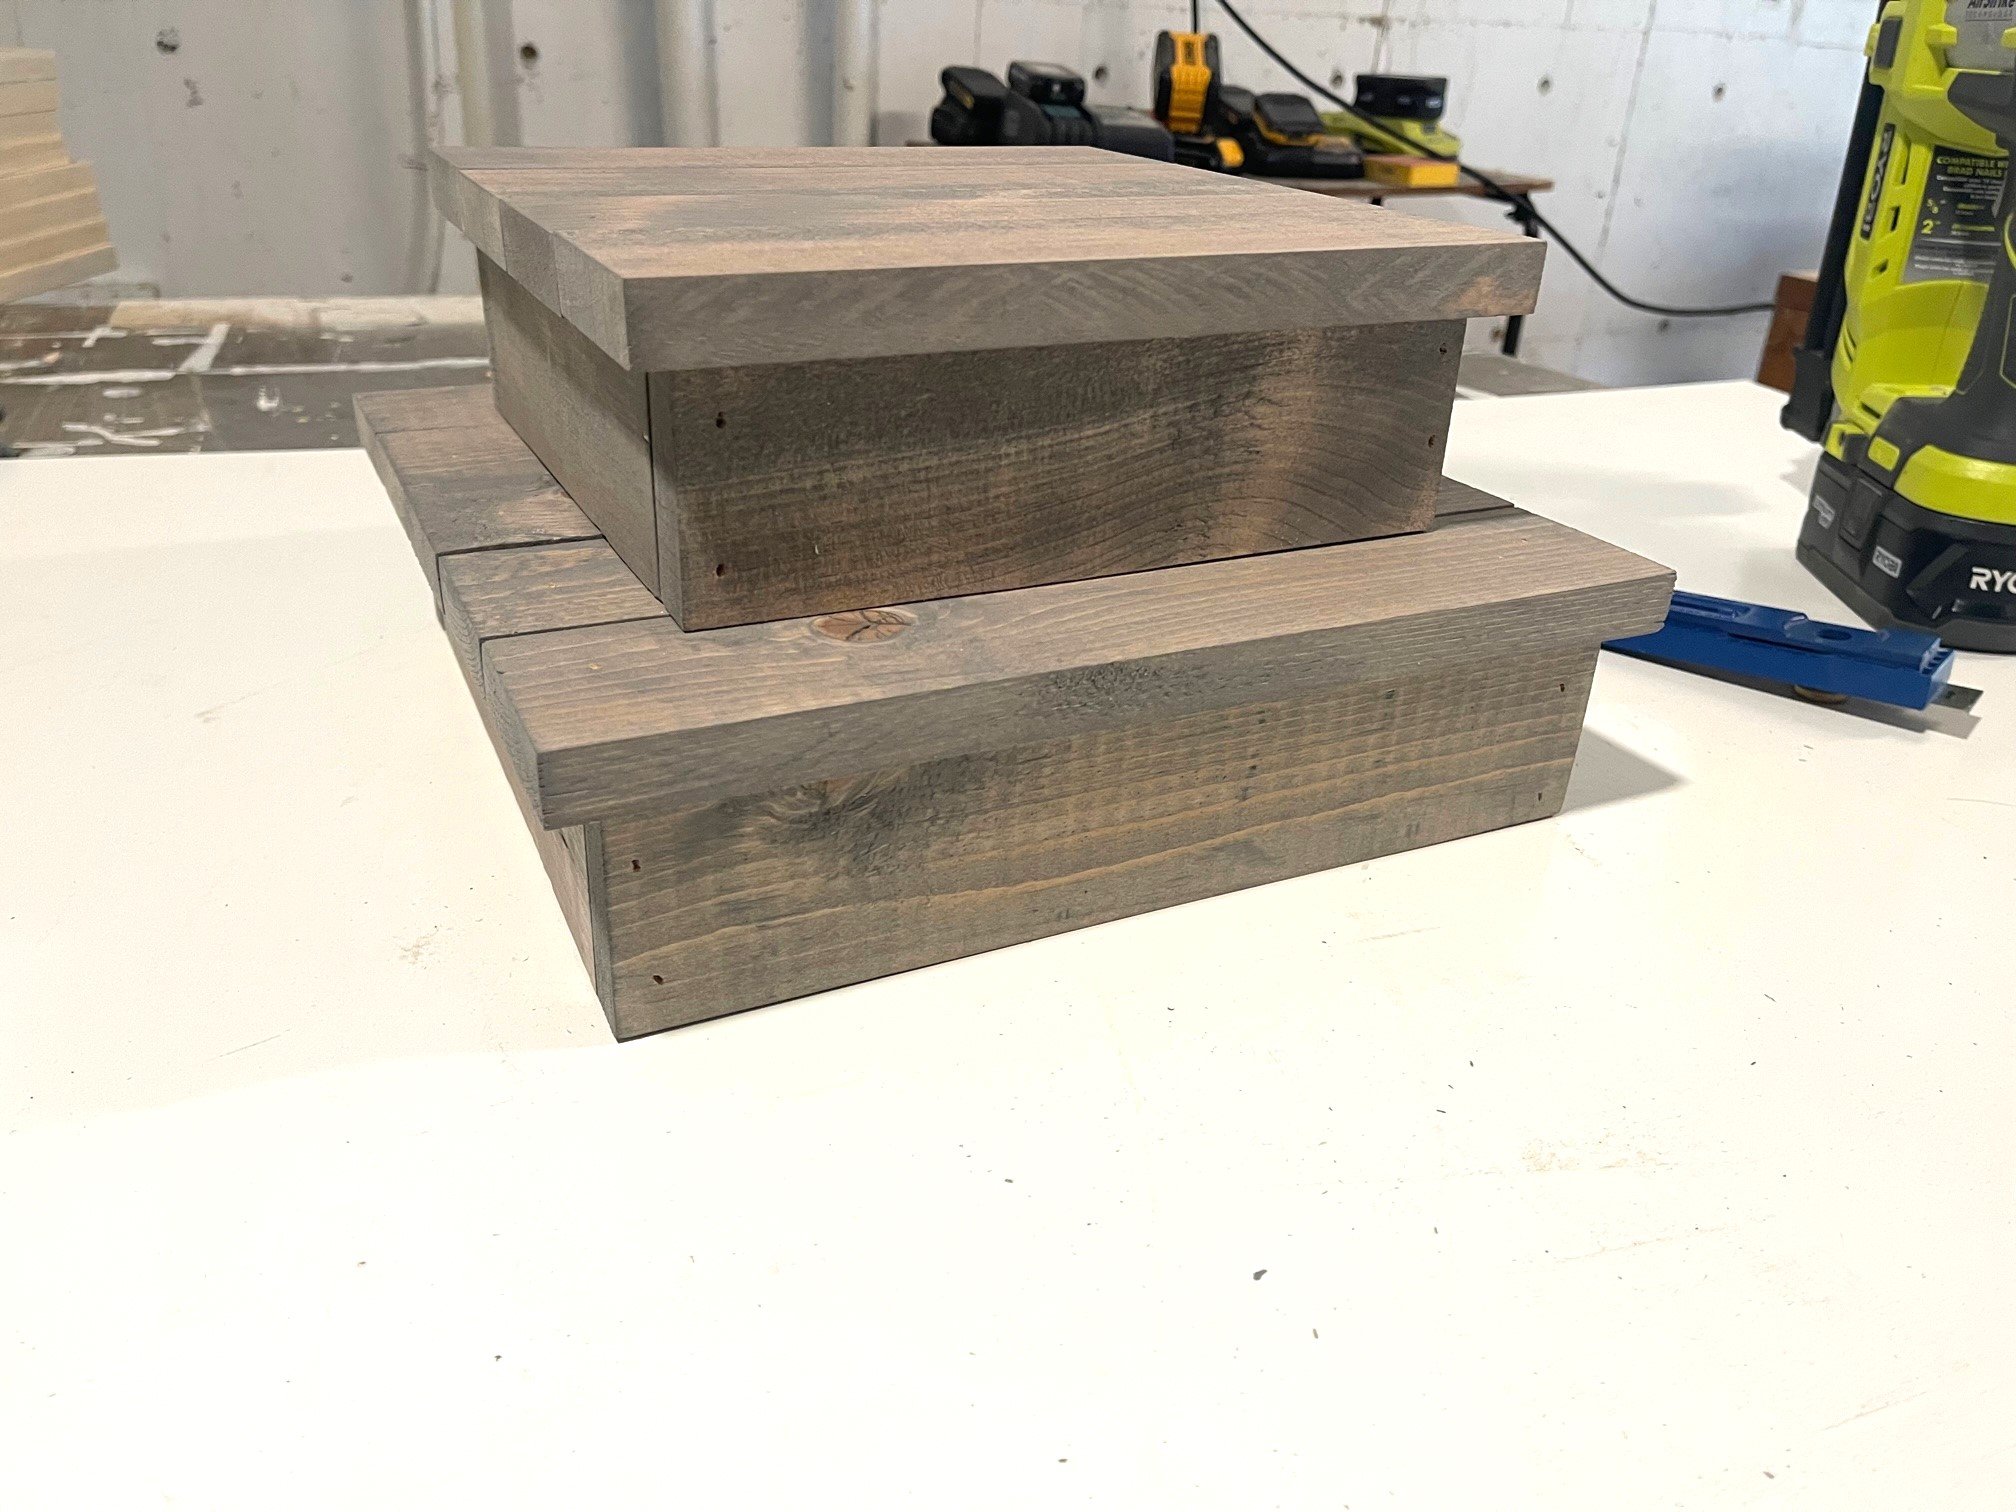
1x4 Wood Cake Stand Plans - 10" and 18" Sizes
Build this stacked cake stand in an hour or less!
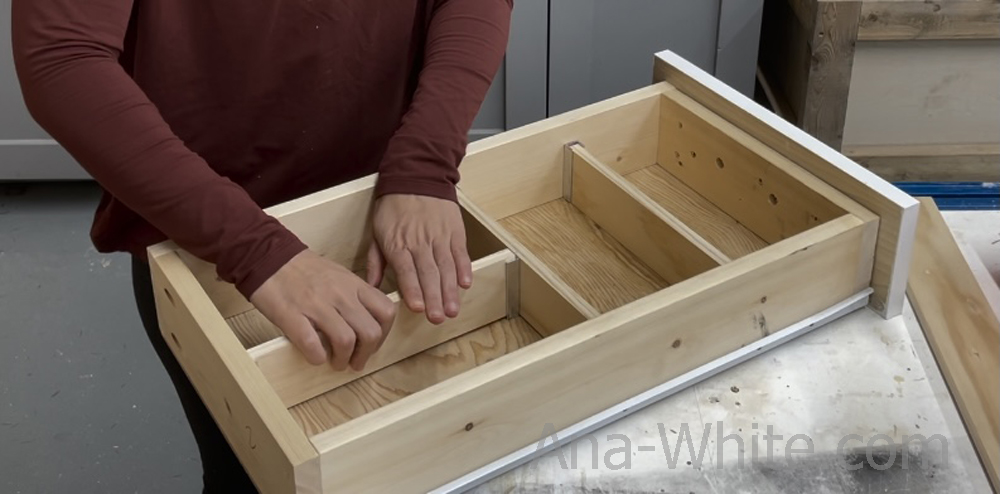
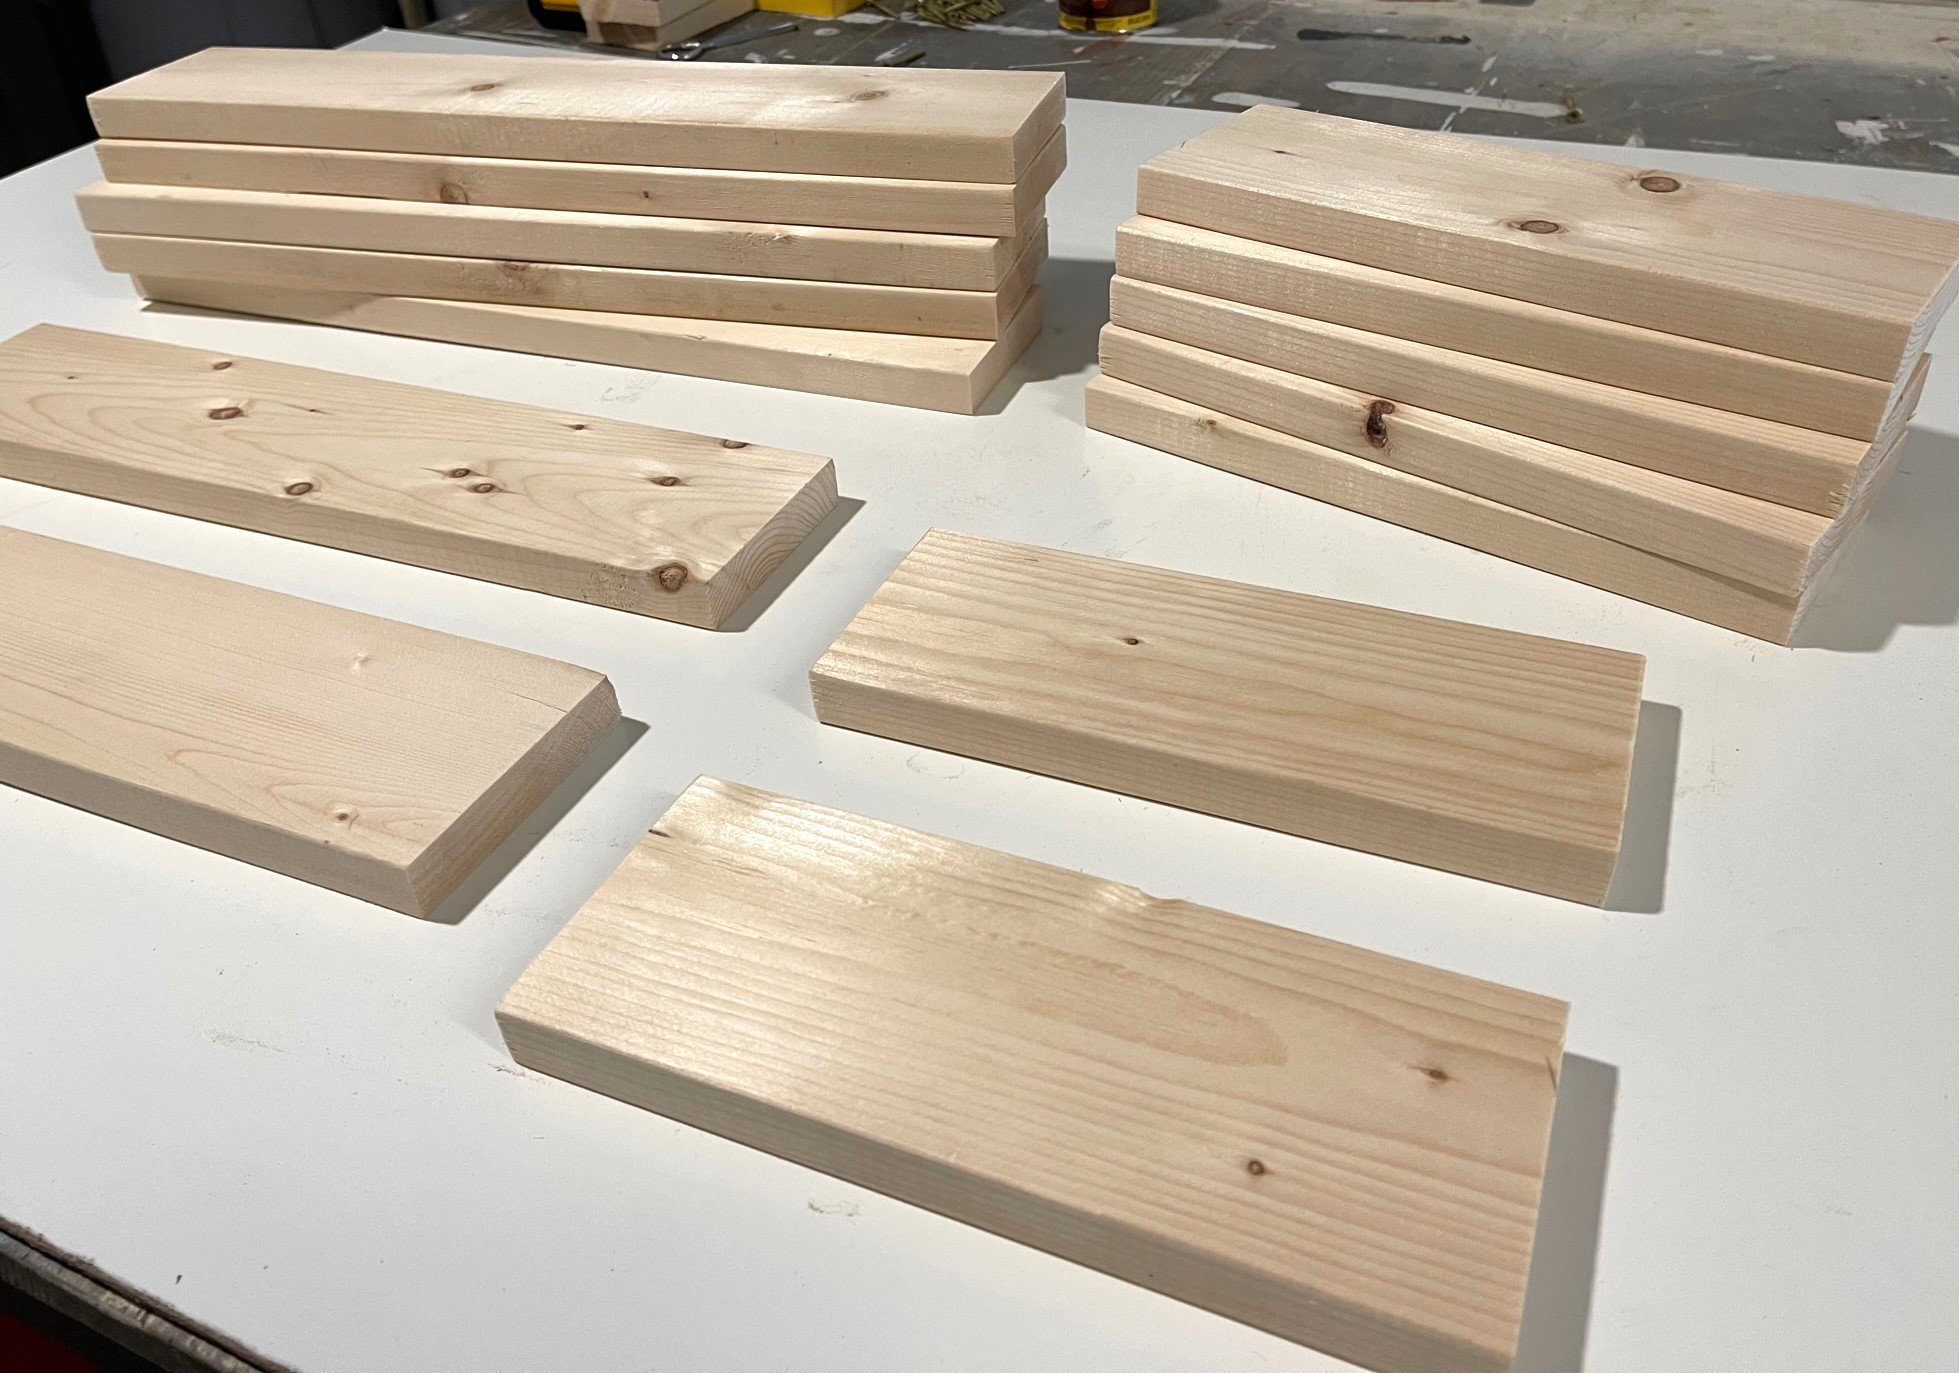
How I Build these Cake Stands
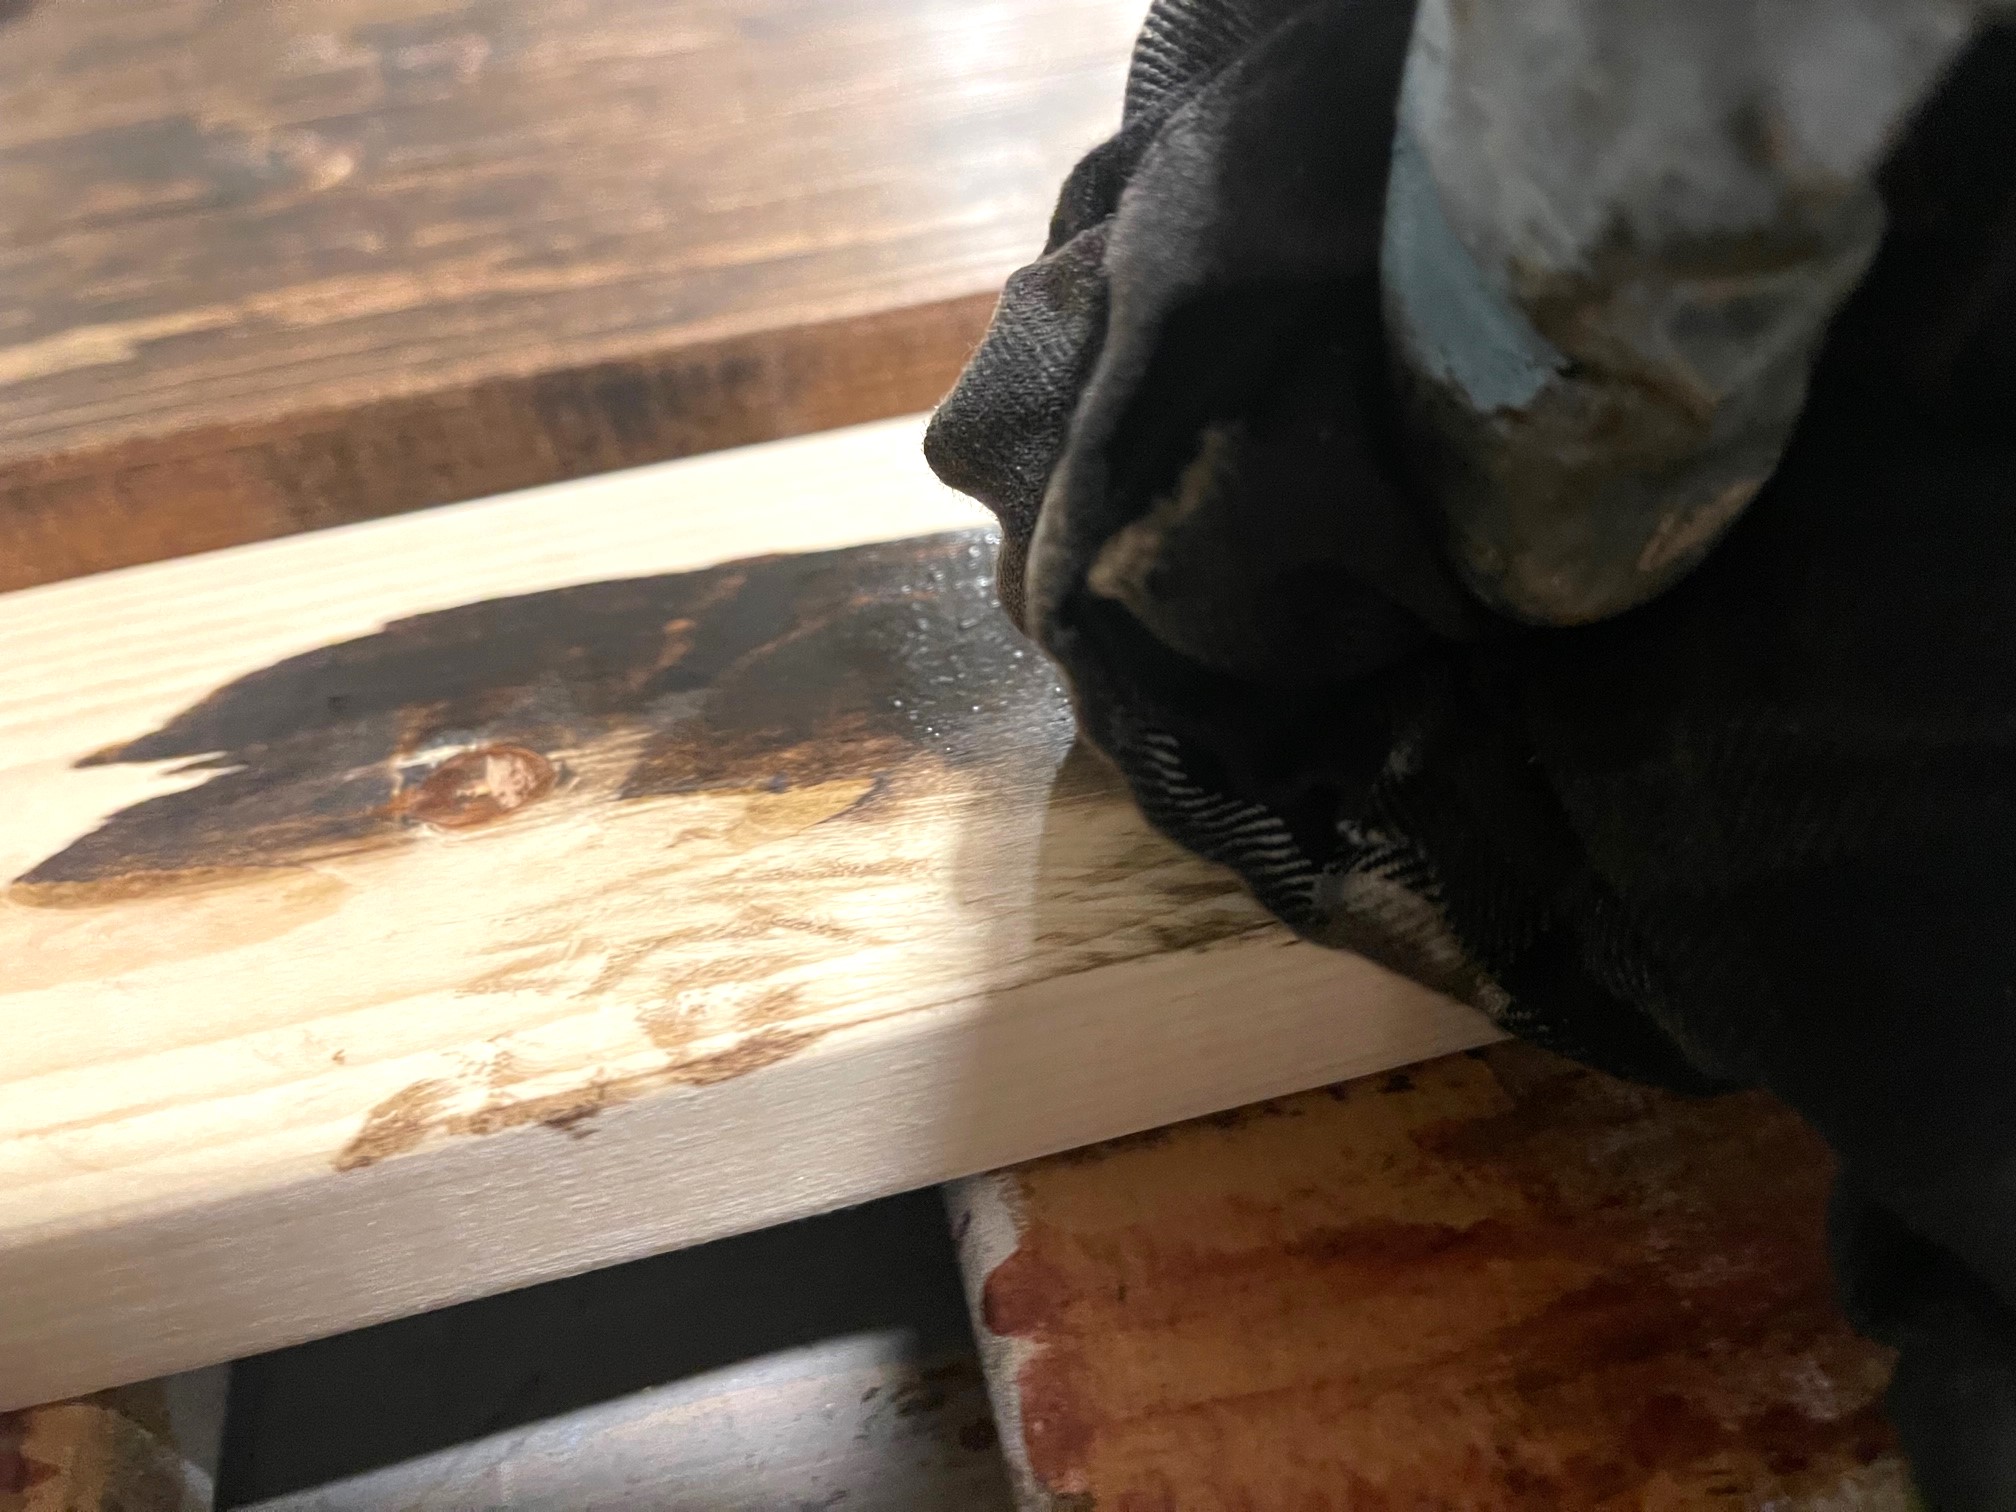
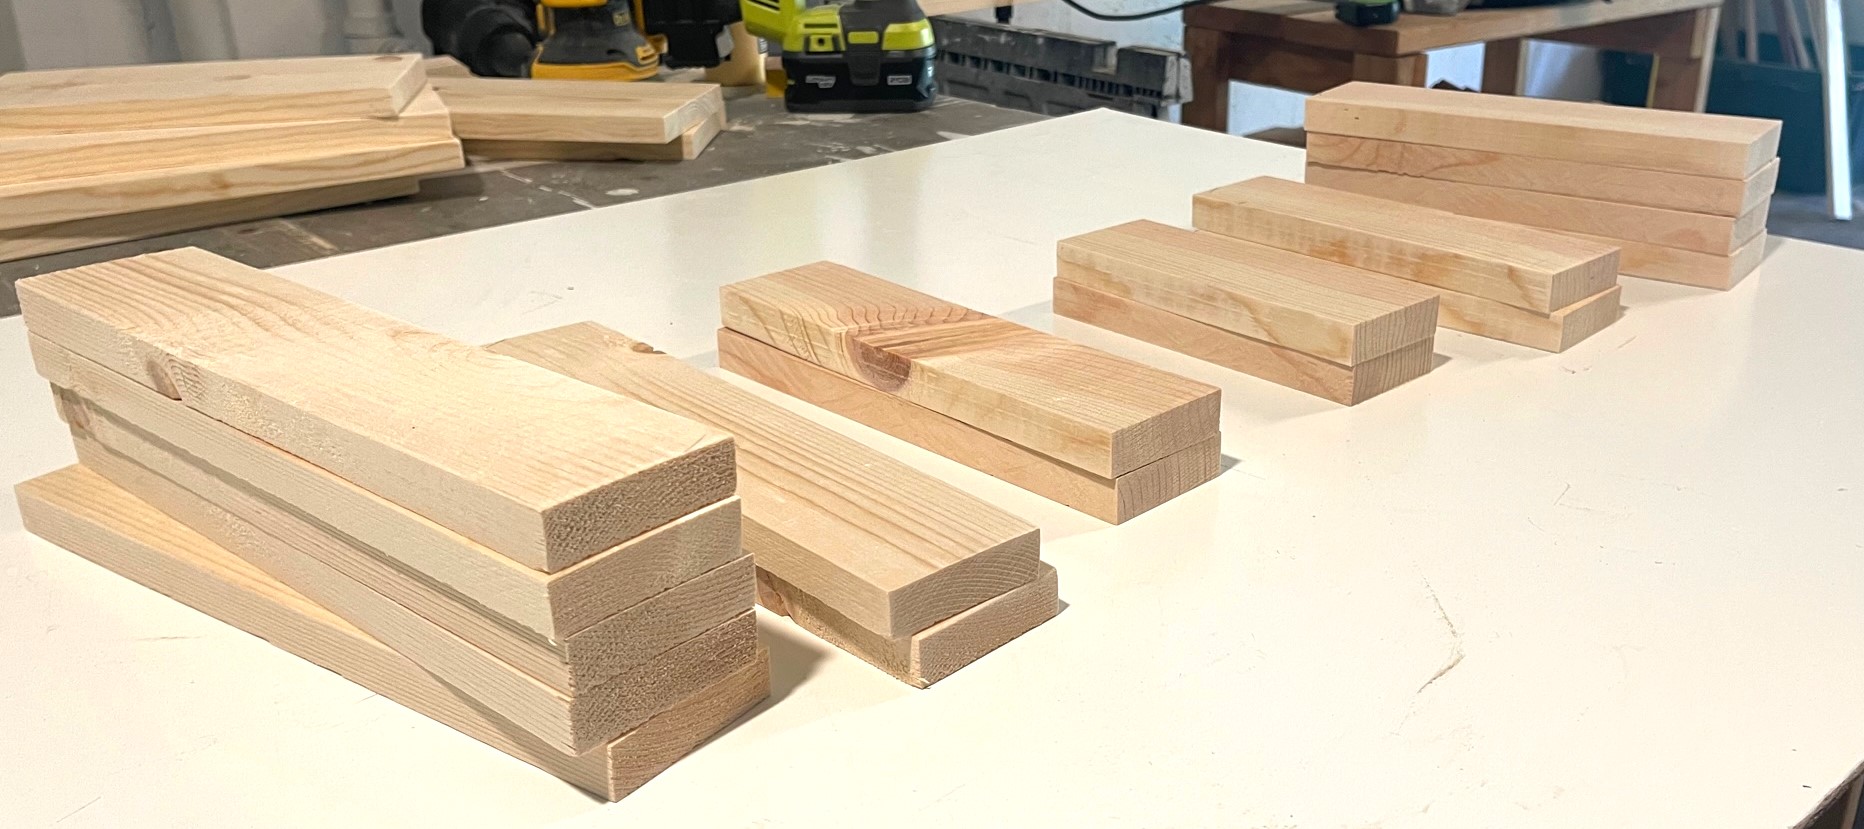
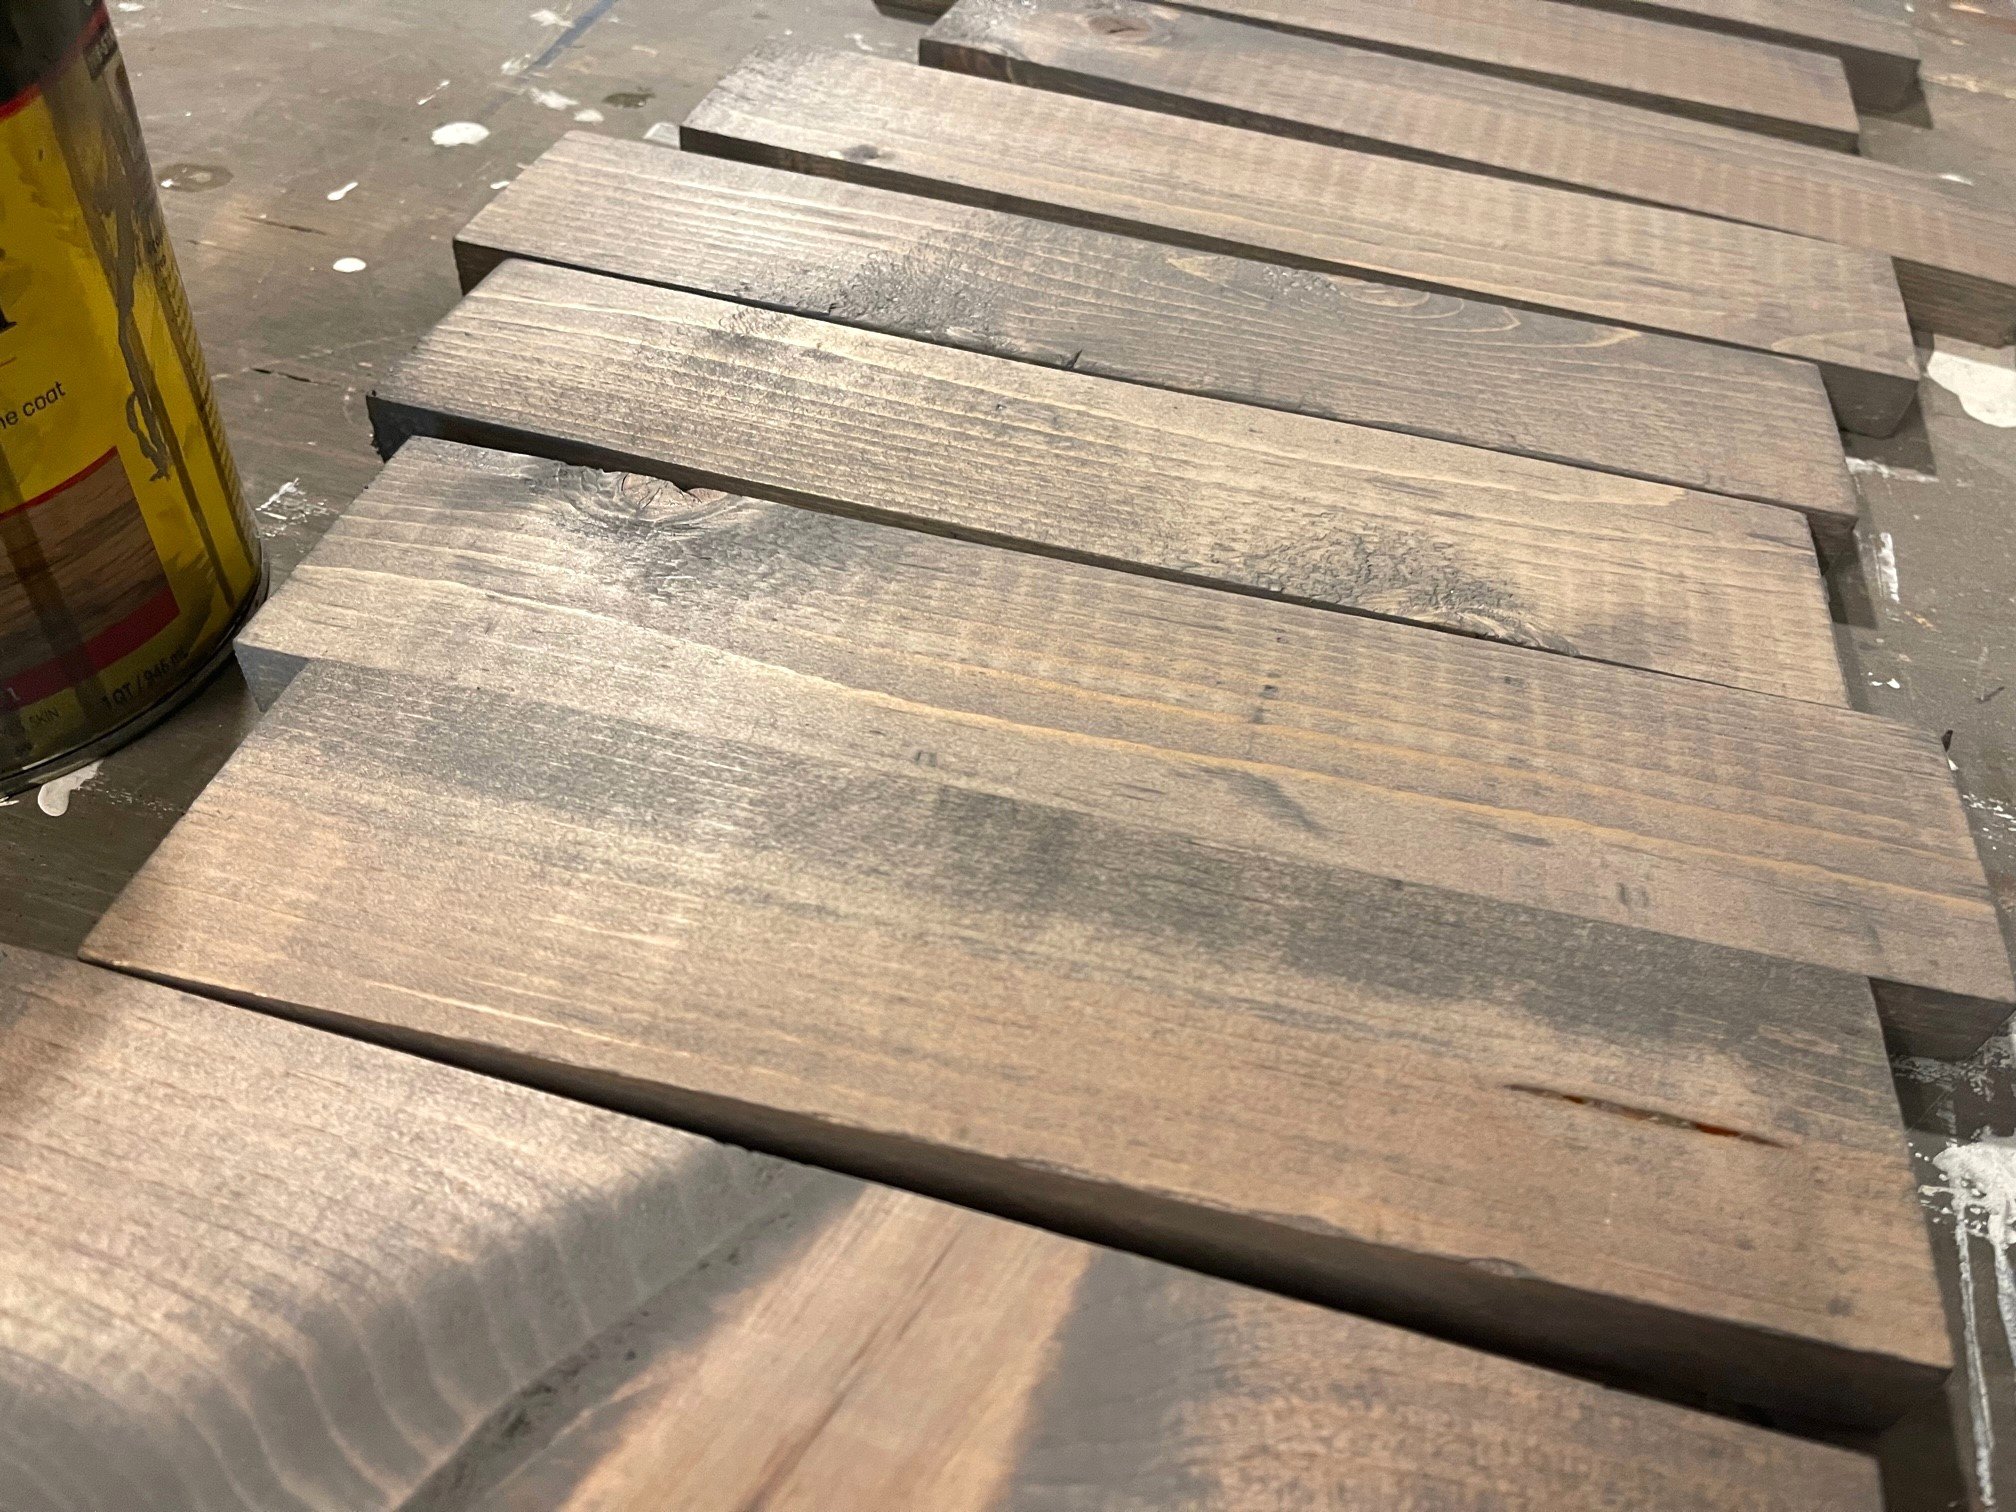
Start by cutting all of your boards, be sure to sand any rough edges. Now you may leave the wood natural or I recommend prefinishing the boards.
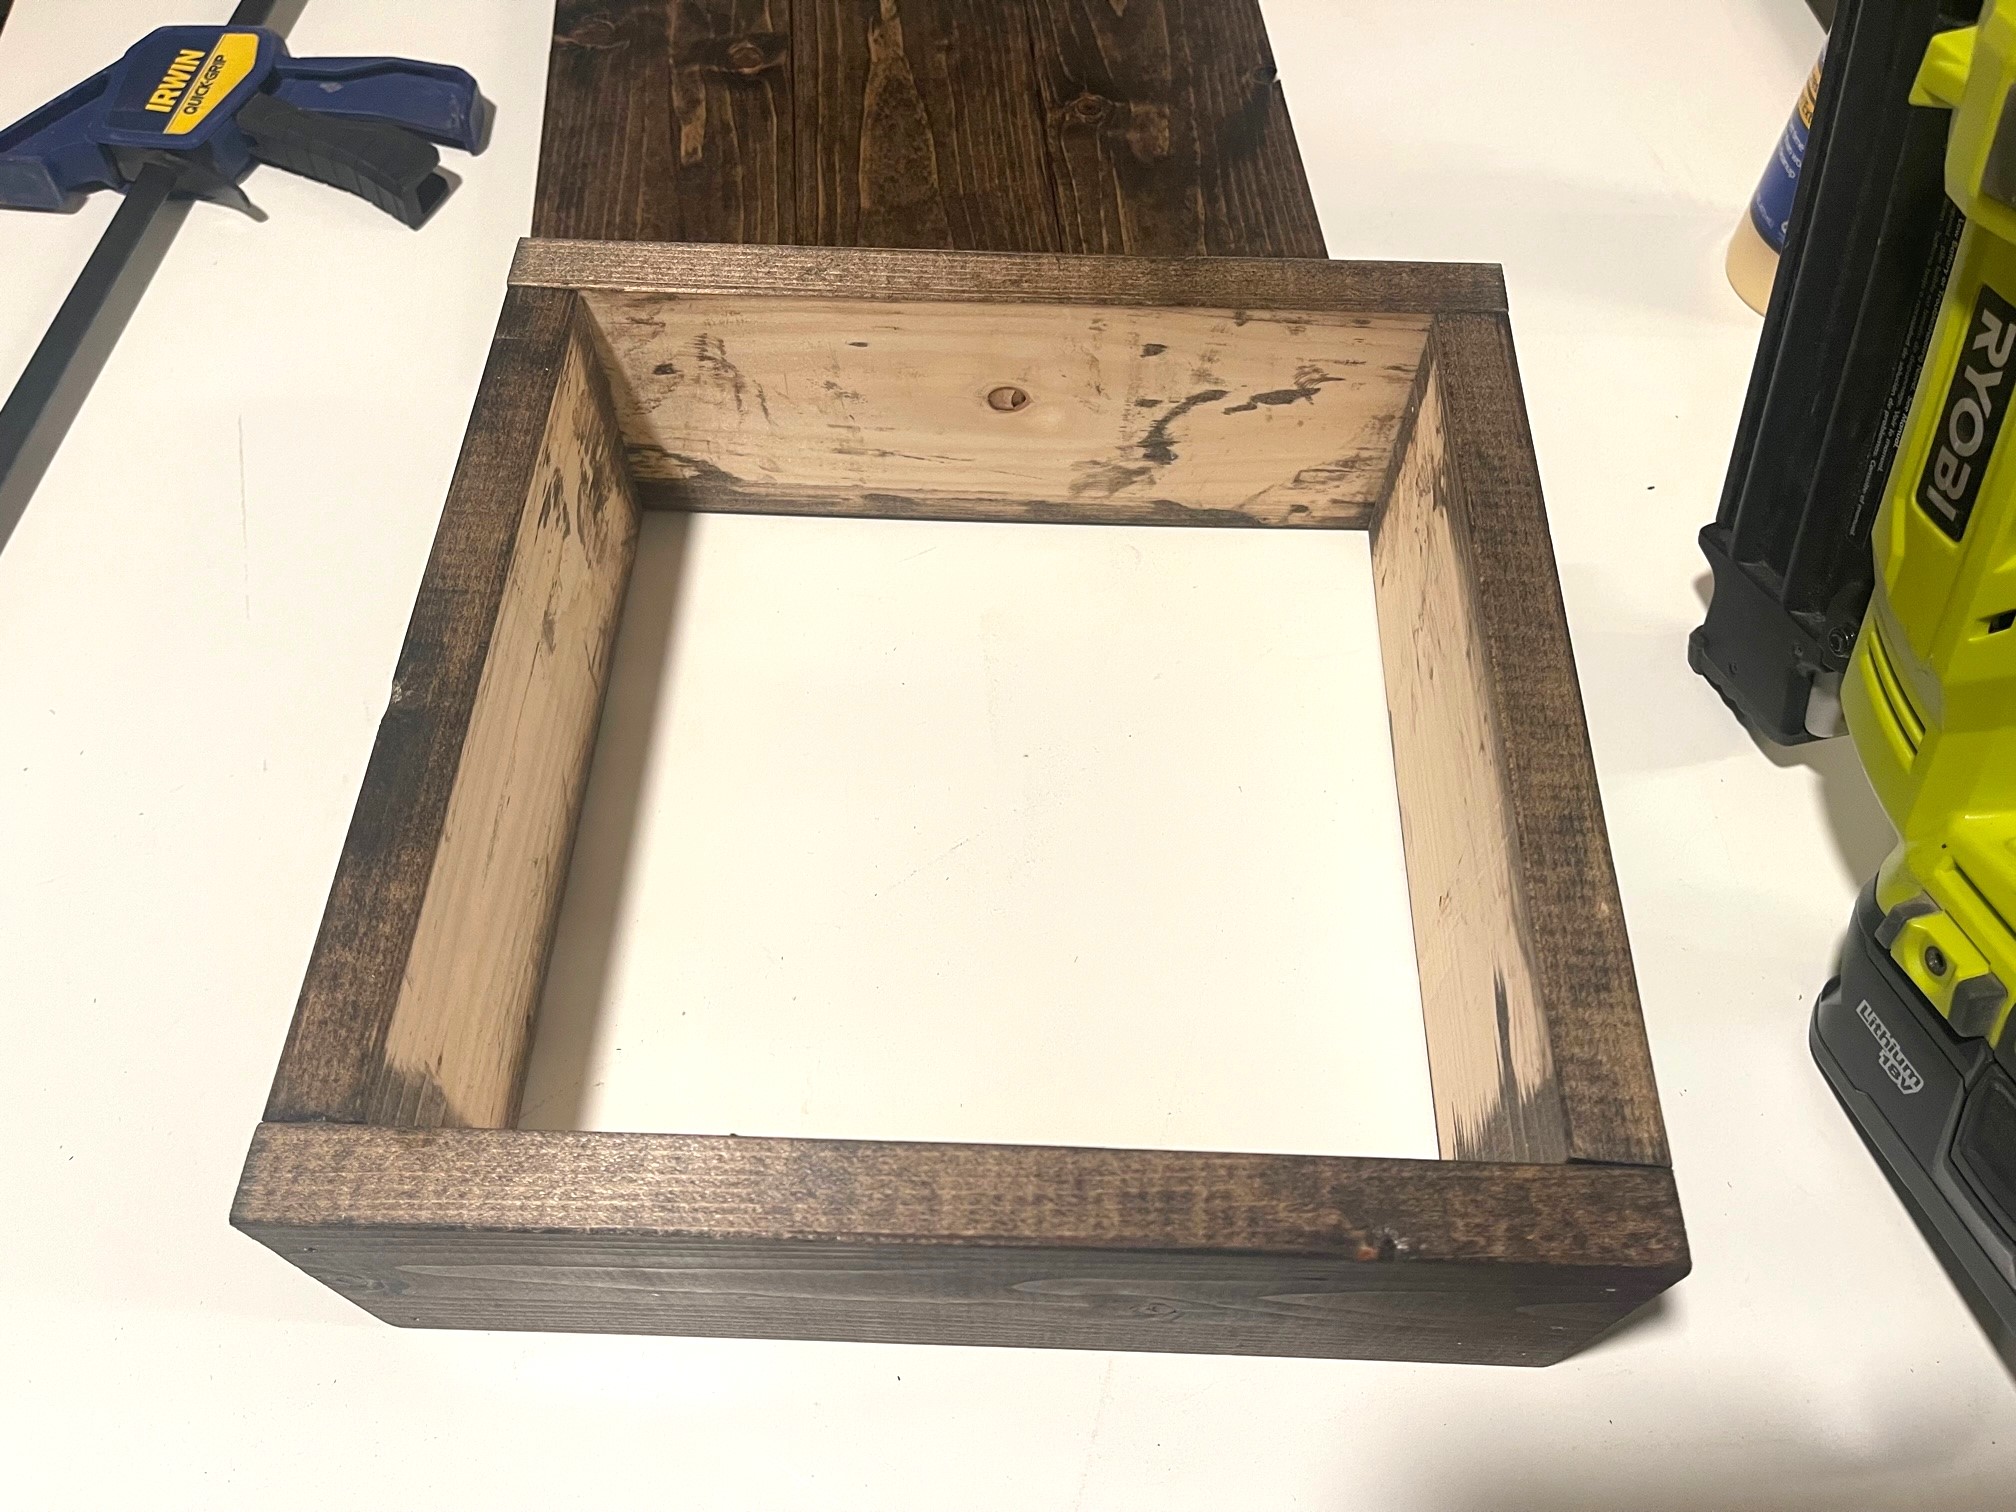
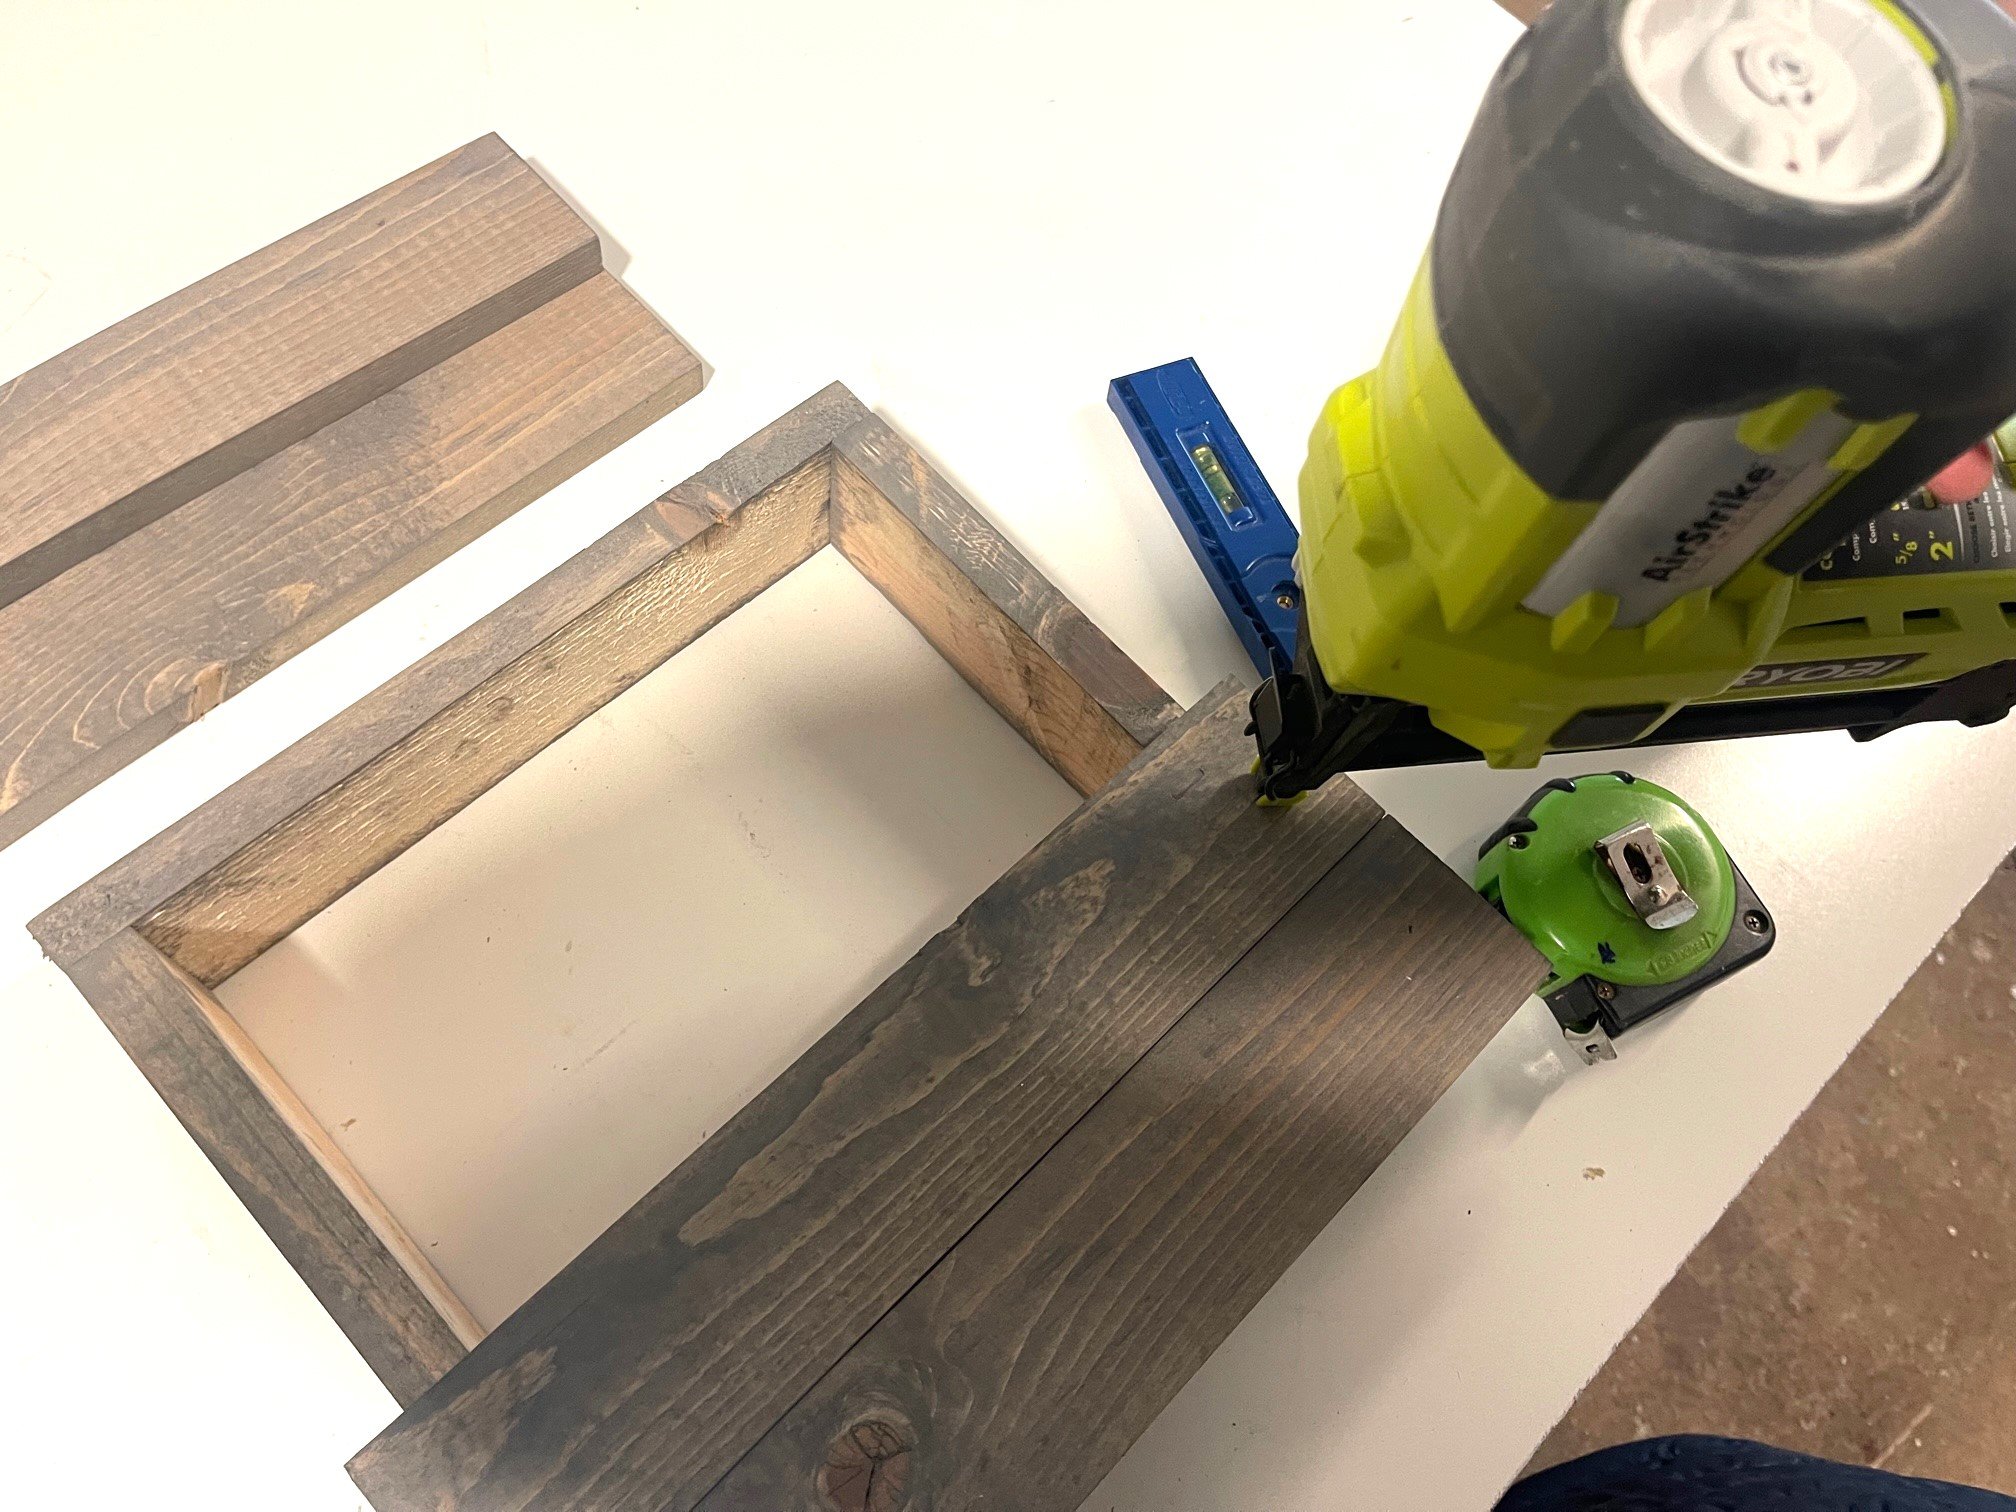
For assembly, you will nail and glue the 4 side piece together.
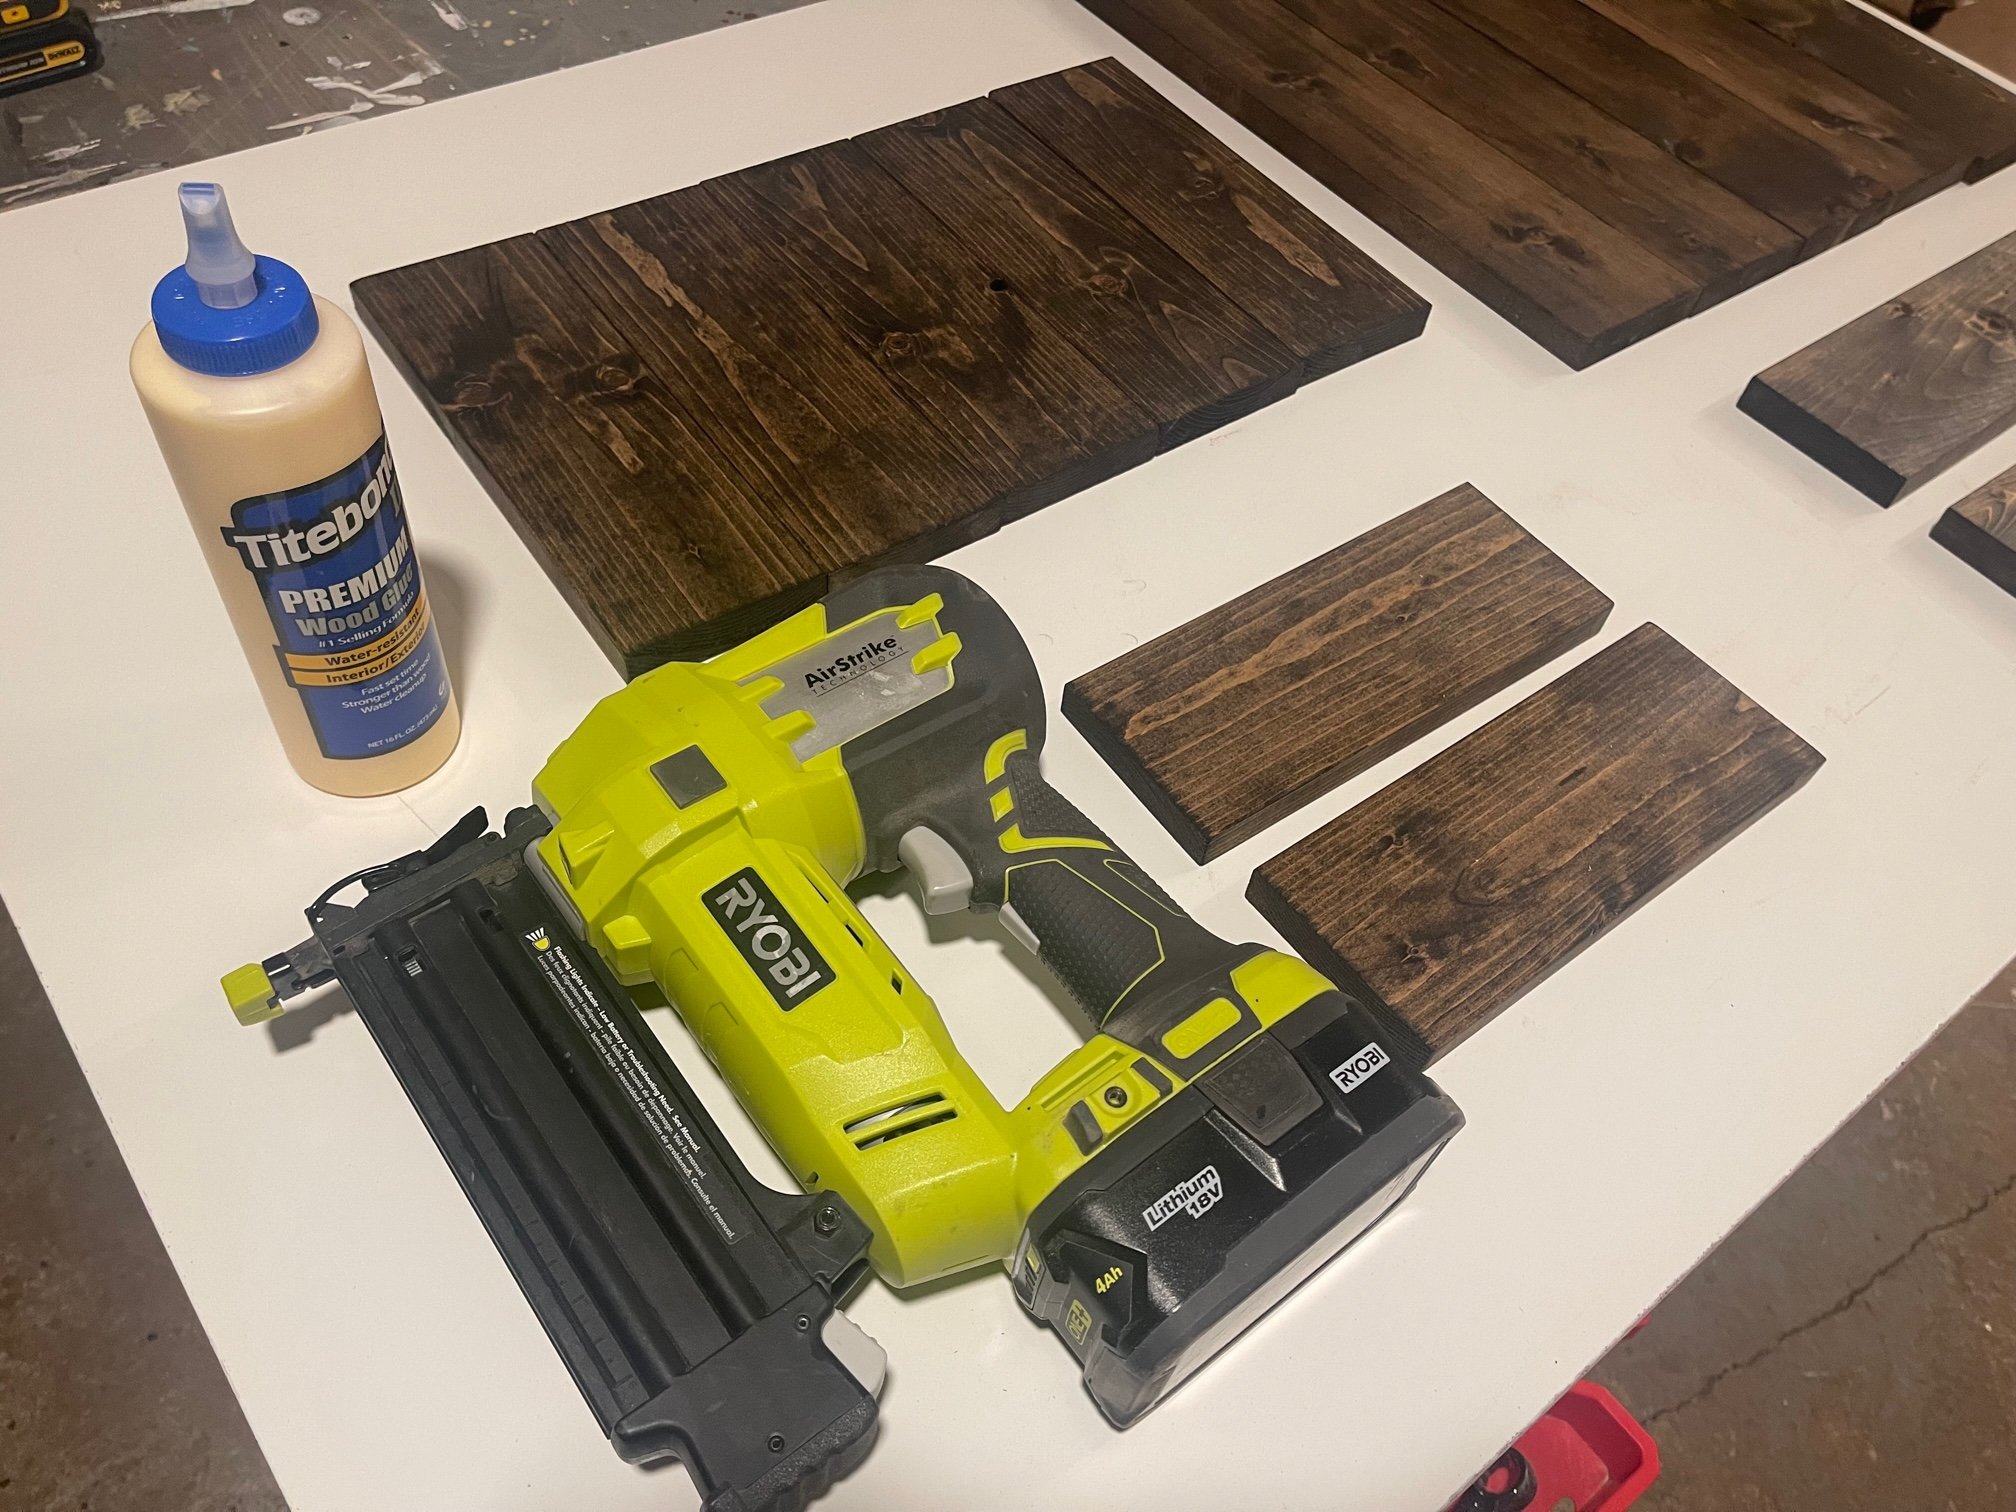

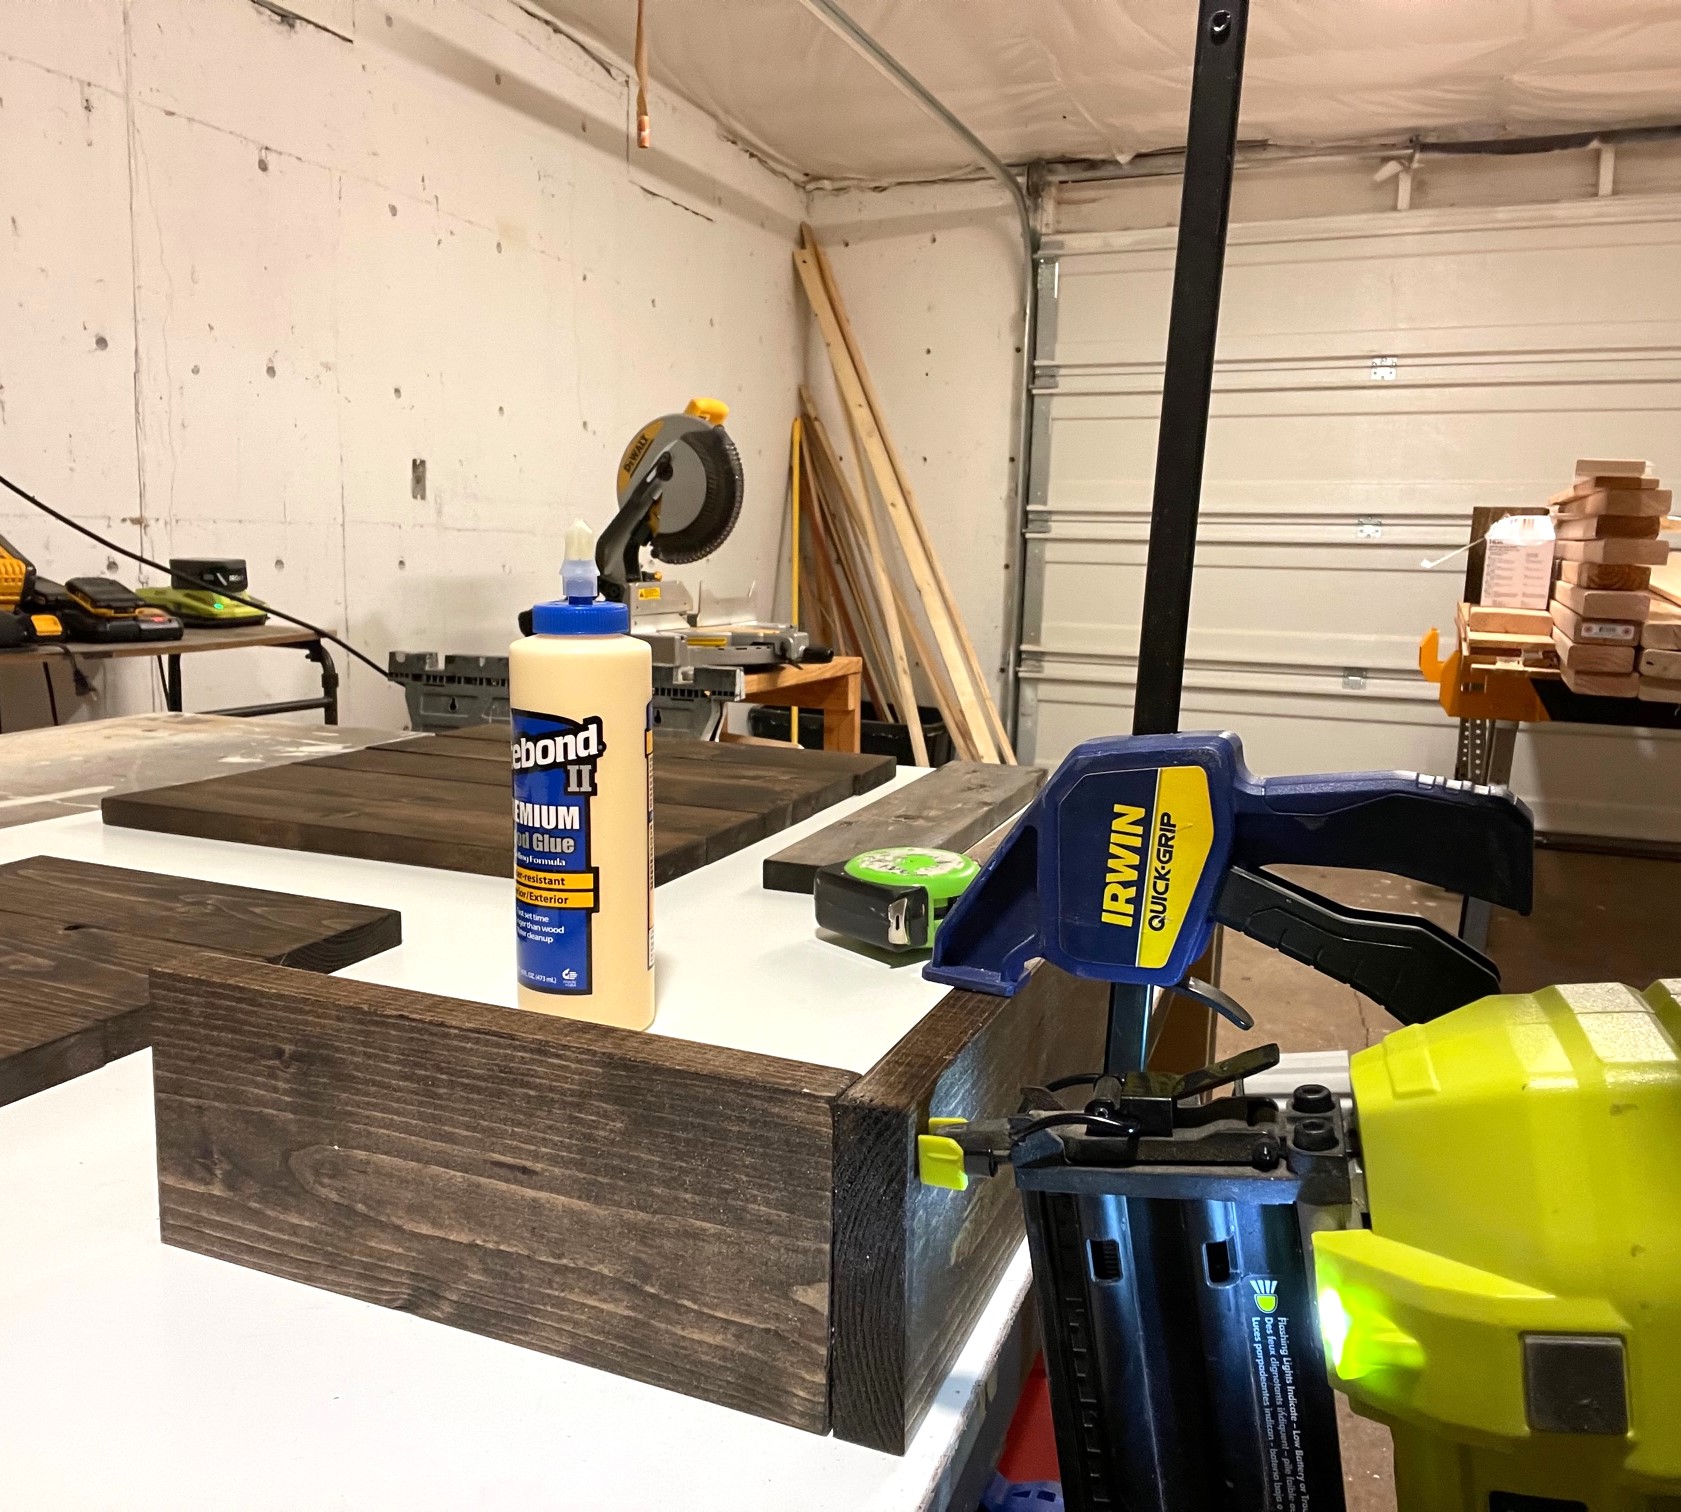
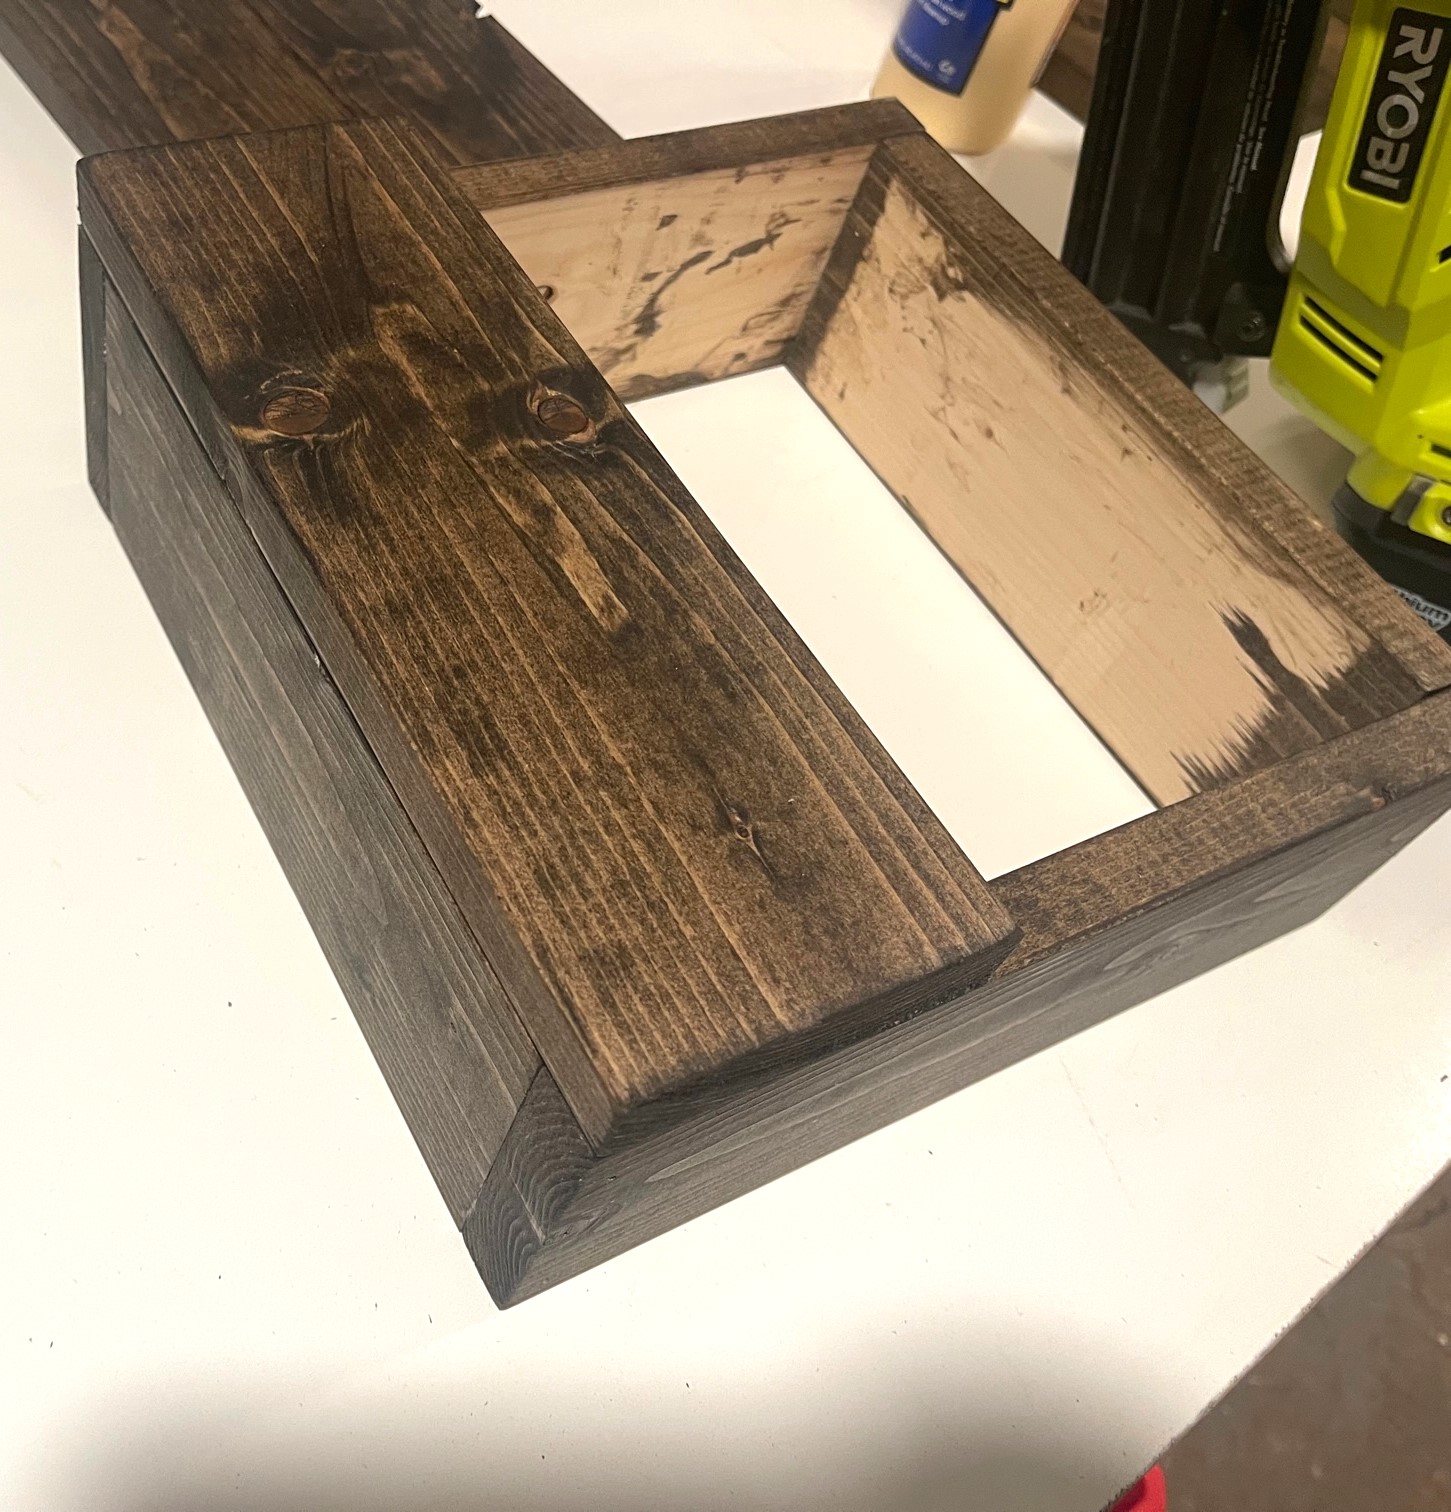
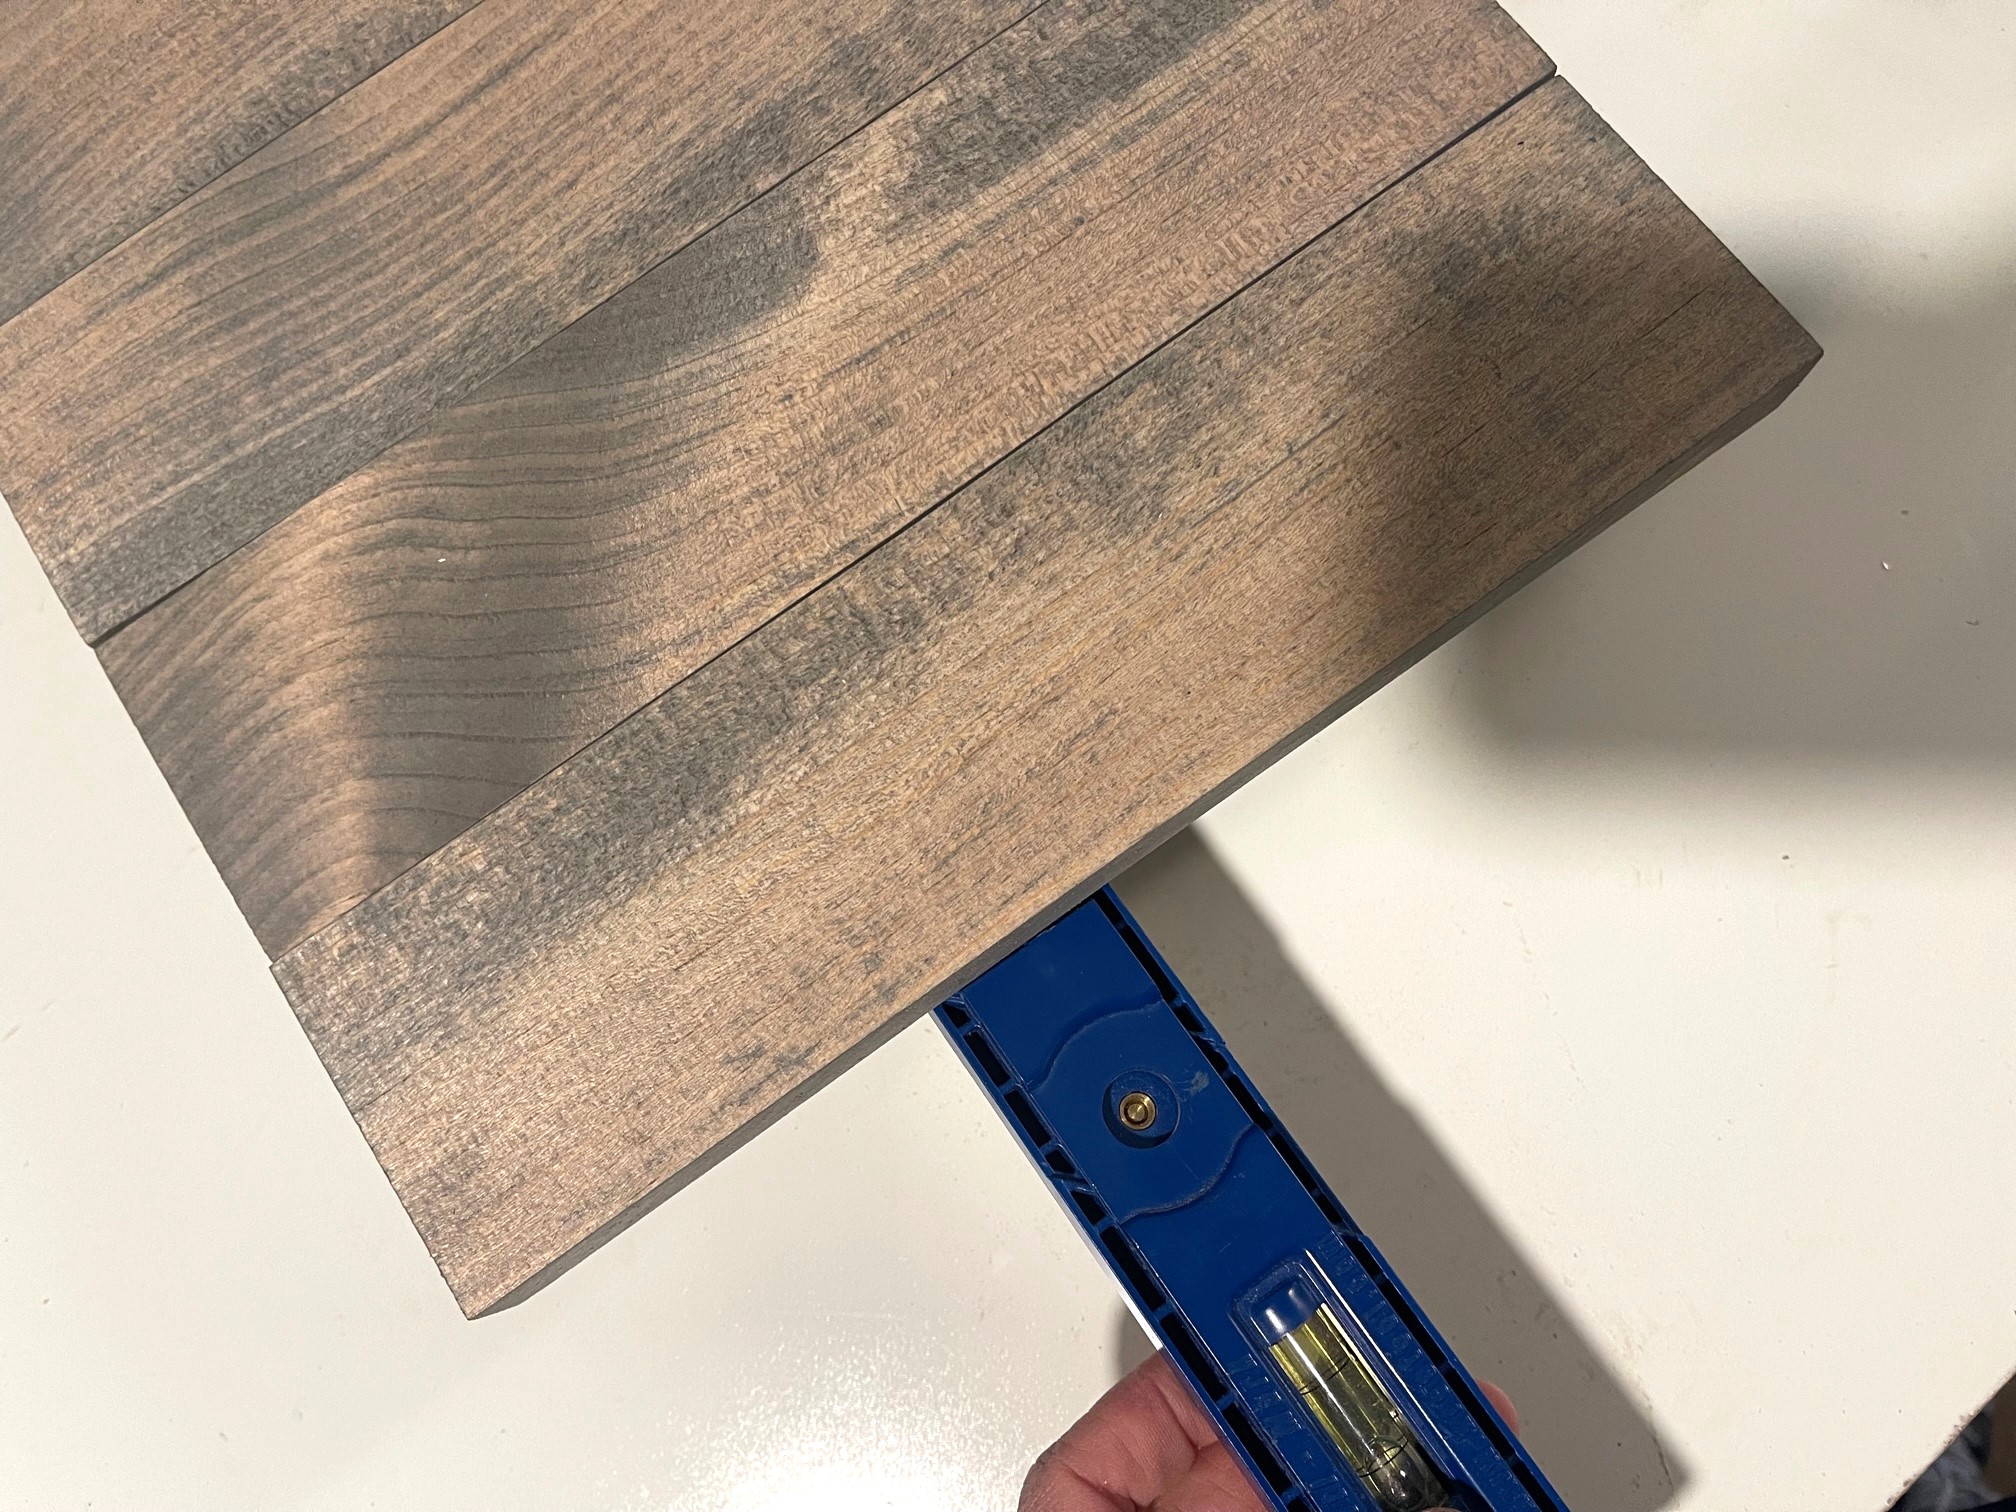
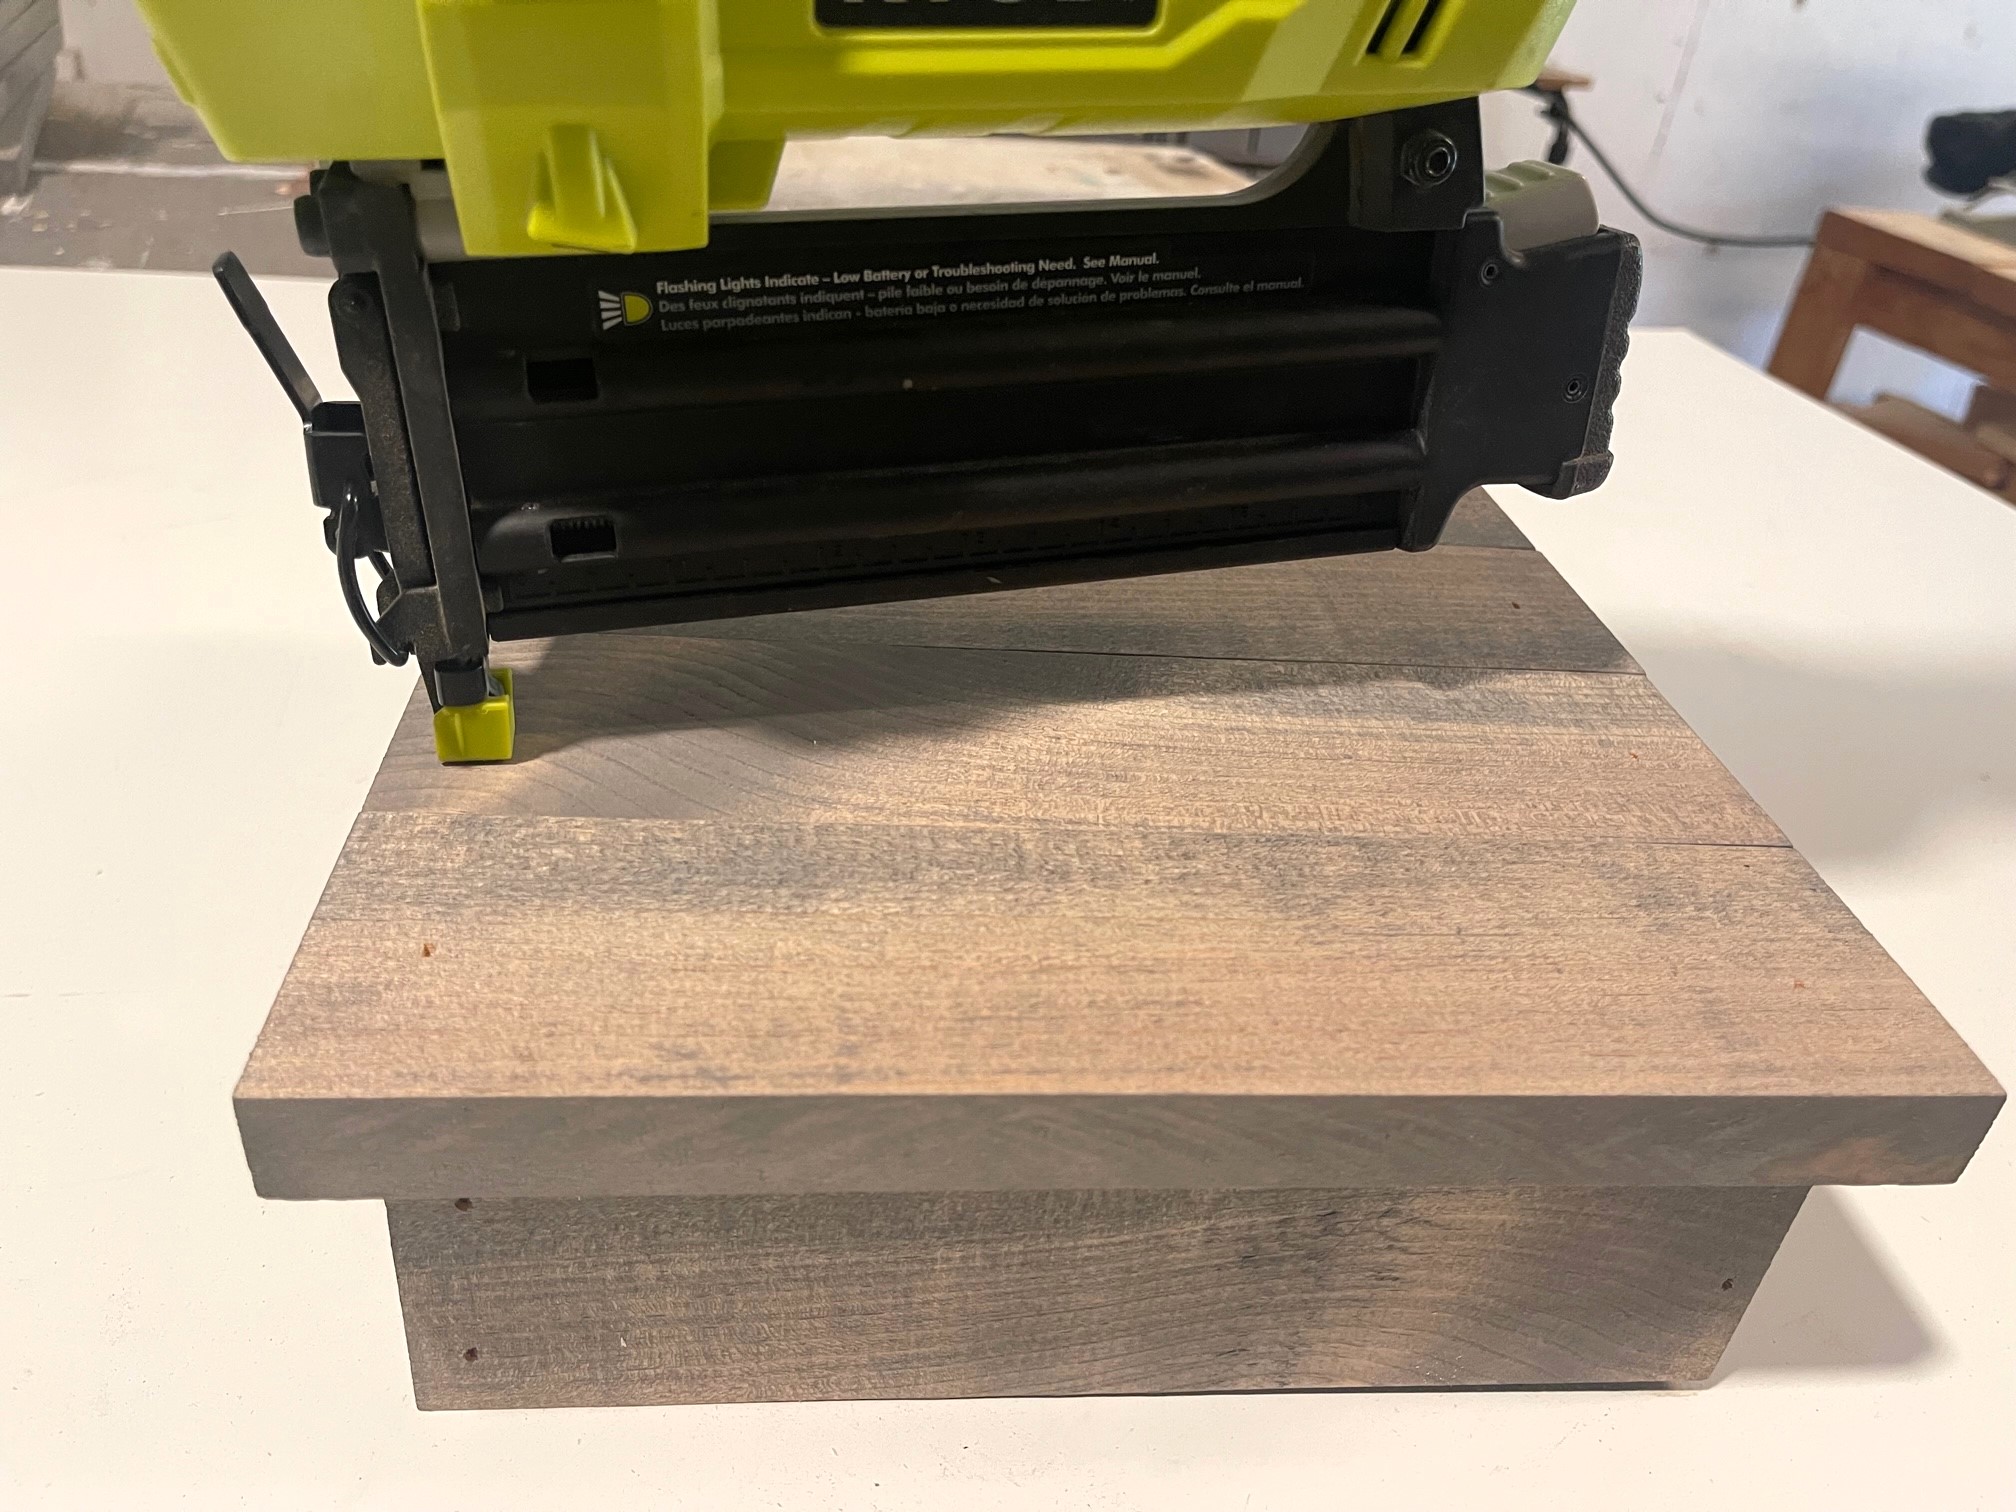
Next set the planks across the top keeping them flush to each side. Nail and glue each board down to the box base.
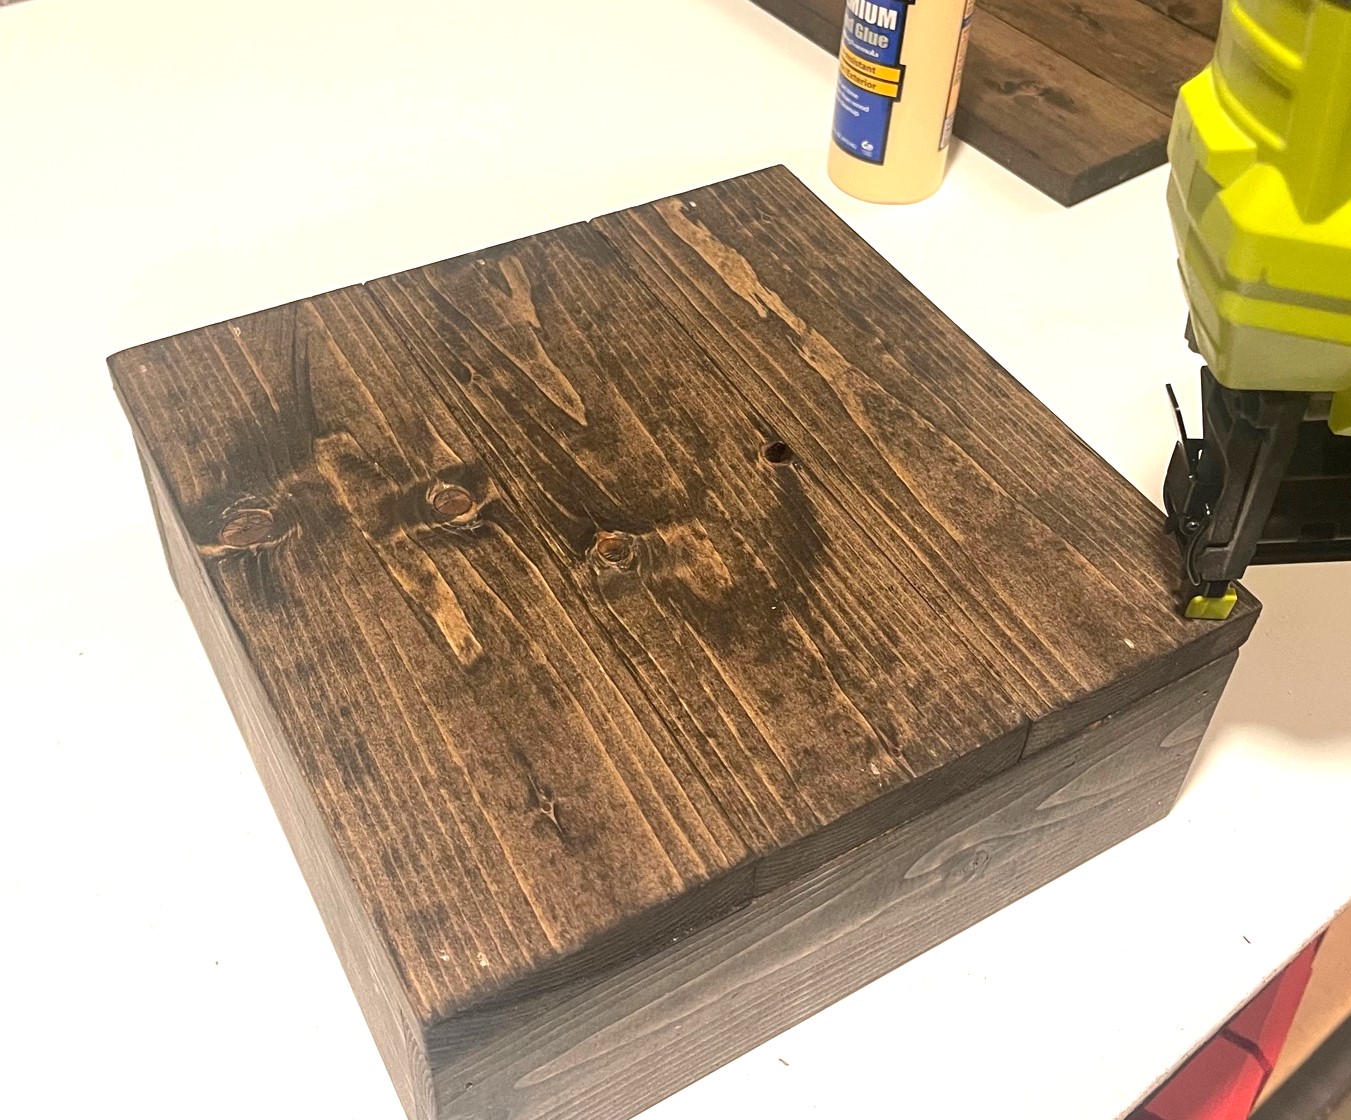
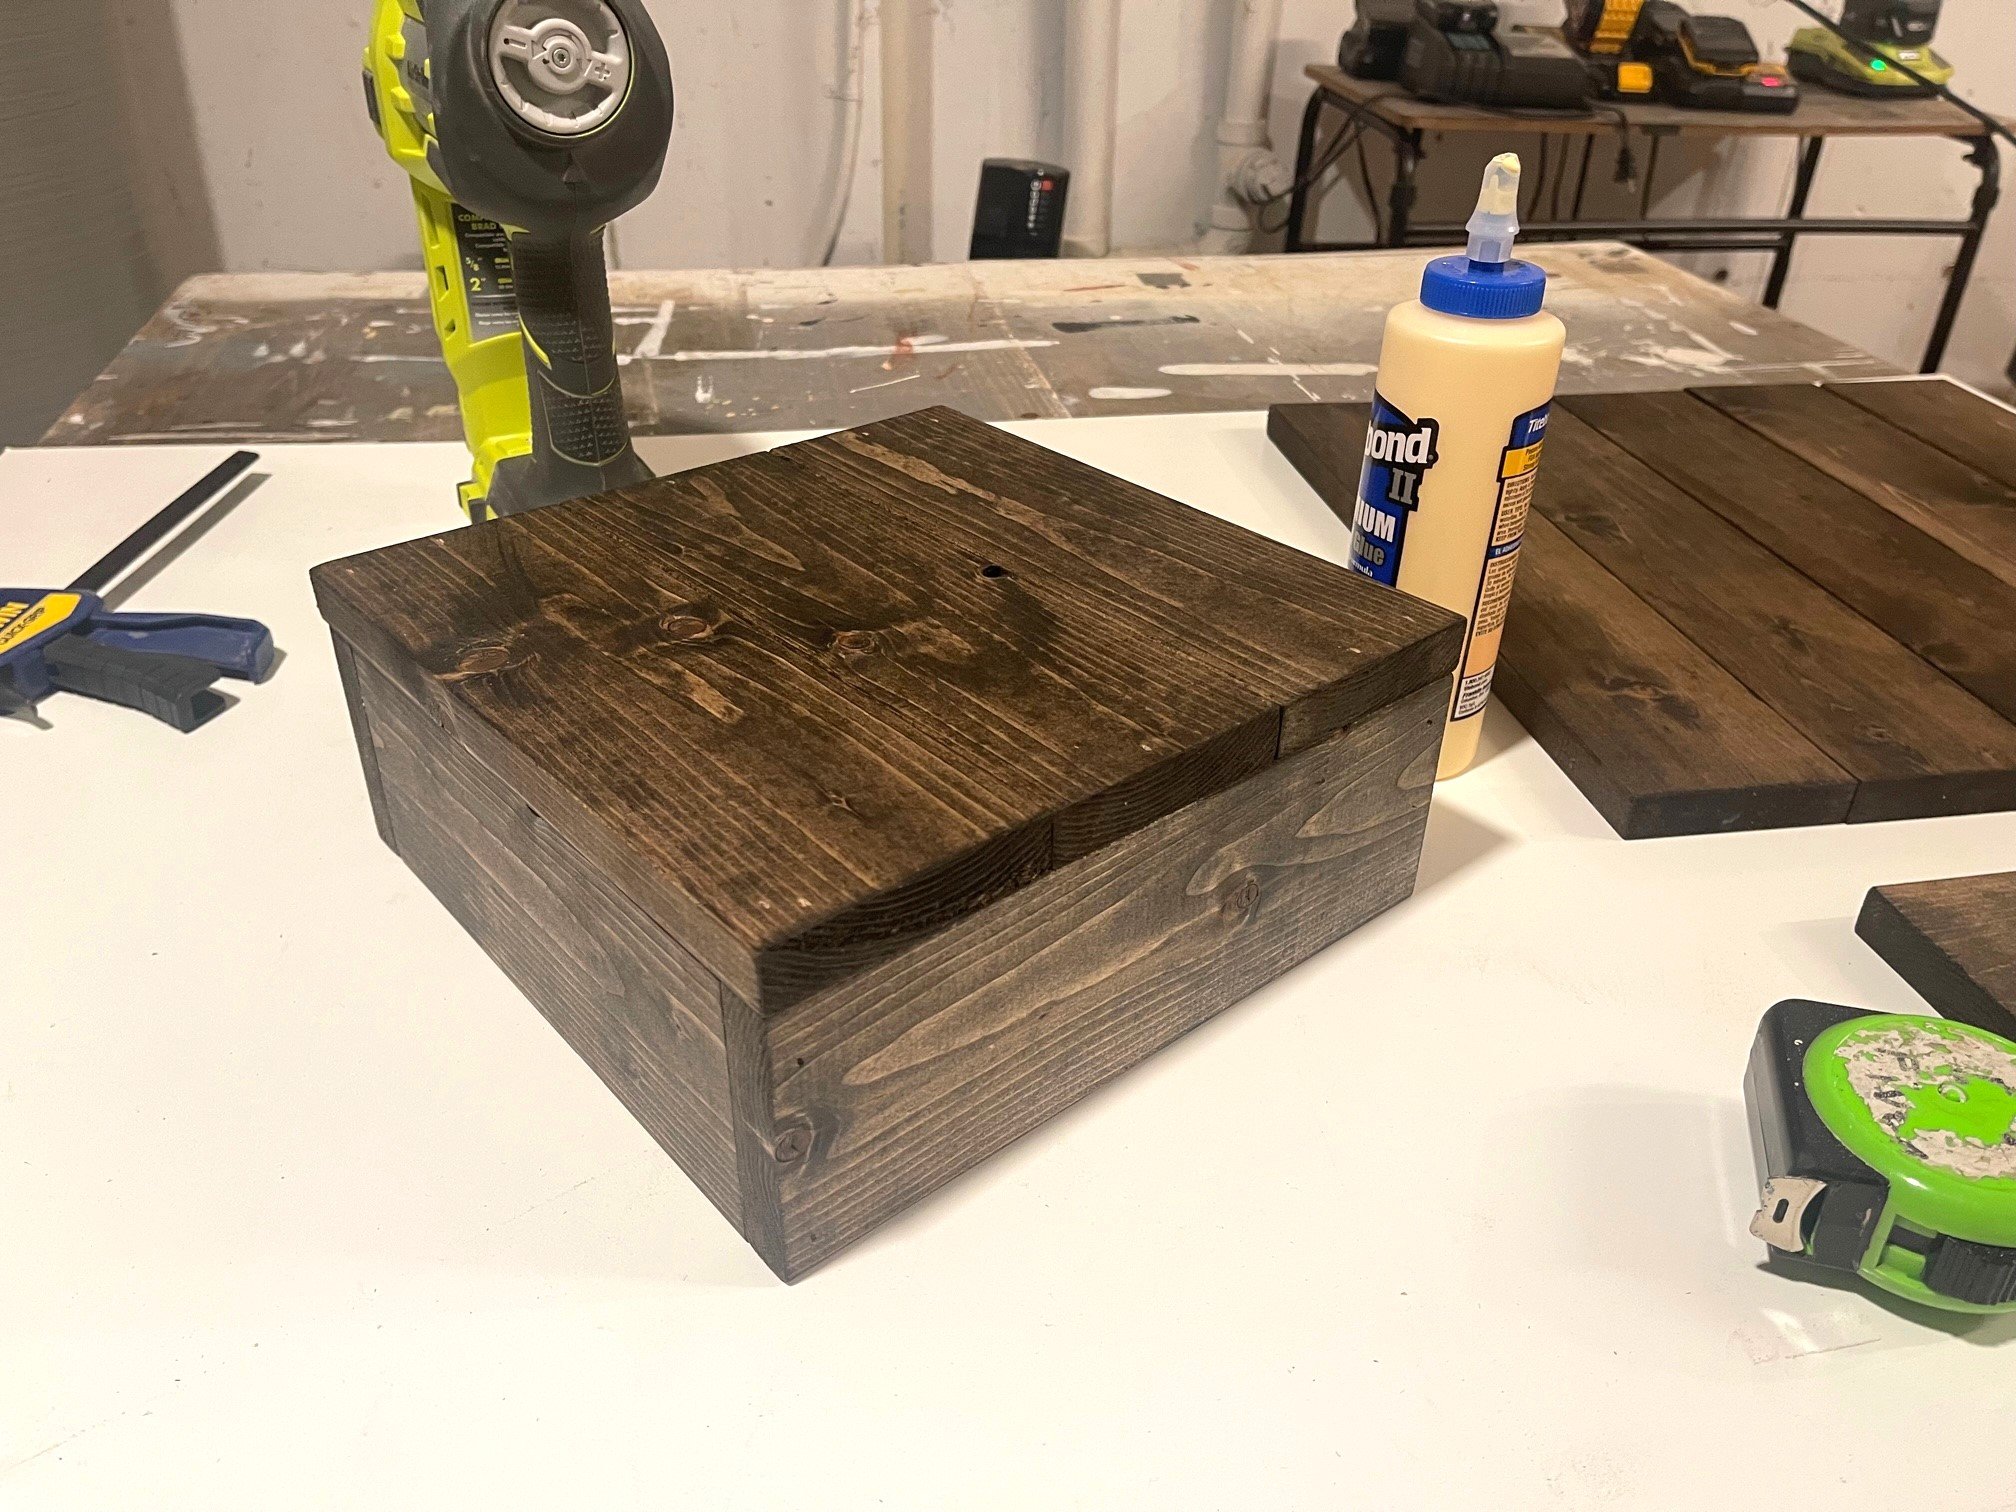 You will build the next box with the same steps as the first and then just stack! This DIY cake stand is easy to personalize with initials or a name. Plus you may customize the size or how many boxes you stack. Something this simple, why not take an ordinary cake to the next level?
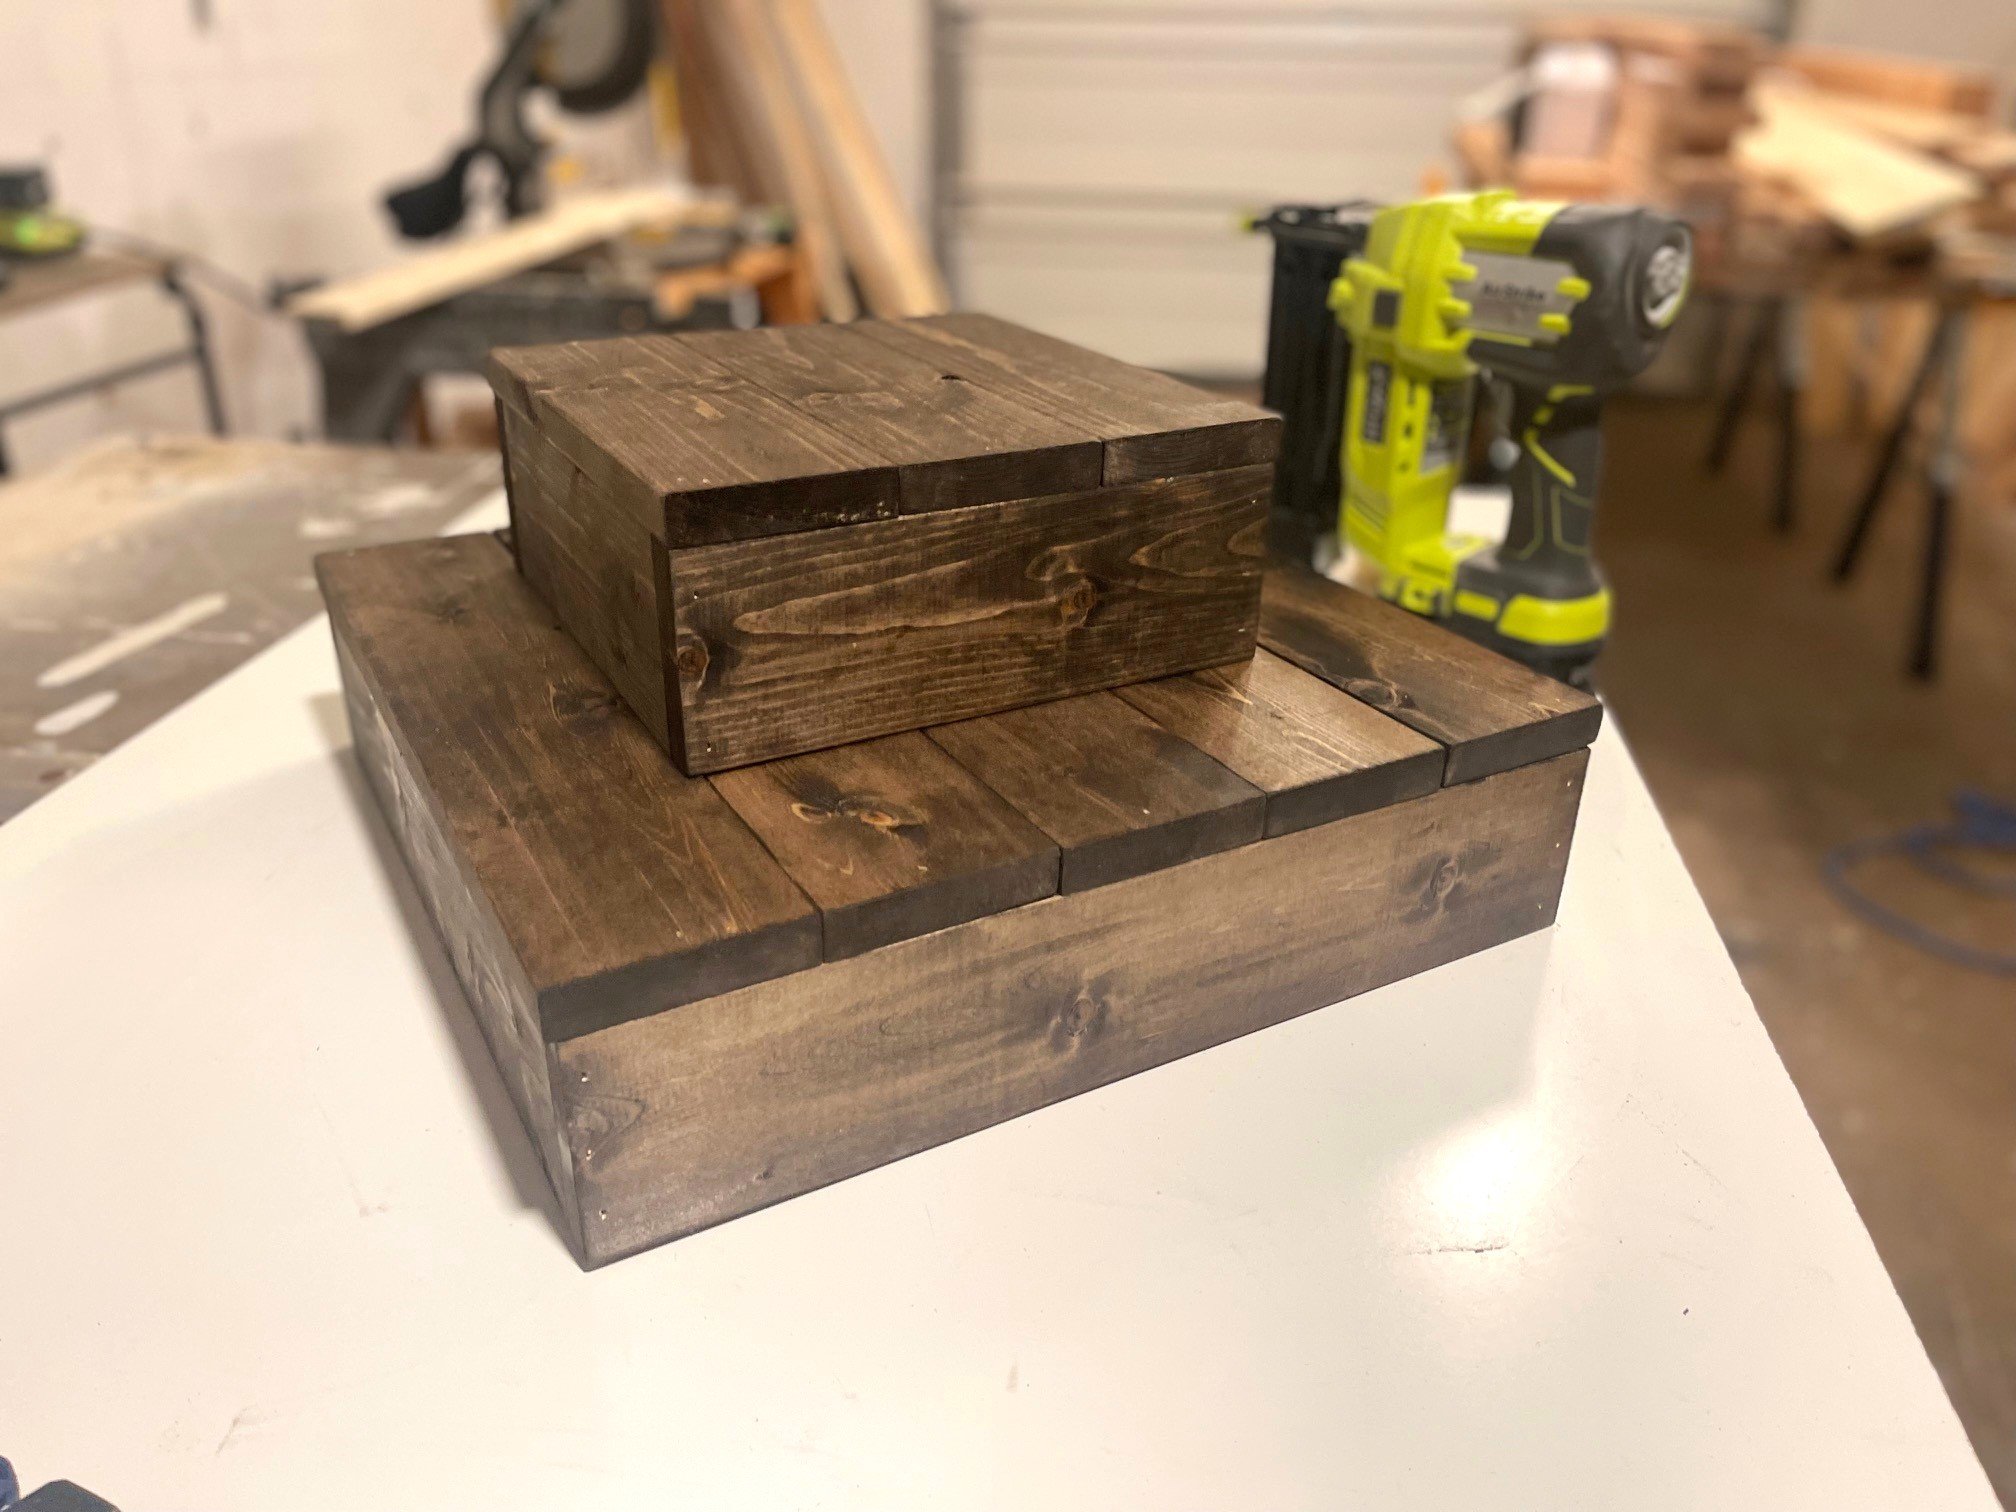
 I love that it holds a small cake and cupcakes. This was a super fun and easy build, now it's your turn!
Free Plans for Two Tiered Cake Stand
Ready to build yourself? The free plans for this tiered cake stand are below.
from Recent Project Plans https://ift.tt/yNezKY0
1x3 Furring Strip Cake Stand - 10" and 12" Bases
How I Built this Tiered Wood Cake Stand
You'll start by cutting and prefinishing all the boards.
Next you will glue and nail the base pieces together creating a box shape.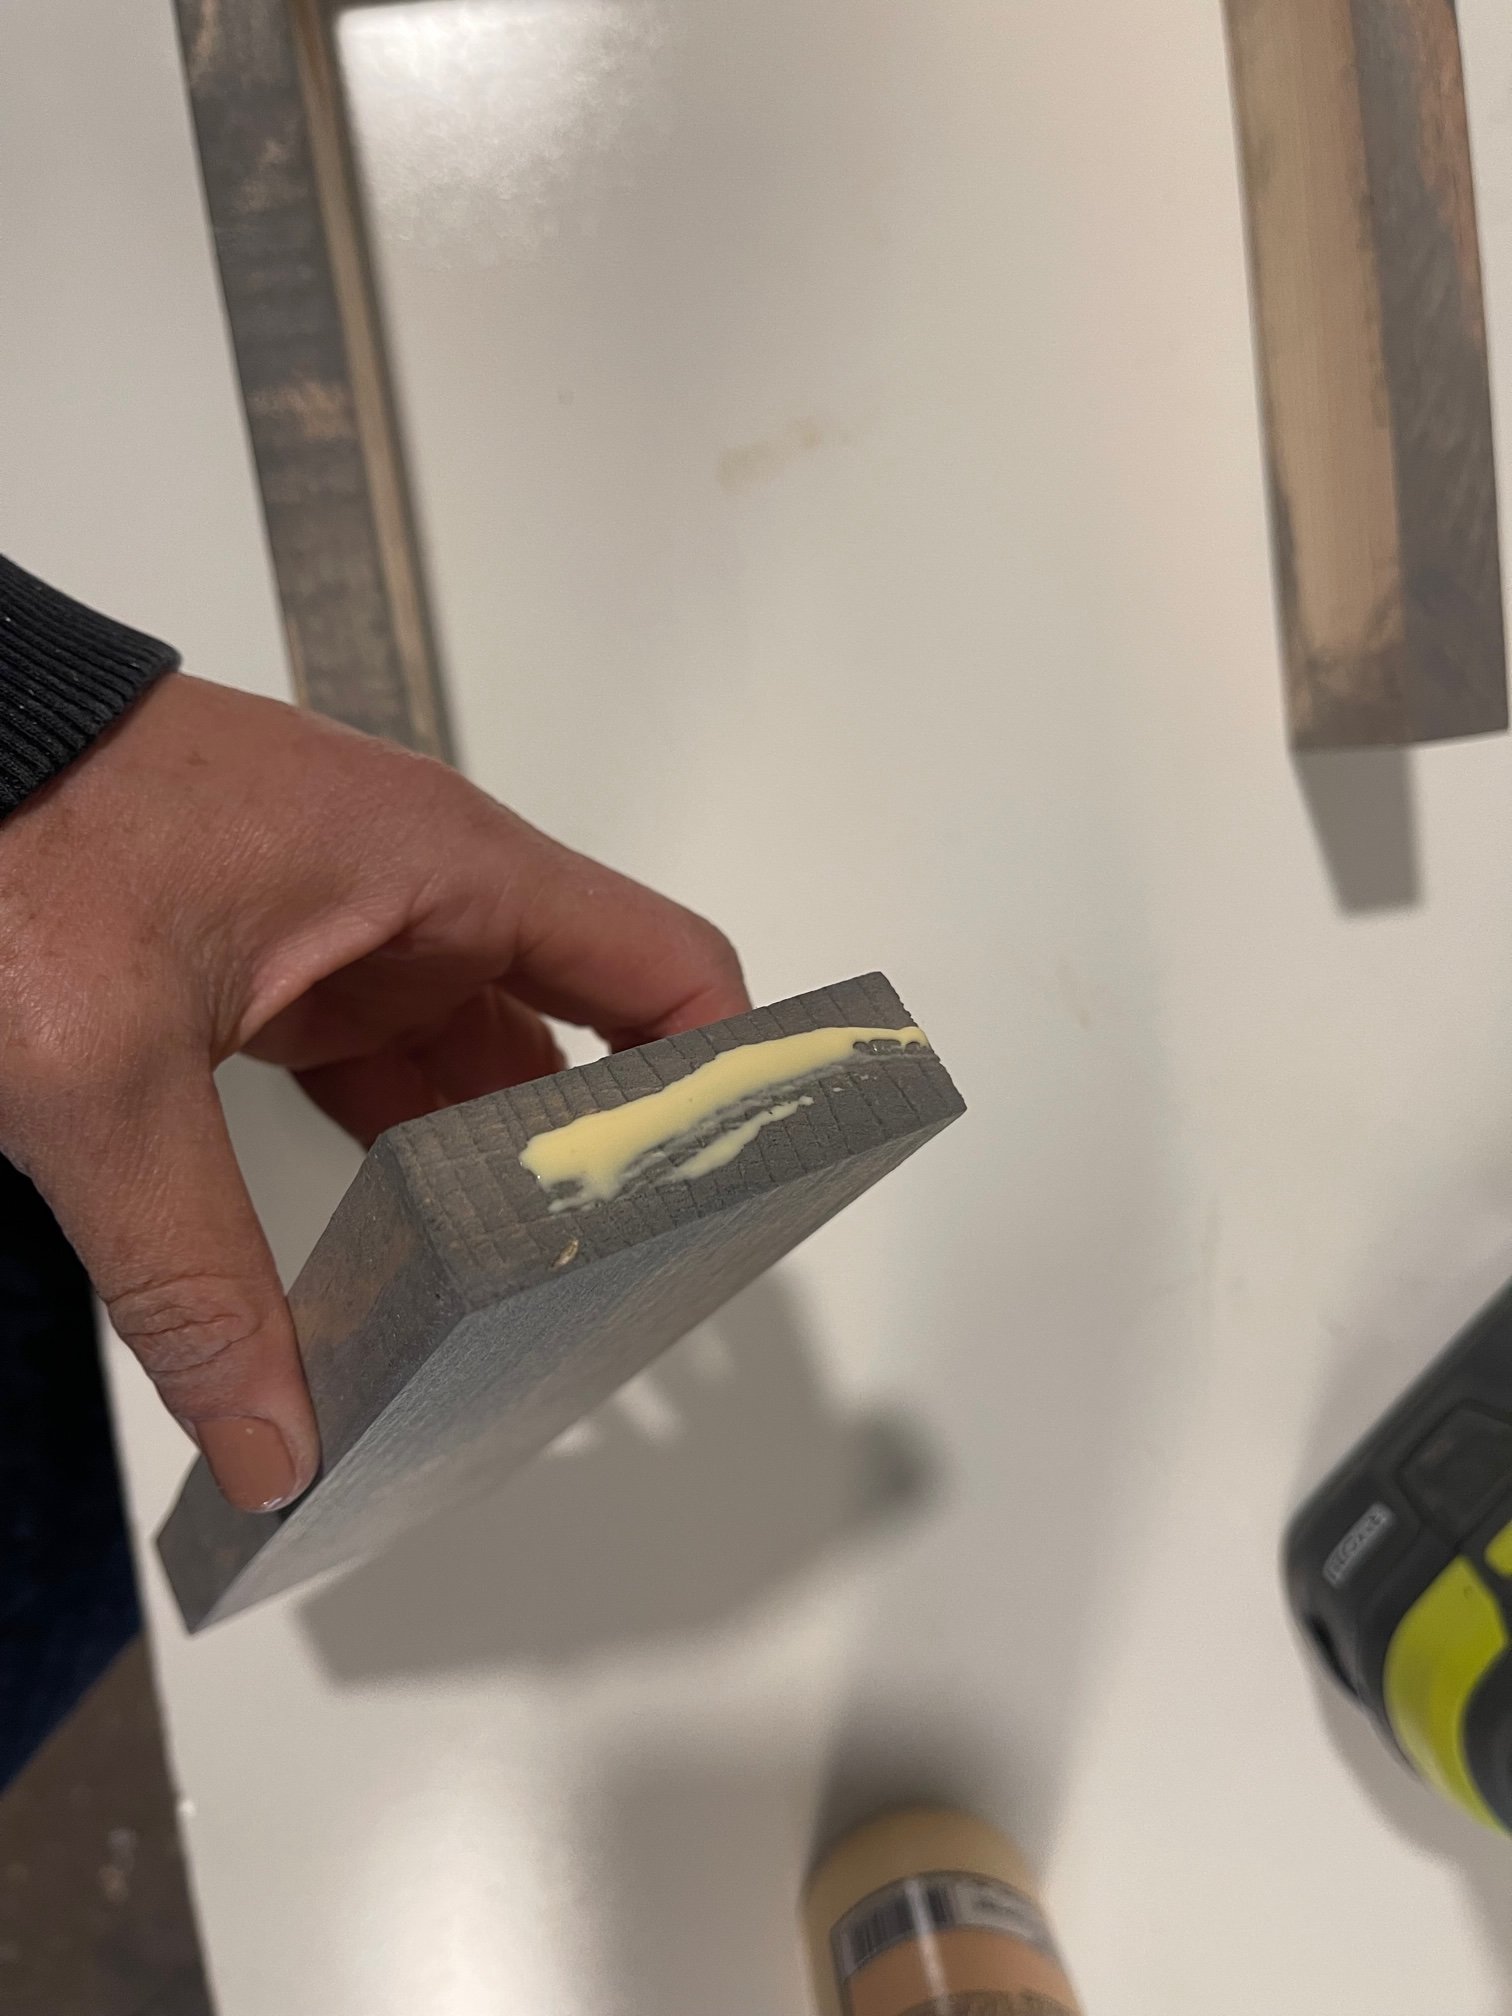

 Next you will plank the top with 1/2" overhang on all sides.

 Build the second one following the same steps!
 Then stack!
 Such a fun and easy way to display a cake for a special occasion!
Free Plans to Build Your Own Cake Stand
Are you ready to build yourself? Here's the free plans!
from Recent Project Plans https://ift.tt/I9McmJg
2023年4月18日星期二
Bandsaw Contours… a Spectacular Finish! #diresta
Check out how I use the bandsaw to create the contours needed to make this wooden spoon.
from jimmydiresta https://www.youtube.com/watch?v=1NUZb9zircA
from jimmydiresta https://www.youtube.com/watch?v=1NUZb9zircA
2023年4月17日星期一
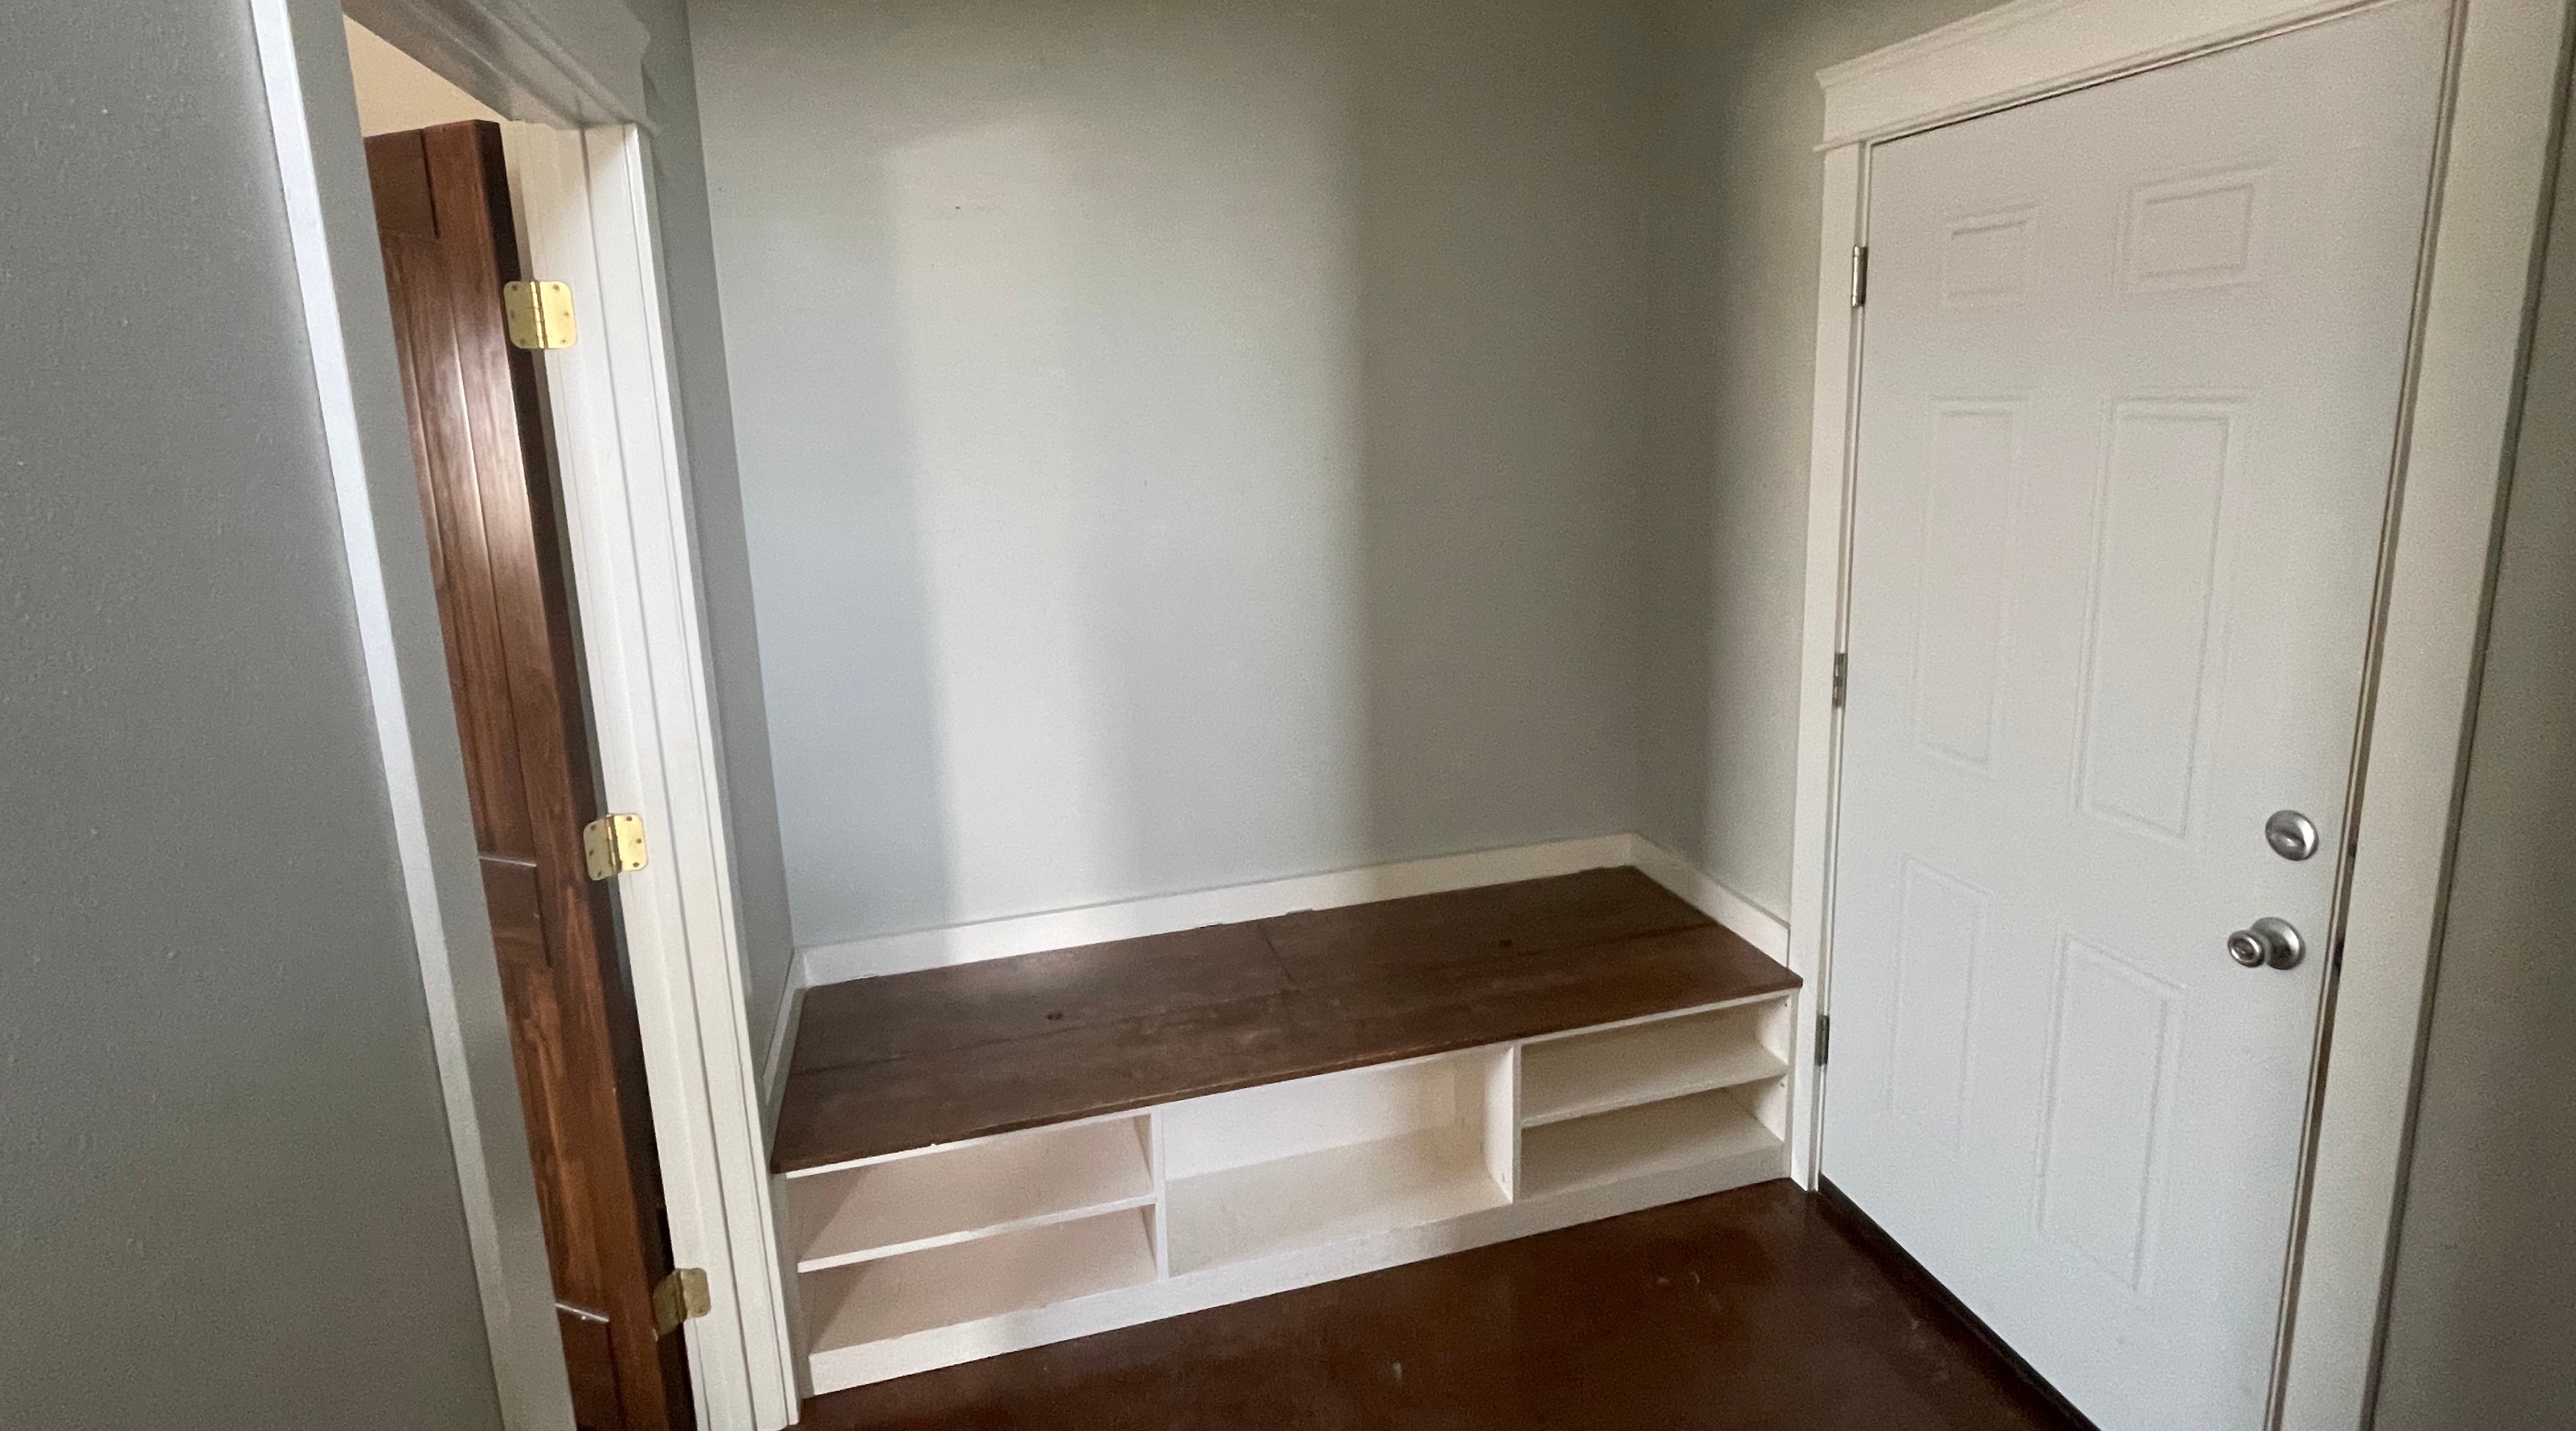
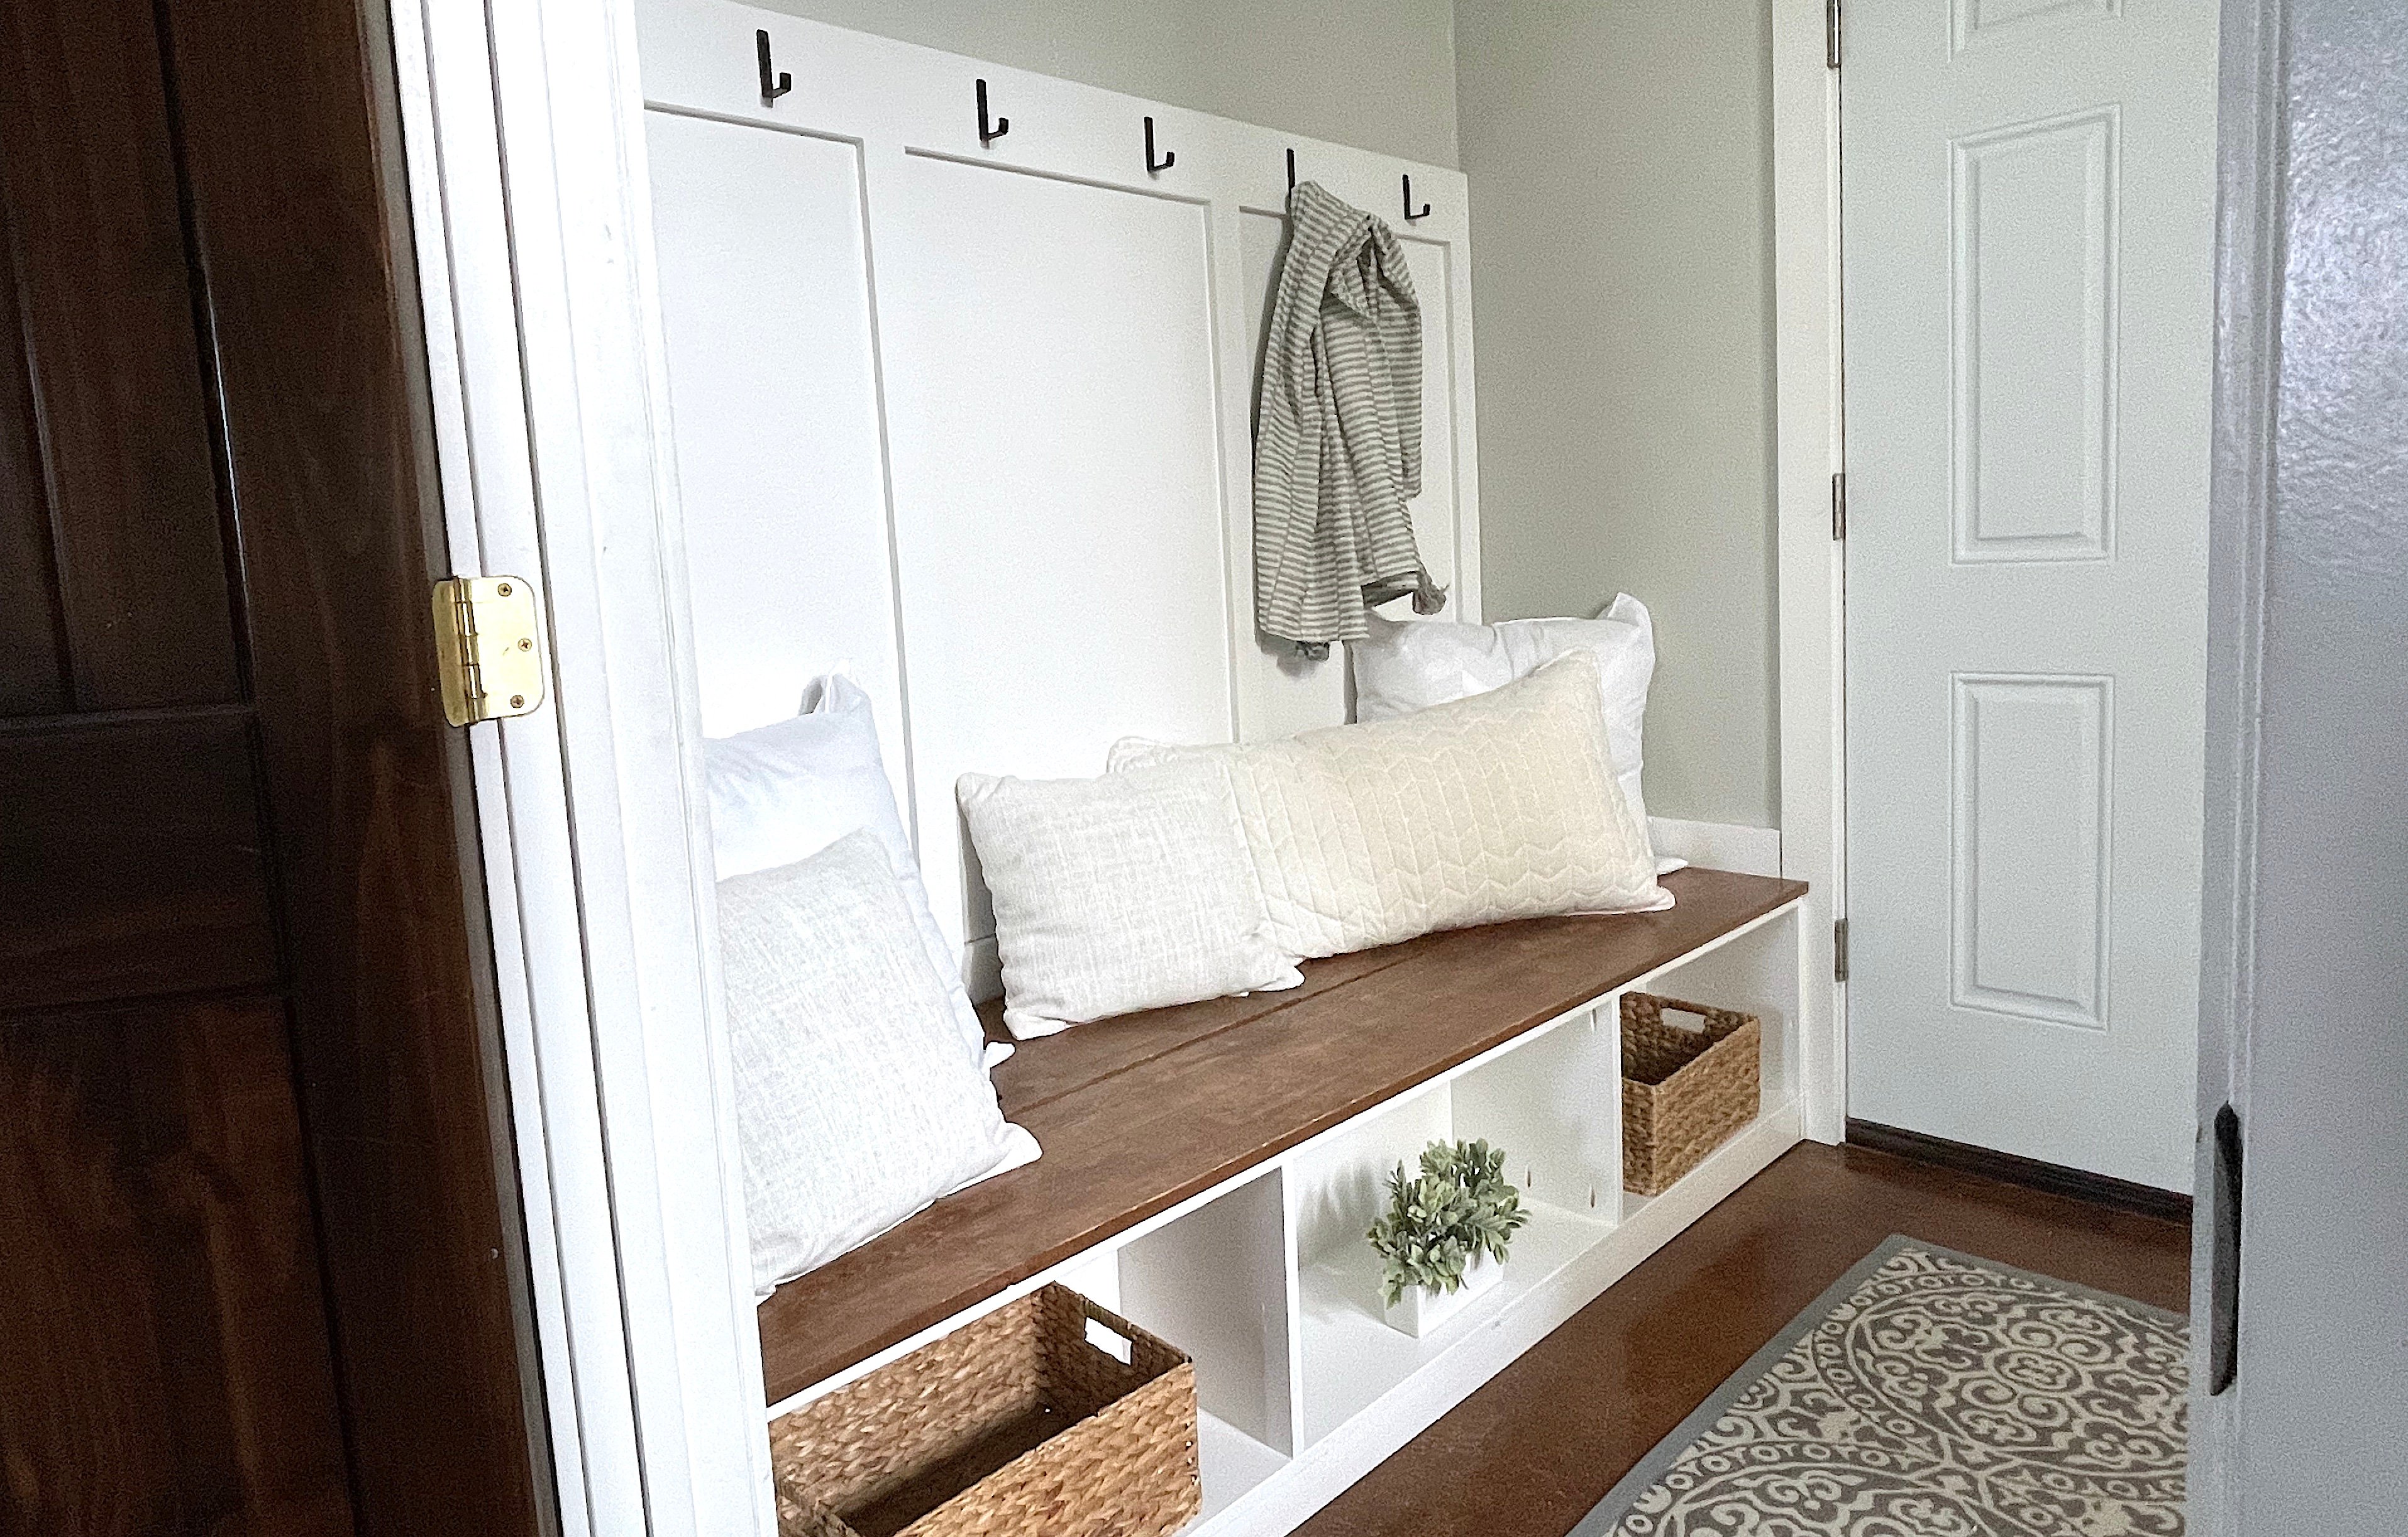
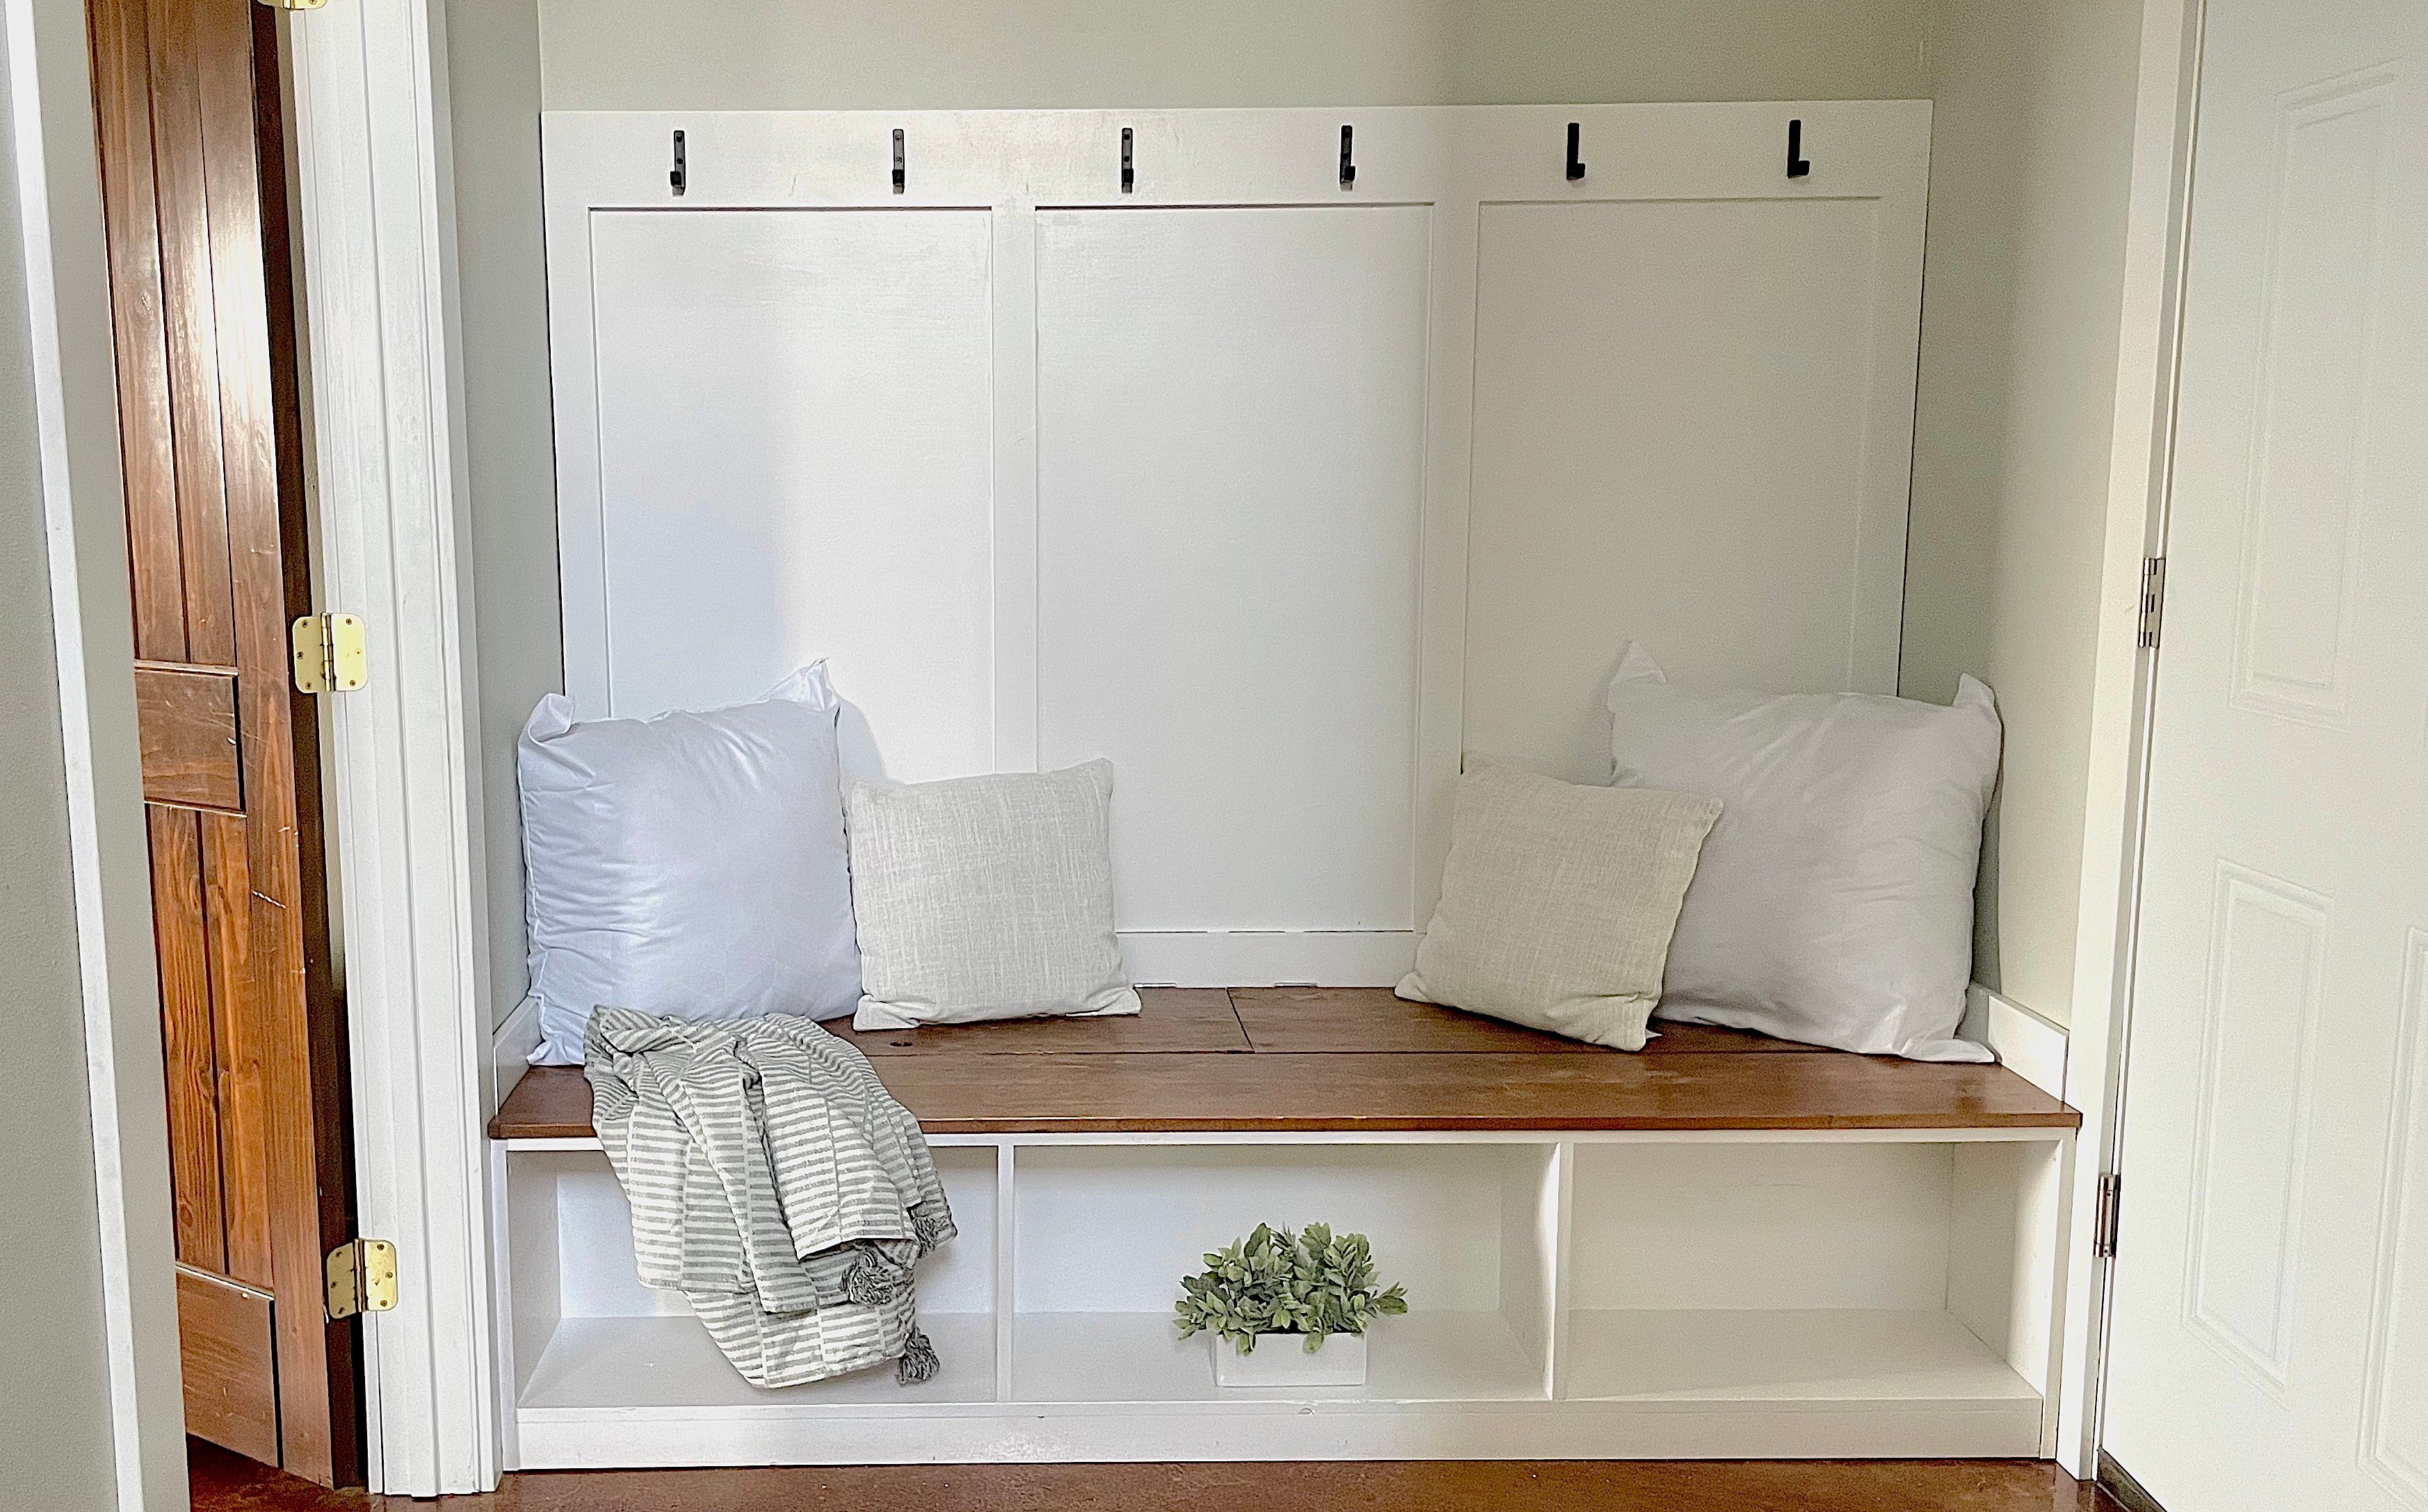
Board and Batten Panel for Entryway or Mudroom
A board and batten wall panel in the entryway or mudroom can add tons of storage and beauty, as well as durability.
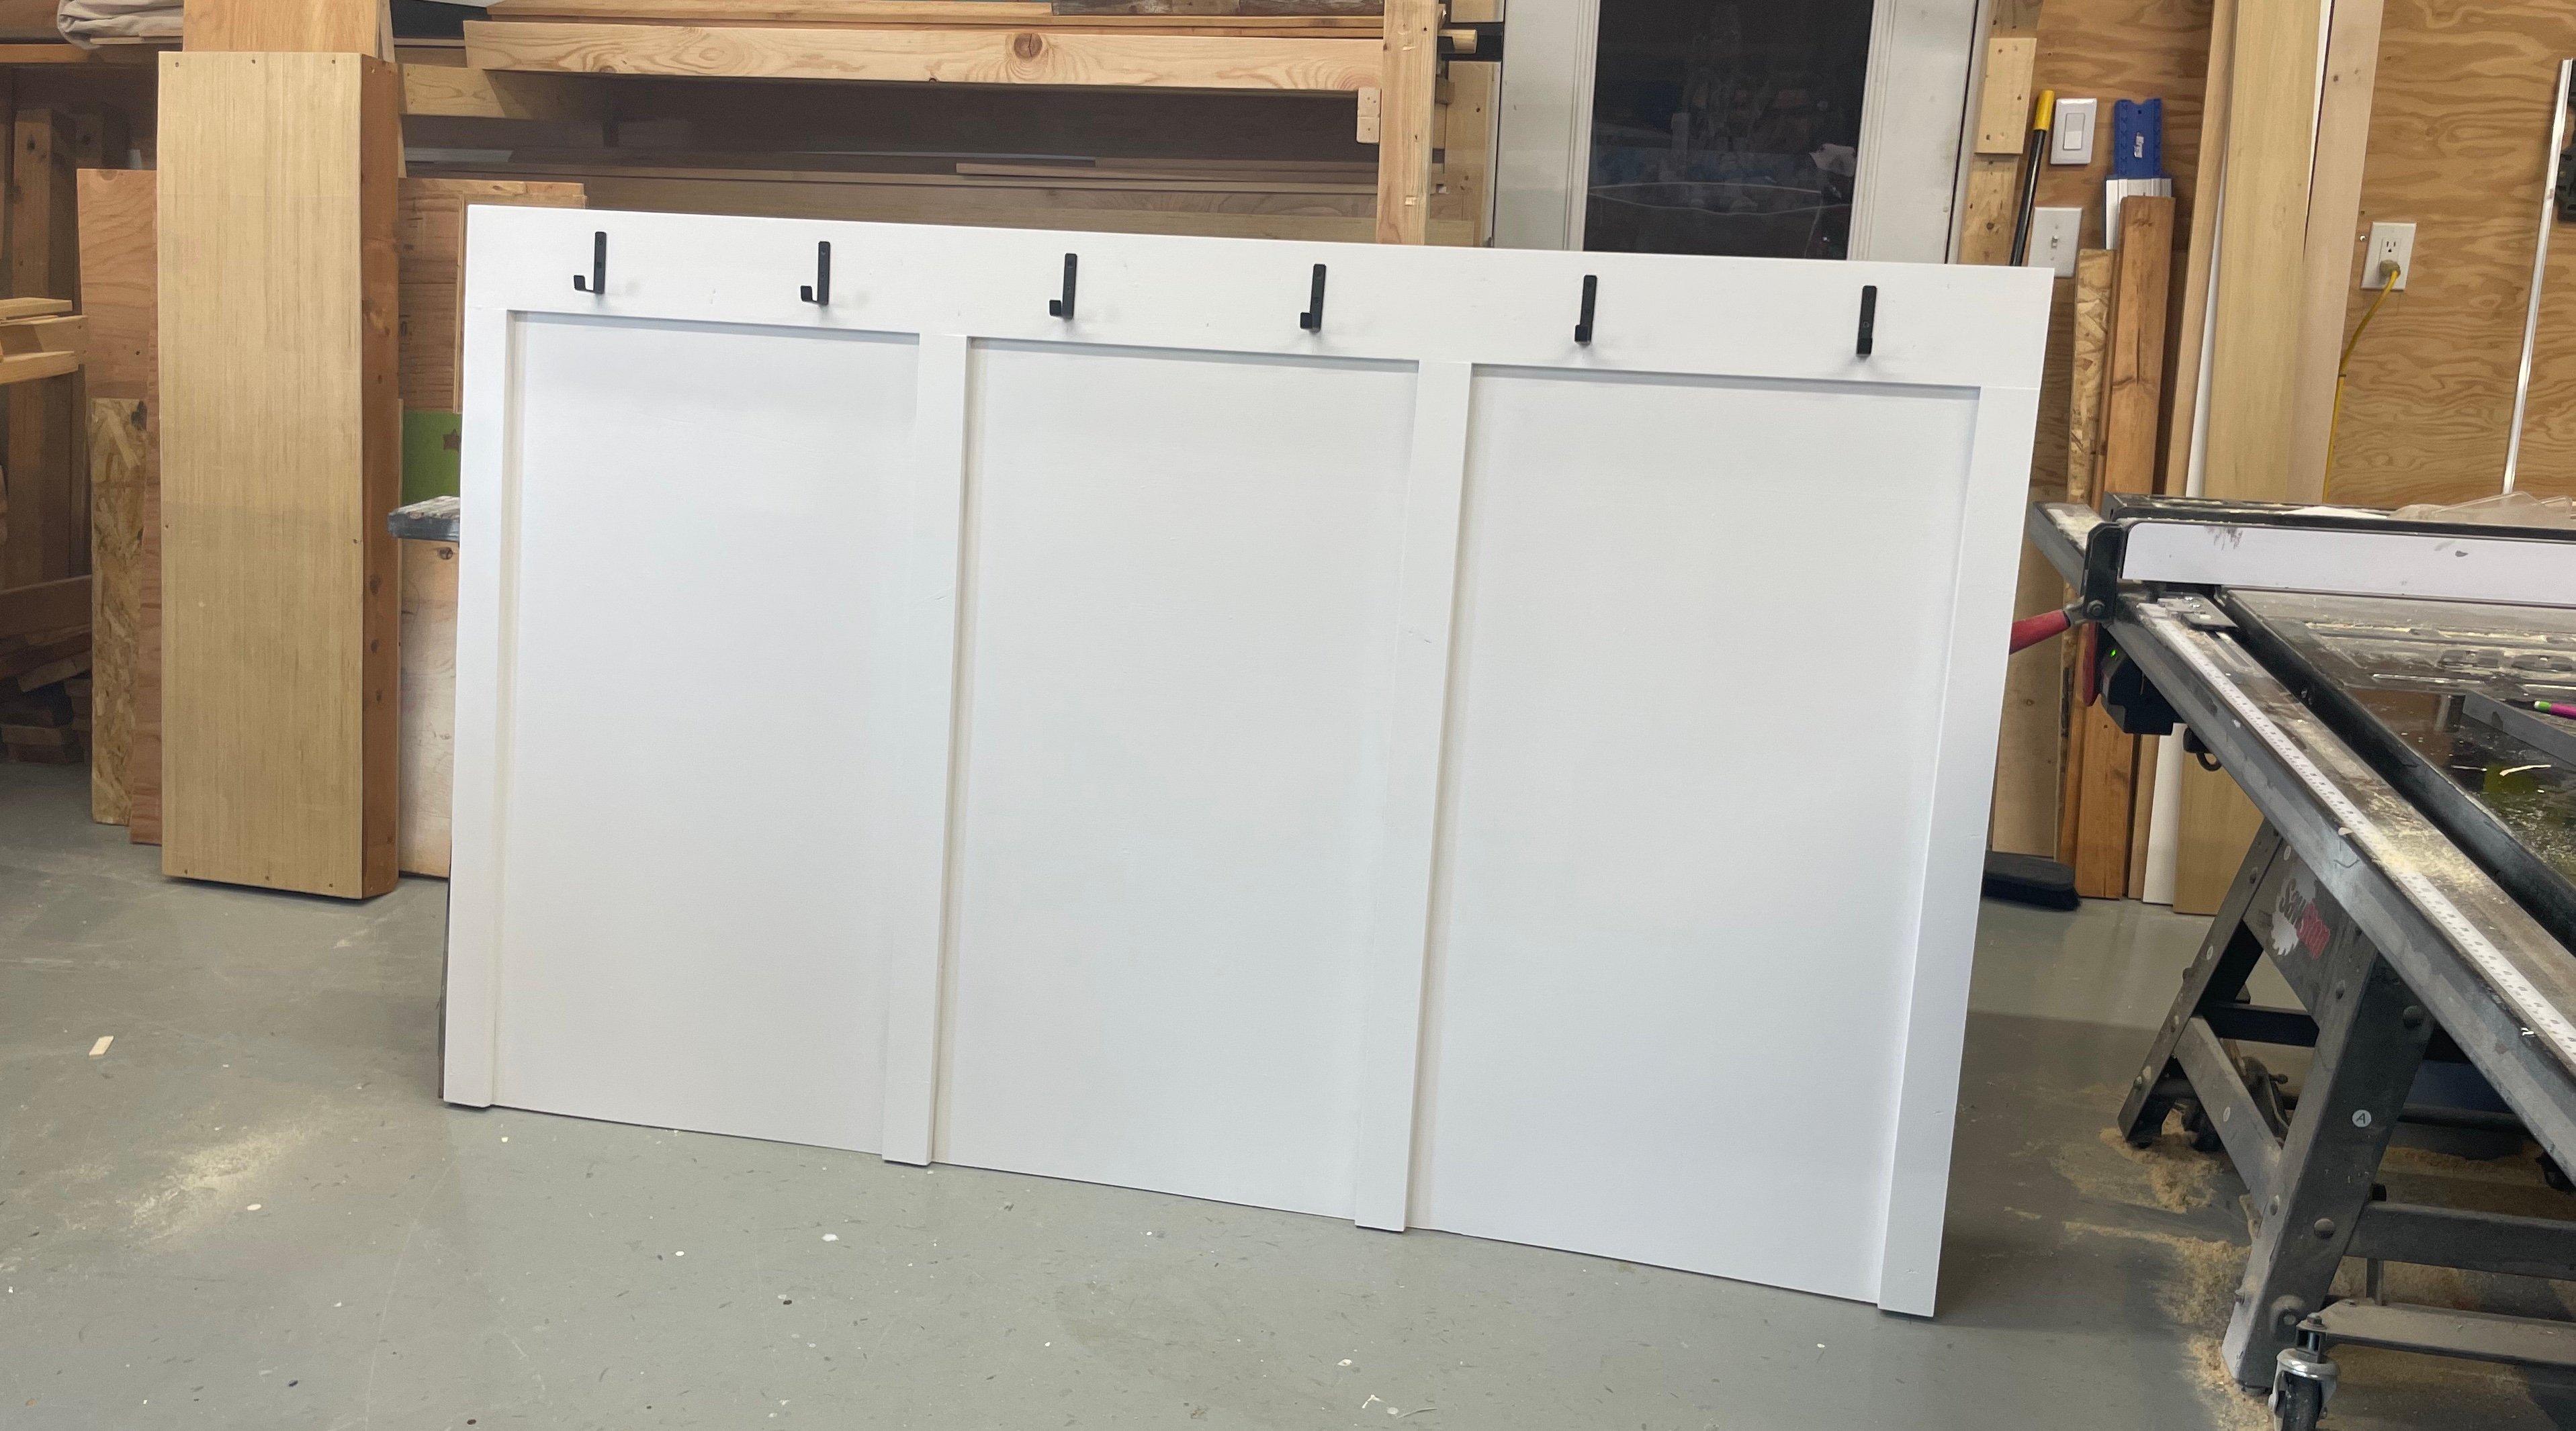
Here's how you can make this happen without a home remodel hassle: Build it first in the garage or outdoors, and install it as a completed panel.
Before
Pre-Built Panel in Garage
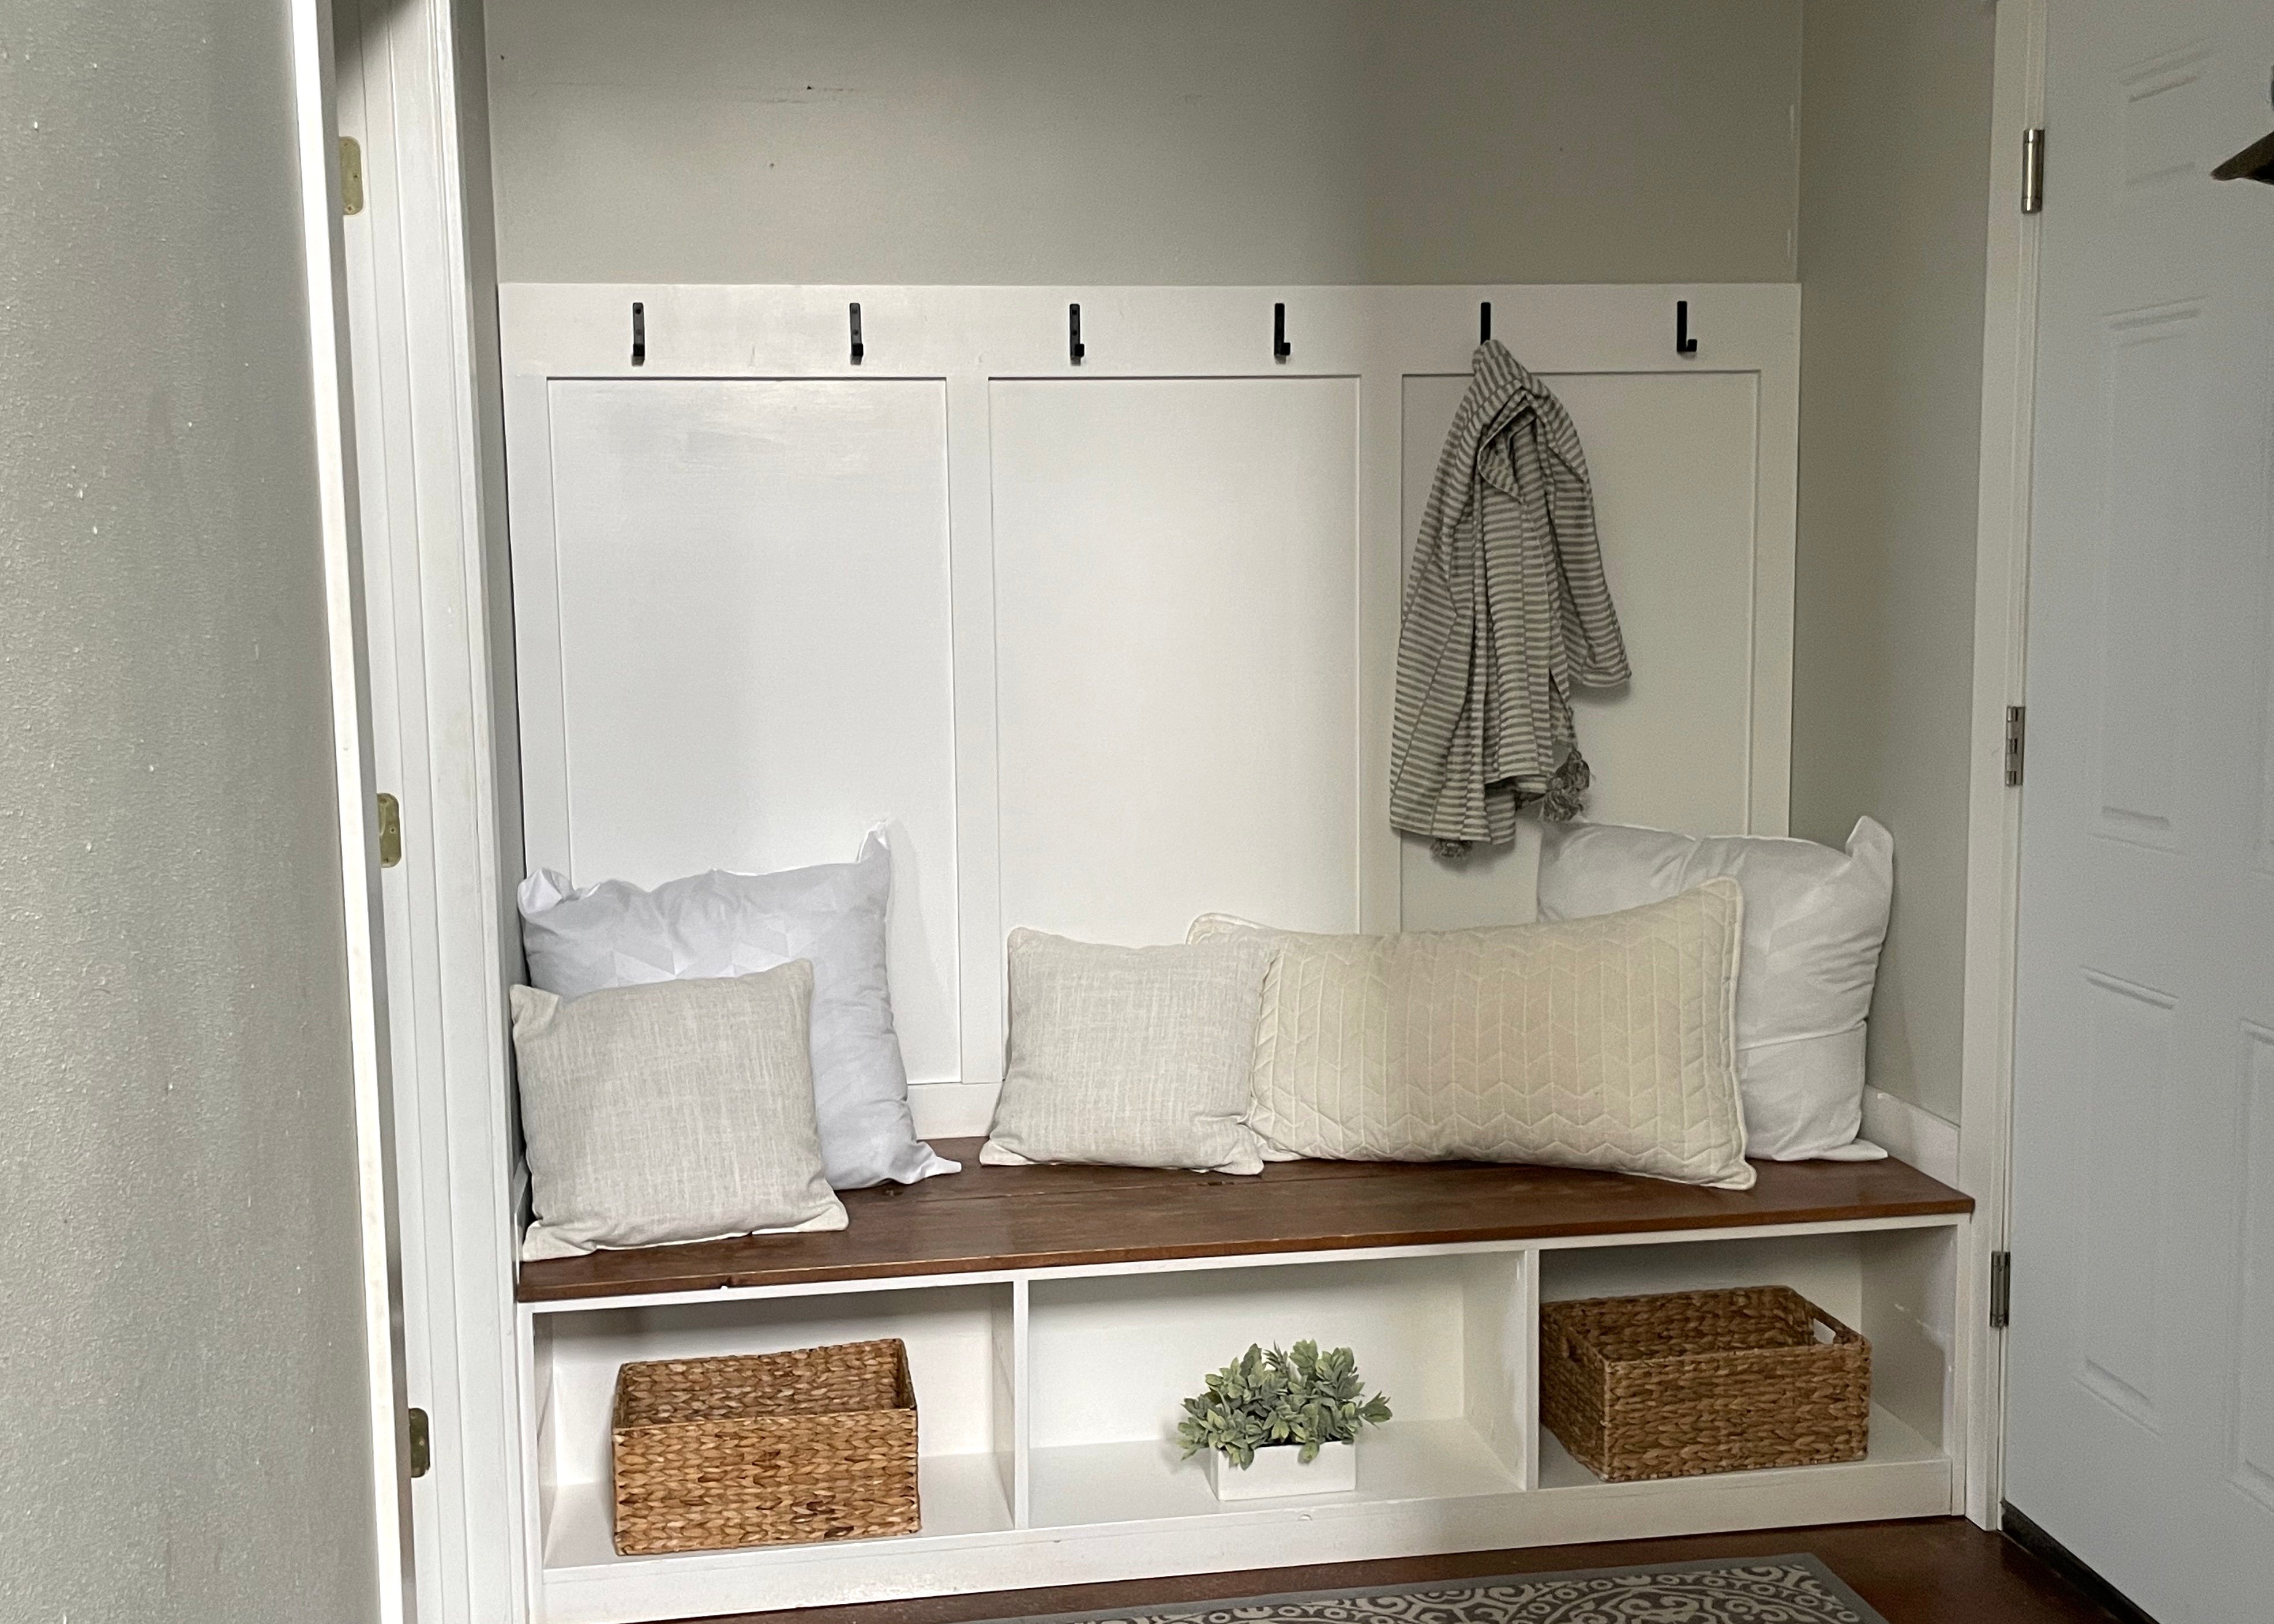
Hung on Wall in Mudroom/Entryway
Quick Video Showing Me Building This
I did a VERY quick video showing how I built this project, for those of you who like to see a project come together on video. Please take a moment to watch:
Tutorial for Entryway or Mudroom Board Batten Panel
This project is designed for you to make it your own for your space. Here's how I built it, and some tips to consider.
from Recent Project Plans https://ift.tt/2FCV7pE
2023年4月15日星期六
This used to be my 100 year old porch.
Get 15% off ALL Cardinal Boots & Accessories using code DIRESTA15. Expires 5/15/23 Shop Cardinal Boots: https://bit.ly/3JSYQDC Shop Accessories: https://bit.ly/3JTh9bJ Build Part one https://www.youtube.com/watch?v=f9lPaYC_-_Y&t=298s Thank you for watching my videos!! support me here https://ift.tt/CqHiDth
from jimmydiresta https://www.youtube.com/watch?v=z0PsjO0BQsE
from jimmydiresta https://www.youtube.com/watch?v=z0PsjO0BQsE
2023年4月14日星期五
Why start sooo THICK? ...for those dimensions at the end!
Check out this bandsaw build on how I made this cool toy horse.
from jimmydiresta https://www.youtube.com/watch?v=28BEQQApzV8
from jimmydiresta https://www.youtube.com/watch?v=28BEQQApzV8
2023年4月12日星期三
The BRAND Build – Shop Sign! #diresta
Here is a short of me making the IMake Brand sign for the shop – Enjoy!
from jimmydiresta https://www.youtube.com/watch?v=YOv3CuBbfAM
from jimmydiresta https://www.youtube.com/watch?v=YOv3CuBbfAM
2023年4月11日星期二
You REALLY square? Watch this Bandsaw Tip!
A quick bandsaw tip to make sure that you are all square when making your cuts!
from jimmydiresta https://www.youtube.com/watch?v=oUv6UC2lGHQ
from jimmydiresta https://www.youtube.com/watch?v=oUv6UC2lGHQ
2023年4月10日星期一
Tongue and Groove Ottoman Tray
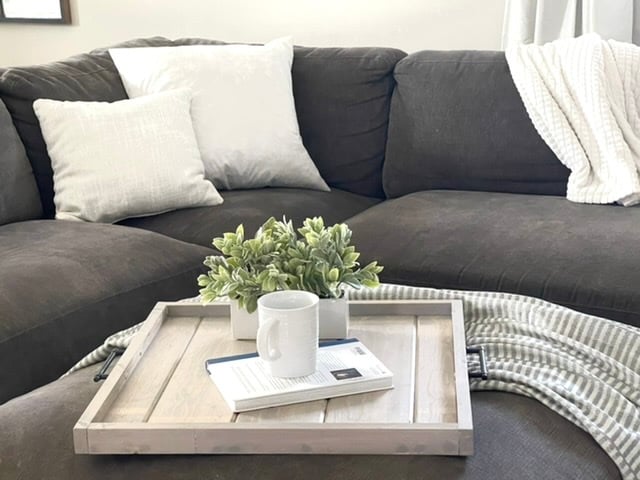
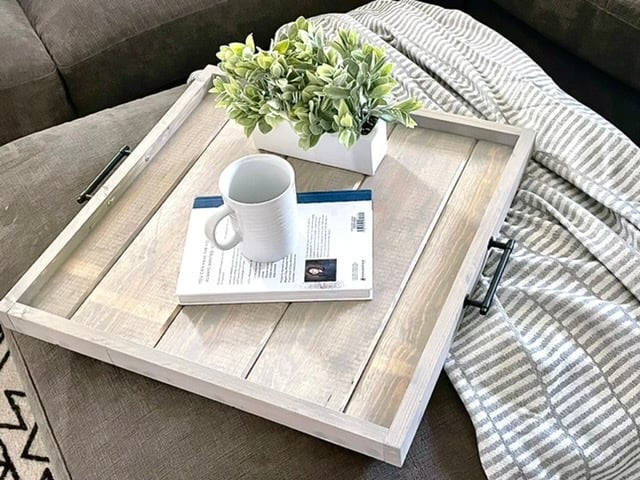
How to Build this Ottoman Tray - Video Tutorial
from Recent Project Plans https://ift.tt/yuNpcat
2023年4月9日星期日
Bandsaw MISTAKE… don’t do it – Do this! #diresta
Here is a fool proof way to get out of a very common mistake that people make when working with a bandsaw!
from jimmydiresta https://www.youtube.com/watch?v=LfT5ZWC_Bjo
from jimmydiresta https://www.youtube.com/watch?v=LfT5ZWC_Bjo
2023年4月8日星期六
9 mistakes beginners make at the bandsaw. What to do instead.
Ive been using a bandsaw for nearly 50 years. I made nearly all the mistakes. in this video I show the biggest ones and how to do better. please post your bandsaw tips below! thank you for the love and support! Merch https://imakeny.com support me here https://ift.tt/XiHaVy4
from jimmydiresta https://www.youtube.com/watch?v=WaTC1sNTHuE
from jimmydiresta https://www.youtube.com/watch?v=WaTC1sNTHuE
2023年4月7日星期五
Big Kids Picnic Table Plans
Build photo submitted by Fethiye
Our most loved kids picnic table, this one is suitable for exterior use, and can be used by big kids (and even small adults). The 2x construction makes it durable and heavy - so it won't blow away in the wind.
We have many other free picnic table plans:
- Essential Picnic Table (standard sized)
- Long Picnic Table (double length)
- Little Kids Picnic Table (smaller sized with 1x construction, can be brought indoors too)
- See all picnic table plans here
How to Build It - Ana White Picnic Table Video Tutorial
Watch this super quick video tutorial to help you visualize how to build this picnic table.
from Recent Project Plans https://ift.tt/LmjNI30
2023年4月6日星期四
Recycled Wood… into a GREAT SHOP TOOL!
Check out this woodworking mallet build from old recycled wood – Enjoy!
from jimmydiresta https://www.youtube.com/watch?v=loYCAFYBjso
from jimmydiresta https://www.youtube.com/watch?v=loYCAFYBjso
2023年4月4日星期二
“S” Times New Roman Alphabet Series... #BandsawCowboy #diresta
“S” up next in my alphabet bandsaw build series – Enjoy!
from jimmydiresta https://www.youtube.com/watch?v=092RY7YfrQ0
from jimmydiresta https://www.youtube.com/watch?v=092RY7YfrQ0
2023年4月2日星期日
“R” Times New Roman Alphabet Series...
“R” is rounding the home stretch in my alphabet bandsaw build series – Enjoy!
from jimmydiresta https://www.youtube.com/watch?v=-RTk5wnbcGI
from jimmydiresta https://www.youtube.com/watch?v=-RTk5wnbcGI
2023年4月1日星期六
I built a scale model of my shop to make a $100,000 decision!
In this video I make a scale model of my dream shop to study the plan to build a second floor! The build scale is 1/2” = 1 foot. The shop is 40’ x 72’ I used Titebond wood glue and Titebond CA glue with accelerator to move through the build. Thank you Titebond: http://www.titebond.com
from jimmydiresta https://www.youtube.com/watch?v=SlE5fE1wAr8
from jimmydiresta https://www.youtube.com/watch?v=SlE5fE1wAr8
订阅:
博文 (Atom)