2023年12月13日星期三

Rustic Farmhouse Round Coffee Table

Watch - How I Built this Coffee Table

From cutting the round tabletop to making the angled base, in this video you'll see how this rustic farmhouse coffee table is built.

More Plans in this Collection

I liked this coffee table so much, I went on to build the end table, and hopefully more plans in this collection!

Rustic farmhouse coffee table and end table

Here's the plans I've built so far:

Rustic Farmhouse End Table Plans


Free Plans to Build Your Own Round Rustic Farmhouse Coffee Table


from Recent Project Plans https://ift.tt/oYTZeW7

Rustic Farmhouse Round End Table

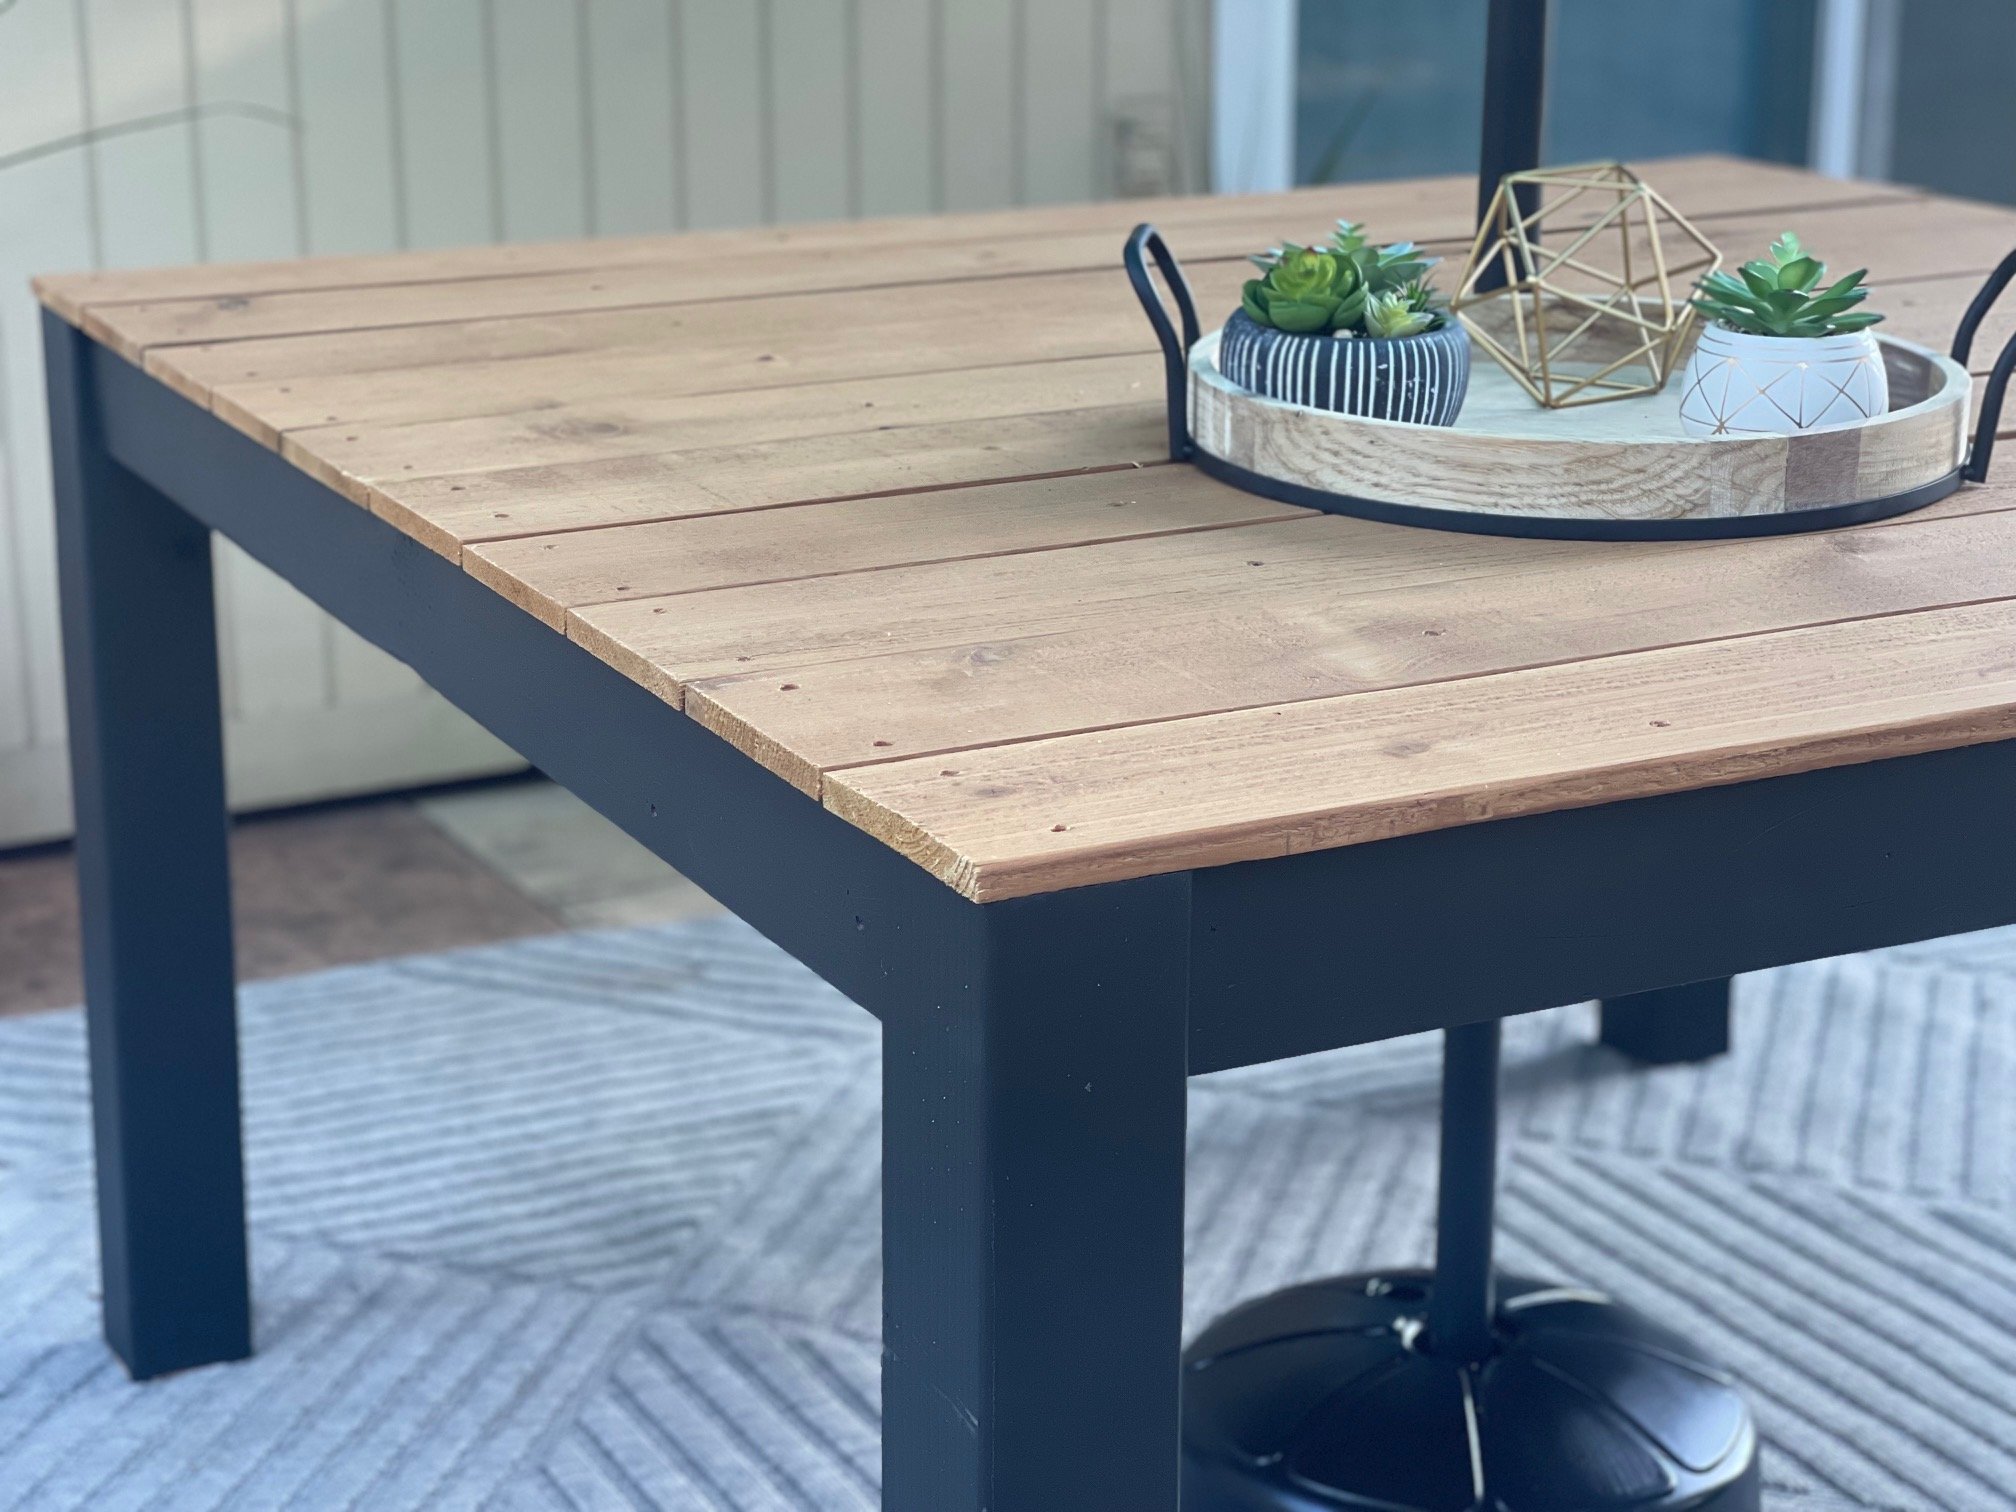
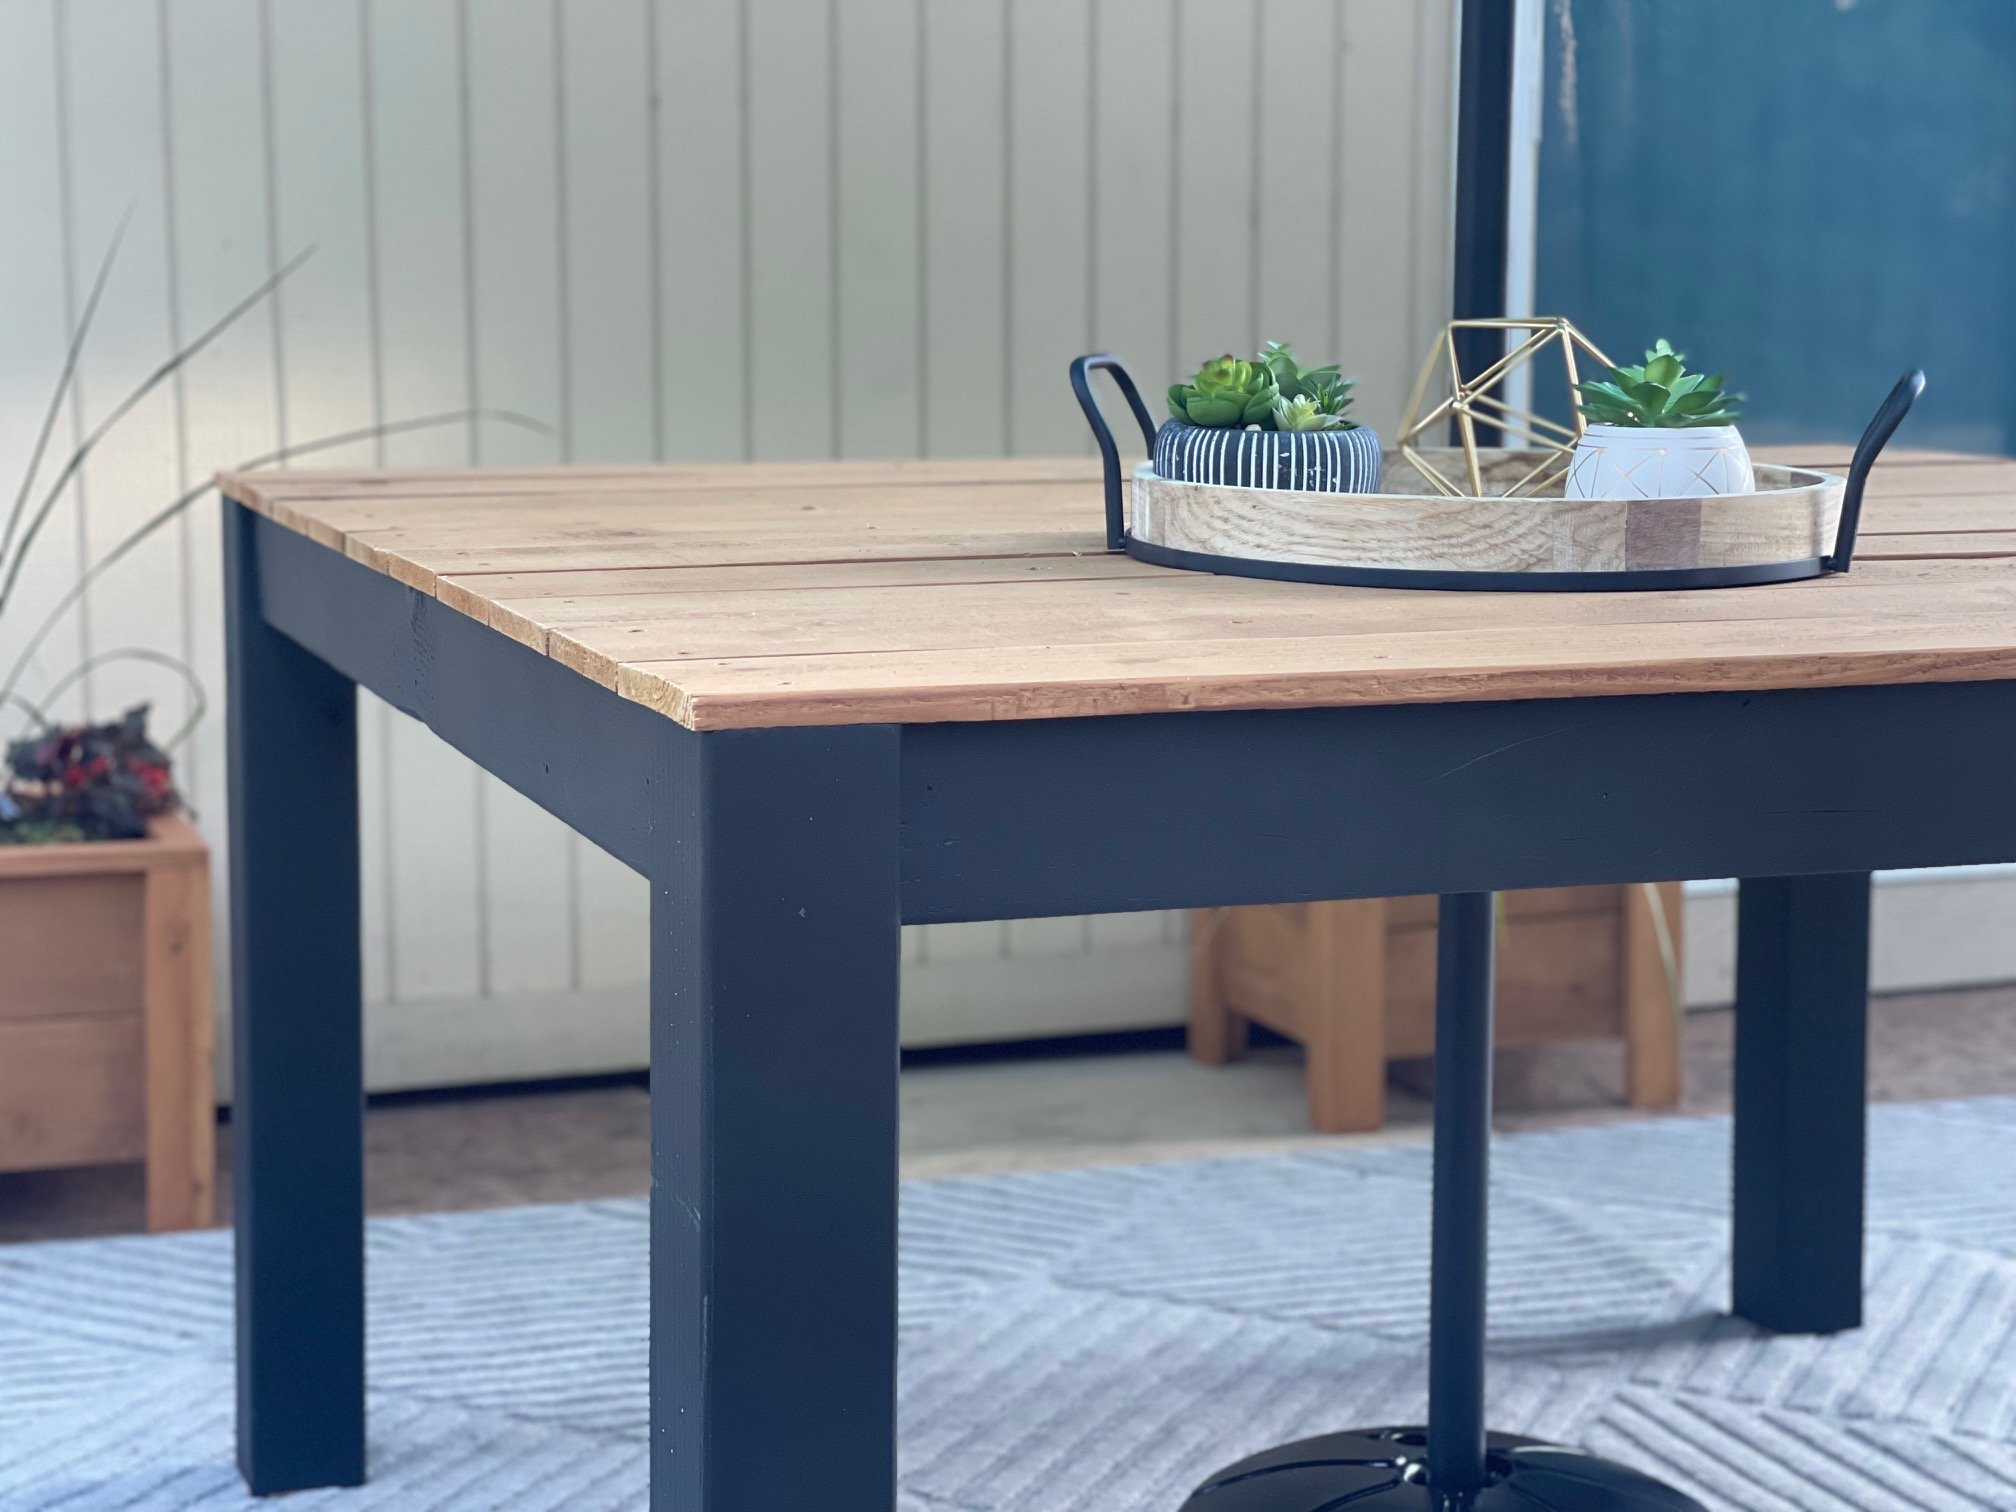
Building the Round Top of this Rustic Farmhouse End Table

Here's how I built the round top for this end table.

rustic farmhouse end table pottery barn knock off

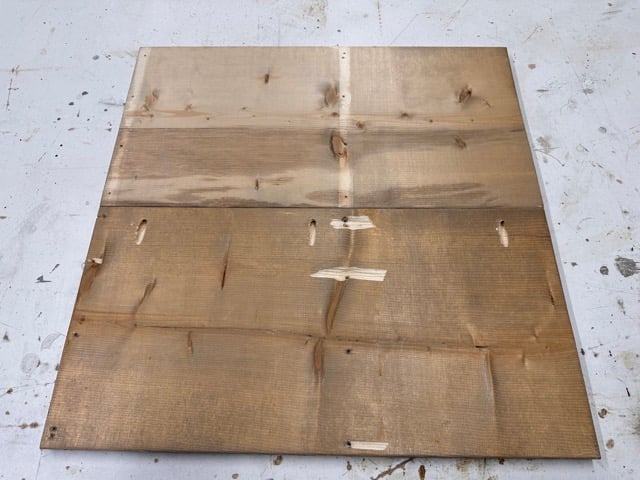
First, joint two 1x12 boards together using pocket holes to make the tabletop boards.  Avoid screws where the saw will cut into when cutting the circle. NOTE: I am using reclaimed 1x12 boards.

rustic farmhouse end table pottery barn knock off

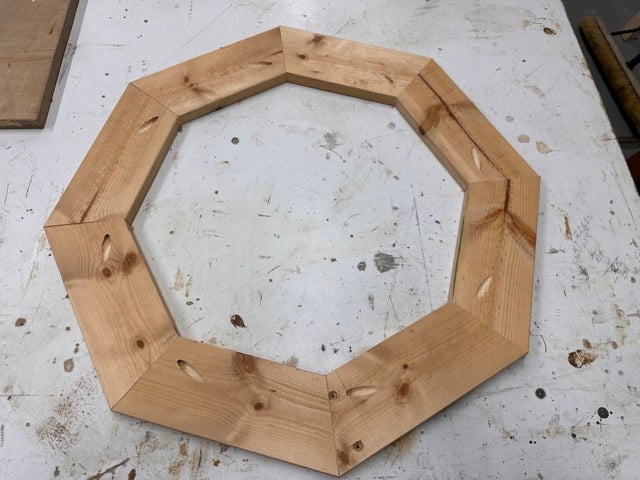
Then, build the octagon apron for under the tabletop.  Avoid screws where the saw blade will cut into when cutting the circle.

rustic farmhouse end table pottery barn knock off

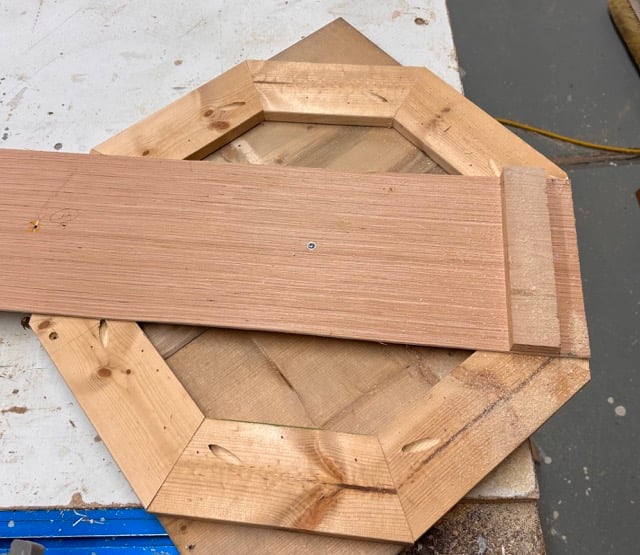
Attach the octagon apron to the underside of the 1x12s with brad nails and glue - avoid nails where the saw blade will cut into when cutting the circle.

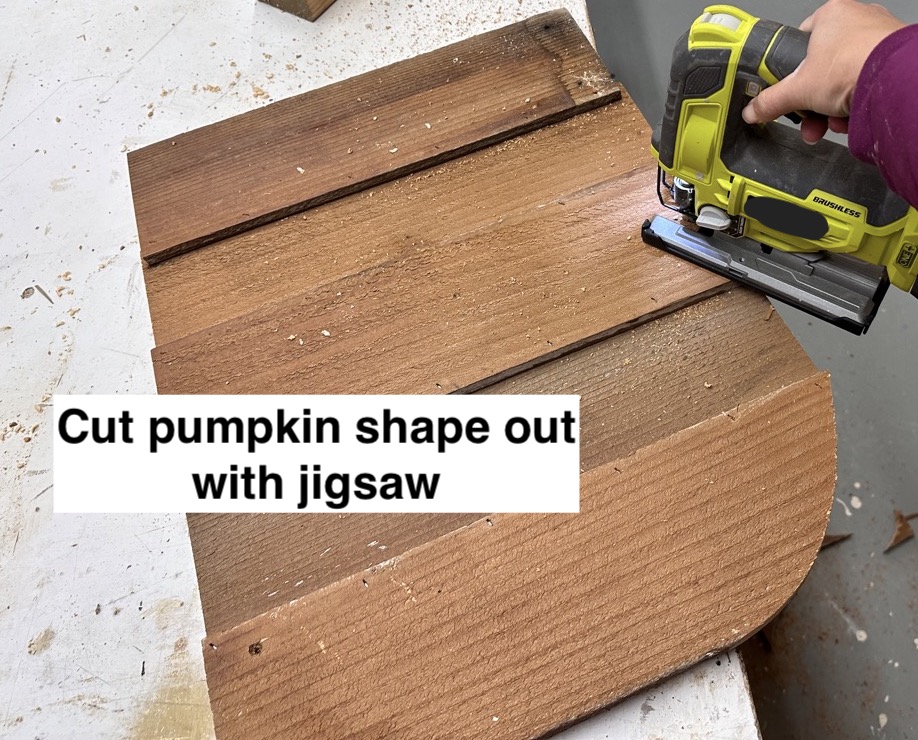
Use the circle jig to cut the tabletop into a circle.

rustic farmhouse end table pottery barn knock off

After cutting the tabletop into a circle, add more screws or nails to the underside of the apron as needed to tighten the apron to the tabletop boards.

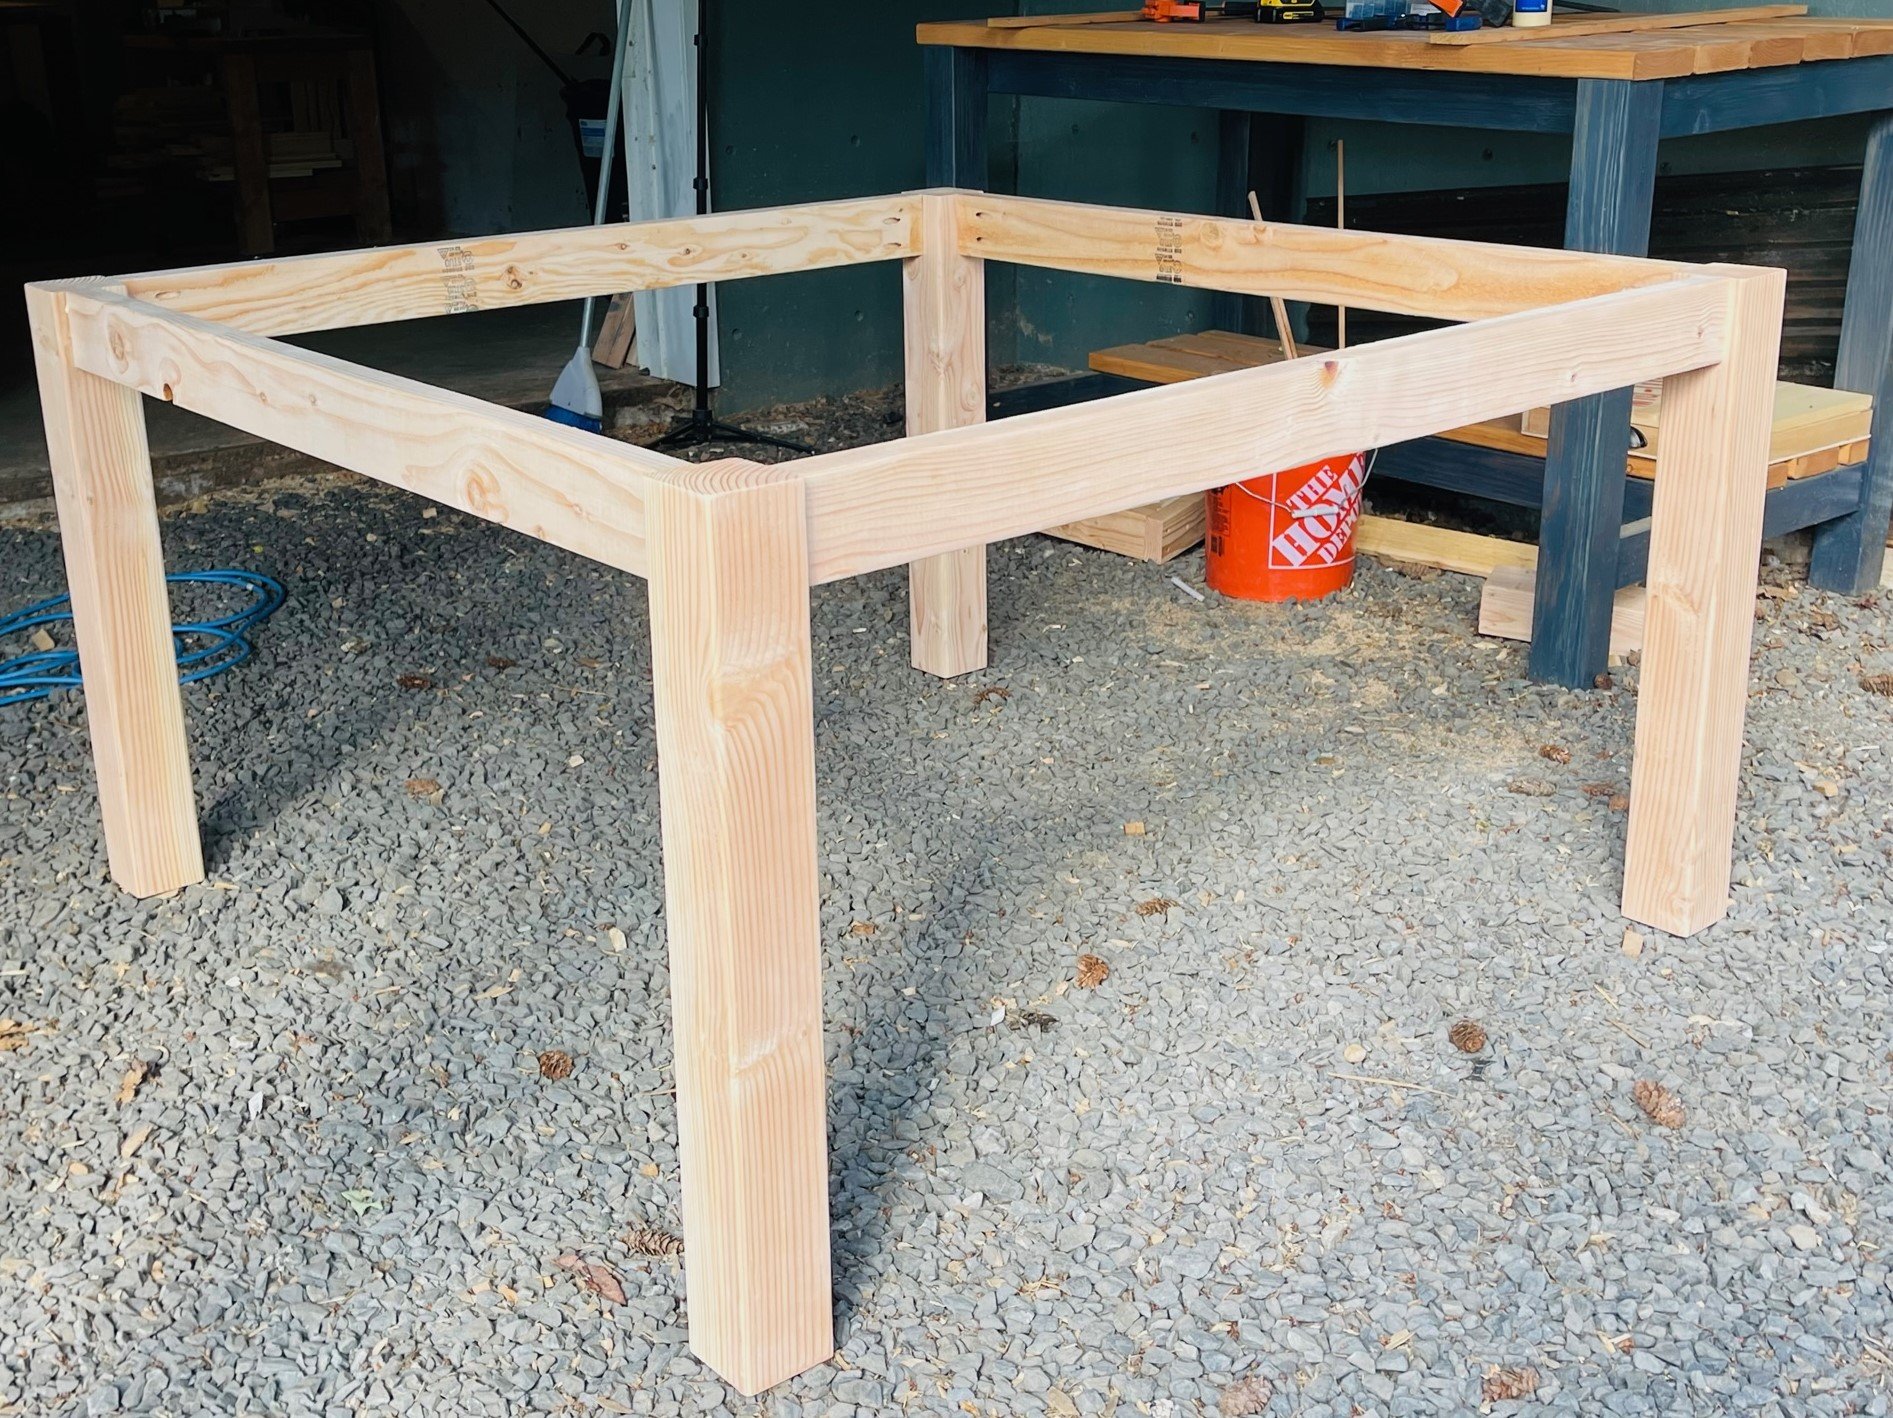
Building the Base of this Rustic Farmhouse End Table

Once the top is done, I can now work on the base.

rustic farmhouse end table pottery barn knock off

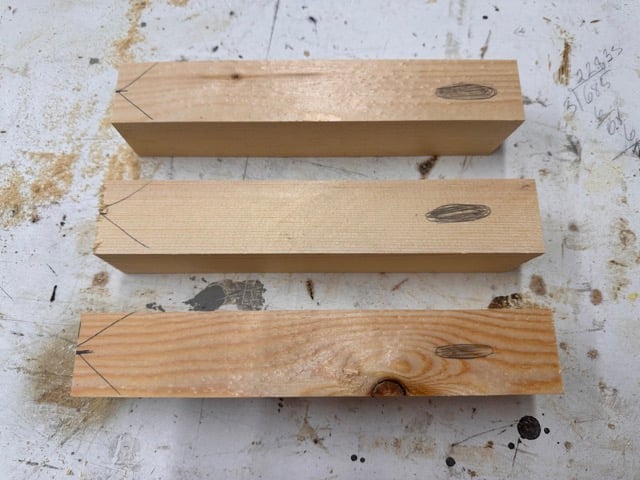
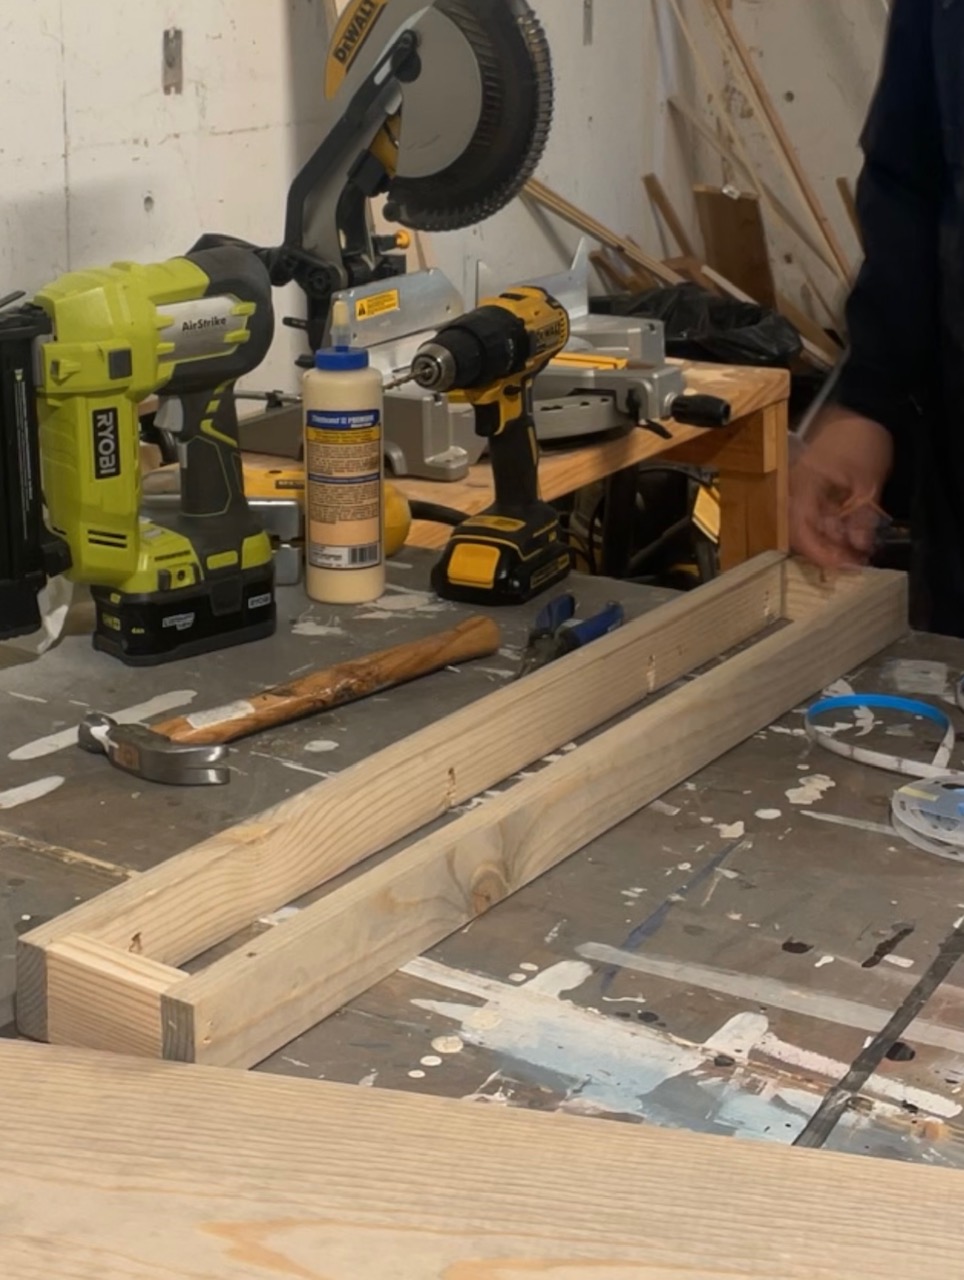
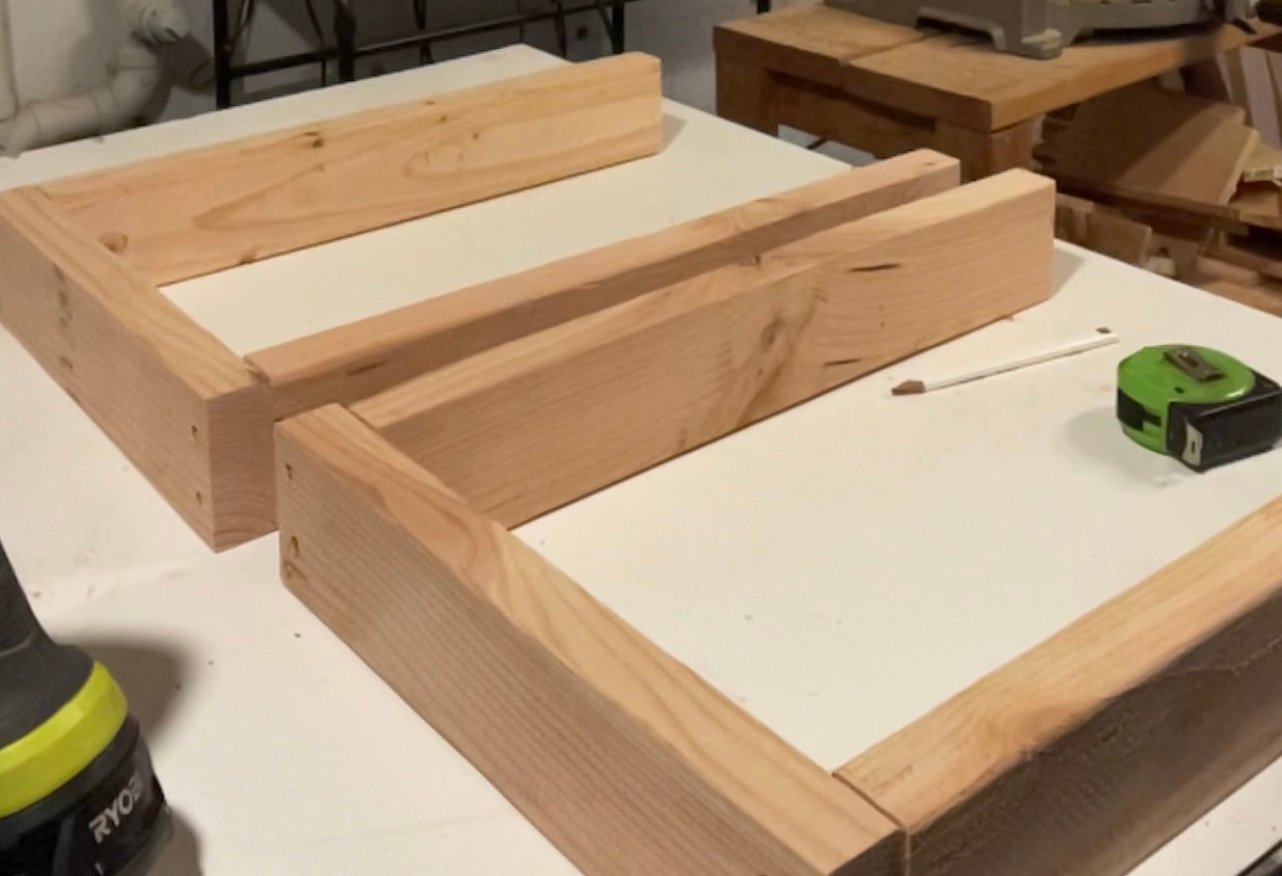
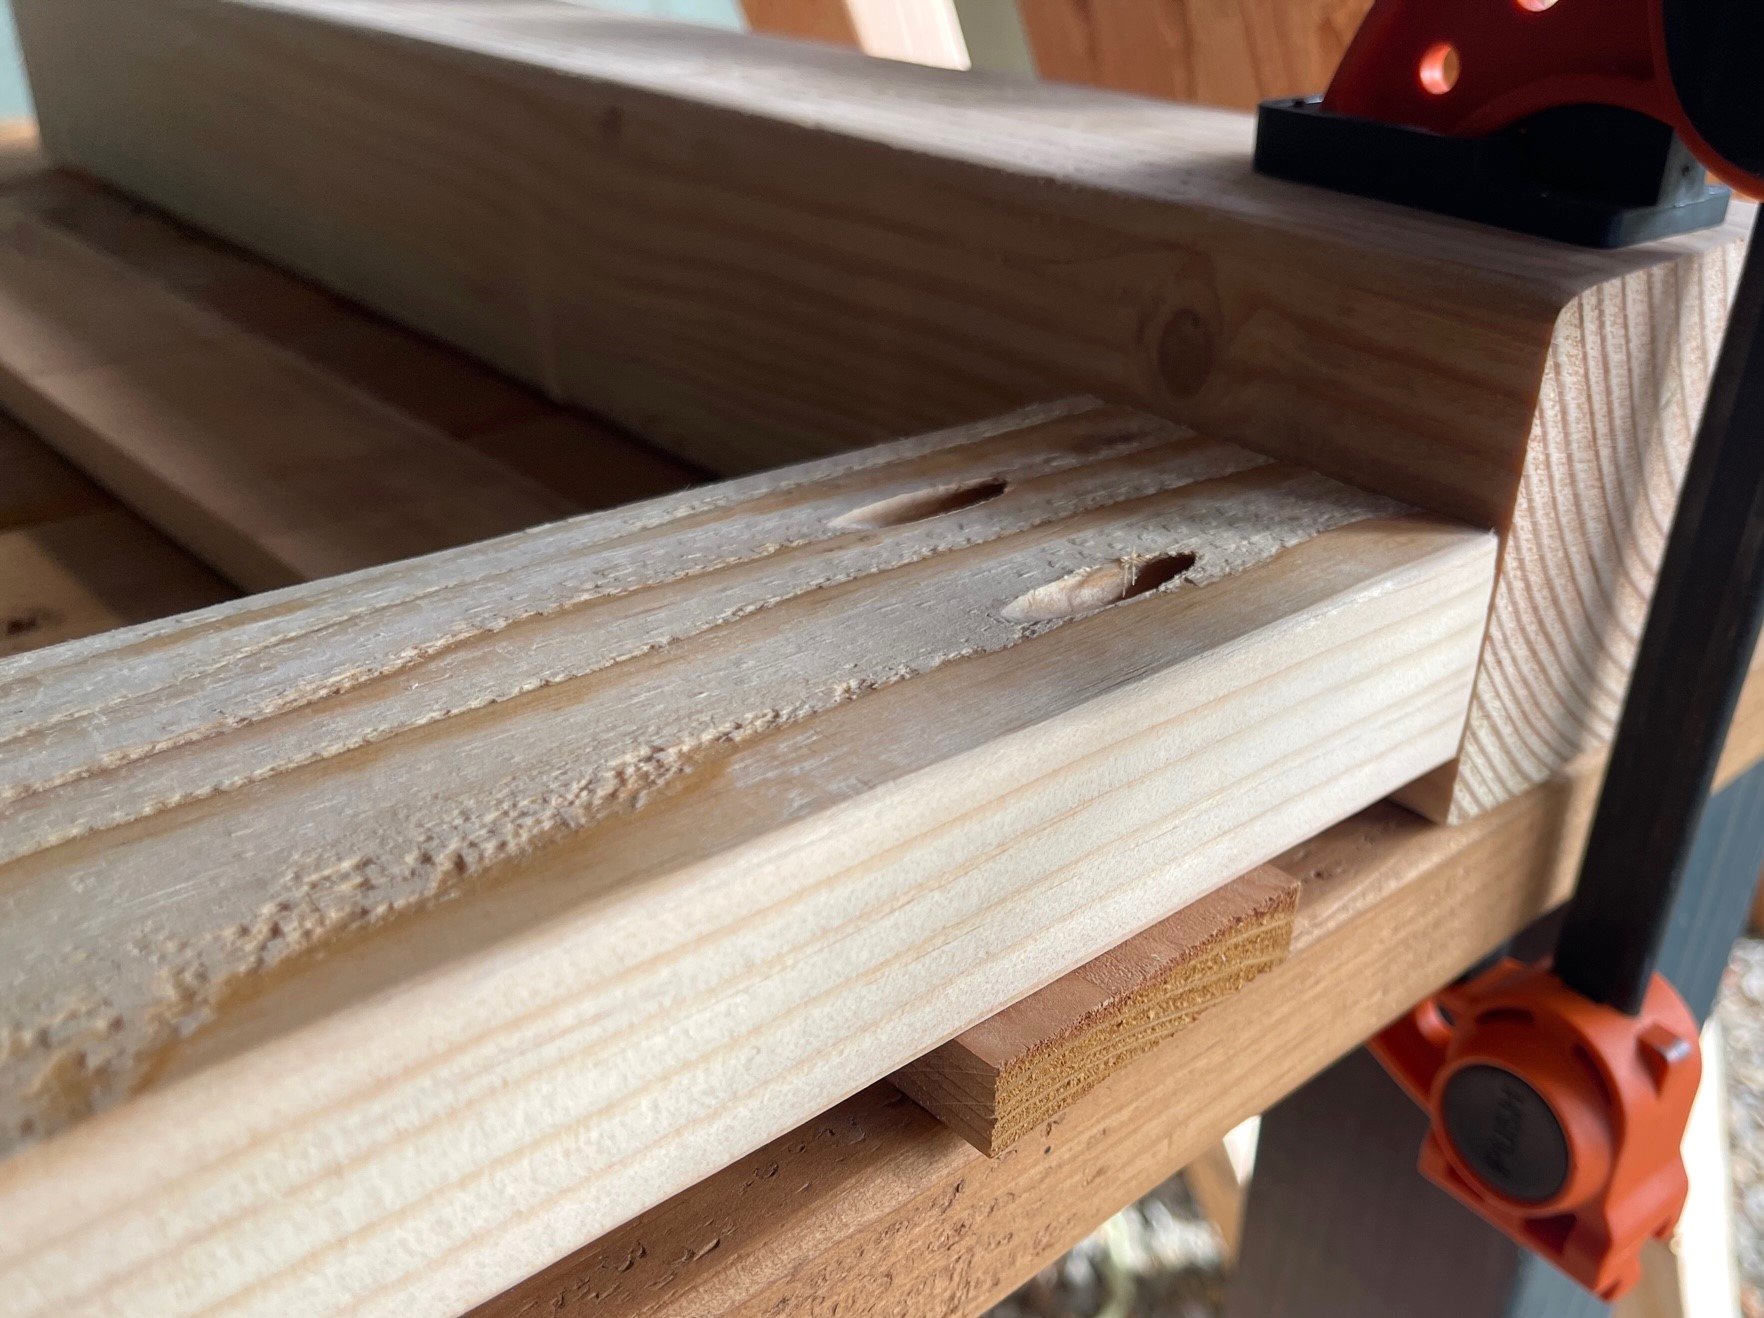
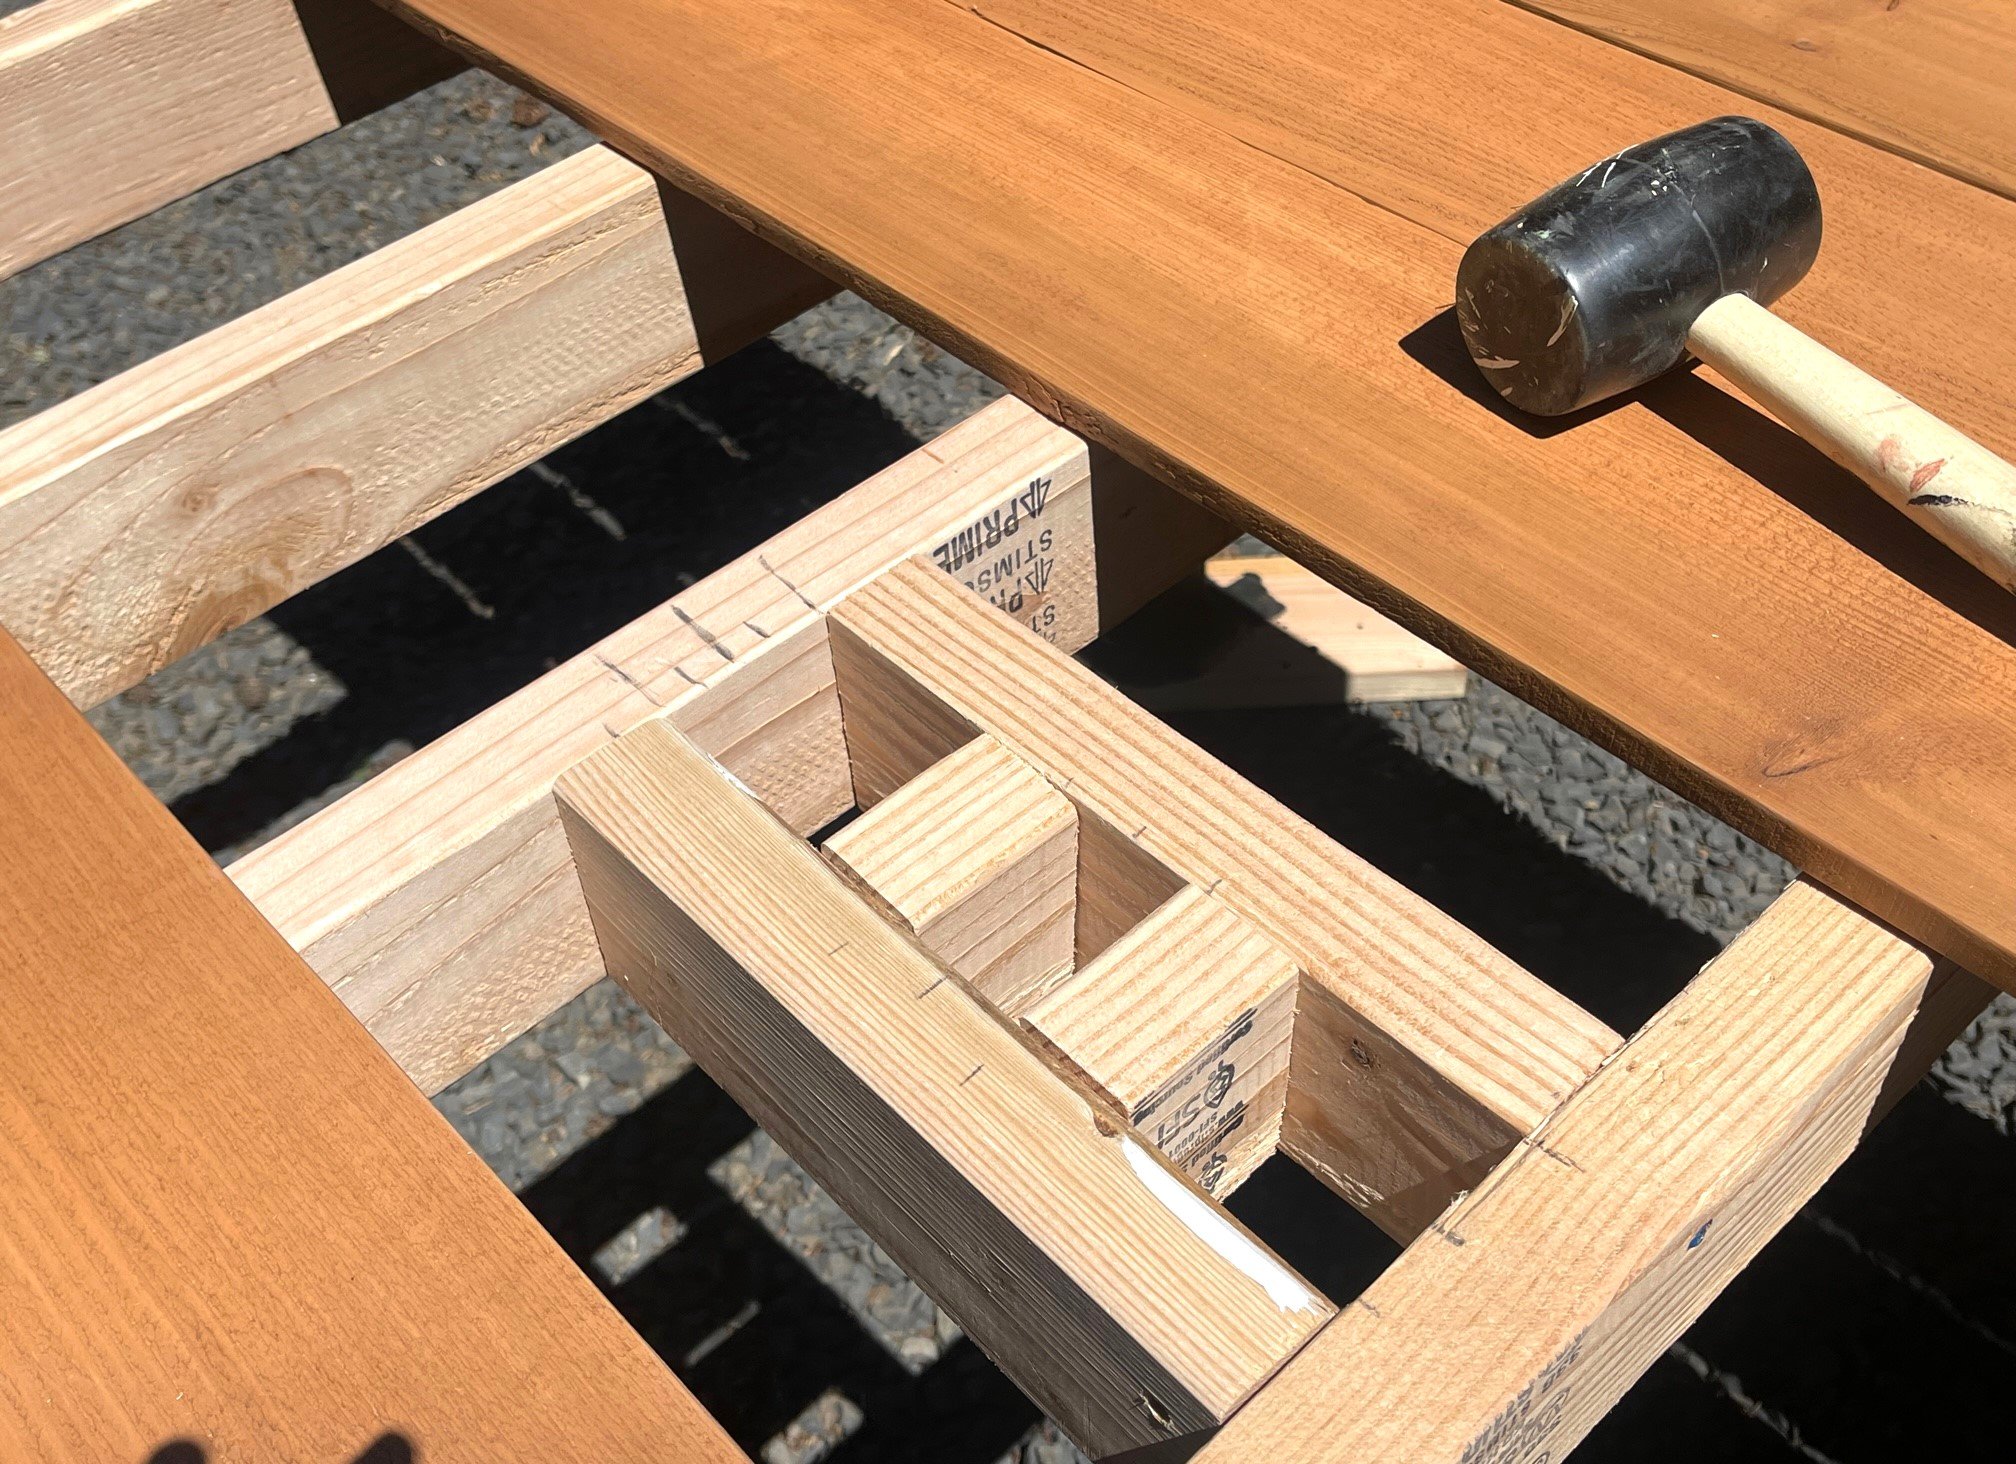
For the small triangle stretcher pieces, I mark out the pocket hole and the end angles first, then carefully prepared using a miter saw.

rustic farmhouse end table pottery barn knock off

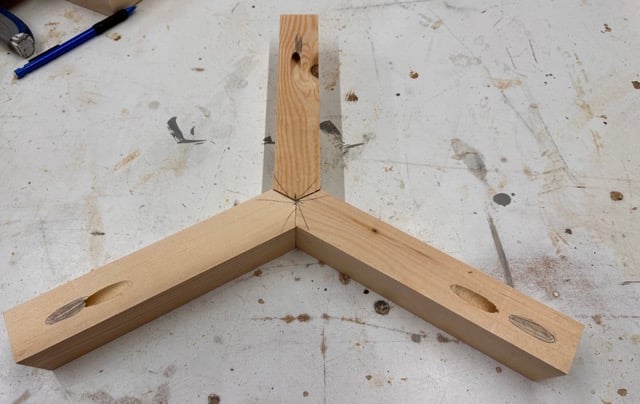
Then I joined the three boards together to make the center stretcher, using glue and 2" trim screws.

rustic farmhouse end table pottery barn knock off

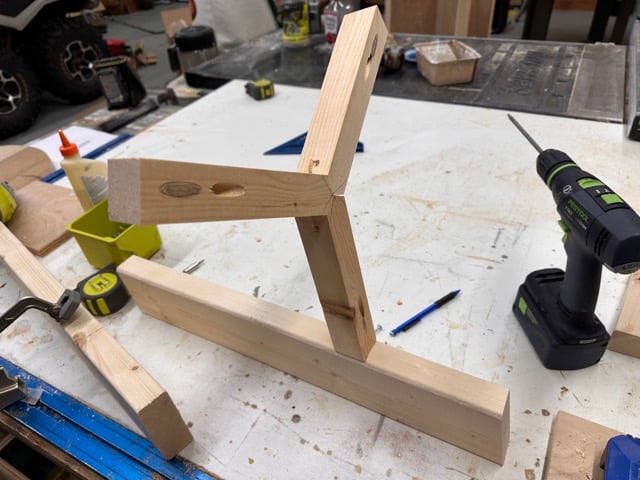
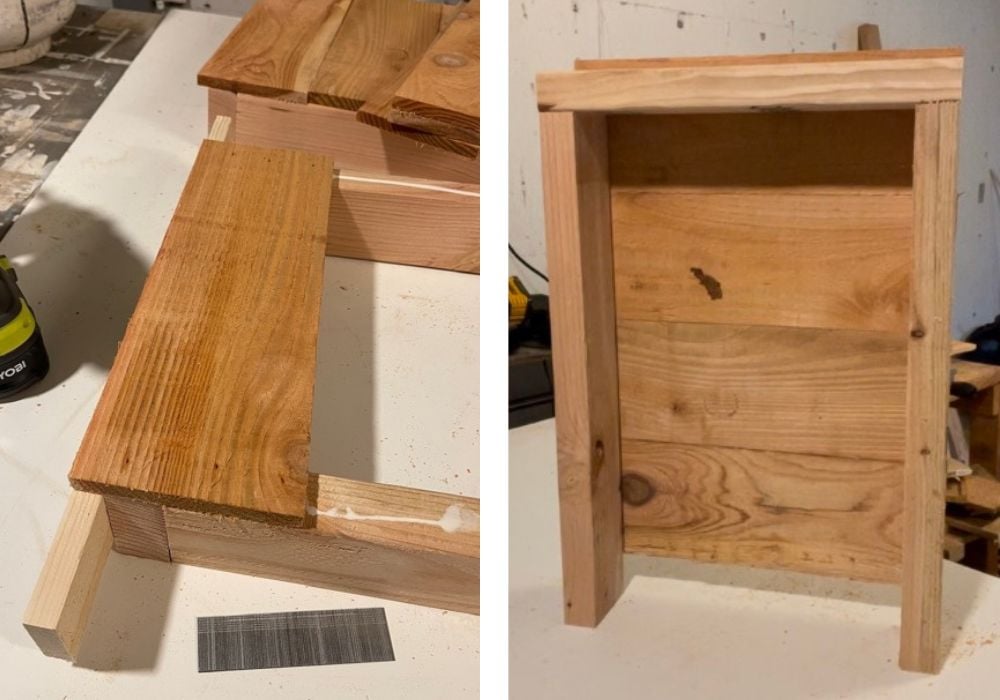
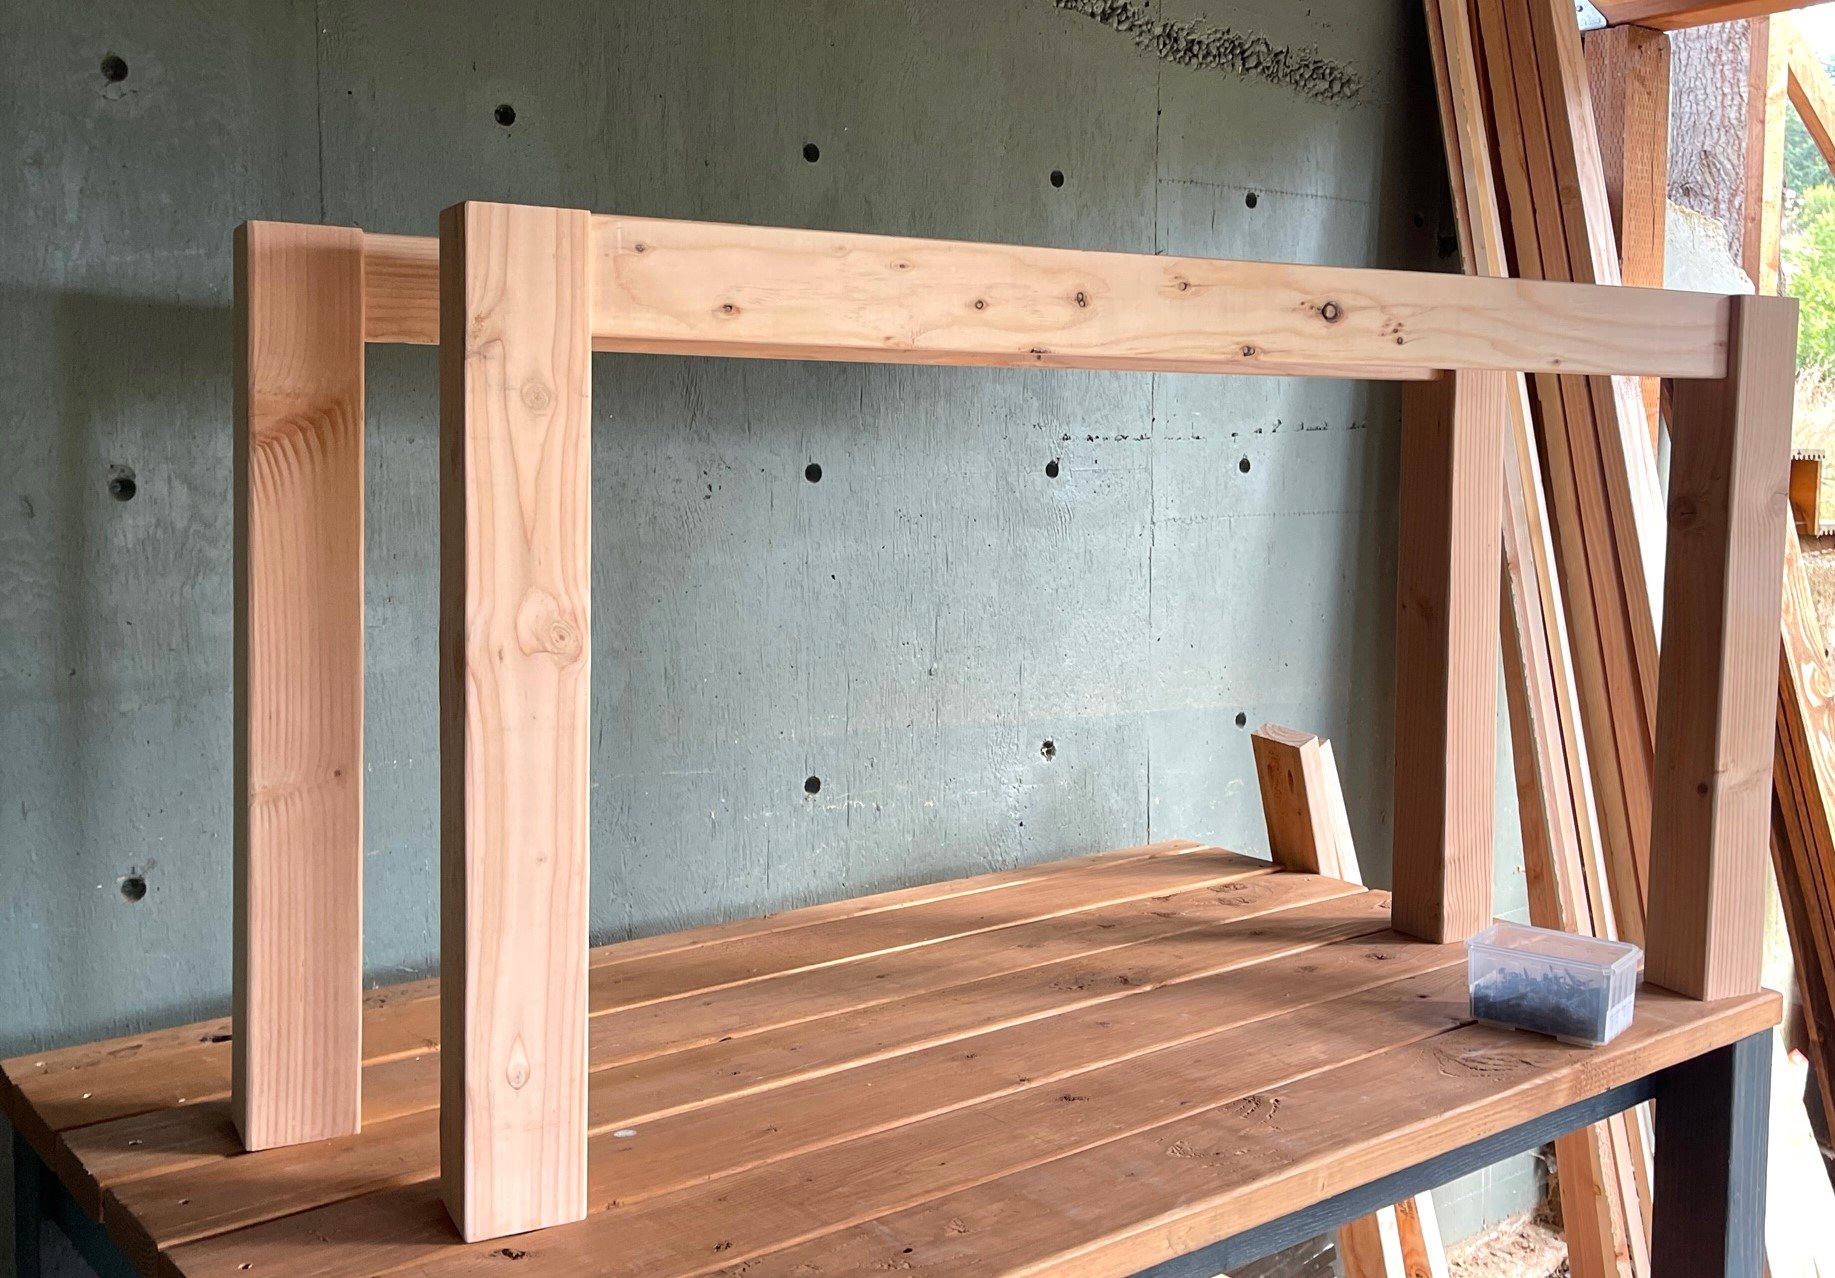
Then I attached the center stretcher to the legs with the predrilled pocket hole, using glue and 2-1/2" pocket hole screws.

rustic farmhouse end table pottery barn knock off

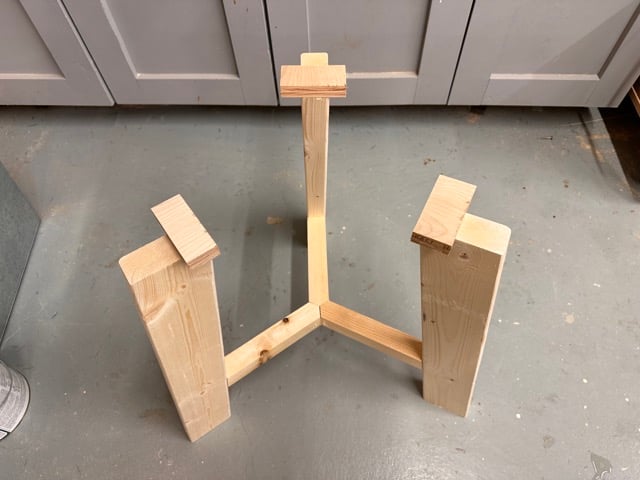
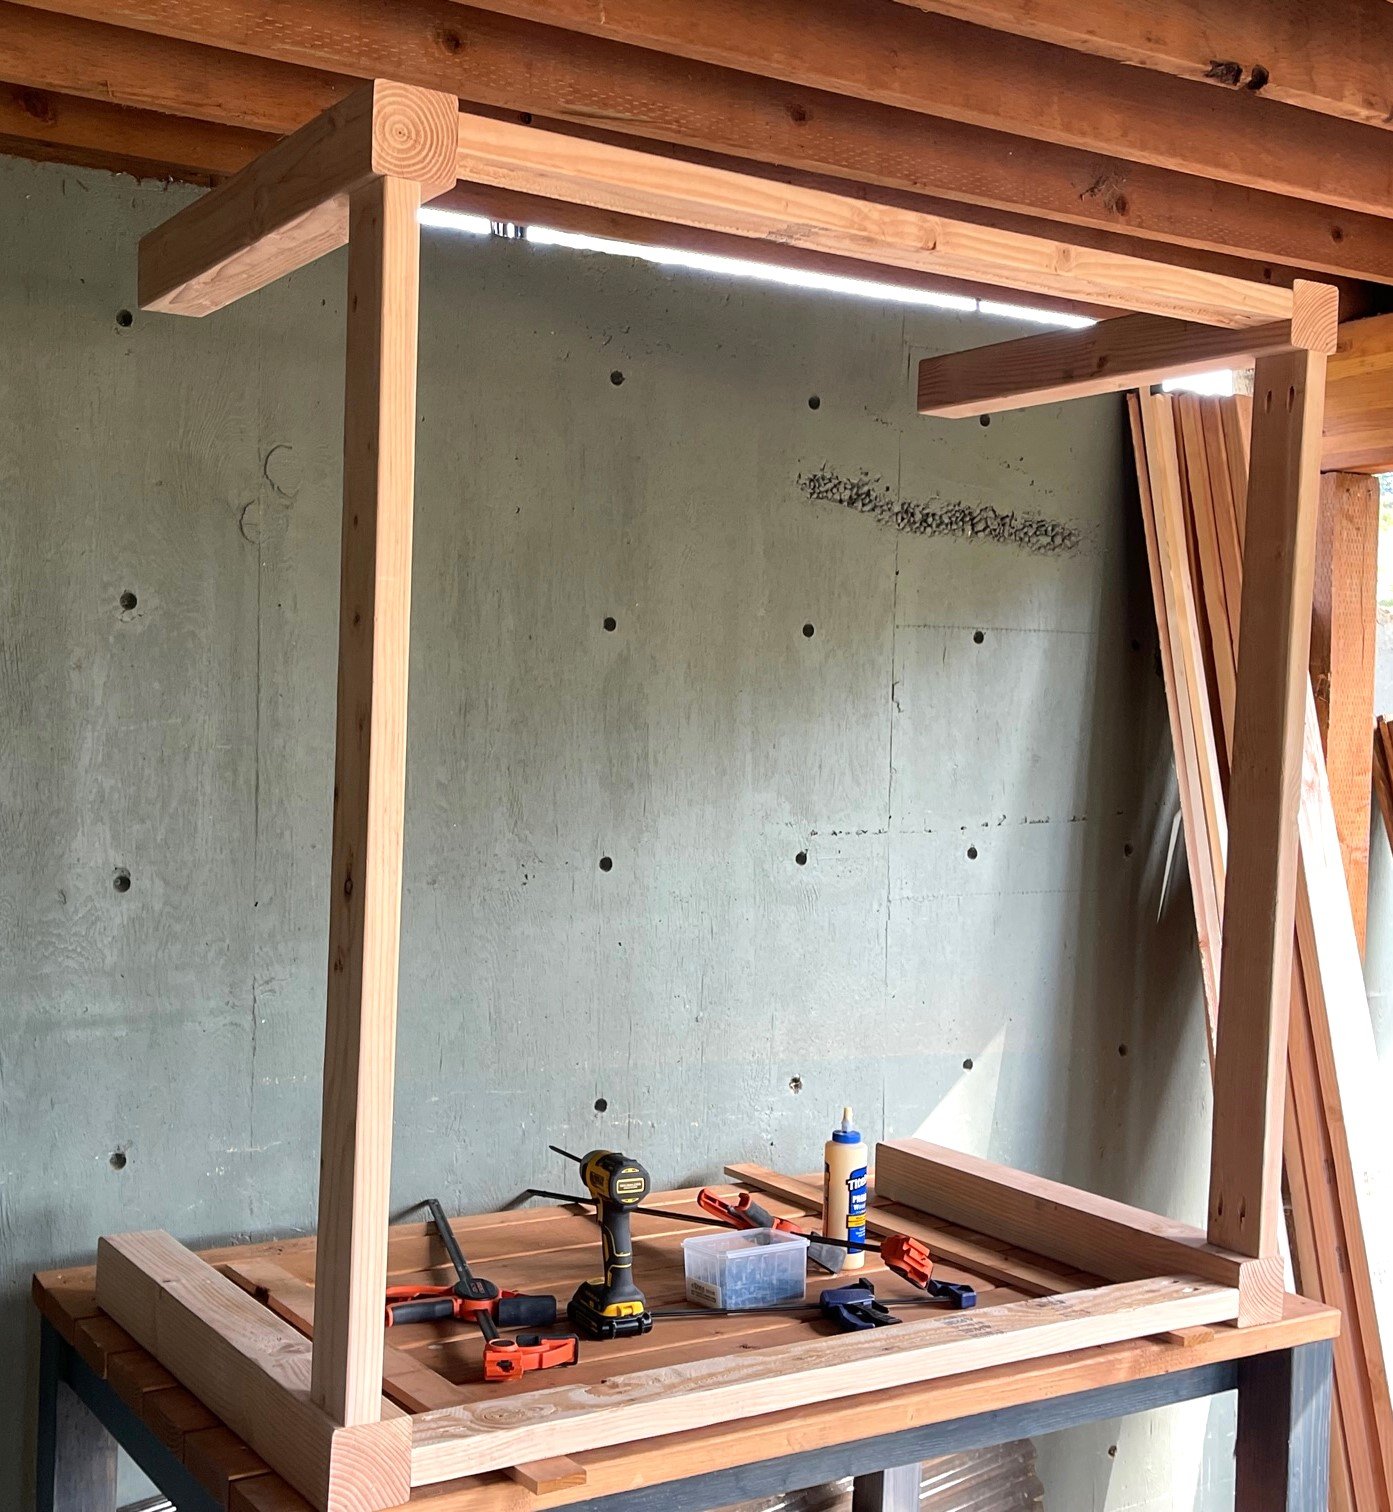
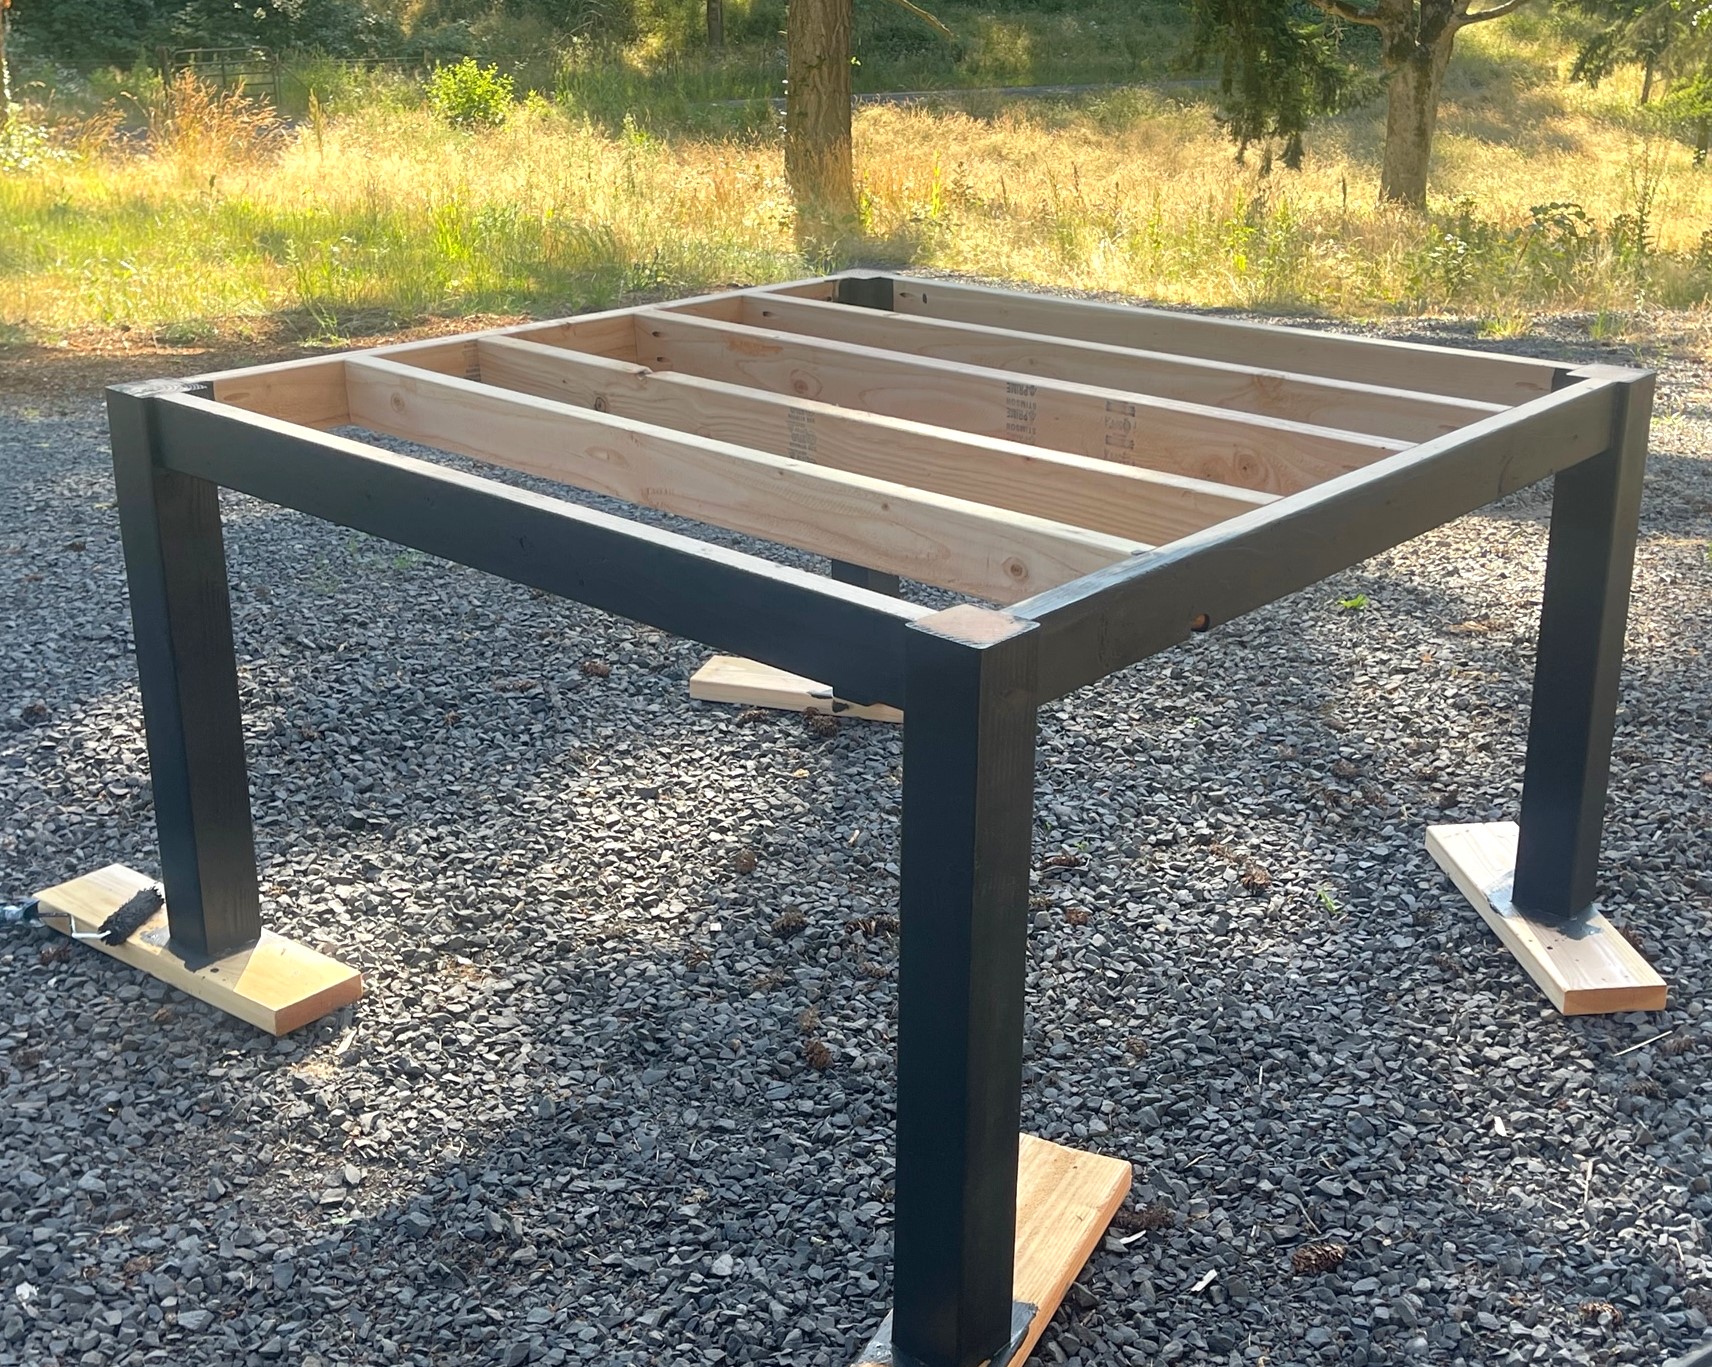
I set the base on a flat surface to the the glue dry up.  I attached scrap wood pieces to the tops of the legs with 2" trim screws and glue.

rustic farmhouse end table pottery barn knock off

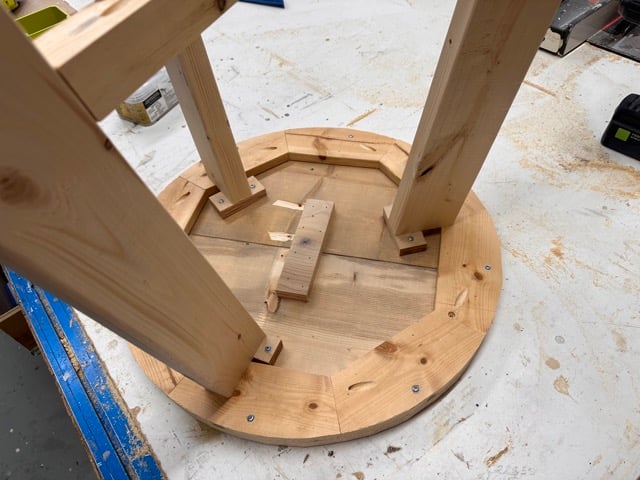
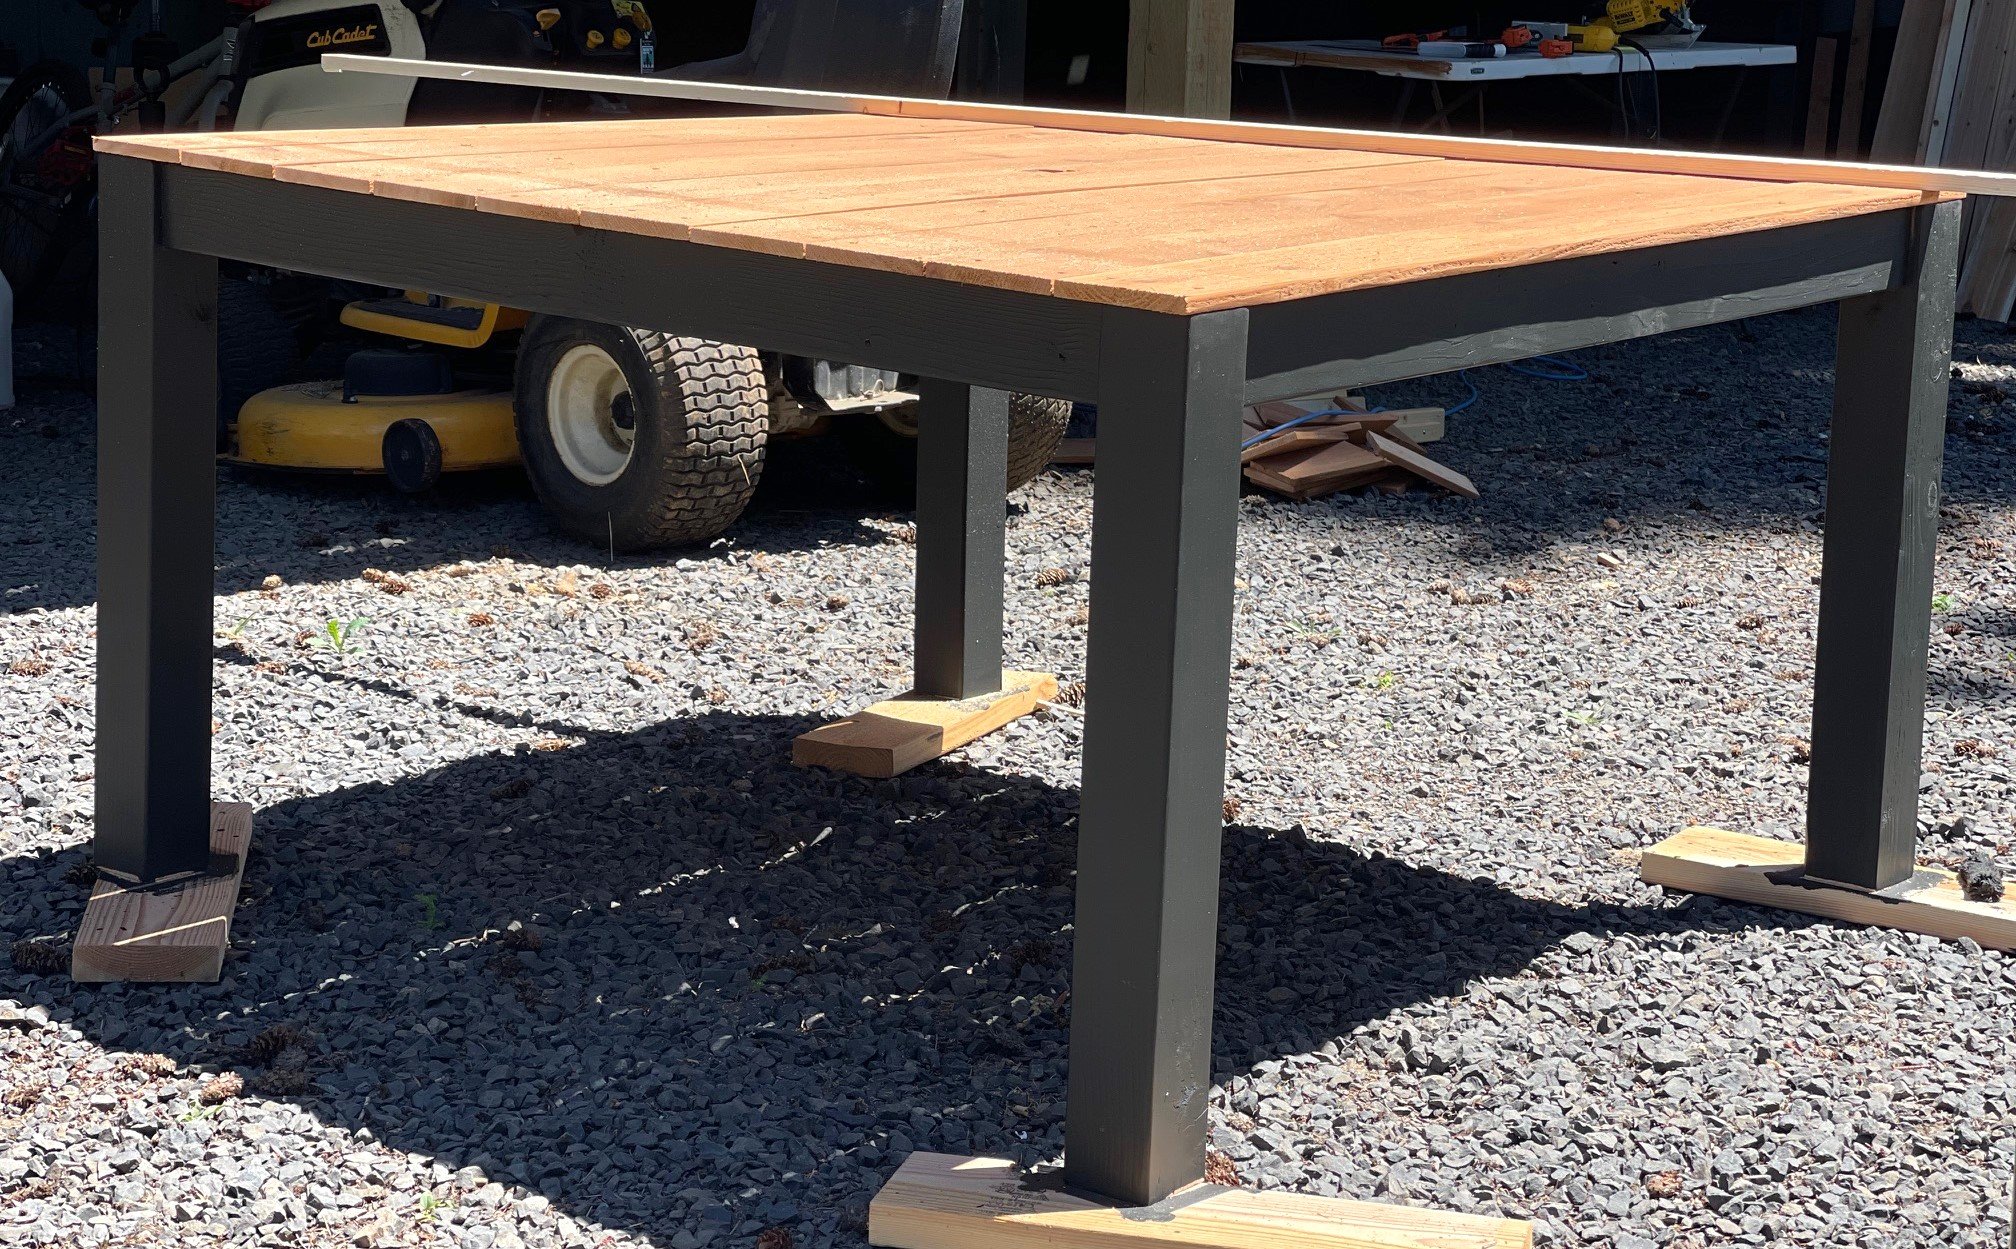
Finally, I attached the base to the underside of the tabletop using the scrap wood pieces and 1-1/4" pocket hole screws.

Video Tutorial - How this Project is Built

Here's a quick video tutorial, showing how this project is built.  It is the coffee table, but the steps are essentially the same:

VIDEO COMING SOON


Matching Plans Also Available!

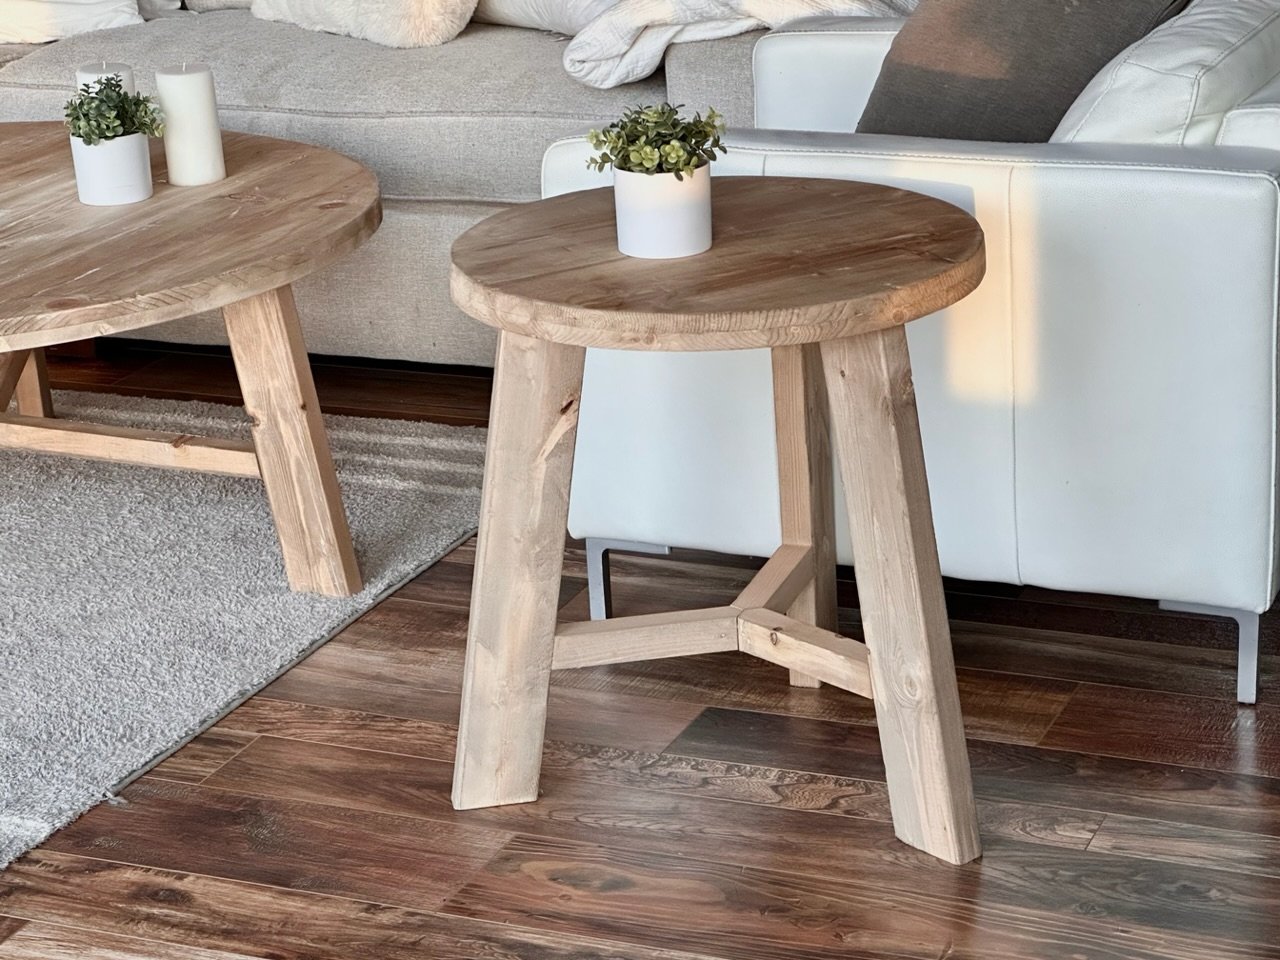
This end table is part of a collection of plans that I built to match.

Rustic farmhouse end table diy

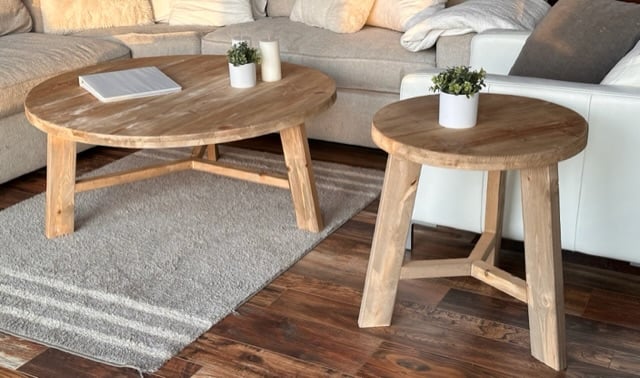
Here's the plans I have so far:

44" Round Rustic Farmhouse Coffee Table Plans


Free Plans to Build Your Own Rustic Farmhouse End Table


from Recent Project Plans https://ift.tt/yWbsmB3

2023年11月28日星期二

Monogrammed Snowflake Cutout

Do you like making snowflakes?  Folding the paper up into a triangle shape, then cutting out, and seeing what you get?  

Call me a kid at heart, but it never gets old for me!  It's amazing what a few little snips can do to a piece of paper.

So that's why I'm giddy excited about today's project!  Not only is it a snowflake, but it is cut from wood!!!  And just like the paper snowflakes that you create and no two are alike, you can do the same with this one!!!


Video Tutorial - Making this Wood Snowflake


Free Plans - Build Your Own Oversized Monogrammed Snowflake


from Recent Project Plans https://ift.tt/iUrspLP

2023年11月22日星期三

DIY Desk under $40 | DIY Creators

I am going to transform $40 of lumber into a sleek and stylish desk. Get $40-off Carver Mat frames with code DIYCREATORS or Click https://ift.tt/1STUxPG (expires 11/28; terms & conditions apply) In this video, I'll guide you through the step-by-step process of creating a desk that's not only on a budget but also adds a touch of elegance to any workspace. Subscribe & "RING the Bell": http://bit.ly/1PtWJEd MY WOODWORKING PLANS https://ift.tt/woARsD6 Materials: • Desk Plans: https://ift.tt/SAxNP6D • (1) 2 by12 by 12 southern yellow pine • (4) 2by 4 by 8 Lumber • (1) 3/8 dowel • (1) LED Strip https://amzn.to/40MoNeZ • Wood Glue - https://amzn.to/3GhfiuF • Black paint gloss • Gel stain – Red Elm https://amzn.to/40We41K • Pocket hole screw https://amzn.to/3Ra3FLt Tools used: • Circular saw https://amzn.to/49JYeey • Clamps https://amzn.to/40WeJjK • Tool Hose https://amzn.to/3RatoEw • Pocket hole jig https://amzn.to/47Ha07r • Drill https://amzn.to/47txDRl • Hot Glue - https://amzn.to/3R7LkQf • Scraper - https://amzn.to/3SZ6MrM • Flush cut saw https://amzn.to/47KxhW2 • Belt sander https://amzn.to/49PZ2yn • Sander orbital Disclaimer: This video description contains affiliate links. If you click on one of the product links and make a purchase, I may receive a commission. This commission comes at no additional cost to you and helps me make videos like this. I appreciate your support! ********** Support my work ********** My Woodworking Plans: https://ift.tt/woARsD6 Help me make more Video: https://ift.tt/CaJUotg YouTube: Subscribe & "RING the Bell": http://bit.ly/1PtWJEd Instagram: https://ift.tt/xlzuL2E Pinterest: https://ift.tt/t1DAEi4 #woodworking #DIY #desk

from DIY Creators https://www.youtube.com/watch?v=zjfcVC20Tdc

2023年11月16日星期四

DIY Play Kitchen with Back Wall


A new, easy to build play kitchen!  The kitchen is just 1x12 boards (the door too) and the back is an off the shelf 24" x 48" plywood panel, so no difficult cuts needed.

The shelving above is perfect for little play food items.  This one is sized for toddlers or small children.


More Photos and Build Post

For lots more adorable photos, take a second to visit Jaime Costiglio and thank her for her hard work on getting these free plans out to you.

CLICK HERE FOR MORE PHOTOS BY JAIME COSTIGLIO


from Recent Project Plans https://ift.tt/8Cko3R2

2023年10月30日星期一

Lighted Floating Table Runner Riser

Make your own gorgeous wood centerpiece riser, it floats and is lighted to elevate your decor and dishes!

We love this both with decor on top, or your favorite meal on top!

table runner riser

lighted floating table runner


How This Floating Wood Riser Centerpiece is Made

This wood runner centerpiece riser is so easy to make.  We used 1x pine whitewood boards and brad nails to whip it together.

diy wood table runner riser

Here's the pieces cut.  I used a miter saw to make my cuts, but you could also use a jigsaw or circular saw.

wood table runner riser


For assembly, I used glue and 1-1/4" brad nails and a brad nailer.


wood table runner riser


To attach the bottom, I decided to go fancy and used pocket holes on the inside BUT this is totally optional.  You can also just nail and glue from the top (I detail out how to do this in the plans below).


wood table runner riser


from Recent Project Plans https://ift.tt/WqKY1La

2023年10月23日星期一

DIY Wood Trunk with Storage - Free Woodworking Plan

Why I Built this Wood Trunk

I have been storing our gift wrapping supplies in the guest room - it just makes sense to be able to wrap presents in the guest room with the door closed. So I wanted to create a storage solution that guests would not use, but was still easily accessible. 

An end of bed chest was the answer. Guests can use the bench top for setting suitcases and bags, or even seating, but all the storage inside would still be super easy to get to.

Photos of Gift Wrap Inside Wood Chest


Other Uses for This Wood Trunk

While I use my wood trunk as a gift wrapping station in my guest room, there's lot more uses throughout the home!

  • Entryway bench with gear and shoe storage inside
  • End of bed bench for queen or king sized beds
  • Living room bench 
  • Dining room bench banquette seating
  • Kids room as toybox


The Inspiration Behind this Wood Trunk

The wood trunk is inspired by Pottery Barn Parkview Wood Trunk.  Costing $1200, and not shipping to my home, this wood trunk was out of reach for me.  So I decided to build my own using locally sourced wood, right in my own garage.


Video Tutorial - How I Build this Wood Trunk

This wood trunk was actually pretty straight forward to build.  Watch this quick build video to see how this project goes together.


from Recent Project Plans https://ift.tt/LWR06BM

2023年10月12日星期四

2023年9月29日星期五

Easy Fence Picket Wood Pumpkin Decor


How I Built this Layered Wood Pumpkin Using Fence Pickets

This project was super easy to make.  You'll just need a jigsaw and a brad nailer or stapler and 1" fasteners.

I cut the fence pickets to the lengths needed in the cut list.

pallet pumpkin wood

Then I layered the wood pieces, overlapping about 1" (no need to be super accurate here) and attached with 1" fasteners and glue.

pallet pumpkin tutorial

For the larger pumpkin, I layered five pieces.  

diy wood pumpkin

Then I just cut a pumpkin shape out.  No need to stress here - all pumpkins are different shapes and sizes, and you can always cut off more if you don't like the shape.  Just avoid cutting any nails or staples and make sure the jigsaw blade can operate freely and you aren't cutting into your work table.

wood pumpkin

I didn't like this shape, so ended up further rounding the corners and also taking some out at the bottom.

wood pumpkin

When I was happy with the pumpkin shape, I attached the 1x2s at the bottom to act as a stand and the 1x2 stem.  You'll attach these pieces from the front, through the fence pickets.

wood pumpkin diy

What Type of Wood Did You Use?

I used reclaimed cedar fence pickets in the 5-1/2" width.


Can I Make My Pumpkins out of Pallet Wood?

Yes!  However, pallet wood may be 3-1/2" wide instead of 5-1/2" - so you will need more boards to get the width for a plump pumpkin.  


from Recent Project Plans https://ift.tt/yBDcizO

2023年9月18日星期一

Cedar Propane Tank Cover Table

Why I Built a Propane Tank Cover Table

We are going to add a propane heater to our deck space to allow us to sit out and enjoy it for a longer period of time. We were also lacking a side table that would look nice with our modular seating. To check both projects off the list, I came up with this! Something that conceals the ugly propane tank and adds a tabletop surface to set things on. 

Modular Outdoor Seating 


More Photos of My DIY Propane Tank Cover Table

propane tank cover table


propane tank cover table


propane tank cover table


Photo Steps of Building my Propane Tank Cover Table

Here's some photos I took while building this propane tank cover -

propane tank cover table building steps

The first step is to build these two frames out of 2x4s.

Then you just add the cedar fence pickets to the outsides of the frames to enclose the sides.

propane tank cover table building steps

The propane tank will go in between the two side panels.

propane tank cover table building steps

Then I just added the front and back cedar fence pickets to the side panels.

propane tank cover table building steps

For the top, I set a 1x3 piece on top of the 2x4 frames and attached the top cedar fence pickets to it and added a hinge on the back.

propane tank cover table building steps

This propane tank cover table turned out so great for being such a quick and easy project!

propane tank cover table building steps


Related Plans in this Collection

This plan is based off my original outdoor storage chest plan. 

outdoor storage bench

I have been using this outdoor storage chest for almost five years.  I did have to replace a couple of screws in the hinges, but it is STILL being used to hold my kid's outdoor toys!


Free Plans to Build Your Own Propane Tank Cover Table


from Recent Project Plans https://ift.tt/GIjzigZ

2023年9月12日星期二

Minimalist Modern Tall Dresser

Why I Built This Dresser

A few weeks back, I built my youngest daughter this dresser:

pottery barn dresser modern $250

You wouldn't think a five year old would be excited about a piece of furniture, but this little girl is.  Every visitor must come see her new dresser that mommy built her.  

My older daughter loved the dresser too, and put in a request for a taller version.  So I built this dresser.

Why Didn't I Just Buy A Dresser?

It's an option, and no judgement if you do, but for me, it just makes sense to build my own dresser.

  • Save money - the inspiration dresser cost $1200 - before tax, shipping.  I was able to use up the scrap plywood from the first dresser and spend about $100 building this dresser.  That's quite a savings - especially when you consider two dressers built.
  • Good for the Earth - I use wood that is harvested about 50 miles from my home for the 1x materials.  This is much more earth friendly than shipping a dresser around the globe.
  • Rewarding - It's not just a dresser, it's a project and it's very rewarding to put my time into building something for my family.
  • Good Exercise - Building is a great way to keep moving and be productive - without having to go to a gym!

Matching Plans In This Collection

I have been loving this style furniture and am adding more and more plans to this collection.  Here's what I have so far:

Watch!  Similar Dresser Video Tutorial

In this video tutorial, I build the standard sized dresser.  Both dressers are built using very similar techniques and steps (the tall dresser is actually simpler) so this video should be very helpful in understanding how I built it.


from Recent Project Plans https://ift.tt/lzhOtd5

2023年9月4日星期一

I installed vinyl flooring for the first time, and (WHAT A Difference 😍) | Garage makeover Ep. 01

Installing vinyl flooring for the first time can be an exciting and rewarding experience. It allows you to transform the look and feel of your space with a durable and low-maintenance flooring option. By following the manufacturer’s instructions and using the right tools, you can achieve a professional-looking finish that adds beauty and functionality to your home or office. Check out my WOODWORKING PLANS https://ift.tt/ZcRoWtj Materials use Vinyl Flooring: https://ift.tt/PDzbEce Vinyl Multi-Purpose Reducer Molding: Baseboard and door Tim Tools used: Milwaukee Miter Saw: https://amzn.to/45Np3M6 Nail gun: https://amzn.to/3Z04cTw Pin nailer: https://amzn.to/3Lv71qn Measuring tape: https://amzn.to/3Z3sDQ2 Utility knife: https://amzn.to/3sAjjH7 Speed square: https://amzn.to/45DbCP6 1/4in spacer: https://amzn.to/3qPuBXH Rubber mallet: https://amzn.to/44CYOqK Safety gear Boots: https://ift.tt/FC5YWHA ************ Outline for installing vinyl flooring ************ 1. Measure and plan - Measure the room and calculate the amount of vinyl flooring 2. Prepare the surface - Remove any existing flooring, clean, dry, and level. 3. Acclimate the vinyl - Let the vinyl flooring acclimate for 48 hours. 4. Prepare the vinyl - Cut the vinyl flooring to fit the room using a sharp utility knife. 5. Install the first row - Begin at one corner and lay the first row of vinyl planks or tiles, using spacers for consistent gaps. 6. Continue installation - Lay the subsequent rows, interlocking the edges of the planks. 7. Trim and fit - Measure and cut the vinyl planks 8. Install transition pieces - Install transition strips or moldings. 9. Finishing touches - Clean the floor thoroughly and enjoy. Follow the manufacturer’s instructions for detailed guidance. AFFILIATE DISCLOSURE: This video might include affiliate links. If you click on one of the product links and make a purchase, I may receive a small commission at no extra cost to you. I only recommend products or services I used in this project or have personal experience with. Your support is greatly appreciated, as it helps me create more videos like this. Thank you! #vinylflooring #vinylfloor #diy

from DIY Creators https://www.youtube.com/watch?v=OkKPWV0jgaM

2023年9月3日星期日

I am BACK: Why I Stopped Uploading

“Hey, everyone! Welcome back to my channel! After a brief hiatus, I want to share the reasons behind my absence. Thank you for your support!

from DIY Creators https://www.youtube.com/watch?v=v-dvBbw0IHQ

2023年8月28日星期一

Adjustable Desktop Organizer

adjustable desktop organizer shelf

From compact to corner, to expanded out - you can always be customizing this clever desktop organizer to suit your space and needs. 

We love it as a kitchen organizer and decor shelf, and an office or vanity organizer.  

This simple build uses a 1x6 board, and can be painted or stained any color!

Adjustable Shelf Desktop Organizer Plans


from Recent Project Plans https://ift.tt/v51SwhB

2023年8月21日星期一

Minimalist Modern Dresser

pottery barn cayman dresser $250

pottery barn dresser modern $250

Why I Built My Own Minimalist Modern Dresser

  • Its gorgeous, the depth and beauty of this piece is stunning.  Even my kids remarked on how beautiful it is.
  • To save money - similar style dressers run in the thousands of dollars.  I spent about $250 on this dresser build.
  • Because I didn't want to wait - by building the dresser myself, I was able to get it in a few days.  I didn't have to wait for shipping or delivery.
  • I used local materials - the wood in my dresser is milled about 50 miles from my home.  You can't get more local than that for furniture. This is much more responsible than shipping a dresser around the globe.
  • Building is fun!  I can't think of a better way to be active and create value for our home and family than by building my own furniture!

Other Plans that Match this Dresser

This dresser is building off the success of a nightstand project I did a few months back that turned out really well, was easy to build, and also only used a nail gun for assembly.  I also did a bed plan too, and hope to do a few more plans in this collection.

Watch! How I Built this Dresser

Here's a quick video showing the steps to build this dresser.  It was pretty fun and easy to do!


from Recent Project Plans https://ift.tt/4serSJD

2023年8月17日星期四

2x4 Face Frame Bookshelf - Custom Sizes

Bookshelves don't have to be boring!  By just changing up the front trim (called the "face frame") you can give your storage piece a completely different look!

mountain modern bookshelf

Yes, this is just a simple bookshelf, with a chunkier face frame!  It gives this piece a modern but crisp look - so mountain modern!

Why I Built this Bookshelf

I built this piece for our cabin in the mountains, where I'm craving a simplified life, with less things to pick up, less details to dust and wipe down, but still looking to be inspired and encouraged by the surroundings. I needed the storage for shoes, hats, gloves, sunglasses - entryway dropzone stuff - but wanted a piece that could also look good empty.  I do love an empty shelf.  It's an opportunity to put something away.

Can I Build a Custom Size?

For my bookshelf, I built a custom size to fit in the space perfectly. If you are building it, you might as well get the right size, tailored for your space.

I love this plan because it is very easy to customize the size in both height and width! You can build just about any size you can think up! 

customize bookshelf sizes

The tutorial below will show you how to size yours just right for your space without doing any crazy math or worrying about making mistakes.


Video Tutorial of Building this Bookshelf

I put together a quick video showing the steps to build this bookshelf.  Please watch before you build.


Mountain Modern Bookshelf Plans

Here are the plans for this bookshelf.  I decided to do this one more as a template (so you can customize the sizes) - since getting the perfect fit is so important.  It will be easy to come up with a cut list and shopping list once you have your carcass laid out.  

Thank you for using our plans, we appreciate the trust and support.


from Recent Project Plans https://ift.tt/ugAU5BQ

2023年7月30日星期日

Window Seat with Drawers


Window Seat Drawer Bench Features You'll Love

  • Customize-able to any length
  • Paint or stain any color of choice
  • Fits standard 24" cushions on top
  • Beautiful mitered baseboard for a custom look
  • Easy to build frameless design for professional looking results 

Do you need a window seat or mudroom bench with drawers that is built well, but isn't super hard to make?

window seat bench

For about $300 total, I built this TEN FOOT LONG window seat by myself!  

We have been using this piece for several years now, and it is one of the most used pieces in the house.  

The extra seating is always handy, for both regular family use and for larger gatherings - the dog also has claimed it as her spot, so she can watch the driveway.

I like to keep my dining table clean and clear, so we use the drawers to support that - I have a laptop drawer that I use as my office - when I work, I take the laptop out and use it on the table, then put it back in the drawer when done.  We store board games in another drawer and arts and craft supplies in another drawer.  This drawer bench keeps our dining room so neat and tidy.

WATCH! How I Built this Window Seat Drawer Bench By Myself 

Here's the video tutorial:

Custom Size is the Key

The problem with just going out and buying a drawer bench or window seat is you won't be able to get the exact size you need.  I needed 119" bench, 120" would not have fit between the beams in my house.  

This tutorial is set up so you can easily create your own custom sized bench to fit your space exactly.


How to Build this Window Seat with Drawers Bench


from Recent Project Plans https://ift.tt/AbfDihT

2023年7月24日星期一

Square Outdoor Dining Table for 8 - Build It!

square outdoor table for 8

square outdoor dining table for 8

Why I Love this Square Outdoor Dining Table

  • Simple design, perfect with metal, wicker, fabric covered or wood outdoor chairs
  • Seats 8 comfortably
  • Beautiful wood design, adds texture and warmth to outdoor space
  • Durable cedar top
  • Easy to build
  • Heavy and substantial - won't blow away in normal winds
  • Perfect when paired with a large umbrella


How I Built my Square Outdoor Dining Table for 8

The plans for this table are below, but I wanted to also share some photos of the build steps.

attach table aprons to legs with pocket holes

I used pocket holes to attach the aprons to the legs.  I used 4x4s for the legs and 2x4s for the aprons.

build two legs sets as shown

It's easy to build - just build two of the leg sets -

attach leg sets together

Then make the table frame by adding the remaining aprons.

table frame complete

To support the cedar fence pickets, I added inner 2x4 supports.  This makes the table super substantial.

add supports and stain base

Here's the umbrella framing I did.

framing to support umbrella

And then just cut out the top with a jigsaw.

cutout for umbrella

For the top, you can lay the boards on top long, and then cut them all at once, so the cut edges are a perfect line.

staining the top

This table turned out so good!  I can't wait to see brag posts!

finished square table outdoor for 8


Square Outdoor Dining Table for 8 Plans

Here's the plans, hope to see lots of builds from it!


from Recent Project Plans https://ift.tt/nFoO0xz