Use Code JD25 to get 25% off Select Carolina Boots! Shop Carolina: https://bit.ly/3Hd4g8R In this video you’ll see me make 25 wallets with the shoe imprint.. inspired by my walk in the snow!! Look around you and see what simple thing can inspire your next project. Carolina shoe will do an announcement on their Instagram page how you can get one of these 25 wallets!!! Thank you Carolina shoes for sponsoring my channel please go show Carolina shoe some love and pick up some boots!! Thank you https://bit.ly/3g9UN69 for leather and supplies https://fslaser.com/ for the laser!
from jimmydiresta https://www.youtube.com/watch?v=4QaoVOQrjX0
2022年1月29日星期六
2022年1月25日星期二
2x4 Pantry Shelving
Are you looking for inexpensive, no frills shelving, that does the job, without a ton of work?
In our pantry, I wanted a shelving solution that worked - NOT a second kitchen to have to keep clean and tidy.
Our pantry isn't huge, so I also wanted custom shelving that went wall to wall - no awkward gaps or not the right depth shelves to deal with. I only have one pantry, I want the shelving to be just right for it.
So I came up with this - a 2x4 framed pantry (for strength) topped with inexpensive 1x6 boards.

It's not the most beautiful thing I've ever made or seen.
But after almost FIVE years of using it, it's still going strong, still doing it's job, and still keeping my kitchen super clean and beautiful. This is the no frills storage solution we needed.
DIY 2x4 Pantry Shelving Features
- Easy to build using 2x4s, 1x6s and construction screws
- Easy to customize in size for just about any space
- Open floor design, easy to clean underneath
- Strong and sturdy - can hold all the cans
- Thin shelves don't take up vertical space
- Inexpensive to build
- Can be used in garages, closets, playrooms, mudrooms, laundry rooms - anywhere you need simple sturdy shelving!
Pantry Shelving Plans
This is a super easy build. You'll want to customize for your space, so I'm not giving a specific cut list or shopping list.
from Recent Project Plans https://ift.tt/3tYamGa
2022年1月23日星期日
DiResta Mobile Anvil Stand 2.0
Get My Giant DiResta Razors: https://ift.tt/3eBbJjd In this video I make a better mobile base for my 675 lb. anvil. This is a better version of the mobile anvil stand I made 2 years ago.. https://www.youtube.com/watch?v=vEJ2Gr5fjXc thank you to https://ift.tt/2vkYIGx https://ift.tt/2YXbmte https://ift.tt/2CvKBmC to support voiced over videos https://ift.tt/2eBXwH5
from jimmydiresta https://www.youtube.com/watch?v=PWZULDm5s0s
from jimmydiresta https://www.youtube.com/watch?v=PWZULDm5s0s
2022年1月22日星期六
Virtual Craft Festival DiResta
ill be chatting and talking about making stuff .. please come with any questions thank you! jimmy xo
from jimmydiresta https://www.youtube.com/watch?v=aK9V3pDTiyU
from jimmydiresta https://www.youtube.com/watch?v=aK9V3pDTiyU
2022年1月21日星期五
Shelf Covers over Wire Shelving Brackets and Tracks
When I was pregnant with my son (now 8) I wanted to create a beautiful shelving system for his things (and some decor too) - but without a ton of work or time commitment.
I used cheap and easy to install wire shelving components topped with beautiful wood boards to create this:
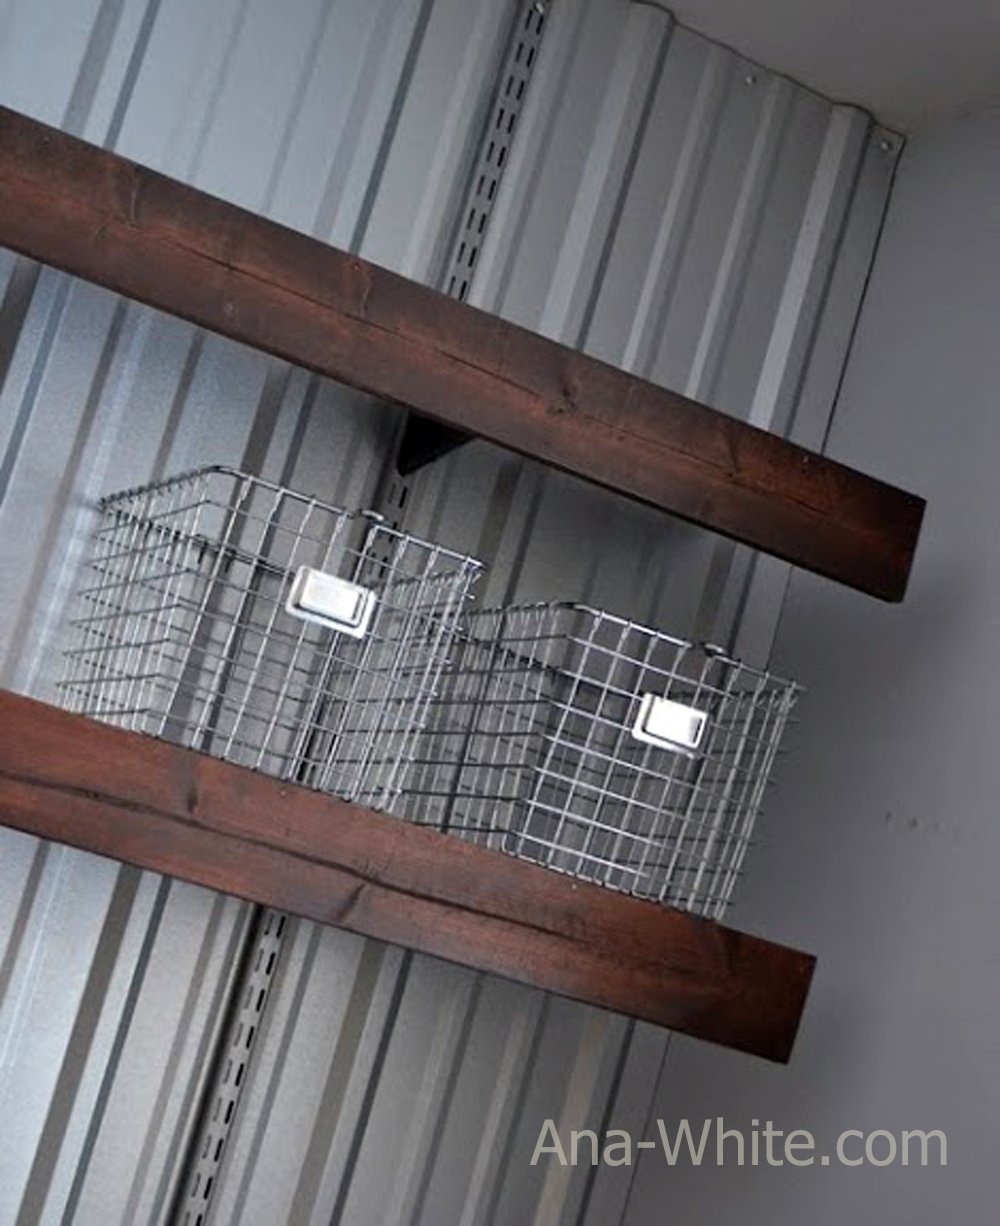
This was the perfect solution - fast, easy, cheap, but great results!
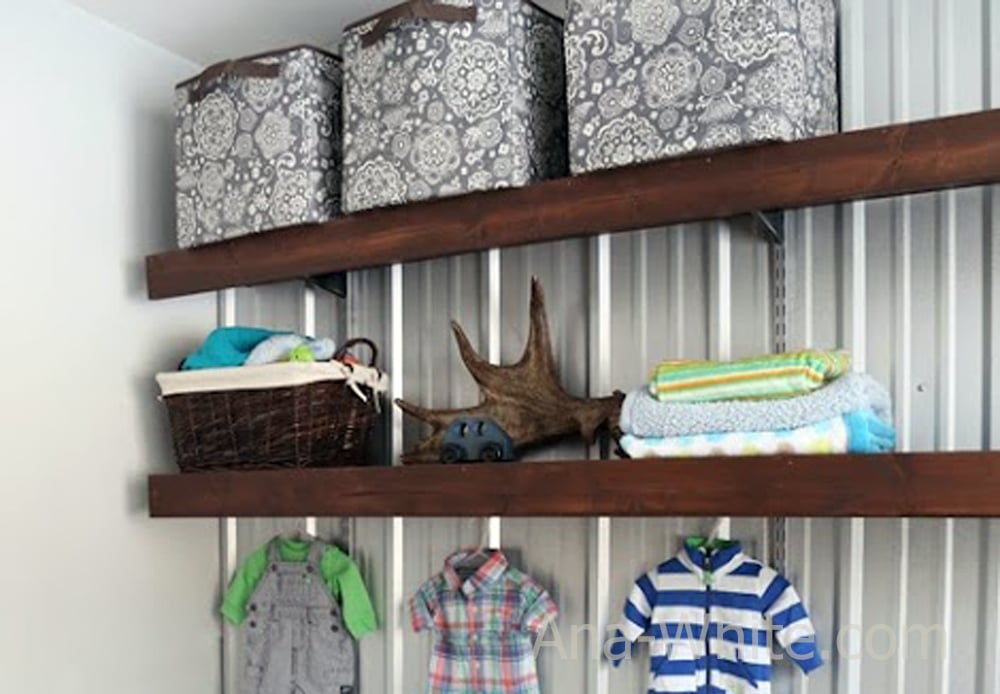
Once the shelves were loaded up, you can barely see the hardware on the wall.
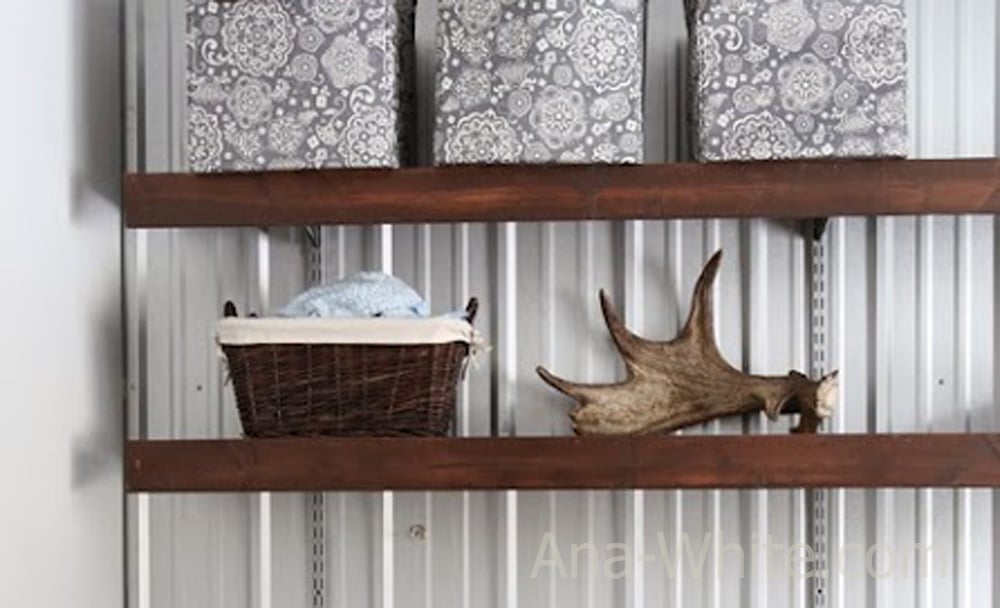
While I used mine for a nursery closet, you could use this shelf cover idea just about anywhere to make cheap wire shelving beautiful - pantries, linen closets, toy storage units in playrooms, garage shelving - your options are endless.
And with the full wood shelving on the top, you don't have to worry about stuff falling between the wires, or getting stuck on the wire shelving. It's the best of both wire shelving and beautiful wood shelving: easy to install but more functional and beautiful.
Shelf Cover Tutorial
Here's the step by step for creating your own wire shelf covers.
from Recent Project Plans https://ift.tt/3fLJz7P
2022年1月17日星期一
Easy to Build Modern Keyboard Stand
Keyboard Stand Features
- SUPER easy to build!
- Inexpensive
- Solid wood can be stained or painted any color
- Can be customized in height and length
- Simple modern design blends with almost any decor style
- Compact and perfect for small spaces
- Can be used as a console table or desk
Keyboard Stand Build Video
This keyboard stand was built by our Ana-White.com video editor for her family, Jen. Jen was kind enough to put a quick video together showing the steps to build it. Jen considers herself a beginner woodworking. Take a second to watch!
from Recent Project Plans https://ift.tt/33lC9FV
2022年1月15日星期六
DiResta [Trailer] Marquee Light up Sign
Get the DiResta Razor Here: https://ift.tt/3eBbJjd In this project build video I make the light up sign that goes with the wine trailer in my last video! All the letter parts were made from light weight MDF and lit up using sockets and bulbs from "Action Lighting" found on line. I hope that you enjoy this project video. Thank you to https://ift.tt/33KYKbm
from jimmydiresta https://www.youtube.com/watch?v=-EB54uaLrpY
from jimmydiresta https://www.youtube.com/watch?v=-EB54uaLrpY
2022年1月8日星期六
DiResta [Pt. 2] Camper Trailer Interior
In this project I execute and fabricate the interior of the camper trailer built in part one. The interior for this camper trailer was designed on paper by the client and given to us to interpret. Taylor Forrest worked hand-in-hand with the client choosing materials the best represented what was shown in the drawing. And I also made some changes along the way as far as colors and textures. The walls of this camper trailer are covered with a Formica type laminate. The countertops are Corian. And the under cabinets are plywood in MDF in conservation of excessive weight. Patrick Renolds did all the electrical system based on the conversations with the client and what their needs would be, and the plumbing system is designed by Taylor Forrest, a simple gray water system. Much of the research for this camper trailer project build was found on YouTube so thanks for that!! and thank you for watching! follow Patrick for daily electric tips https://ift.tt/3qSG9VO Thank you to https://ift.tt/2vkYIGx merch: https://ift.tt/3EypoW6 https://imakeny.com support https://ift.tt/2eBXwH5
from jimmydiresta https://www.youtube.com/watch?v=cXMxVoMB0VI
from jimmydiresta https://www.youtube.com/watch?v=cXMxVoMB0VI
2022年1月6日星期四
Ziploc Bag Organizer
Why You Need this Ziploc Bag Organizer
- No more searching for the right size ziploc bag
- You'll know when you need to buy more ziploc bags
- Cleans up your drawer and optimize the space in your drawer
- Standalone organizer can be removed from the drawer
- Wood design helps compartmentalize a drawer, acting as a divider in larger drawers
- Can be used for reused ziploc bags with easy to load top
Ana White's DIY Ziploc Bag Organizer Features
- Just one 1x3 and some scrap 1/4" plywood to build (if you have plywood scraps, could be about $3 to build!)
- Top load - no moving parts to break. Simply stuff bags in from the top.
- Sized for standard ziploc bag packs: 50 Gallons, 50 Quarts, 125 Sandwich, 120 Snack
- Customizeable to fit your kitchen style and drawer size
- Makes a great gift that will be appreciated but not expensive!
How to Build this Ziploc Bag Organizer Video
Here is a VERY quick video of the basic build for this project.
Video coming soon
The free plans follow. Thank you for using our plans.
from Recent Project Plans https://ift.tt/3n4QwVv
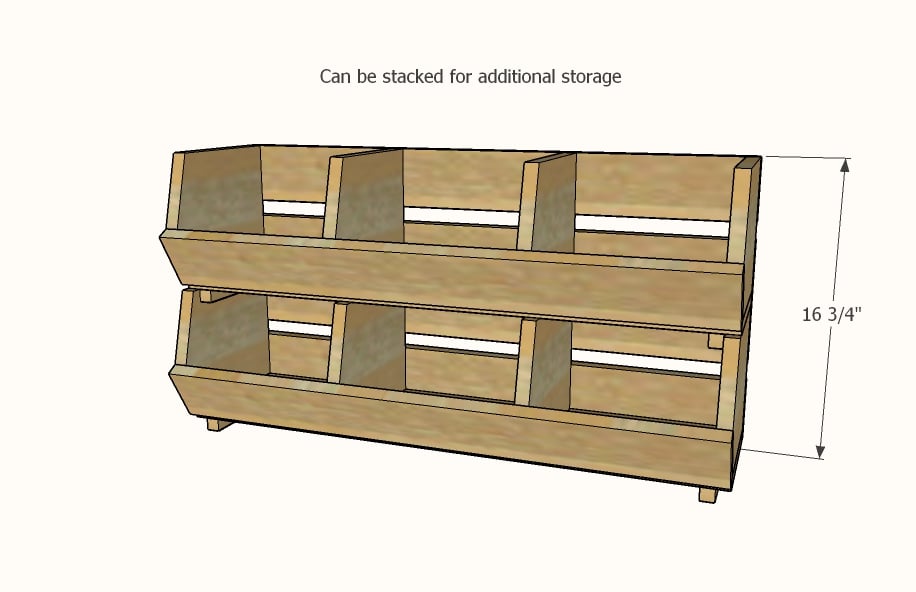
Countertop Potato Bin
Why Store Produce on the Countertop?
If you have some extra countertop space in your kitchen, storing produce in plain sight has benefits-
- Easy to keep track of stock and know when to buy more produce
- Easy to put away produce
- Keeps healthy produce handy - my kids ate three times as many apples a day since the apples were in plain sight
- Countertop convenience makes it easy to add more vegetables into foods - no more digging for garlic in the pantry
- Saves space in the fridge and pantry
- Easy to clean and remove spoiled produce
- Adds a gorgeous decor element to the kitchen
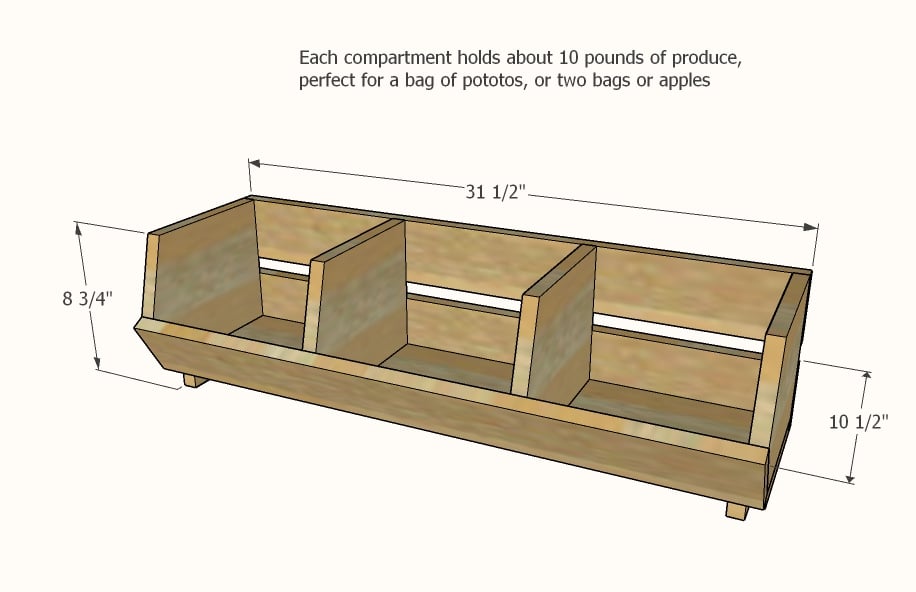
Why Build This Potato Bin?
- Only about $20 in lumber
- Smartly sized to hold 10 pounds of produce per section
- Footed design is easy to move and clean under
- Solid wood is more food safe - good for storing raw produce
- Can be finished to suit your kitchen
- Stackable for even more storage
- Easy to customize length to fit your space
- Beautiful farmhouse look - for that farm to table element
- Our free step by step plans make it easy!
from Recent Project Plans https://ift.tt/3t53yGA
2022年1月4日星期二
3 Tier Can Organizer
This is a DIY tutorial to build your own 3 tier can organizer in ANY LENGTH.
No more poor fitting organizers that consume more space than they save - this perfect cut to fit organizer uses every square inch of your cabinet space.
What Do I Need for Tools?
You'll need a saw to cut wood (miter saw recommended, but a jigsaw or circular saw is fine), and a drill with screws or a brad nailer with brad nails.
If using screws, go for 2" long self tapping star bit wood construction screws.
If using nails, go for 1" long brad nails and wood glue.
What Do I Need for Materials?
You'll need a pine wood 1x12 in the overall length of the can organizer.
And three times that amount in 2x4 boards.
from Recent Project Plans https://ift.tt/3HRGAH9
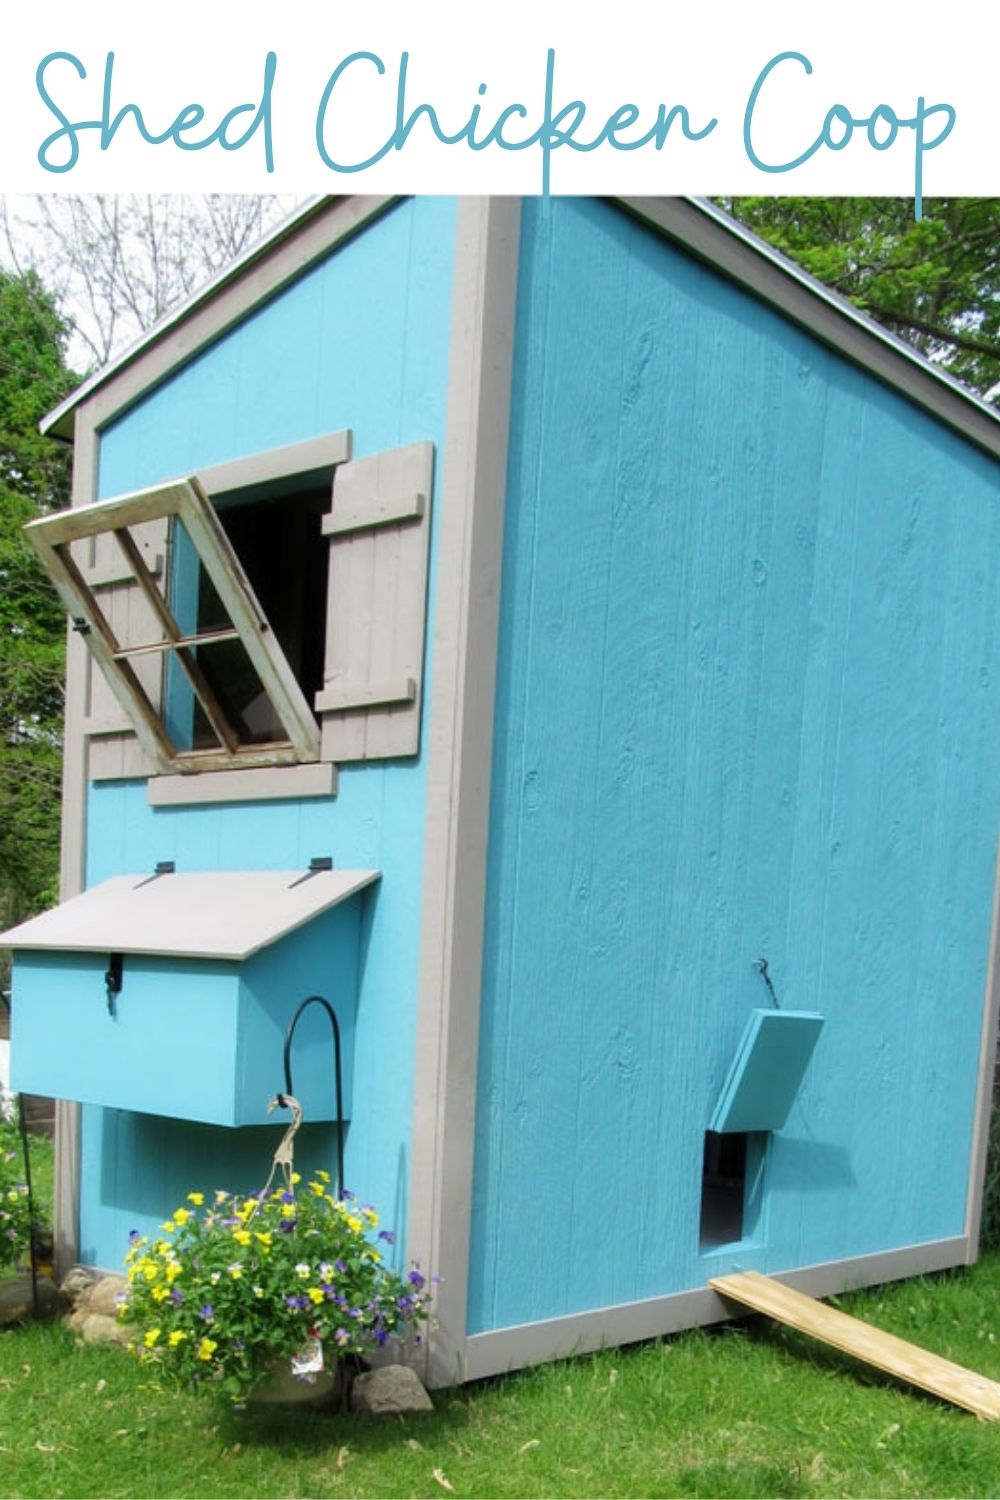
Shed Chicken Coop
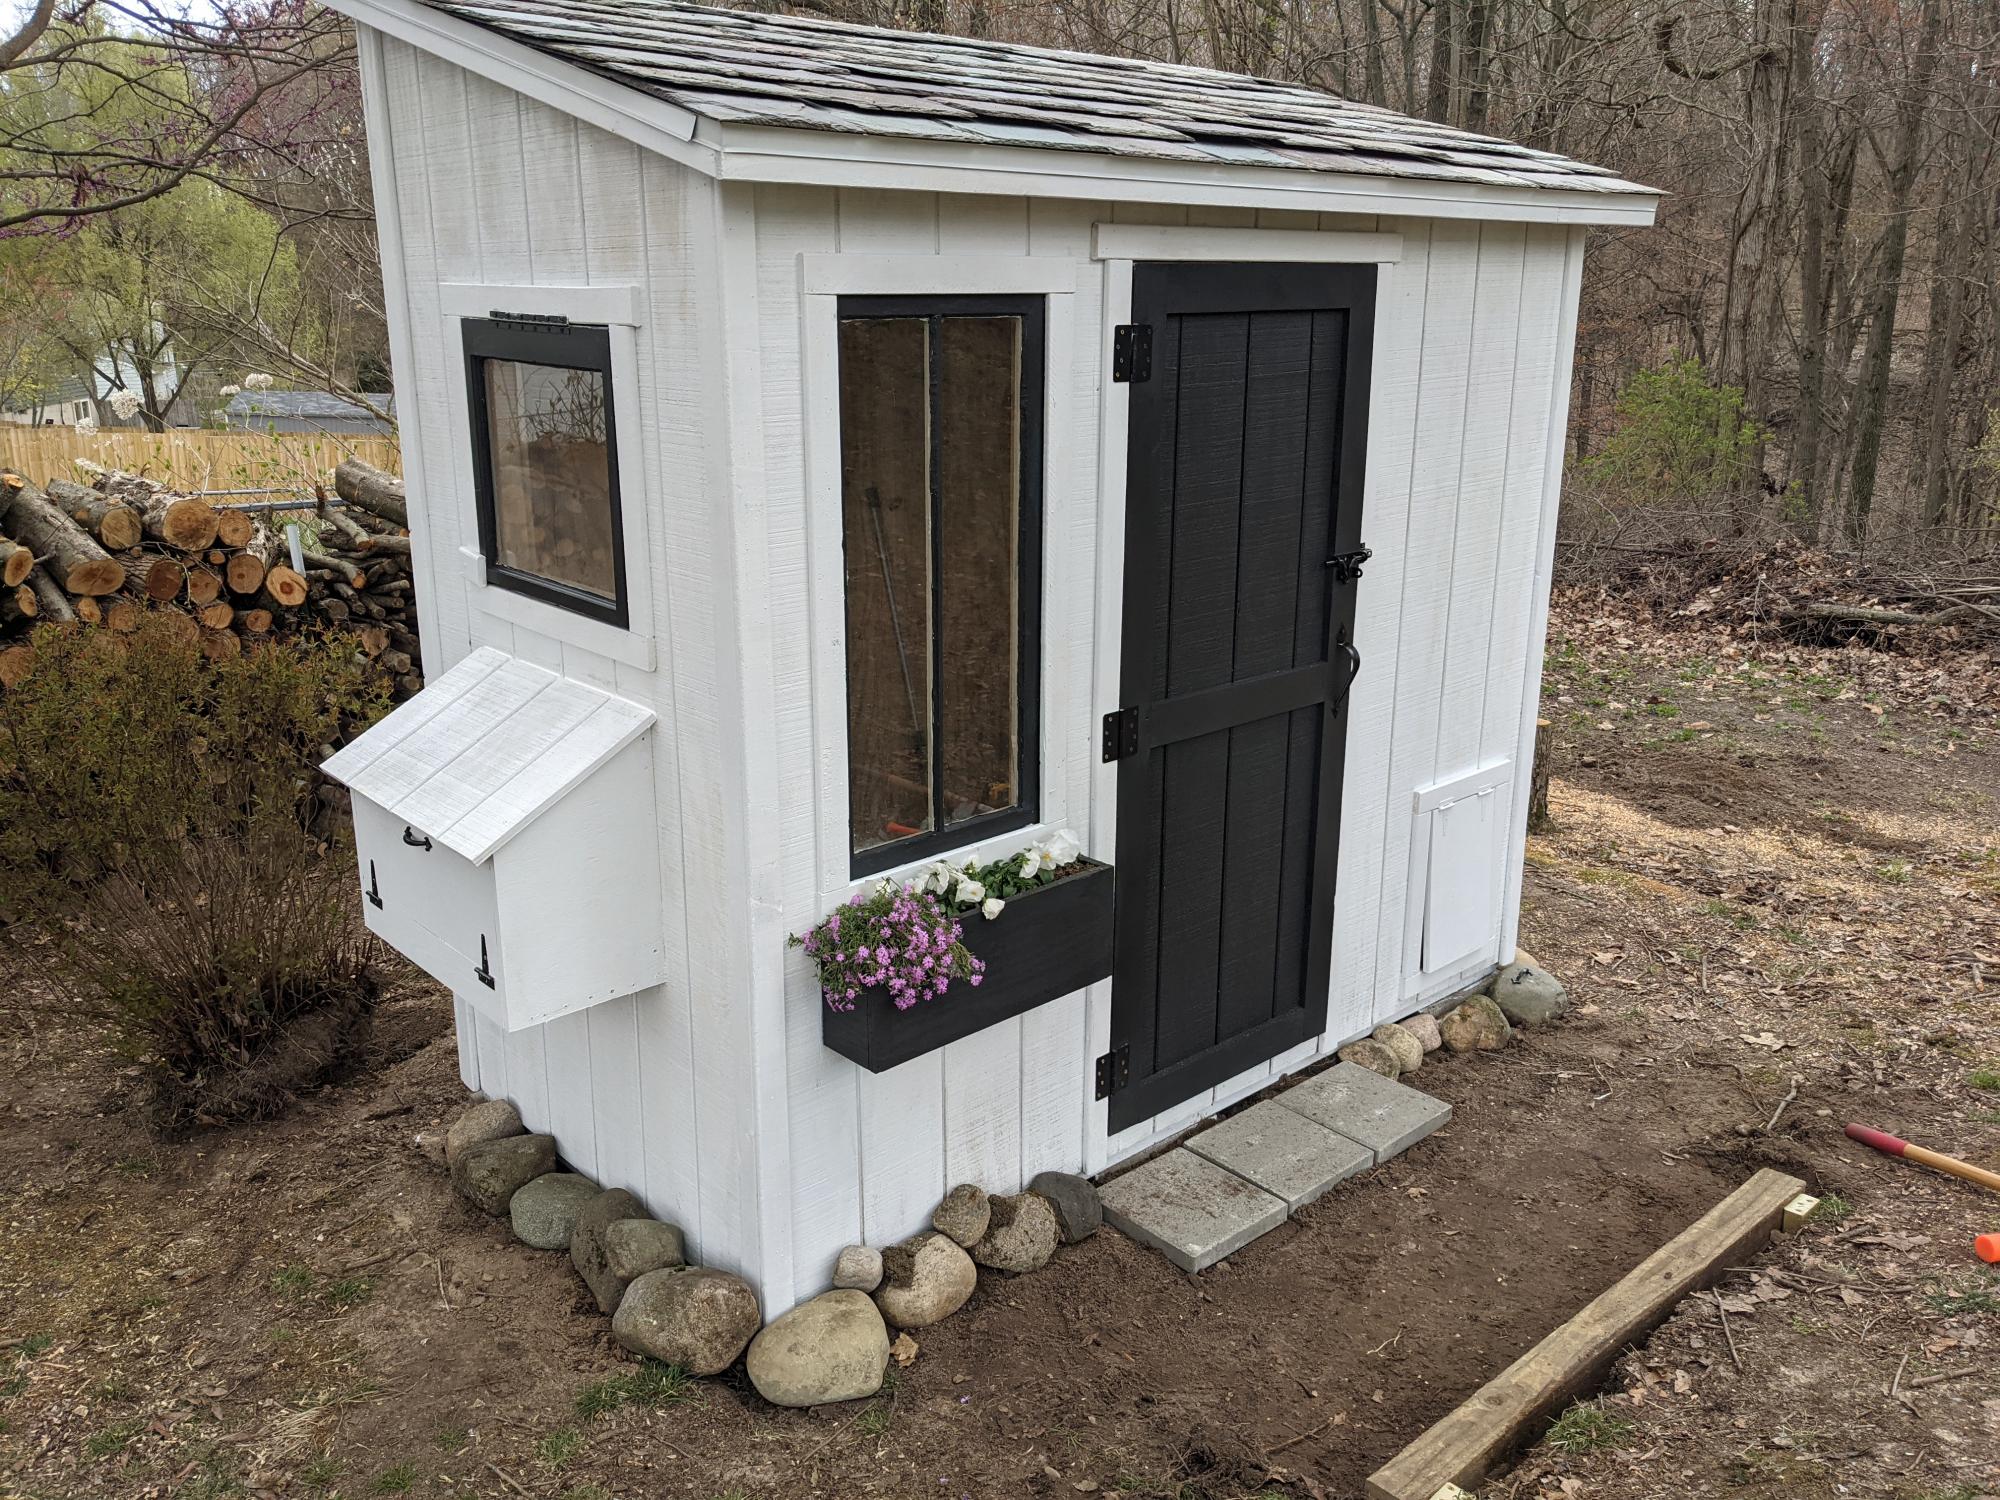
Reader Photos and Whitney Builds:
We did use 2x3's for the framing and it really did work out nice. They are a little harder to work with because they are not as ridged as a 2x4. But at a cost savings of about $0.75 per board it really saves.
We did use some old wood windows and opted to not make the shutters operational. My concern was that the shutters would keep out the sunlight that helps keep the chicks warm in the winter. So this may be an option for someone who can get a hold of windows. We also used some barn wood for the shutters... so cute!
Another change, we did not make the front of the nesting box hinge. From what I have read the hens keep their nesting box fairly clean so it should be easy enough to clean it from the top. This also helps make the nesting box extra strong (my 5 year old nephew was already caught standing in it!).
One other change to the nesting box, I made it shorter. Once we got the wood right up to the coop it was way to deep and would have been hard for the hens to get in and out. I shortened sides by 4" and that left it with about a 3" drop into the box.
Please stop over and check out more construction photos and read more tips from Whitney from Whitney's Workshop. Thank you again Whitney and family!
Pin For Later!
from Recent Project Plans https://ift.tt/334HJfj
订阅:
博文 (Atom)