We Built It! Here's How it Turned Out!

from Recent Project Plans https://ift.tt/pzx80Qd
We Built It! Here's How it Turned Out!
This year I am on a tight budget for giving, so when Ana came up with these plans to add to our best hostess gifts collection, I jumped right on it and made multiple presents for under $10 each. I bought the wine glasses and rope at Dollar Tree, making it even more affordable!
Built on a budget, with only about $10 in materials
Makes a thoughtful and personalized DIY gift
Perfect for picnics, outdoor concerts, and park outings
Adds rustic charm with its handcrafted look
Quick and simple project that’s easy to build
Great way to use scrap or reclaimed wood
Functional design that securely carries a bottle and glasses
Fun opportunity to practice woodworking skills
Brings a touch of homemade hospitality to any wine night
Crafted with care to create something both beautiful and useful
Cut material according to the cut list.

Drill your holes in the center uprights and cut out the dog ears with a jig saw. I clamped the boards together to drill the hole. You want to use a bit that is the same size as your rope.


Start assembly by attaching bottom and sides and then add the center uprights. I built a few of these and after the first one I pre-finished prior to assembly. That seemed to be the best option. I used glue and nails for assembly throughout the project!


I recommend fitting the wine glasses and bottle of wine here to ensure correct spacing, also notice there are 2 sizes if you have a larger wine bottle or glasses. For the smaller size I marked 4" in from each side and the larger was 5" in. Now just add the 1x2 slats. Be sure to measure the same distances to keep everything straight when attaching to the uprights.

Then just add the rope and it's done!

Watch! Build Video for This Project
Video coming soon!
Ready to build this yourself? Here's the free plans, enjoy!
Charcuterie boards are a entertaining staple, the perfect base and backdrop for a gorgeous edible collage. But the charcuterie board itself - the wood board - can be hundreds of dollars! You can build your own using scrap wood for free.
I partnered up with Jaime Costiglio to build and test this project for you. This DIY tutorial walks you through how to piece scrap wood together to make a Charcuterie board.

To tie all the boards together, we added a footed base:
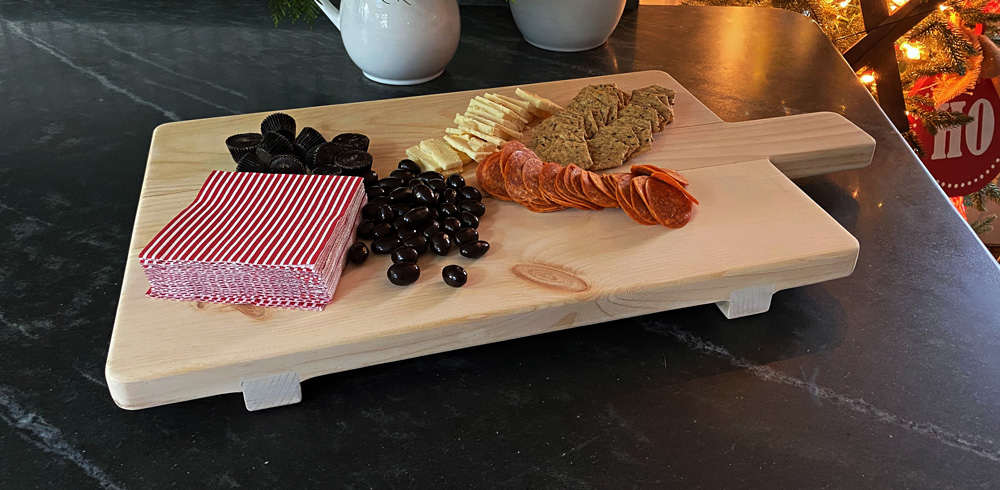
So just cut your boards, lay them out with glue, and attach the boards to the bottom. Super easy!
More photos and build tips at Jaime Costiglio.com
This was a fun project to tackle with my kids. We took the 2x4 blocks, stained them, and predrilled out the spots of the metal wire

And then inserted the paper clips that we straightened out.

Hello, happy weekend!
Christmas is getting so close! I don't normally post on Sundays as we try to keep the weekends for family time, but I wanted to make sure I got these last few plans to you before Christmas morning.
This morning, my sister came over, and she showed me some ideas for gifts the kids can make for the grandparents. Grandparents are hard to shop for, as ours already have everything they need. My sister's idea was to do something so that the grandparents could display photos of their grandkids.
So we went to the garage, dug through the scrap wood, and after a couple of hours of wood crafting, this is what we came up with!
Both of these gifts were under $5 to make (free if you have the scraps) and could be made in half an hour (it took us longer because were were designing as we built). The grandparents haven't seen the gifts yet - pending they don't hop over and read the blog in the next couple of days, and I just know they are going to love them!
I mean, really, how can you not love that?!?!?
This is way better than another sweater or kitchen appliance that doesn't work as advertised. For the photo display block, we just took scrap 2x4s about 12" long, stained them using Rustoleum Golden Oak,
then drilled holes in the tops and poked wires in the holes. We twisted the wire so it would hold a photo. A large paperclip would do the same thing.
For the text, we used Painter's Markers to personalize the wood blocks.
The wall display was super easy too.
It's just 1x2s and clothespins. I cut the boards,
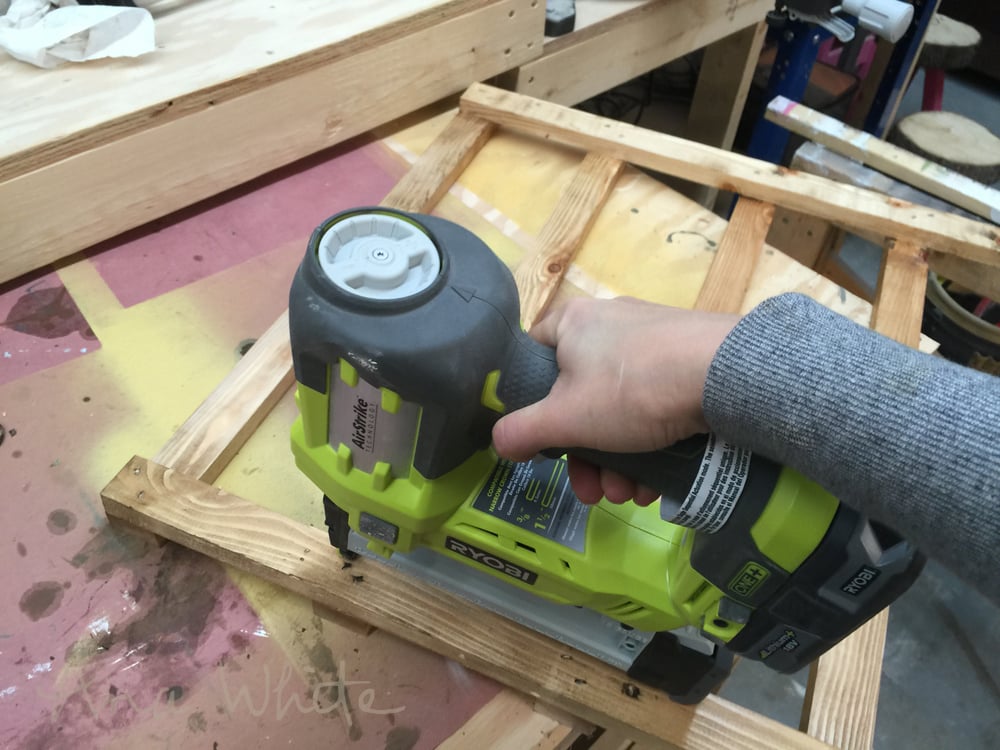
Then I used glue and my crown stapler (you can also use the brad nailer or screws) to attach the frame boards together. The sides just overlap the back boards for a very simple joint.
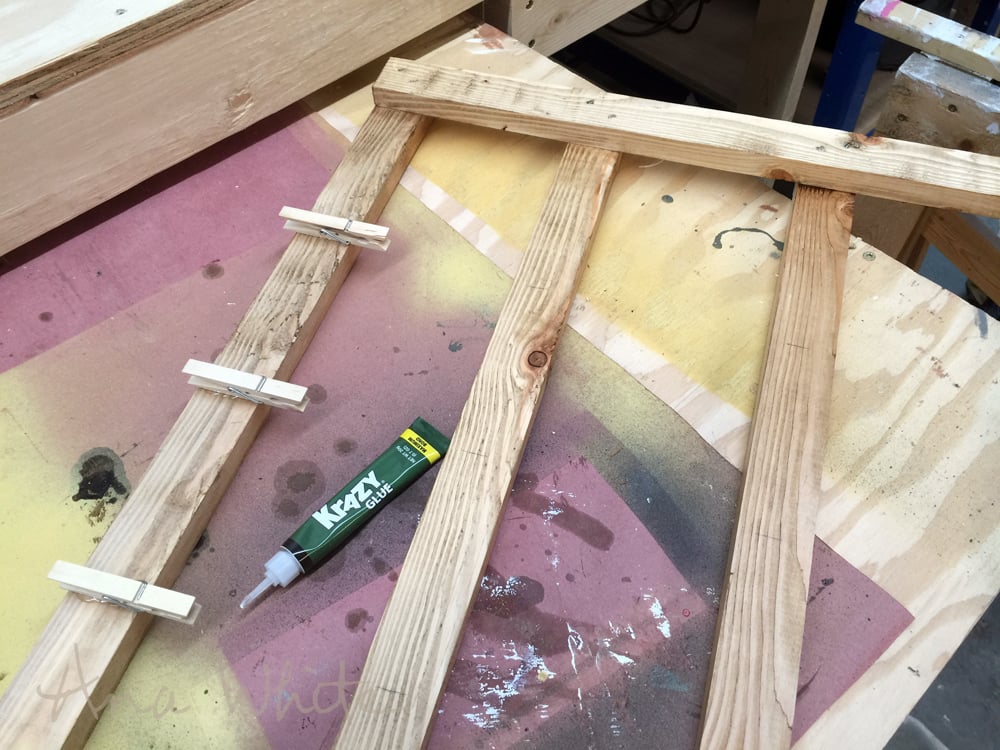
Then we just used Krazy craft glue to attach the clothespins to the wood frame.
I can't wait to gift these!
All right, your turn! The plans for the wall frame are below, but if you can't get these built in time for Christmas, make sure you pin for later!

Our guest room is getting an update and the old metal bed frame wasn't cutting it. I am working hard at making this bedroom update as budget friendly as possible. When Ana told me she was working on this plan, it was perfect timing, so I got right to work!
Start by cutting all of your boards according to the cut list.

I then sanded everything and began assembly.

For the siderails I used a 1x spacer at the top for adding slats later. I clamped and predrilled and attached the 2 boards together, use glue here. Be sure to mark the top of the side rail to be sure you attach it to the legs correctly.
Next I built the legs. I blocked up the 2x4 and predrilled before screwing. Be sure to glue.


Next attach the legs to the side rails. Use glue and place screws at an angle.


Working on a flat level surface attach the footboard and headboard ends. There isn't much room here. You will want to glue and screw at an angle. I predrilled all of my holes for this project.


Finish the frame and add the slats - This design is so neat because it hides all the fasteners making finishing a breeze!


if applicable, embed video here
Ready to build this yourself? Here's the free plans, enjoy!