2025年7月31日星期四

Small Locker Cabinet - Freestanding Mudroom Shelf - Free Build Plans!

design image is rendered from plans.  actual results may vary.


One of the First Pieces I Built

I built this piece many years ago.  The size is small, but I actually liked the small size as the top becomes a useable shelf.  Honestly, I built the larger size too, but this one was just as functional and so much smaller.  This was a great piece, created an instant mudroom with no hooks on the wall.


See Also: Tall Mudroom Cabinet

Love this project but want to go taller?  We've got free plans for a similar cabinet, just taller and wider

free plans locker entryway mudroom freestanding shelf


Free Plans to Build Your Own Small Mudroom Shelf

We are happy to be able to provide free plans for you below.  Please share a photo if you build, we love seeing how your projects turn out!


from Recent Project Plans https://ift.tt/SAZyYs8

The Surprising Reasons Why Building Your Own Furniture Is Good for the Planet


reduce pollution diy furniture

Surprising Reason #1: It Cuts Down A Ton of Shipping Pollution

That flat-pack furniture from the store? It might’ve traveled across an ocean, sat on multiple trucks, and burned a whole lot of fuel before landing in your living room.

But when you build using locally sourced lumber—maybe even from your neighborhood mill or hardware store—you skip all that. Less fuel, fewer emissions, less packaging waste. Boom 🌍


diy furniture reduces packaging waste

Surprising Reason #2: There’s Almost No Packaging

If you’ve ever opened a store-bought dresser, you know the drill—foam, shrink wrap, weird bolts, mystery plastic pieces.

With DIY builds, it’s just lumber, screws, and glue. Your “packaging waste” is usually a few wood shavings on the floor. Bonus: your offcuts can be repurposed or composted (if untreated).


diy furniture is biodegradeable

Surprising Reason #3: It Lasts (But Still Breaks Down Naturally)

Most factory furniture is made with MDF, staples, and frustration. It’s designed to fall apart eventually—and end up in a landfill.

But when you build something? It’s solid wood, strong joinery, and made to last decades. And here’s the kicker: even when it finally does reach the end of its life, it’s biodegradable.

That’s right—wood breaks down. Plastic and metal don’t. Big win for the earth.


diy furniture is repairable

Surprising Reason #4: You Can Actually Fix It

Ever tried to repair store-bought furniture? Good luck. One broken cam lock and it’s headed to the dump.

DIY furniture, on the other hand, is totally fixable. Tighten a screw, replace a board, sand it down, refinish it. Because you built it, you know how to fix it.


hand built furniture is better for the environment

Surprising Reason #5: It’s Built (and Finished) by Hand

Mass-produced furniture is made with massive machines—think sawdust-spraying, energy-hungry, high-emission factories. Then it's often finished with industrial-strength chemicals in spray booths and packed in plastic.

But your furniture?

  • It’s cut by hand (or a small saw in your garage).

  • It’s sanded by hand, often with reused sandpaper.

  • And it’s finished with care—maybe just a simple oil or low-VOC stain you brushed on yourself.

The difference in energy use, emissions, and chemical impact is huge.
Handmade isn’t just beautiful—it’s better for the planet.


diy furntiure fast renewing wood species good for planet

Surprising Reason #6: We Use Softwoods—Fast-Renewing and Earth-Friendly

Most DIYers use softwoods like pine, fir, or spruce—because they’re affordable, easy to work with, and available just about everywhere.

Here’s why that’s awesome:

Softwoods grow fast. That means they renew quickly, making them one of the most sustainable materials around. And while they grow? They’re busy pulling carbon from the air, cleaning soil, and helping ecosystems thrive.

So every time you build with a 2x4, you’re supporting a resource that gives more than it takes.


locally made furniture is good for the planet

One Table at a Time

So yeah, woodworking is fun. It's useful. But it’s also a quiet way to help the planet.

Even just one handmade piece of furniture keeps waste out of landfills and cuts down on industrial impact. And if more people picked up tools instead of credit cards?

That’d be a big deal.


from Recent Project Plans https://ift.tt/2oZwqPl

Locker Bookshelf - Freestanding Mudroom Solution 48" Wide - Free Plans

Design image is rendered from plans. Actual results may vary.


A Complete, Freestanding Mudroom—No Walls Required

This versatile entryway locker is designed to bring the function of a built-in mudroom to any space—instantly and without installation. With its tall, upright form and thoughtfully divided compartments, the piece creates a natural zone for storage, organization, and daily drop-offs wherever you need it.

Crafted with a compact, narrow profile, this unit is ideal for hallways, entryways, or tight transitional spaces where a full built-in isn’t practical. Its vertical structure defines space and adds architectural weight without overwhelming a room, making it feel like a custom fixture rather than a movable piece.

Three tall compartments offer generous vertical cubbies with hook space, while upper and lower shelves provide structured zones for storage bins, baskets, or folded items. The symmetry and balance of the design give it a polished, purposeful look that feels integrated into your home—even though it’s completely freestanding.

Shown in a soft gray painted finish, but you can choose any finish to match your home, the piece blends seamlessly into modern farmhouse and transitional interiors. Its clean lines and upright posture create order without fuss, bringing visual calm to busy entry points.

Best of all, this locker doesn’t require any wall mounting, assembly into studs, or construction mess. Just place it where you need it, and you instantly have a mudroom—even in homes that don’t have one.

Free Plans Available

This project is DIY-friendly, and we’re offering complete plans for free. Build it yourself with easy-to-follow measurements, materials lists, and construction steps. It’s an elegant, high-impact solution for everyday organization.


from Recent Project Plans https://ift.tt/kn7K6xv

2025年7月24日星期四

Free Heavy-Duty Bunk Bed Plans (Twin, Full, or Queen Sizes)

design image is rendered from plans in queen size with bedding facing perpendicular to length of bed - the opening for the top bunk differs slightly from the final plans.  please reference plans for exactly build recommendations for stair/ladder opening


This Free Plan Sponsored by Kreg Tool Company

Big thanks to Kreg Tool Company for sponsoring this outdoor dining set build! I used the Kreg 720PRO Pocket Hole Jig to create strong joints, their Versa Grip clamps to hold everything in place, and the cutting guide system for making clean, straight cuts. I also used Kreg screws for a professional, durable hold.

These tools made the process faster, easier, and way more enjoyable. Highly recommend for any DIY builder!


Why I Built these Heavy Duty Bunk Beds

My friend has a large bunk room in her lake house and asked me to build her some lifetime bunk beds that would hold up over time.  We choose a classic design, made it extra sturdy using 4x4 posts and 2x8 rails.  This bunk system is heavy duty!


How We Built the Bunk Beds

This wasn't a quick and easy project, but working on it as a couple, we were able to tackle the build part in a weekend.  Here's how -

sand boards

First, we sanded every single board, on all four sides.

pocket holes

Then we prepped all the joints by using Kreg Pocket Holes on the 1-1/2" setting.  The Kreg 720 Pro is the best tool for this job.

attaching posts

We built the end panels for the bunk beds in our shop by attaching the slats to the 4x4 posts with 2-1/2" pocket hole screws.

NOTE: For even heavier duty construction, use Kreg HD System and screws

end panel

Here is one of the bunk bed end panels framed.  

blocking

We also added the 1-1/2" x 2" trim pieces (shown in plans too) and the 1x12 skirt to the bottom.  The skirt is optional, we added because my friend eventually wants to add trundle beds, and the 1x12s would end up being the face of the trundle, matching the skirt.

end panel with opening enclosed

The headboard / ladder panel was a little more complicated because we added the paneling to enclose the headboard (and also enclose the stairwell) and the opening at the top took a couple more steps.  Here's the headboard panel framed up (with added 1x12 skirt).

After all the panels are done, my friend stained everything Golden Oak color.  

And then it was just assembly!

pocket hole assembly

Assembly is just attaching the 2x8s that run long to the headboard and end panels.  

This was definitely a two person job as the boards were heavy (and we doubled the work with two bunk beds in full size!)

bed assembled

After that, we just added the slats (1x3 furring strips right on top of the 2x4 cleats)

slats on bed

If you end up with scrap 1x3s that won't span the entire width, but can span half way, you can stagger them like this, just try not to get more than 4" gaps anywhere (or depending on your mattress recommendations for slat spacing).

two beds

Here's with one mattress -

stairs

And then with the added stairs!

What a great project, we are so glad we were able to be part of it.


Watch!  Build Video for This Project

Video coming soon


Build the Matching Drawer Stairs Too!

Did you notice the drawer stairs?  We built them too!  And made free plans for you:

diy bunk bed stairs with drawers free plans

Free Plans to Build Your Own Heavy Duty Bunks in Twin, Full or Queen Sizes

Ready to build this yourself?  Here's the free plans, enjoy!


from Recent Project Plans https://ift.tt/uMEN3Xm

2025年7月22日星期二

Extra Long Buffet Cabinet with Drawers - Free Plans


design image is rendered


Why We Built this Project


My woodworking friend Jaime from That's My Letter is doing some projects for her church.  One of the big projects she wanted to tackle was an extra long buffet to provide more storage and functionality to their dining area. Something a little more simplified and modern, but not loosing that one-of-a-kind handmade just for you feel.

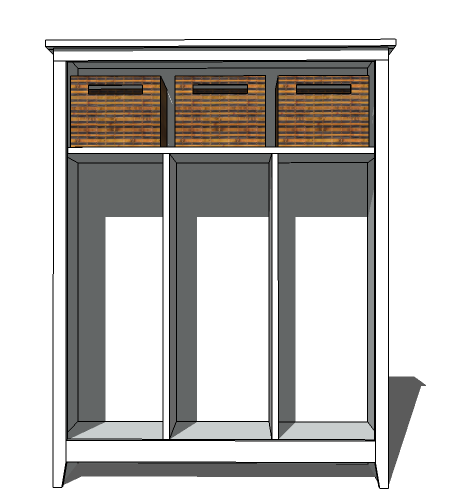
I love how this project turned out! 

Look at all that storage behind the doors!

Those are dinner plates.  And there are three of those drawers!

And did you notice the hardware?  Jaime made that too!


More Photos of Build Process

You can get all the details from Jaime on how she built this cabinet and lots more photos in her building post here.  Please take a second to hop over and check it out.


from Recent Project Plans https://ift.tt/pZOvYgG

2025年7月20日星期日

Clever space-saving idea you can use in any room

This smart wall station combines a desk, a wall lamp, and a bookshelf into one compact unit. Visit https://ift.tt/vHP5Wft for 27% off Sitewide! Thanks to #HelixSleep, for sponsoring! My woodworking plans: https://ift.tt/0S8AUtb Materials Used • (1) 3/4 in. x 4 ft. x 8 ft. Poplar Plywood • (1) 2 in. x 12 in. x 8 ft. Southern Yellow Pine • (5) 4in Lag screw https://amzn.to/4m8HWRY • (5) Washer for the lag screws • (48-) 1- 5/8in wood screws or drywall screws can work https://amzn.to/4kLXU36 • (-) LED strip with a single color or RGB LED with a Controller and remote • (1) Rocker switch https://amzn.to/4lEjM1P • (1) DC power jack https://amzn.to/3IVjJjp • (1) LED Wire https://amzn.to/3IVjJjp • Blue Wire connectors https://amzn.to/4m8HWRY • Epoxym https://amzn.to/44Nj2jq • Markers long head https://amzn.to/40pnsvJ • Giant pencil https://amzn.to/4eZf3F6 • Danish oil and Paint https://amzn.to/4eVZbmW • Foam roller https://amzn.to/4m2Fzjj Simple LED with Remote https://amzn.to/4lEjM1P Tools Used • Table saw • Miter saw • Carpenter square • Sander • Clamps•

from DIY Creators https://www.youtube.com/watch?v=WpDnqkU6G3s

2025年7月10日星期四

DIY Parsons Style Bookshelf – 5 Shelf Tower with Free Plans

design image is rendered from plans


More Free Plans that Match

We LOVED this collection of plans so much, we went on to make plans for you in many different options.  


parsons end table plans

Matching Side Table Free Plans


diy small parsons coffee table

Square Coffee Table, perfect for small tables, or group together


two shelf end table free plans

Two Shelf End Table Free Plans


parsons console bookshelf plans

Parsons Console Bookshelf Free Plans


DIY Parsons Rectangle Coffee Table - Modern Design, Free Plans

Rectangle Coffee Table Plans


from Recent Project Plans https://ift.tt/PzR4yuW

2025年7月9日星期三

DIY Parsons Rectangle Coffee Table - Modern Design, Free Plans

More Free Plans that Match

We LOVED this collection of plans so much, we went on to make plans for you in many different options.  


parsons end table plans

Matching Side Table Free Plans


diy small parsons coffee table

Square Coffee Table, perfect for small tables, or group together


two shelf end table free plans

Two Shelf End Table Free Plans


parsons console bookshelf plans

Parsons Console Bookshelf Free Plans


from Recent Project Plans https://ift.tt/SuJEGMs

DIY Parsons Small Coffee Table

More Free Plans that Match

Want to build a whole set of plans that match this table?  Here are the free plans that we offer that match:
 

parsons end table plans

One Shelf End Table Free Plans


two shelf end table free plans

Two Shelf End Table Free Plans


parsons console bookshelf plans

Parsons Console Bookshelf Free Plans


from Recent Project Plans https://ift.tt/Jekho6V

2025年7月8日星期二

2025年7月7日星期一

DIY Bunk Bed Steps with Built-In Drawers – Easy Build with Free Plans

Why I Built this Project

My friend wanted a quad bunk system that could be suitable for adults.  She wanted stairs with drawers in between for easy access to the beds, and more storage without taking up more floor space.

I had an idea to do a pancake style stair system to make this project more DIY friendly and fast.  I tried it and it worked out great, the stairs turned out awesome and the drawers work well.


Why We Love these Bunk Bed Stairs with Drawers

  • Built-in drawers add tons of hidden storage without consuming more floorspace
  • Easy to build with basic tools and 1x boards
  • No pocket holes or complicated joinery
  • Durable solid wood design holds up to daily use
  • Easy to paint or stain just about any color
  • Customizable to fit different bunk bed solutions
  • Works with most any bunk bed or loft bed with open end
  • Space-saving solution for small rooms
  • Clean, modern look with pancake-style design
  • Budget-friendly and beginner approved


How I Built this Project

This project was about as difficult as building a dresser, and a lot of fun to make!  I would love to try this with 3/4" plywood sides too - but the 1x whitewood boards worked really well and the drawers are sliding great!

I cut all the boards with a miter saw.

build bunk bed stairs with drawers

Then I layed the sides out on a flat level work surface and attach with brad nails and wood glue.  

Here is the plans for my worktable, if you need a worktable that is quick to build and flat.

build bunk bed stairs with drawers

Next, I added the drawer slides to the sides. It is much easier to do this working flat with gravity on your side, than trying to crawl inside the project and install drawer slides.

build bunk bed stairs with drawers

My trick with drawer slides is to start the screws on a line, so it's always level and I just have to work about starting my screw on the line.

build bunk bed stairs with drawers

After the side panels are done, I added the front framing pieces.

build bunk bed stairs with drawers

Then the treads to the tops.

build bunk bed stairs with drawers

Then I built the drawers using brad nails.

build bunk bed stairs with drawers

And added the 1/4" plywood to the bottoms.

build bunk bed stairs with drawers

Then I added the drawer slides to the bottoms of the drawers.

build bunk bed stairs with drawers

Tested all the drawers - amazingly, everything slide perfectly on the first try and I didn't make any adjustments. 

build bunk bed stairs with drawers

Then I took the remaining pieces of 1x10s and used some brad nails to add a gap and attached them.

build bunk bed stairs with drawers

From the inside I further attached with 1-1/4" screws.

build bunk bed stairs with drawers

The drawer faces are a perfect fit!

build bunk bed stairs with drawers

For the finish, we sanded, applied interior wood stain, and poly on the tops.


Watch!  Build Video for This Project

if applicable, embed video here


Free Plans to Build Your Own Bunk Bed Stairs with Hidden Drawers

Ready to build this yourself?  Here's the free plans, enjoy!


from Recent Project Plans https://ift.tt/lRzXtQL