Building a DIY multi-purpose woodworking WORKBENCH Watch the full workbench video here: https://youtu.be/iwuCBxuoHG4 Plans: https://ift.tt/XVrYOCc
from DIY Creators https://www.youtube.com/watch?v=a8_M8KqbAUk
2025年5月30日星期五
DIY Multi-Purpose Workbench (The Frame) – Ep. 02 #Short #woodwork #diyprojects
Building a DIY multi-purpose woodworking WORKBENCH Watch the full workbench video here: https://youtu.be/iwuCBxuoHG4 Plans: https://ift.tt/MlRAofO #diy #woodworking #workbench
from DIY Creators https://www.youtube.com/watch?v=qmYEd-GnXkg
from DIY Creators https://www.youtube.com/watch?v=qmYEd-GnXkg
2025年5月29日星期四
DIY Multi-Purpose Workbench (The Legs) – Ep. 01 #woodworking
Building a DIY multi-purpose woodworking WORKBENCH Watch the full workbench video here: https://youtu.be/iwuCBxuoHG4 Plans: https://ift.tt/MlRAofO
from DIY Creators https://www.youtube.com/watch?v=XTRA5xCz5hM
from DIY Creators https://www.youtube.com/watch?v=XTRA5xCz5hM
2025年5月25日星期日
The DIY Creators WORKBENCH
In this video, I’m creating a completely new and improved workbench packed with all the features I’ve been wanting. Since this isn’t a budget project, I didn’t limit myself at all! Thanks for watching—I hope you like the video! Below, you’ll find the full build plans, a list of materials, and the tools I used to put it all together. NEW Workbench Plans: https://ift.tt/Rg3d6Fm All my woodworking plans: https://ift.tt/qdLc6UN Subscribe: If you are not already subscribing to my channel: http://bit.ly/1PtWJEd VIDEO CHAPTERS: 00:00 – Intro 00:51 - Cutting Plywood for Workbench 02:38 - Assembling Workbench Legs 05:16 - Constructing the Workbench Frame 10:11 - Adding Storage Shelves 12:21 - Creating Suspended Storage Shelf 13:39 - Inside Part of Workbench 16:21 - Building Tool Drawer 16:42 - Adding Bench Dog Holes 19:28 - Installing Metal Strip on Top 22:09 - Drilling Holes for Assembly 24:20 - Making Front Trim for Workbench 27:52 - Painting Workbench Parts 29:00 - Cutting LED Strips for Lighting 33:00 - Installing Casters for Mobility 35:45 - Making Shapes for Design 37:30 - Installing Universal Tracks 39:51 - Cleaning Up Edges of Workbench 40:10 - Adding Metal Panel to Surface 41:38 - Installing LED Cover 42:38 - Overview of Completed Workbench 46:11 - Final Thoughts on Project Materials • (5) Sheets of Plywood https://ift.tt/3L0hgHV • (2) 3/8in Wood dowel https://ift.tt/KMA8eaz • 1/4in Wood dowel https://ift.tt/SiHjF2u • Wood glue https://amzn.to/4jMLcBG • Sand Paper https://amzn.to/3RZsQRD • Iron Ore Gray paint • Foam roller https://amzn.to/4iO8bL7 • Clear Face shield https://amzn.to/4kbxwjk Hardware • (QTY) Pocket hole screws - https://amzn.to/3RW7ZyE • (QTY) #8 1-3/4in Power Pro Wood Screw - https://amzn.to/43hM4s1 • (QTY) #8 1-1/4 Wood Screw – https://amzn.to/4dbcn6H • (QTY) #8 3in Wood Screw - • Drawer slide - https://amzn.to/4dc7WIT • Kreg Clamp Trak Kit https://amzn.to/3SpNLgG • 10in Jaw Vise https://amzn.to/4jTXb0o • Lag screws for vise https://amzn.to/3YBuGMm • Adjustable Feet https://amzn.to/4k5ftMh • Casters https://amzn.to/3GKqIL0 • Small Brackets https://amzn.to/4d6mGc2 • Corner brace large for the vise https://amzn.to/43cGMwJ • Magnetic Tool holder https://amzn.to/4jMLmZD • Metal Slab (Optional at Local metal supply) planned for 1/4in but switched to 3/4in • Tap & Die Set https://amzn.to/3StnLBa Bench Dog accessories • Aluminum bench dogs tools https://amzn.to/3StnLBa • Rockler bench dogs kits https://amzn.to/3F1JWvh • Bench dog accessories https://amzn.to/4keyoUl • Bench Clamp https://amzn.to/4m8Tghr LED & Soldering • LED remote & Controller https://amzn.to/4iXl7yh • (2) LED strips https://amzn.to/3RVzAA4 • Power bank for LED https://amzn.to/4m6Hnsz • Wire to extend LED https://amzn.to/44y3iCI • Shrink Tube: https://amzn.to/42YgtKs • Hot glue gun: https://amzn.to/43w32lB • Terminal block: https://amzn.to/4iWKD6S • Soldering station: https://amzn.to/3GOMUUl Tools • Drill Press https://amzn.to/4mebMoU • Woodworking clamp https://amzn.to/3Shxx9H • Table saw • JessEm Steel precision square https://amzn.to/3GYZ64S • JessEm Steel measuring https://amzn.to/4m6ZqP5 • Miter saw https://amzn.to/4m8UwRH • Circular saw https://amzn.to/44uh5dj • Plunge router https://amzn.to/4k43Rs8 • Trim router https://amzn.to/3ELgOsb • Jigsaw https://amzn.to/4md5Lc4 • Drill https://amzn.to/433VfuS • Right angle drill https://amzn.to/3FaEYw6 • Right angle drill attachment https://amzn.to/3GKIf5T • Pin Nailer https://amzn.to/43cIG0l • Pocket hole jig https://amzn.to/44wTAR2 • Flush cut saw https://amzn.to/439gVWv • 3/4in Forstner Bit https://amzn.to/4jGEKfn • 1/2 in Forstner Bit • 2in hole saw bit https://amzn.to/42RryOV • Router straight bit for template https://amzn.to/4jMTj0Q • Radius Jig Router https://amzn.to/4m84nY0 • Sander: https://amzn.to/43aqX9R Affiliate Links Disclaimer: Some of the links in this description are affiliate links. This means I may earn a small commission at no extra cost to you if you make a purchase through these links. Thank you for supporting the channel! #diycreators #workbench #modern #DIYProjects #WorkshopOrganization
from DIY Creators https://www.youtube.com/watch?v=iwuCBxuoHG4
from DIY Creators https://www.youtube.com/watch?v=iwuCBxuoHG4
2025年5月21日星期三
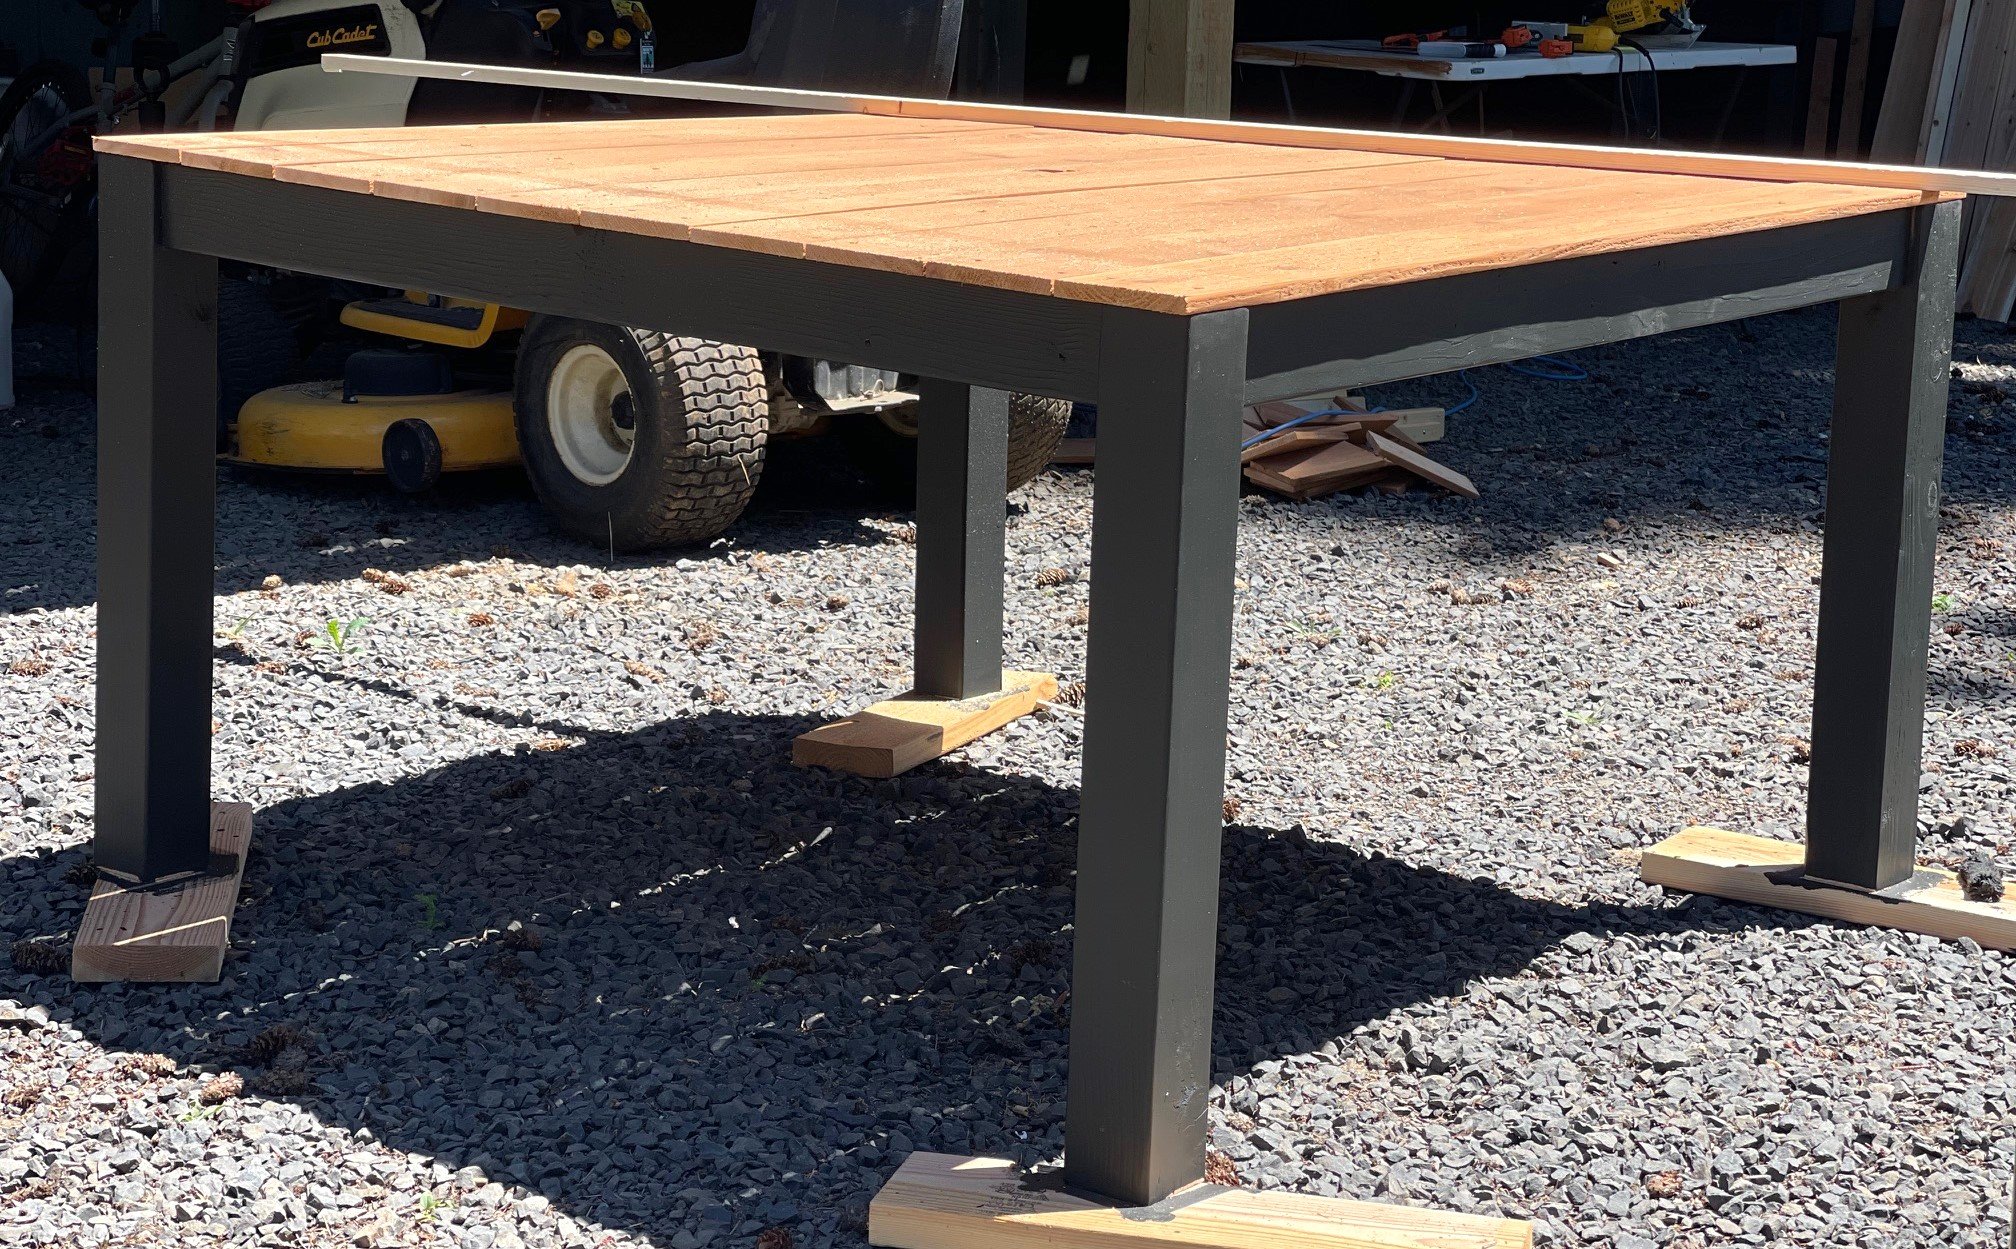
Essential Modern Outdoor Dining Table and Bench Set – Free Woodworking Plans
The image above is a digital rendering, created to scale based on my actual woodworking plans. This is not an AI-generated image. This saves on photography and staging costs, helping us keep plans free. Scroll down to see real build photos from the completed project.
This Free Plan Sponsored by Kreg Tool Company
Big thanks to Kreg Tool Company for sponsoring this outdoor dining set build! I used the Kreg 520PRO Pocket Hole Jig to create strong joints, their Versa Grip clamps to hold everything in place, and the cutting guide system for making clean, straight cuts. I also used Kreg screws for a professional, durable hold.
These tools made the process faster, easier, and way more enjoyable. Highly recommend for any DIY builder!
Why I Built this Project
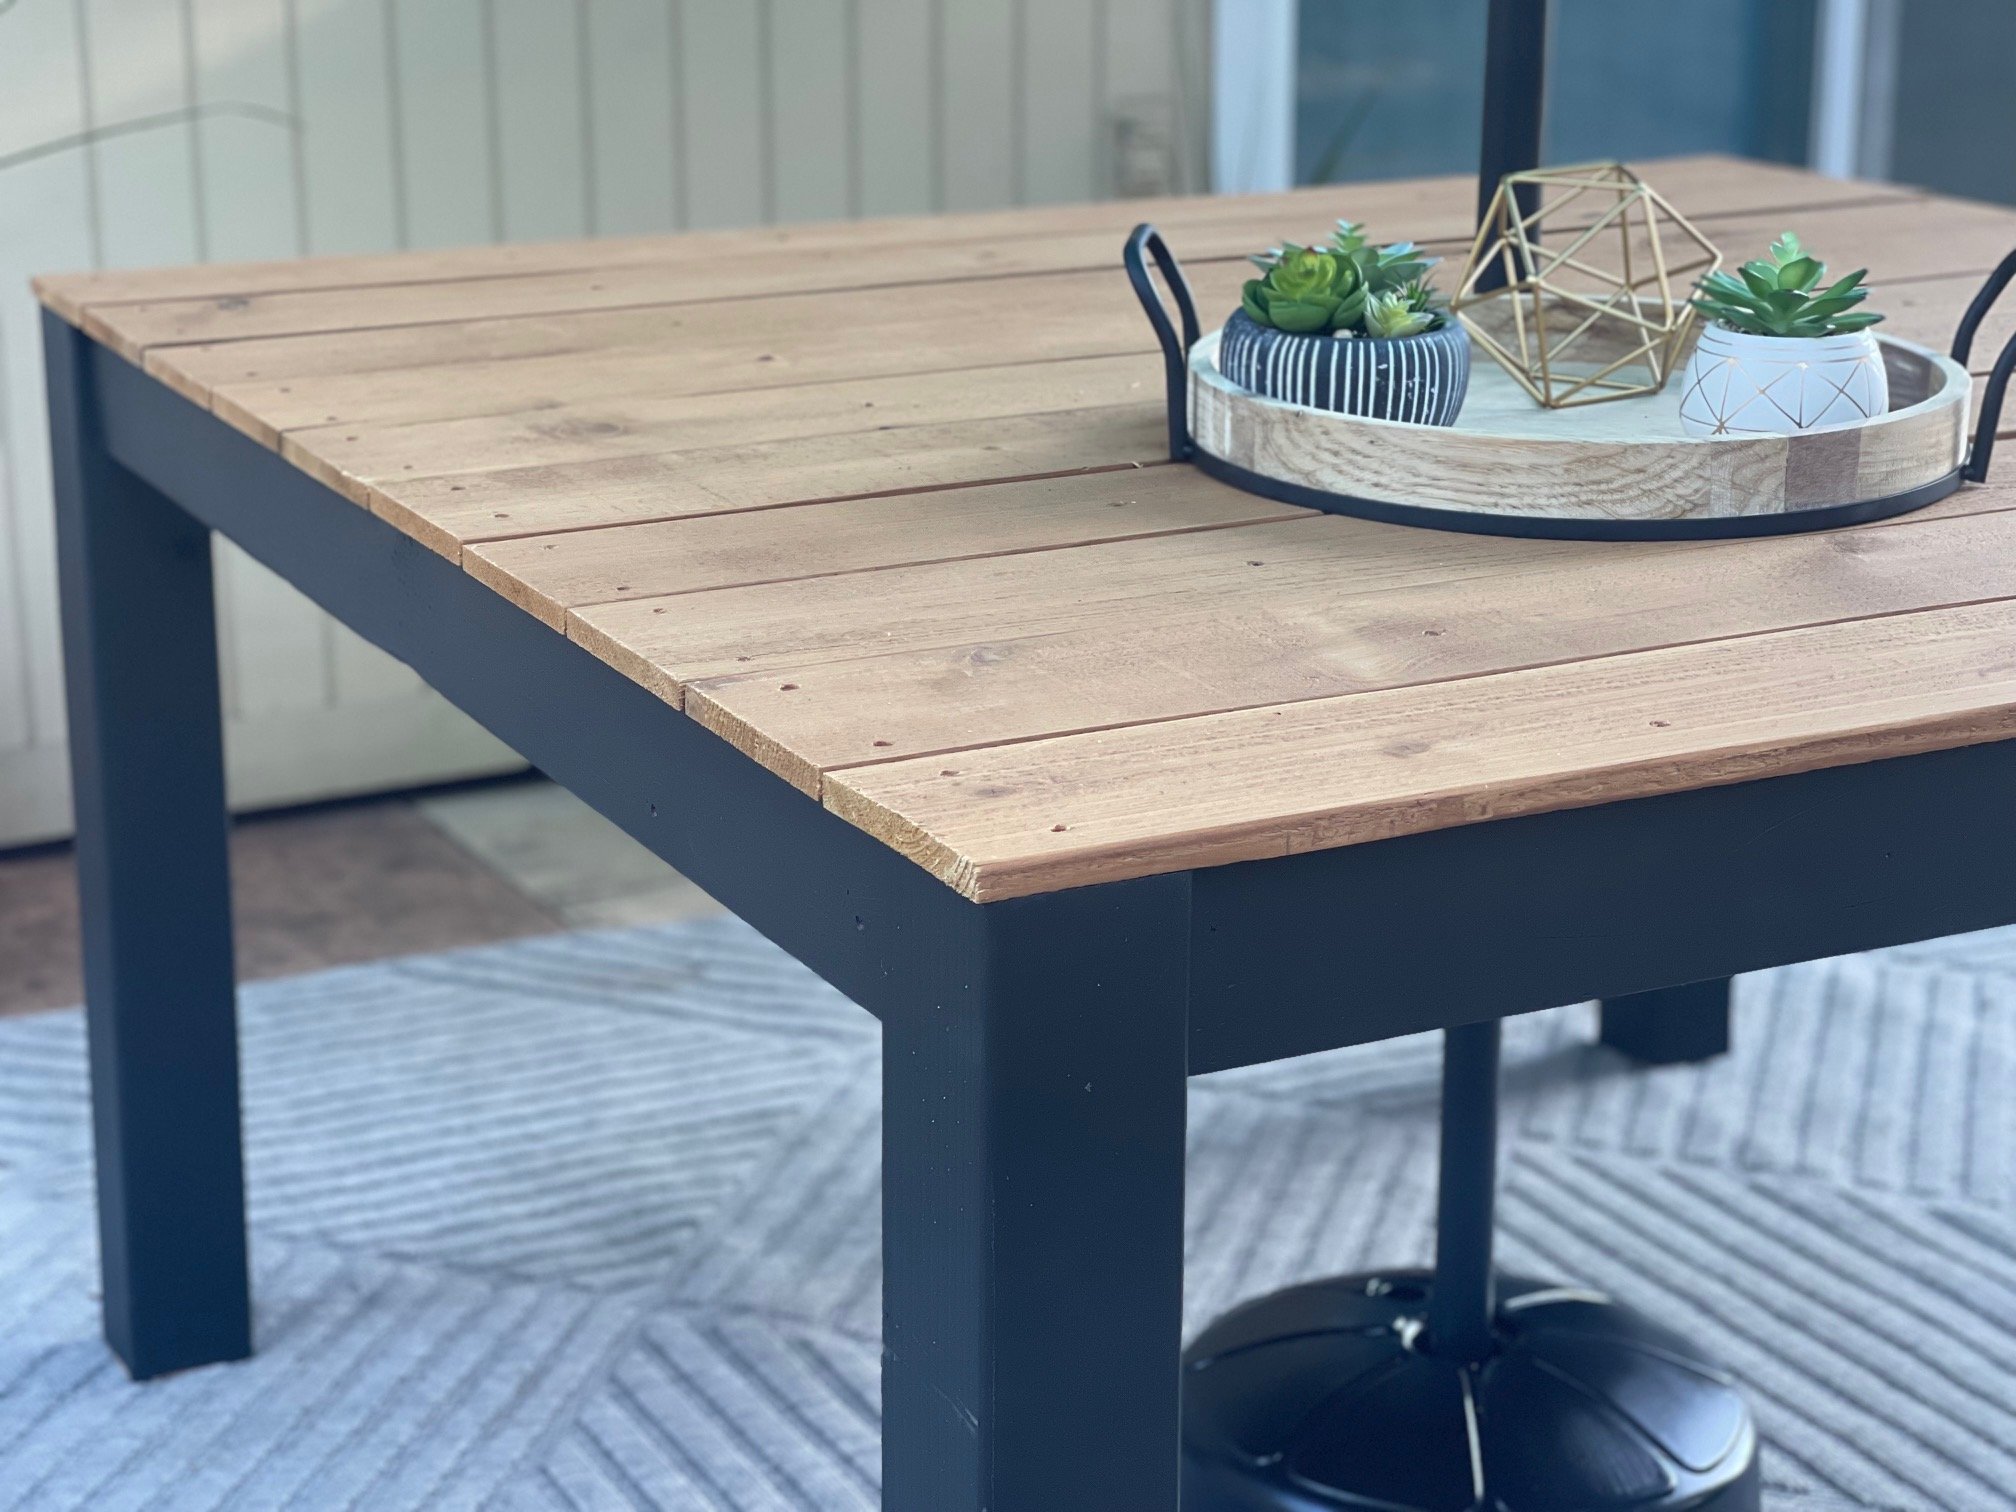
We have a big family and need a big table for outdoor dining! Outdoor dining sets can be expensive, and we are limited on design choices up here in Alaska. I was able to build this entire set for about $200 (including screws and stain).

We have been using this table for outdoor parties and it holds up well and looks so much better than a plastic table or a picnic table! I'm excited about the cedar top, expecting to get many years of use out of this set!
8 Seat Square Version with Free Plans!
You may recognize this design - our website manager Jennifer built a square version a couple years ago, and it turned out amazing. She did a two-tone finish and screwed the top boards on. Here are the plans with video and lots of photos of the build and final product.
How I Built this Project
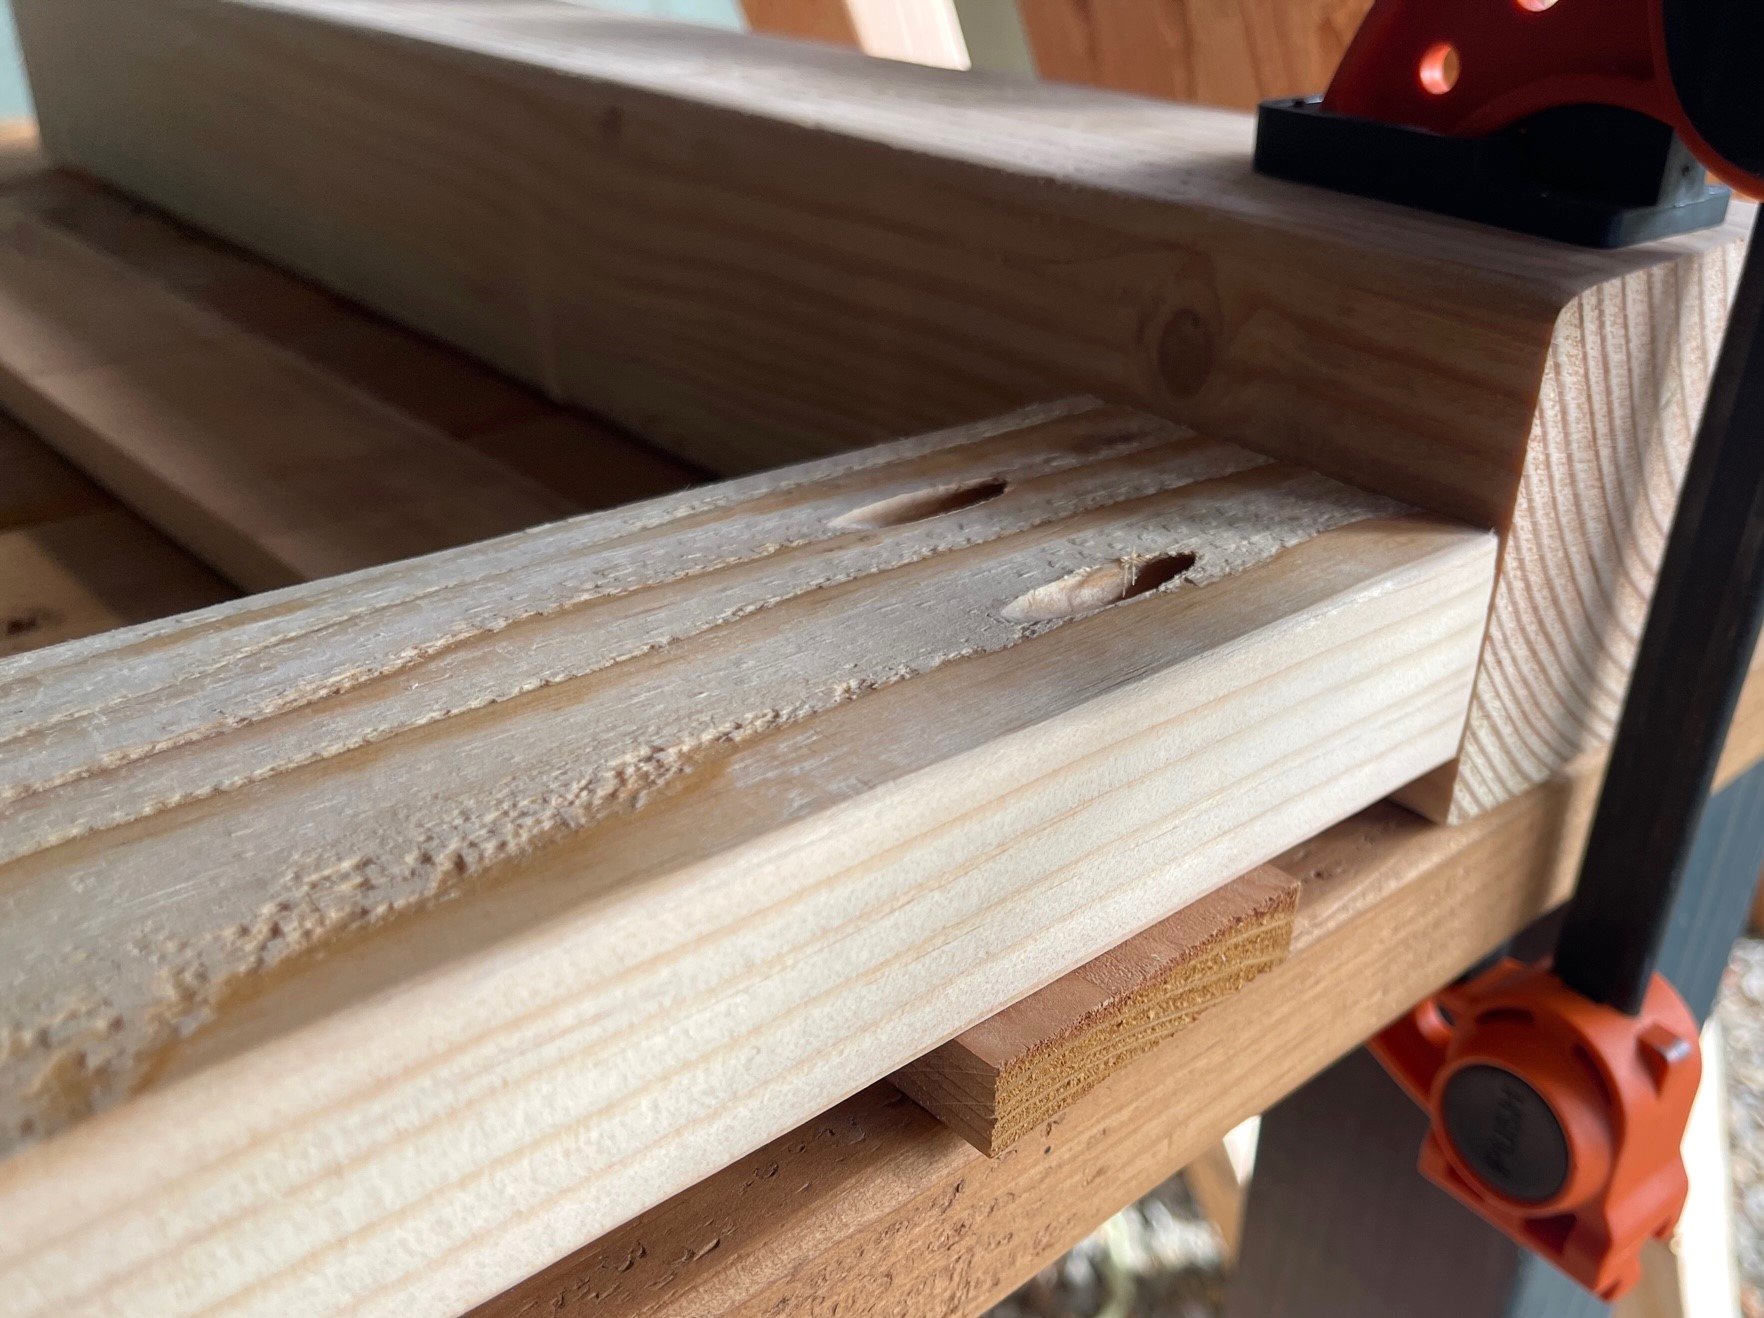
This project is built using basic methods, with just a few tools! Essential to building with 4x4 posts is a Kreg Jig - it's very difficult to join to a 4x4 post with out pocket holes. The Kreg Jig I recommend is the Kreg 720. The auto-adjusting feature makes going between 2x and 1x materials quick and accurate, and drilling pocket holes is fast and easy.

In the plans, you'll drill two pocket holes on ends of all the aprons boards to tie into the 4x4 legs.

You can see how this would be very difficult to do with screws from the outside - trying to screw accurately all the way through the 4x4 post would take precision and leave a big old hole on the outside of the post.
I always clamp, and love the new Kreg VersaGrip Clamps.

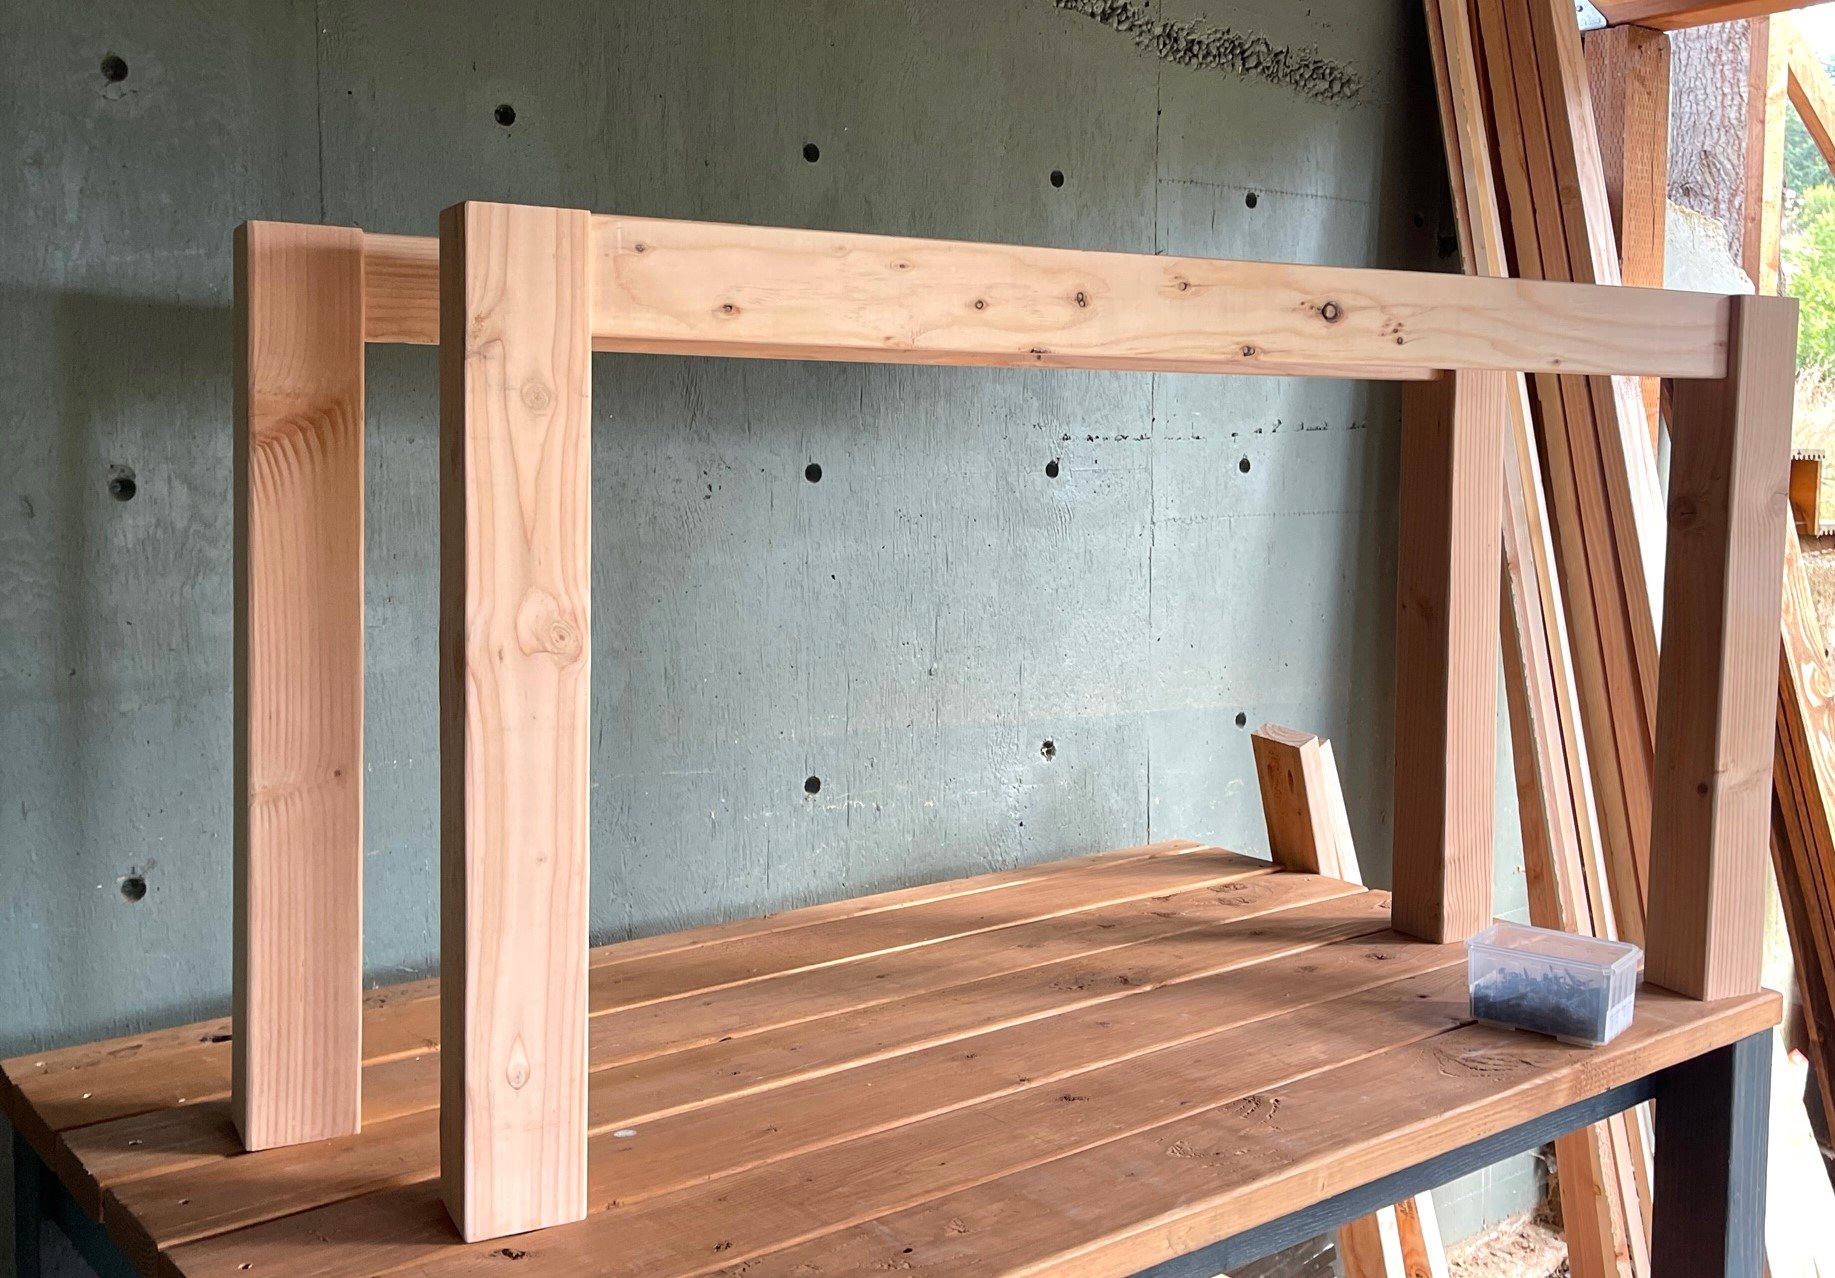
When building the leg sets, on the sides, you can make it work with the standard Kreg driving bit, but using the shorter bit really helped (or a right angle drill if you have one!)

Can you see the double aprons on this leg set? I wanted this bench to be super strong, so doubling up doubles the pocket holes, increasing the overall strength of the joint!

Once the end legs are done, then just add the two side aprons in the same way.

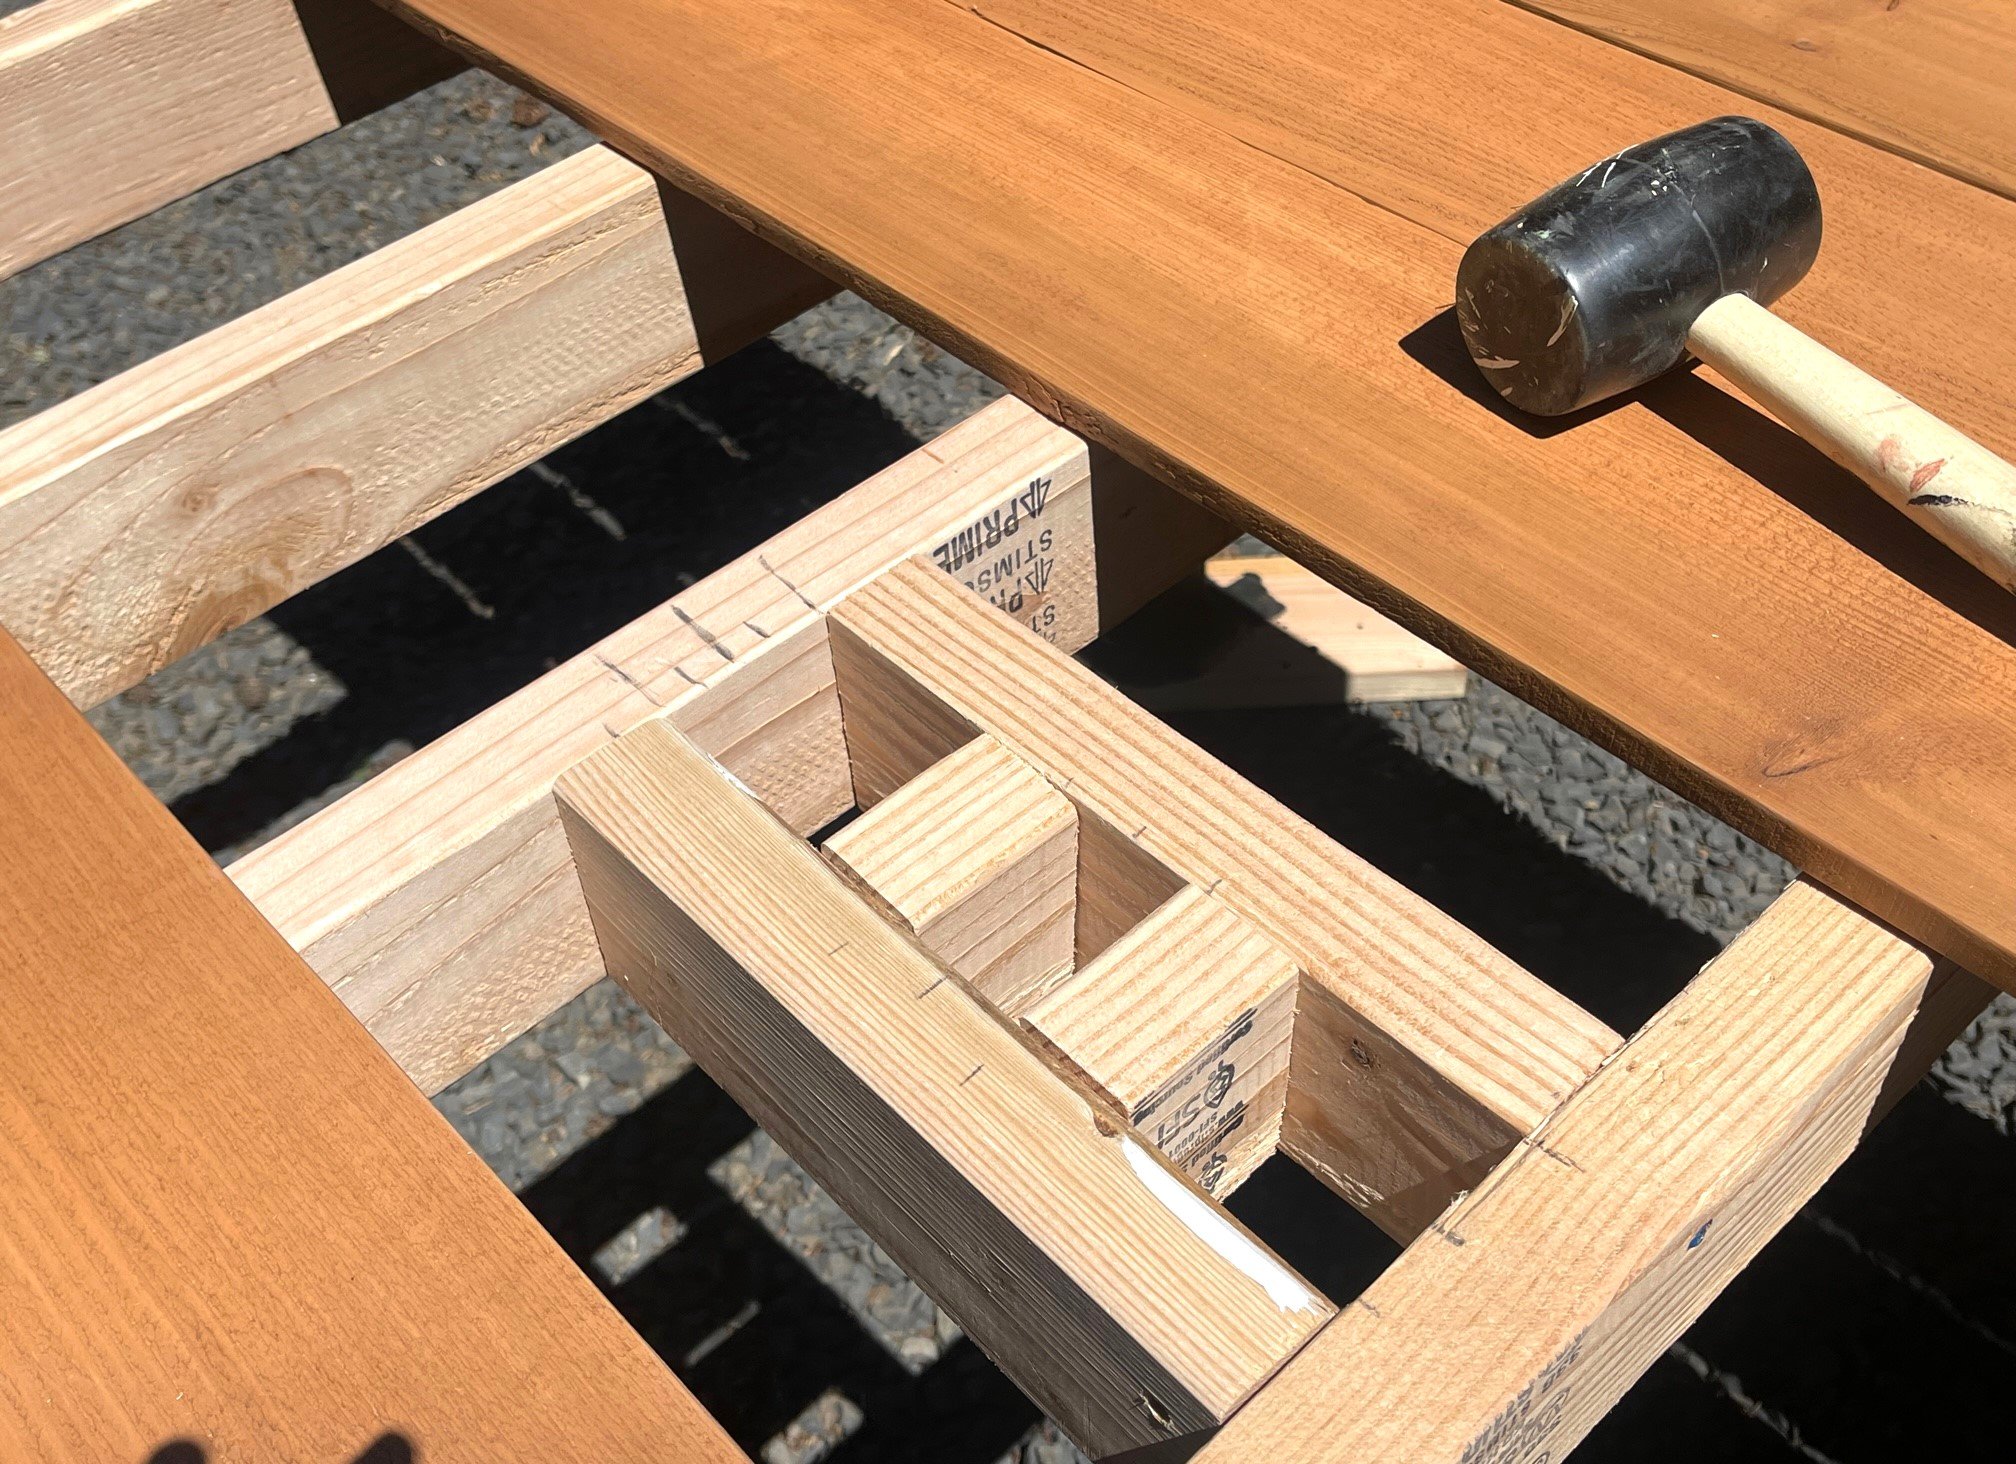
I added extra blocking at the corners here too, to strengthen the joint to the leg.

Here's the bench with the aprons attached. I did end up adding some extra bracing, thinking with the length the extra support could be a good idea.
Next up was cutting the cedar fence pickets for the top -

To keep the cuts consistent and make cuts quickly, I used my Kreg Precision Trek and Stop Kit - I have been using this system for many years and it saves me so much time!

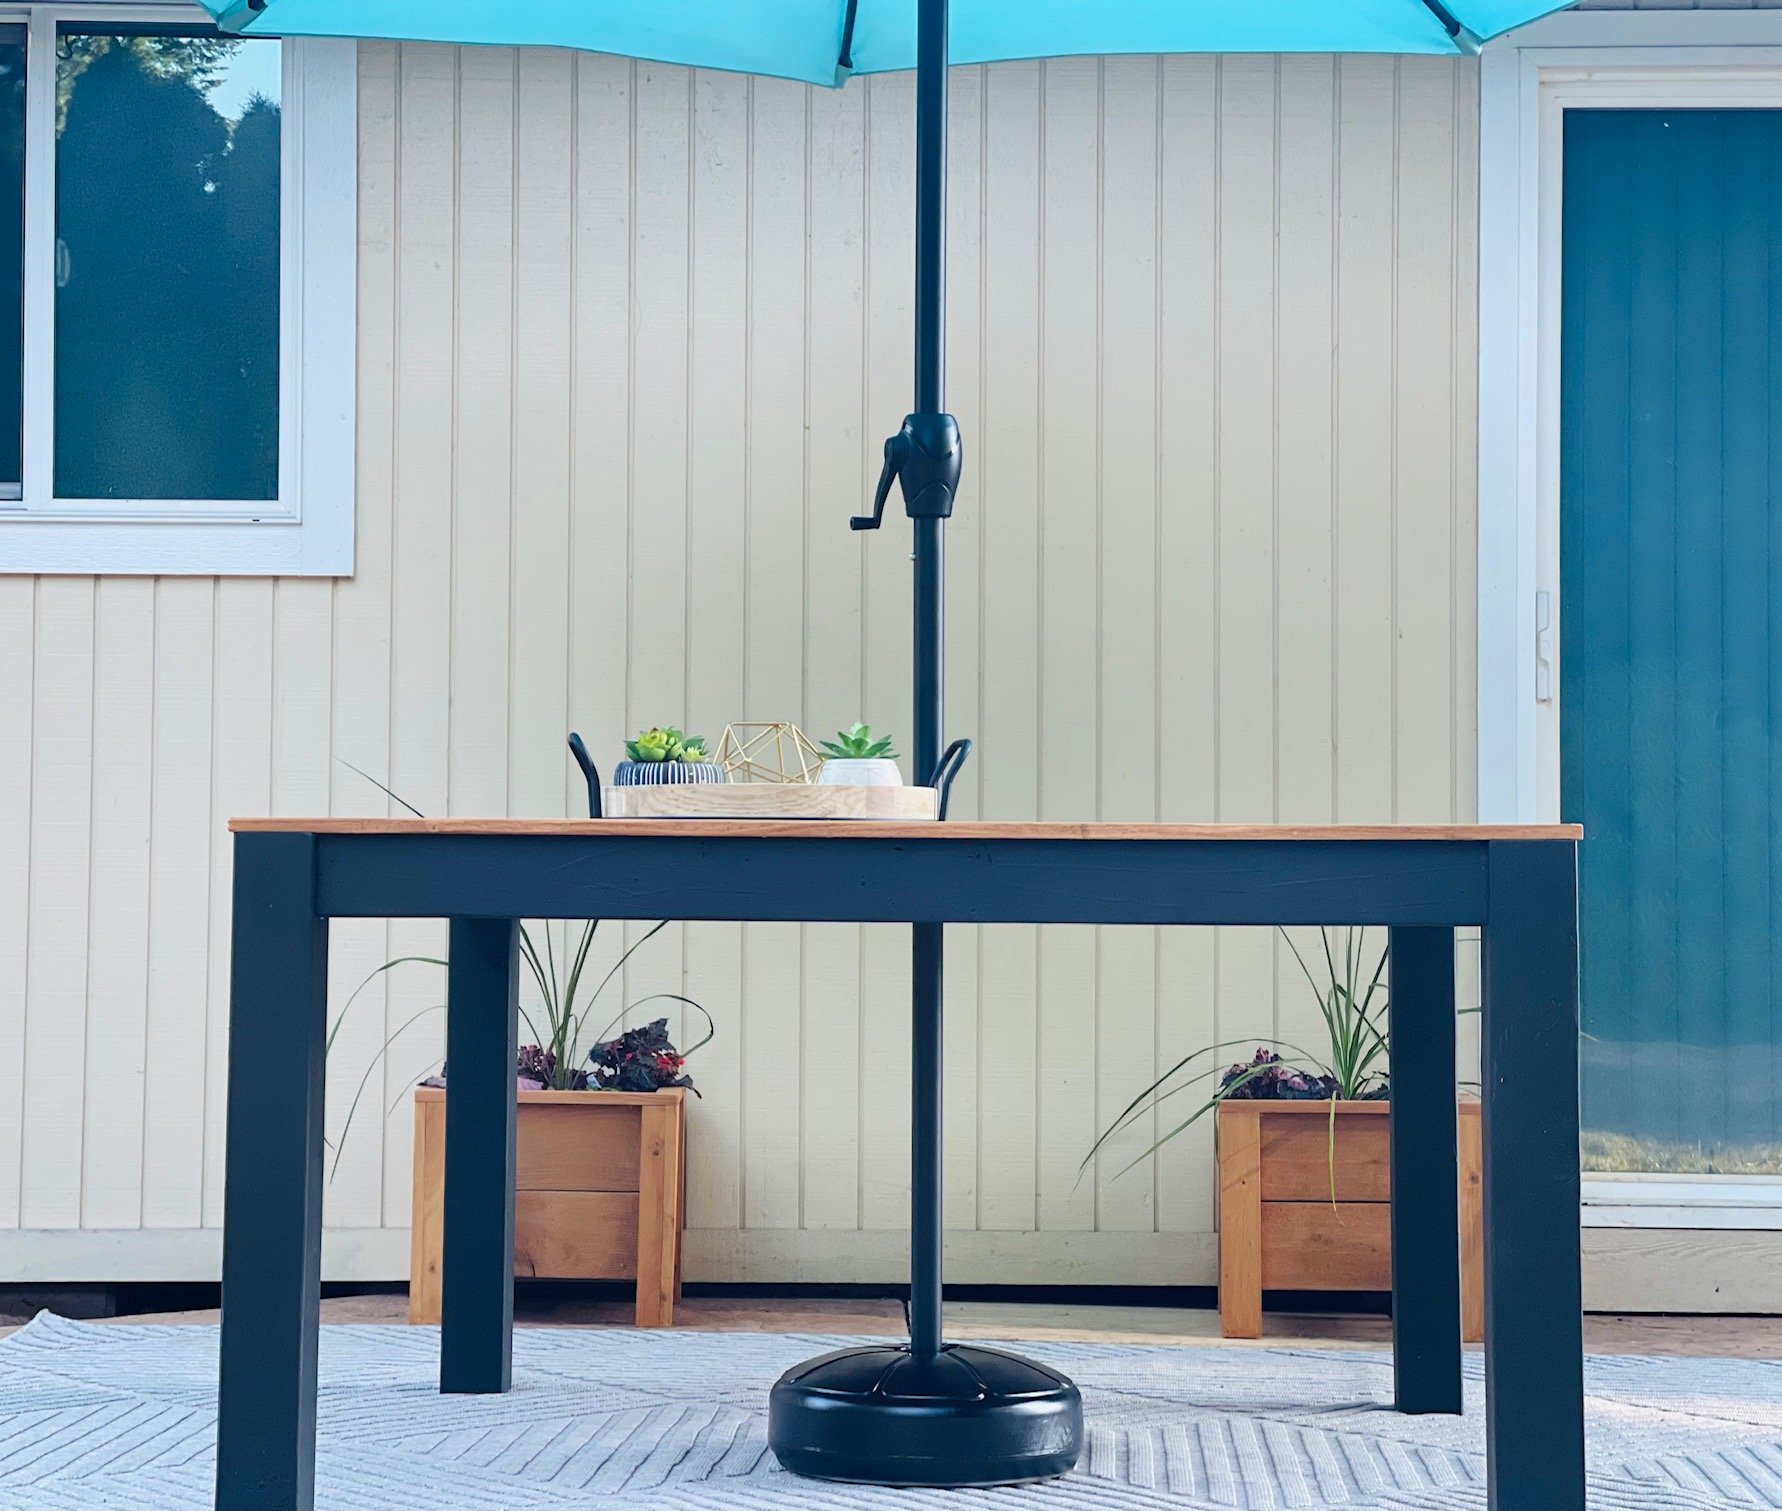
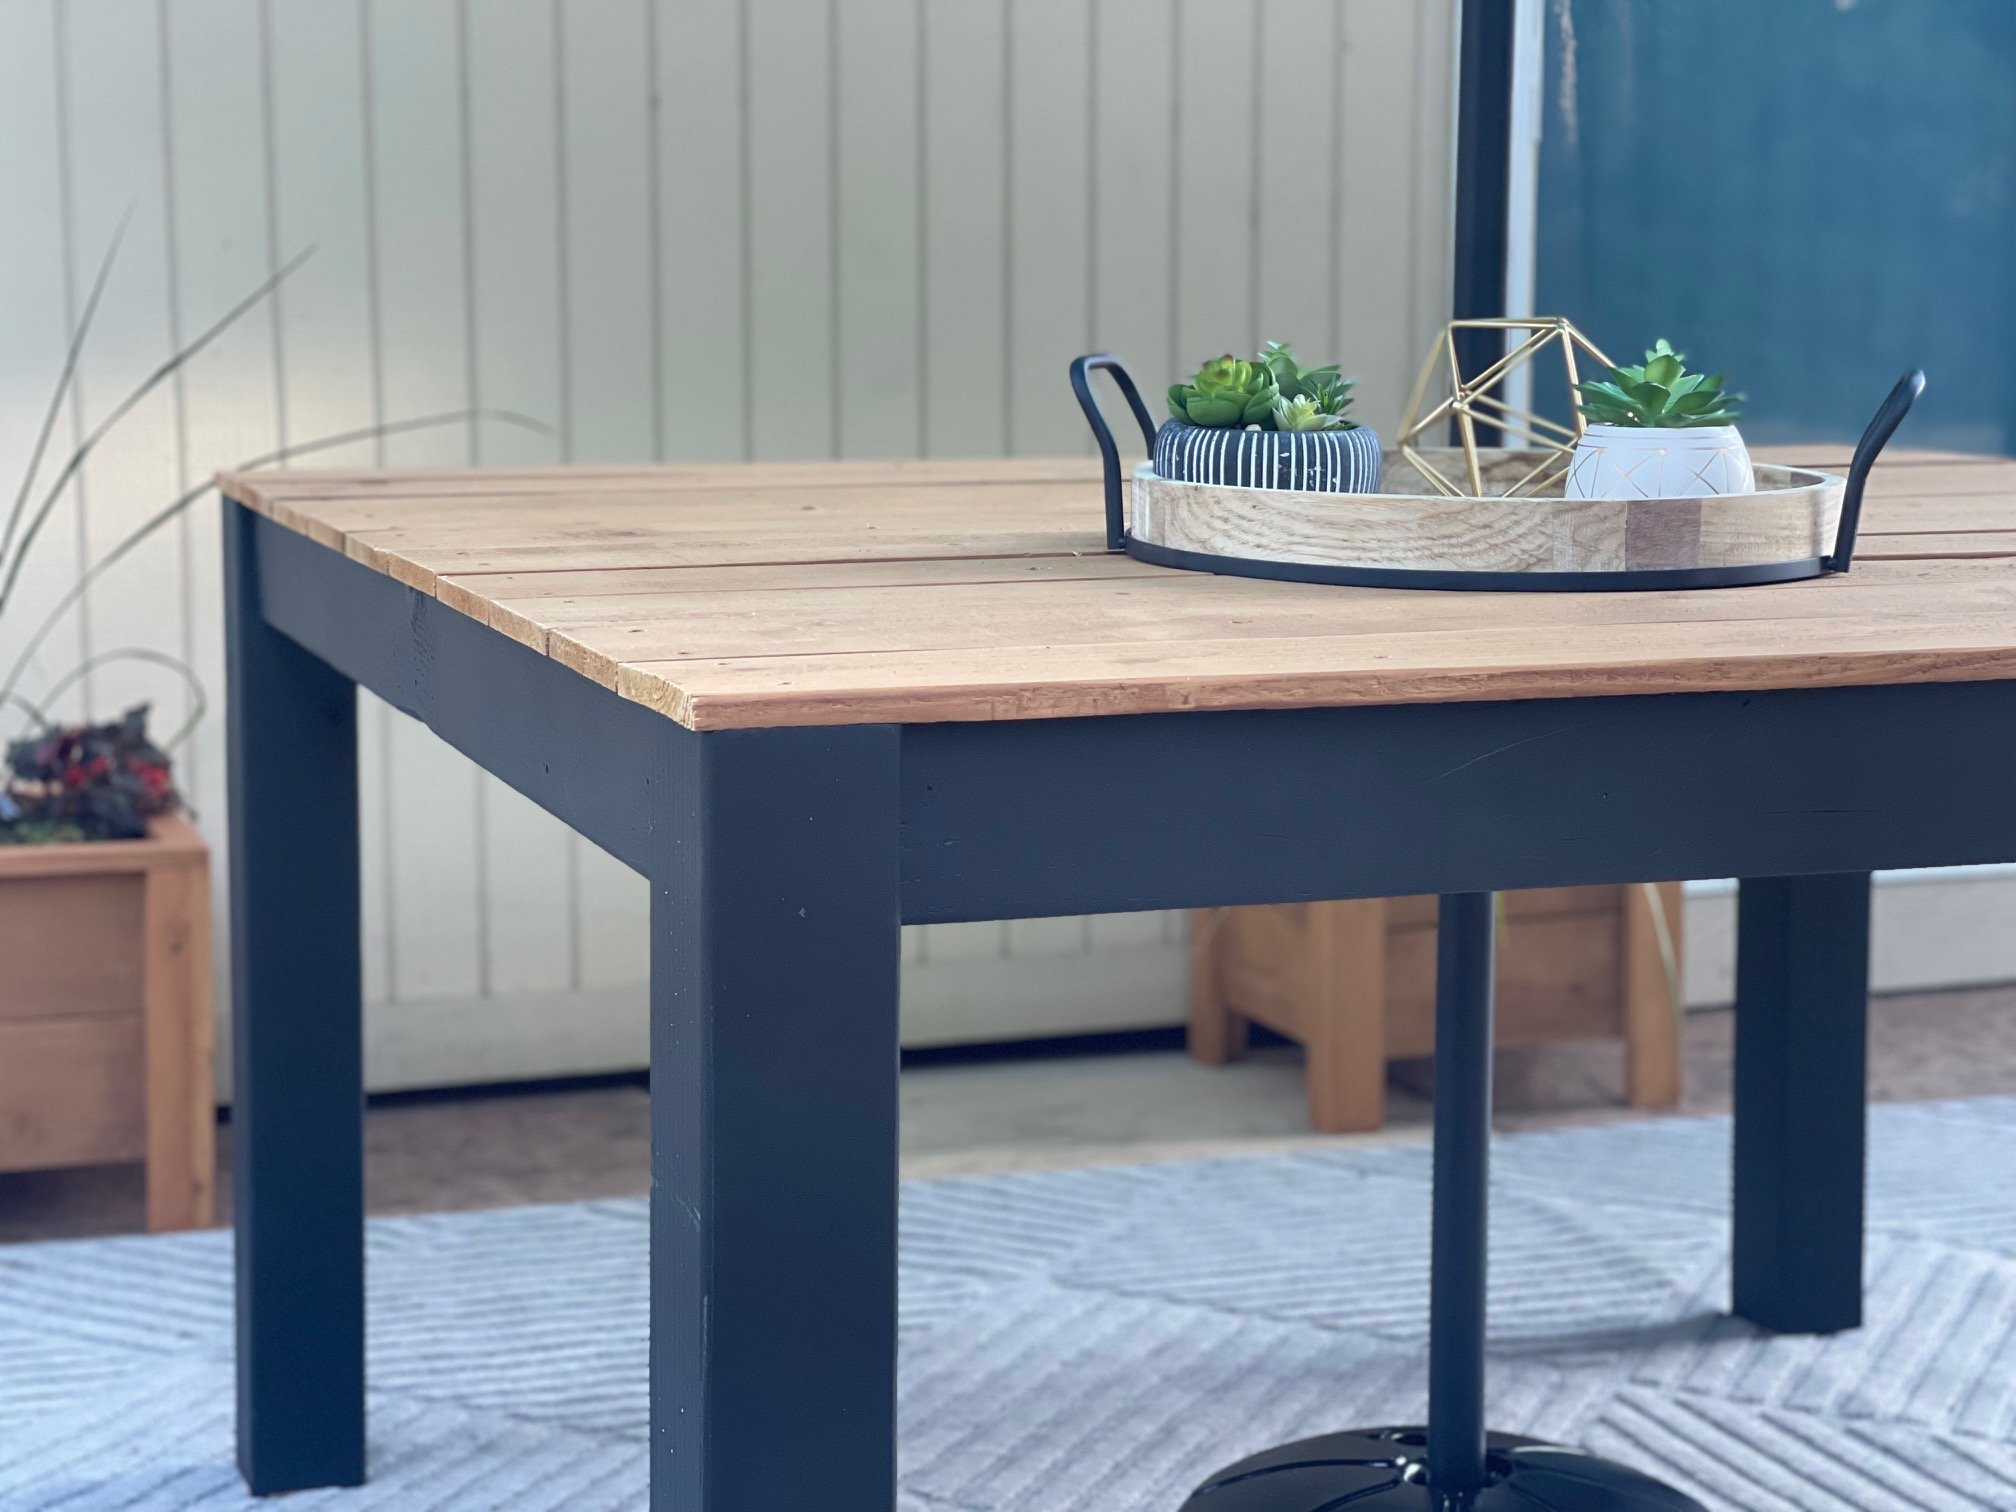
Here's the entire set with the cedar fence pickets on top. With it's natural weathering superpowers, the cedar on top should be more durable than softwoods or whitewoods, and a tiny fraction of the cost of hardwoods.

And then after spraying, this is how it turned out!

Watch! Build Video for This Project
Video coming soon
Free Plans to Build Your Own Outdoor Table Set with Cedar Fence Picket Tops
Ready to build this yourself? Here's the free plans, enjoy!
from Recent Project Plans https://ift.tt/frmgltT
2025年5月19日星期一
Essential Modern Outdoor Square Dining Table– Free Woodworking Plans
More Plans in this Collection
We loved this table so much, we went on to build a rectangle version with benches too! You can find those plans here:

Why We Love This Table
-
Made with durable cedar tabletop boards for natural outdoor resistance
-
Square 5-foot design comfortably seats 8 people (two per side)
-
Optional center umbrella hole for shade-ready seating
-
Sturdy 2x framing and 4x4 legs inspired by deck construction
-
Costs around $150–$200 total depending on materials and finish
-
Beginner-friendly build using common tools
-
Free printable plans with diagrams, material list, and cut list
What’s Included in the Free Plan
-
Easy-to-follow step-by-step instructions
-
Full cut list and shopping list
-
Printable PDF plans
-
Photos of the real build (not just renderings!)
-
Tips for choosing and finishing cedar for long-lasting results
How I Built my Square Outdoor Dining Table for 8
The plans for this table are below, but I wanted to also share some photos of the build steps.
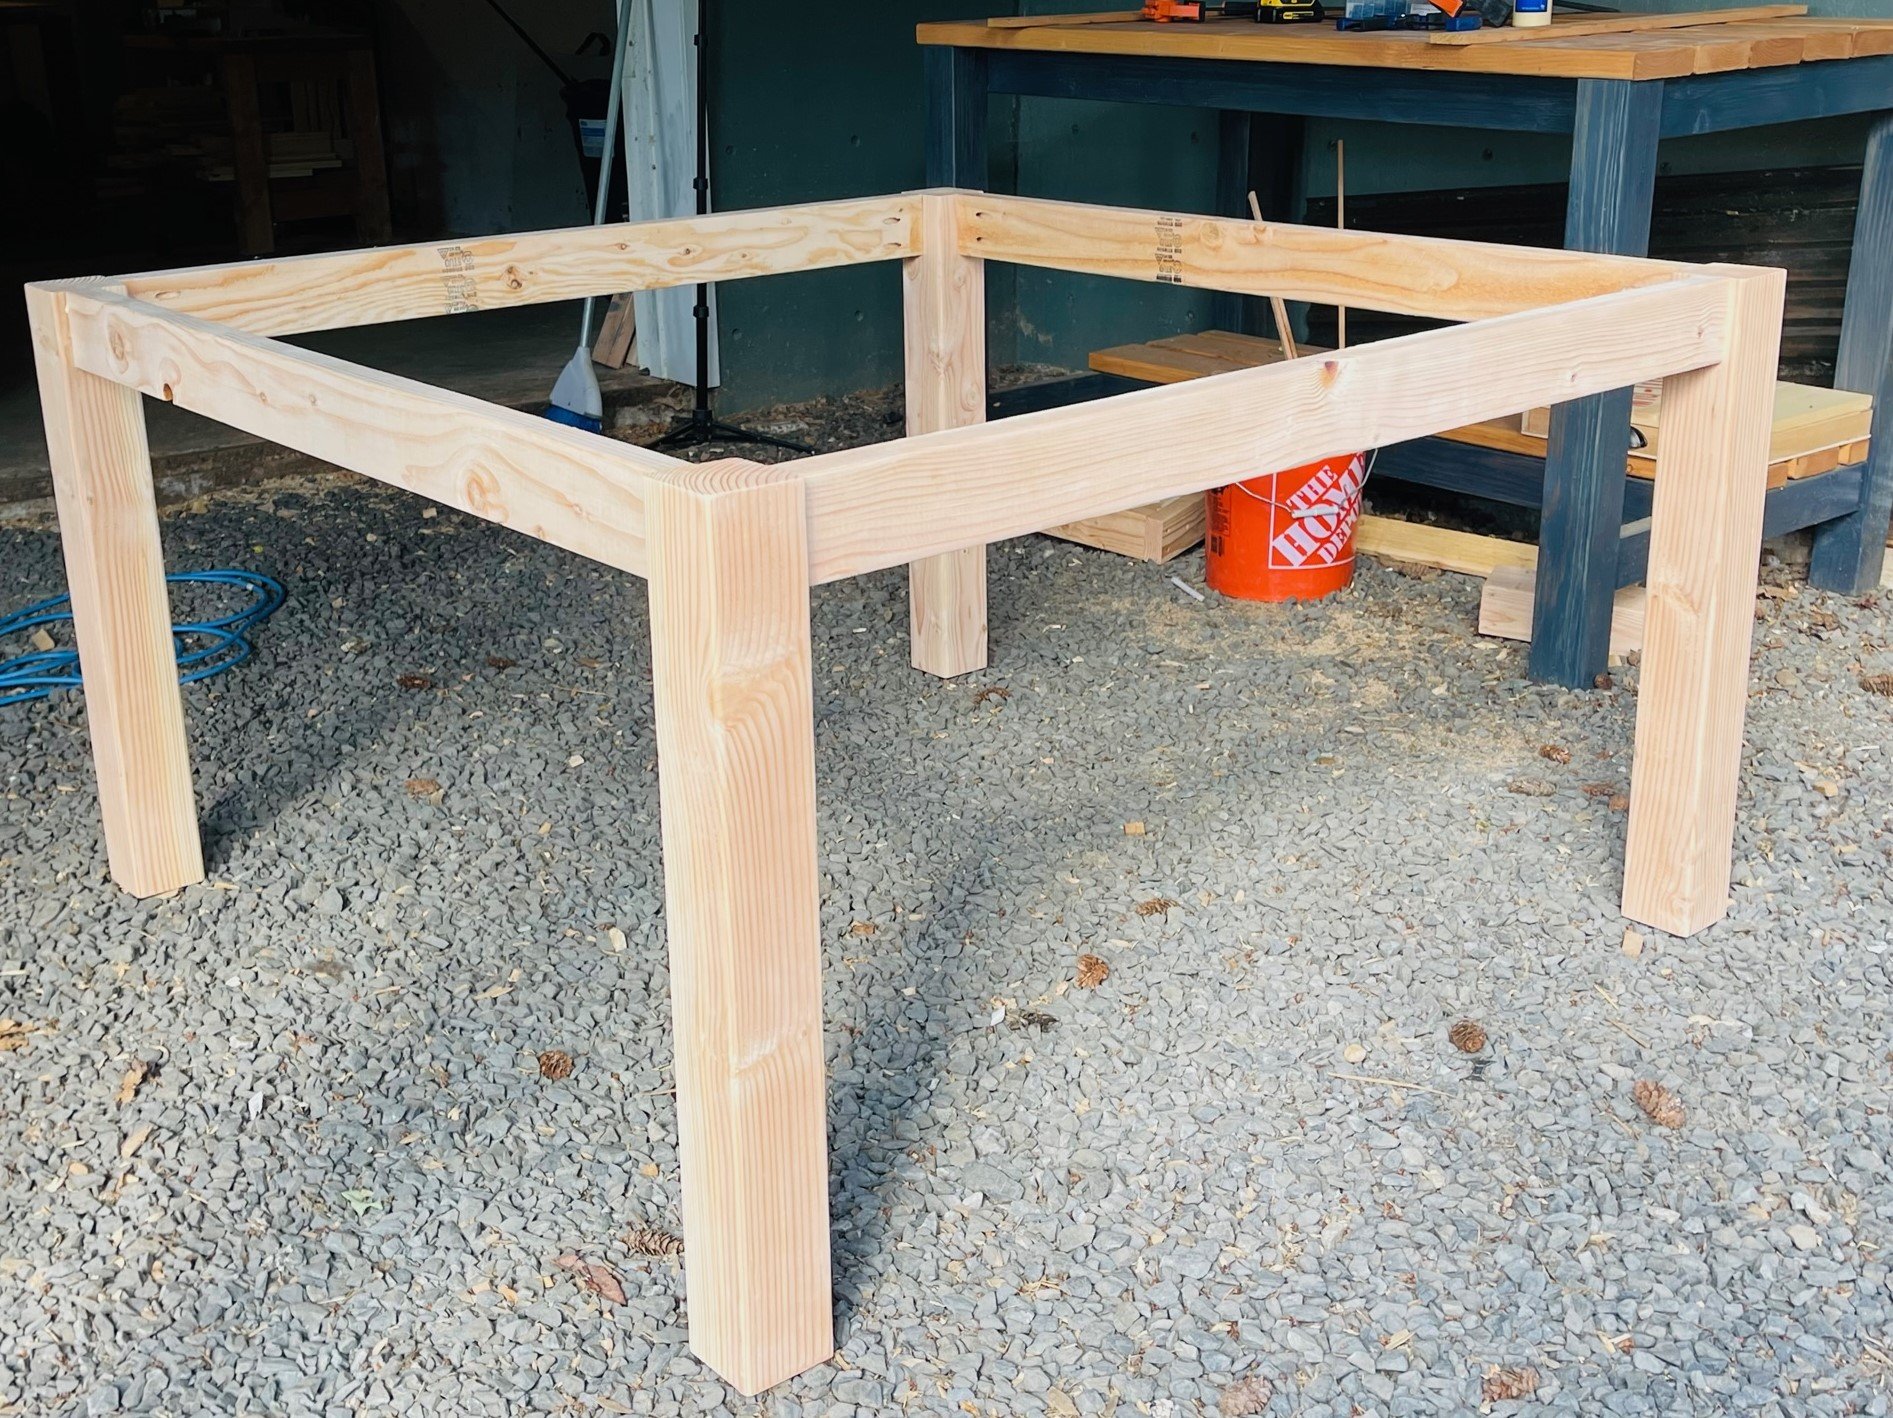
I used pocket holes to attach the aprons to the legs. I used 4x4s for the legs and 2x4s for the aprons.
It's easy to build - just build two of the leg sets -
Then make the table frame by adding the remaining aprons.
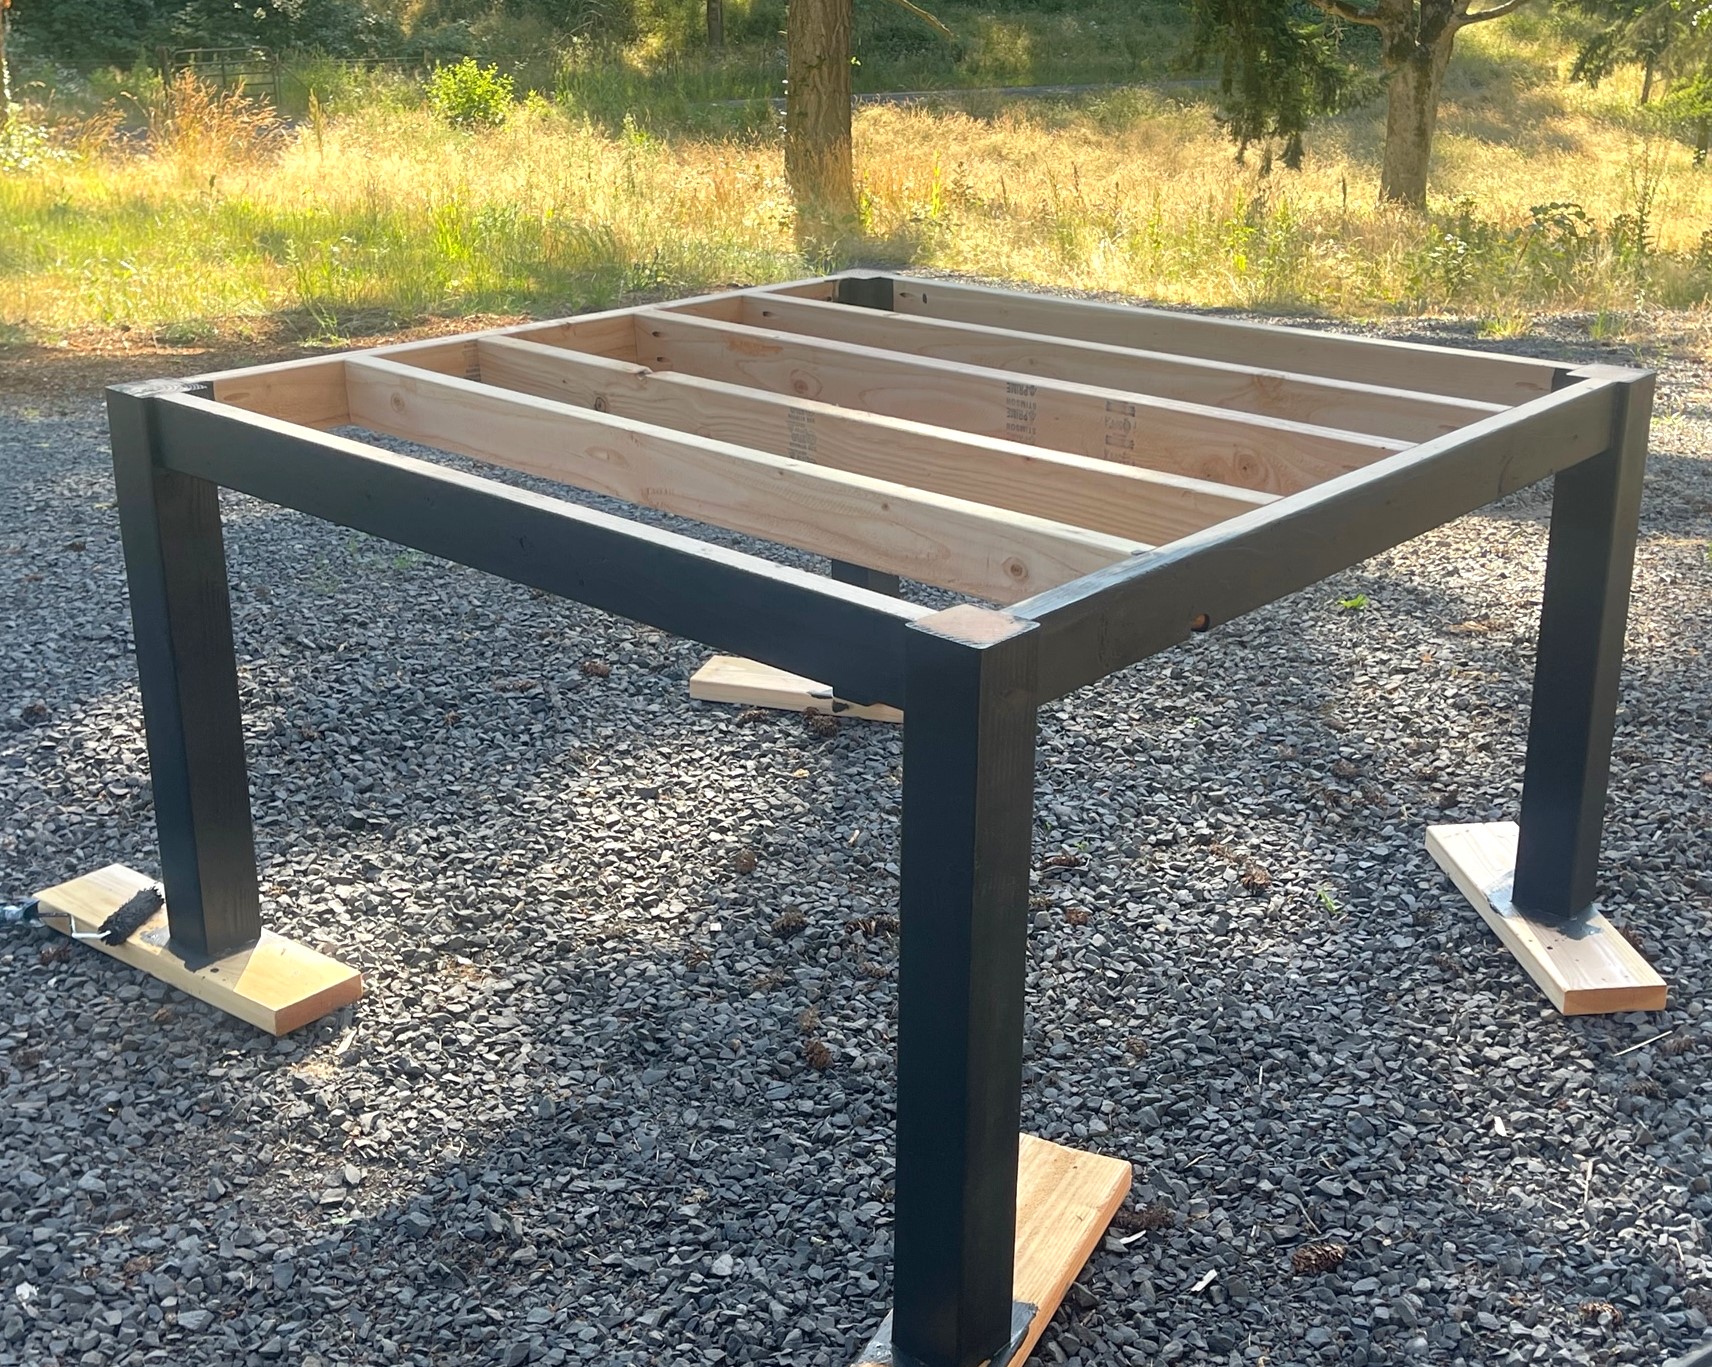
To support the cedar fence pickets, I added inner 2x4 supports. This makes the table super substantial.
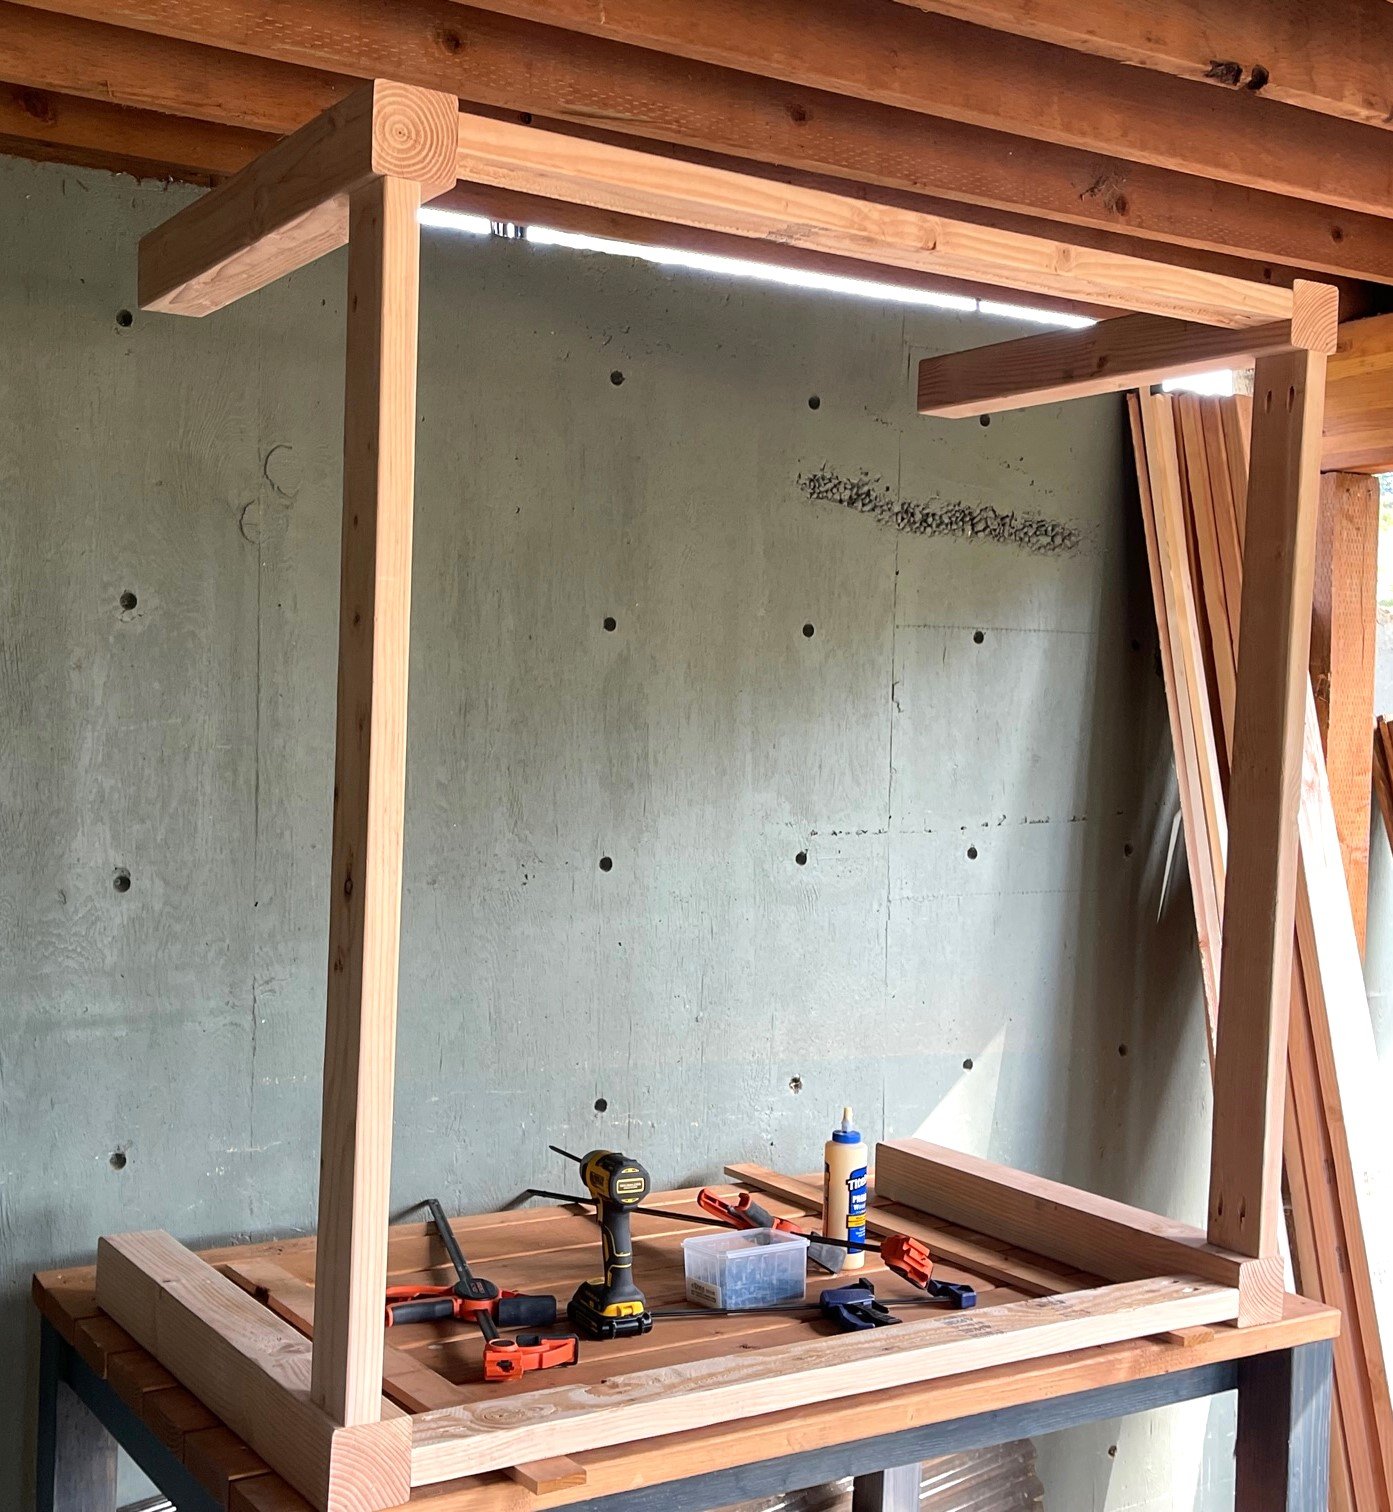
Here's the umbrella framing I did.
And then just cut out the top with a jigsaw.

For the top, you can lay the boards on top long, and then cut them all at once, so the cut edges are a perfect line.
This table turned out so good! I can't wait to see brag posts!
Video of Building this Square Outdoor Table
Check out the build video of building the outdoor table.
Want to Build It?
This cedar table is one of those rare DIY projects that’s practical, good-looking, and fun to build. It’s designed to hold up through backyard BBQs, family dinners, and everything in between.
from Recent Project Plans https://ift.tt/kncjLuI
2025年5月14日星期三
DIY Hanging S’More Station – Free Woodworking Plans
Why I Built this Project
We love having s’mores at our family gatherings, but keeping all the ingredients organized was always a challenge. I wanted a fun, functional way to store everything in one place — and make it easy to move around the yard or hang near the fire. This little station keeps everything tidy and makes s’more time even sweeter!
Why We Love this Hanging S'More Station
- Compartments sized for standard graham crackers, chocolate bars, and marshmallows
- Built-in hooks for hanging roasting sticks (note: don’t hang hot skewers or unprotected sharp points)
- Can be hung from a tree, siding, or set on a tabletop
- Easy to build with scrap wood or inexpensive materials
- Great gift idea or party centerpiece!
How I Built this Project
I kept the build super simple — just a few basic cuts and some wood glue and nails. You can customize the size or finish to match your style. Scroll through the photos below to see how it came together from start to finish!
Watch! Build Video for This Project
VIDEO COMING SOON
Free Plans to Build Your Own PROJECT TITLE HERE
Ready to make your own? Download the free plans below and get building — your next campfire just got a whole lot better!
from Recent Project Plans https://ift.tt/jukvz9o
2025年5月13日星期二
Ultimate DIY Fire Pit Chair – Free Plans
Stop dragging plastic chairs in and out. Ditch the benches. Say goodbye to scorched sling seats.
These are the only fire pit chairs you'll ever want to build.
After tons of testing, prototyping, and sitting around the fire myself, I designed what I truly believe are the ultimate fire pit chairs. And now, I’m sharing the plans with you—for free.


💡 What Makes These Chairs Better?
-
✅ Comfortable – Relaxed seat angle, perfect for lounging by the fire
-
✅ Durable – Built from real wood, designed to last for seasons
-
✅ Lightweight + Moveable – Easily scoot closer to the fire or back off if it’s too hot
-
✅ No Arms – Makes it easy to share with a kid or a cozy partner
-
✅ Efficient to Build – Each chair uses about $12 in lumber, no special tools
-
✅ Stylish – Clean, simple lines that look good on any patio or in any backyard
-
✅ Low Maintenance – No cushions, no fabric, nothing to store
-
✅ Weatherable - keep these chairs by the fire-it all season long, yes even in the winter!
🪑 Why These Beat Store-Bought Options
-
Plastic chairs blow away in the wind and crack easily
-
Metal sling chairs aren’t comfy and can’t handle fire sparks
-
Adirondack chairs are heavy, more involved to build, pricey to buy, and limited to a single user
-
Benches are awkward to move and not ideal for lounging
-
Cushioned chairs? Beautiful, expensive, but high-maintenance and risky near a fire
So Great I Built Eight!
I built a full set of 8 chairs for under $200—including paint and screws. My husband and I built them together, I cut, he screwed them together, we sprayed them. We spent one afternoon cutting and assembling, sanded and sprayed them another afternoon.
They’ve been a total hit. Everyone who sits in them wants a set. Even better? They’re so easy to build, you can batch out a full set in a weekend.

Free Plans to Build the Best Firepit Chairs
This is the fire pit chair I wish I had years ago.
And now, you can build it too.
🧰 Get the free plans today and build a fire pit seating setup you’ll love all season long!
from Recent Project Plans https://ift.tt/ODcIF7S
2025年5月8日星期四
Farmhouse Side Table (Beginner- Indoor/Outdoor)
Reader submitted photo by OMNIA
Video Tutorial (Same Build Techniques as Coffee Table)
This end table or side table is built using the same techniques as the coffee table. Please take a moment to watch this video for insights on how this is built.
from Recent Project Plans https://ift.tt/L6T3r0X
订阅:
评论 (Atom)