2024年5月23日星期四

Rustic Wedding Ceremony Arch Plans

Here's the perfect plans to build your own wedding ceremony arch!  This is traditional style arch, that features rustic cross bracing and since it is solid wood, can be stained any color.

You can use 1x6 and 2x6 to create a thicker look.

It can be disassembled and reused about 10 times before the screw holes will start to strip out.  

We love the idea of using the wood for a bench or other project as a permanent fixture in the home, after the ceremony.  It would make a great end of bed bench!


from Recent Project Plans https://ift.tt/tBL63Nl

2024年5月22日星期三

Hexagon Wedding Arch Free Plans

A hexagon wedding arch adds a modern detail to a wedding ceremony.  You can make your own quickly and easily using these free plans.


Can I make the arch with a wider width board for a thicker frame?

Yes, a 1x6 board will look great!  You can directly substitute the 1x6 for the 1x4s in the cut list and shopping list.


What about making the arch narrower?

You can, but I wouldn't go any smaller than a 1x3, as there won't be much there to attach the two boards together.  But prove me wrong, I'd love to see a 1x2 or 2x2 version.


Will the arch tip over?

We recommend using fishing line and tent stakes to prevent the arch from tipping over.  If in an indoor setting, the arch can be tied to the walls for additional support.  This is especially important with top heavy floral arrangements or potential wind.


Can I disassemble the arch and use it again?

Yes, but with the method of joinery, expect to be able to assemble and disassemble about 10 times before the screws strip out the wood.  If you are looking to create a rental piece, building a second hexagon and lapping joints, with bolts at joints, would be a better long term solution.


What about a double hexagon arch?

Yep, you can do that!  Just build two arches, then connect in between with 1x boards where desired.


What type of finish do you recommend?

It depends on the look you are going for.  Most people want a rustic wood finish - to achieve that look, use a wood stain (small can is all you'll need) and apply with a foam applicator brush and wipe off.  A aged wood accelerator will give you a gray look.  White paint will give you a crisp white look.


I don't have a pocket hole jig - how do I join boards together?

The easiest method is to buy mending plates or tie plates like these from Amazon 
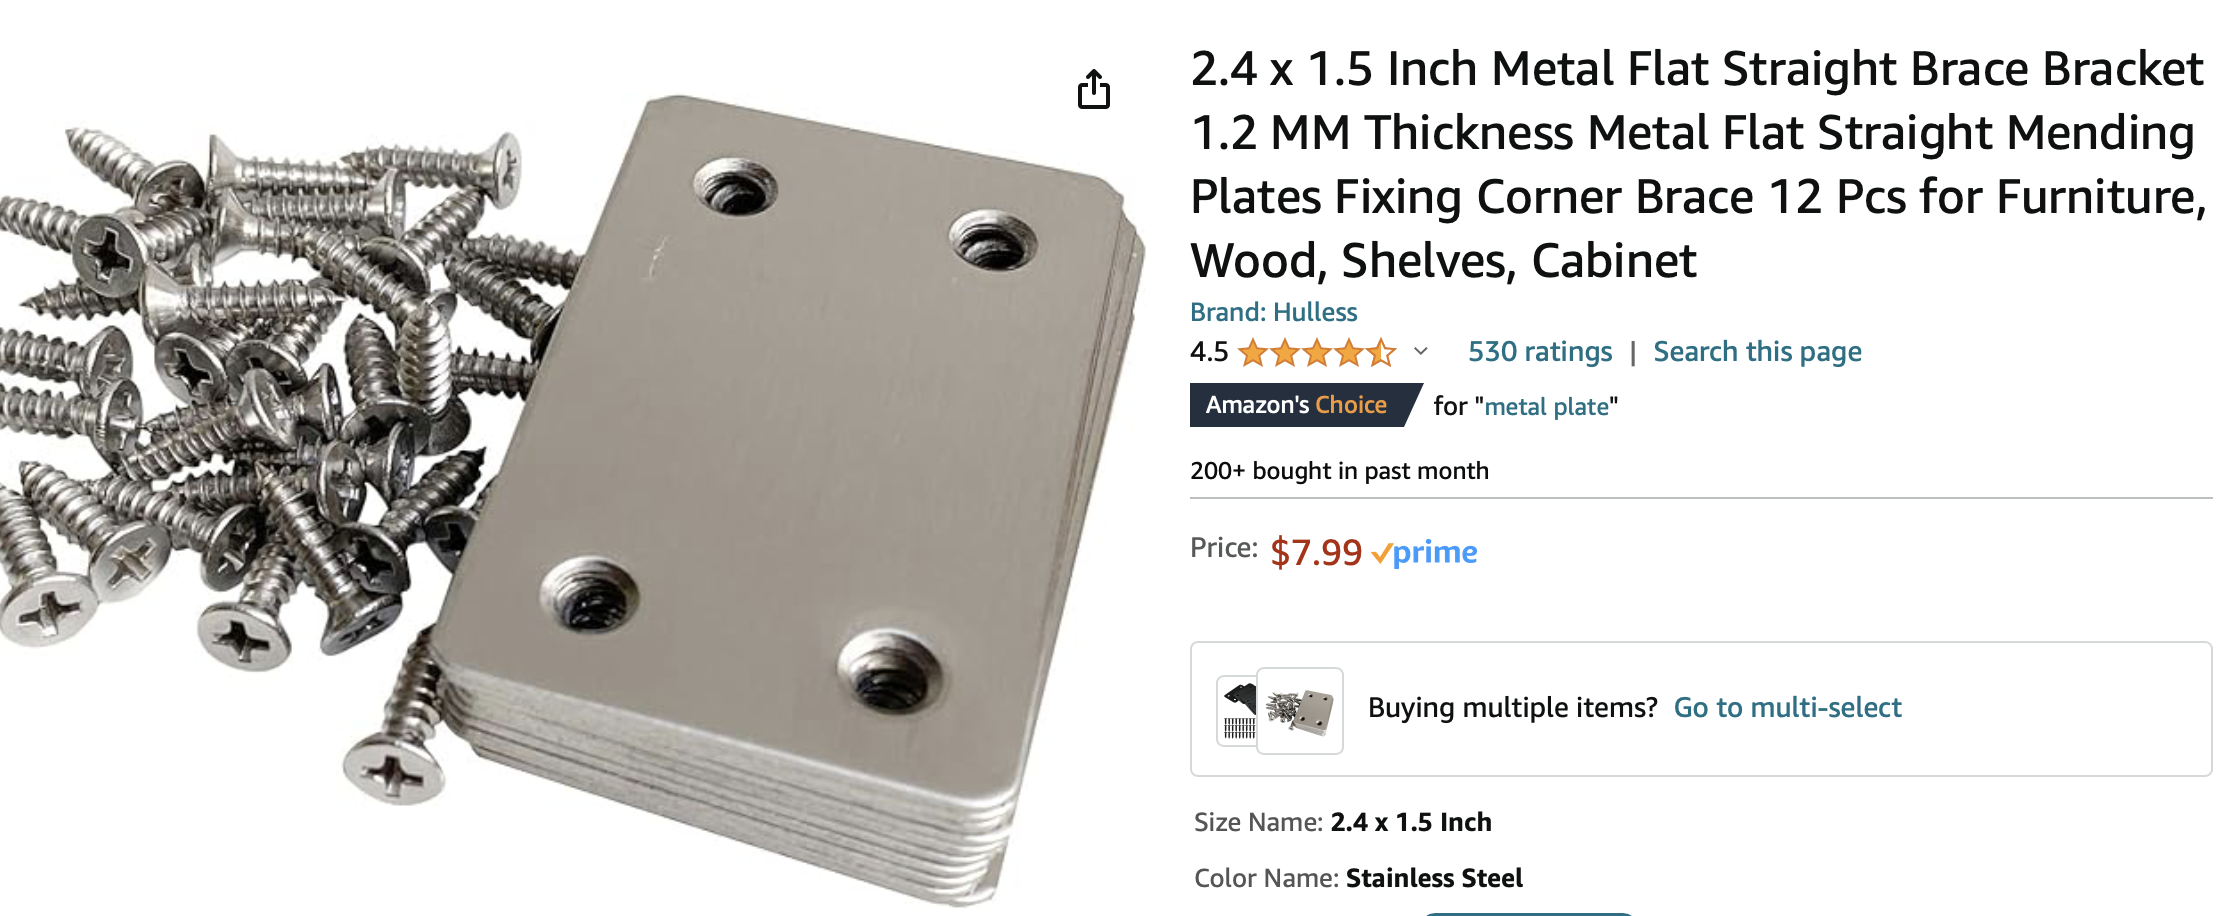
 

Ana White mending plate

Make sure the screws are 3/4" long, so it doesn't poke through the wood, and make sure there are at least four holes in the mending plates (8 would be ideal).  The mending plates should be no bigger than 2" x 5" for a 1x4 board.  


Do I need a miter saw?

The miter saw is going to be the easiest, fastest and safest way to accomplish making these cuts.  You can use a speed square and a circular saw (or even a jigsaw) to make the cuts, but it will definitely be more difficult.  


Free Plans to Make Your Own Hexagon Wedding Arch

Here's the free plans to make your own wedding arch in a hexagon shape.  Please send us a photo if you build, we can't wait to see how your arch turns out!


from Recent Project Plans https://ift.tt/cms5waJ

2024年5月21日星期二

12x16 Greenhouse with Twinwall Glazing - Free Build Plans with Video

Why We Built This Greenhouse

Our friends were looking to add a beautiful, long term greenhouse to their yard.  They had already built a 12 x 16 wood deck for the greenhouse, and just needed the structure on top.

Since it was winter, they wanted to prefab the pieces inside a shop, and then just assemble outside.  So they asked me to draw up plans to help them prefab the pieces.

I did the plans, and our friends cut the pieces out and refinished them in a black paint.  Then we just met up a few times over last winter and helped put it all together and install the twin wall glazing.

Then this spring, we finished it up and it's ready for planting!

Why Choose This Greenhouse Plan

  • This is a large greenhouse, with lots of space inside
  • The exterior is fully sealed off, so this keeps the maintenance down, similar to the maintenance of a well built house
  • This plan is optimized for the twin-wall polycarbonate sheets, which offer insulating properties and is more attractive to look at
  • We designed the front for fitting a storm door - so it's easy to come and go year round
  • The eaves have been designed for easy installation of a gutter system for rain collection
  • You can add siding to match your house to the lower portion of the greenhouse
  • This greenhouse turned out very sturdy and attractive looking

Quick Video of Us Putting this Greenhouse Together

Here's a quick video of us working on this greenhouse over last winter


Base Options for Greenhouses

Our friends already had a base built for their greenhouse, so we didn't show that in the video.  Your base should be determined by your needs and property.  Here' a few popular options:

  • Wood Deck - this is what our friends used for this greenhouse.  A deck was built on poured concrete footings.  If you like this option, use the same techniques as building a deck - this meant concrete footings under the frost line for us in Alaska.  For the top of the deck, our friends used painted tongue and groove plywood, as they will have only raised beds inside their greenhouse.  
  • Concrete Pad - this is a popular option if you have a pad, or want something very low maintenance.  Do consider water drainage, anchoring the walls tot he concrete, and make sure the bottom plate of your walls is treated lumber. 
  • Soil or Gravel Pad - this is the least expensive option, make sure the base of your walls are treated lumber, and use a method of anchoring that is suitable for your region

My recommendation is to do some research in your local region on what works for greenhouse bases.

Free Plans to Build Your Own Large Greenhouse with Twinwall Glazing

This is an advanced project, and builders should have general knowledge of framing techniques and tools.  We are happy to be able to provide the free plans for you to use, please share photos of your project when you are done!


from Recent Project Plans https://ift.tt/wRkADUh

Hang Photo Frames Faster Than Ever With This Hardware

#ad Effortlessly enhance your home decor with 3M CLAW™ Drywall Picture Hangers! In this video, I demonstrate the simplicity and effectiveness of using CLAW™ Drywall Picture Hangers to hang photos, artwork, and more without damaging your walls. Perfect for renters and homeowners alike! @3MCorporate 🌟 Big thanks to 3M CLAW™ Drywall Picture Hangers for sponsoring this video! Check out their innovative products through the links provided and discover how to decorate your space quickly and easily. CHAPTERS: 0:00 - Intro to CLAW Drywall Hangers 1:02 - CLAW Drywall Overview 2:00 – Complete CLAW installation 3:30 - Strength Test of CLAW Hangers 4:12 - Removing CLAW Hangers 4:27 - CLAW vs Other Hangers Comparison 5:40 - Final Thoughts on CLAW Hangers Product links: 25lb - https://c8.io/es0dhb 45lb - https://c8.io/es0dhb 65lb - https://c8.io/es0dhb #CLAW #Drywallhanger

from DIY Creators https://www.youtube.com/watch?v=xKfM10_83DA

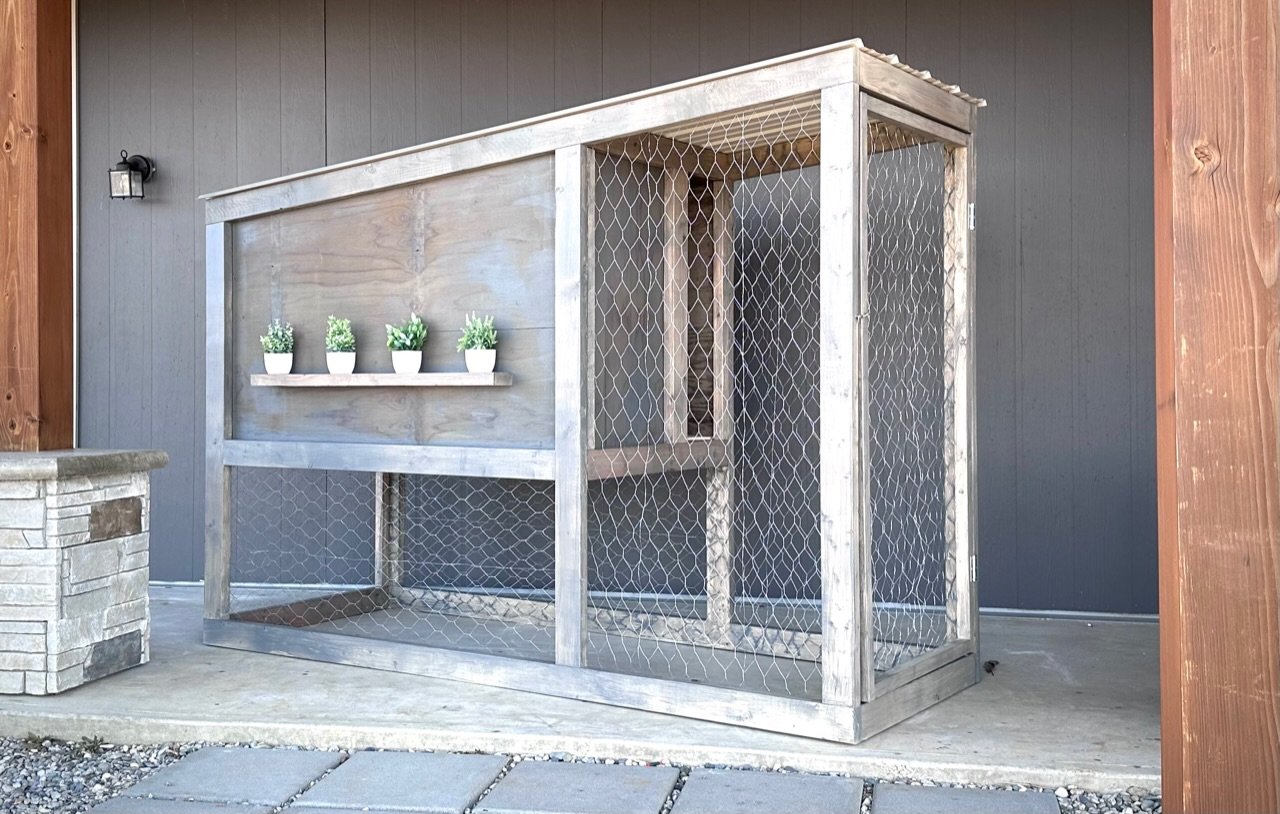
Double Wide Modern Chicken Coop

I built a single wide chicken coop with the concept of one sheet of tin for the roofing a while back.  

Chicken coop modern plans

We've been using it and it has worked out well, but I had always wanted to go back and do a "double wide" version using two sheets of tin for the roof. 

This coop is great in that it covers the run and coop.  Chickens love to be under things, so space under the enclosed coop adds room.  We love the big doors to easy clean the coop, and the enclosed coop part is at a good height to rake out and keep clean.

Video of Building the Single Wide Coop

This coop follows much of the same building practices as the single wide coop.  Please watch this video to see how this coop is put together.


Free Plans to Build This a Modern Chicken Coop with Run

We are glad to be able to provide the free plans for the double wide version.  Please share a photo if you build, we love seeing your work!


from Recent Project Plans https://ift.tt/WhcjINi

2024年5月15日星期三

Factory Cart Coffee Table

Reader submitted photo


from Recent Project Plans https://ift.tt/ENpeM7i

2024年5月7日星期二

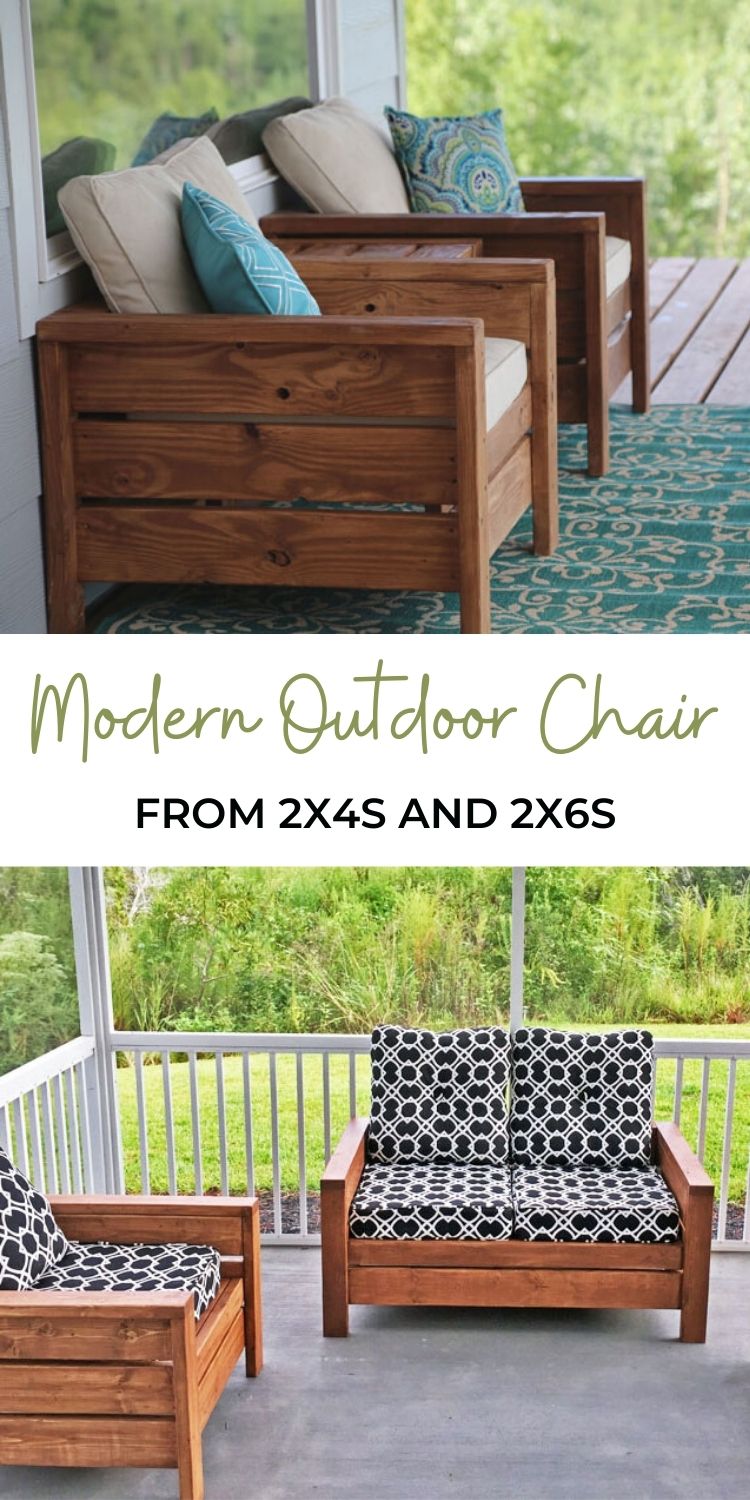
Modern Outdoor Chair from 2x4s and 2x6s

Are you looking for beautiful and sturdy seating for your outdoor space?  Have you considered building your own?  You can save a ton of money and get exactly what you want!  

For about $20 a piece, I built these outdoor chairs!


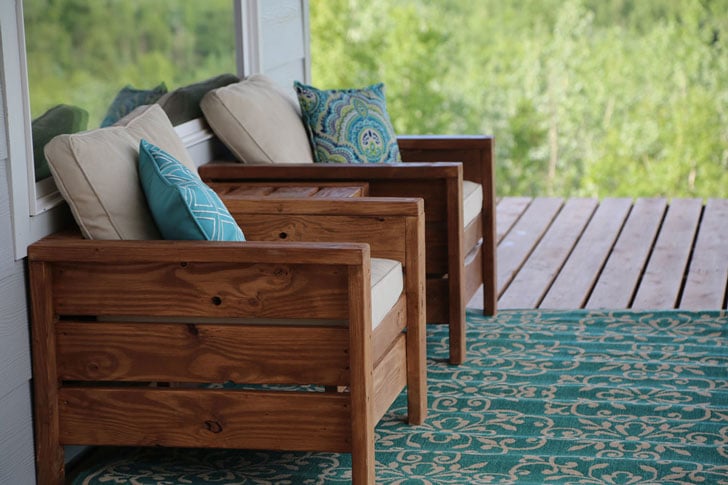
We love they way they look.  We love the sturdiness.  We love how heavy they are - no one likes to chase outdoor furniture down in the wind.  And we love how easy they are to build!


Building the Modern Outdoor Chairs

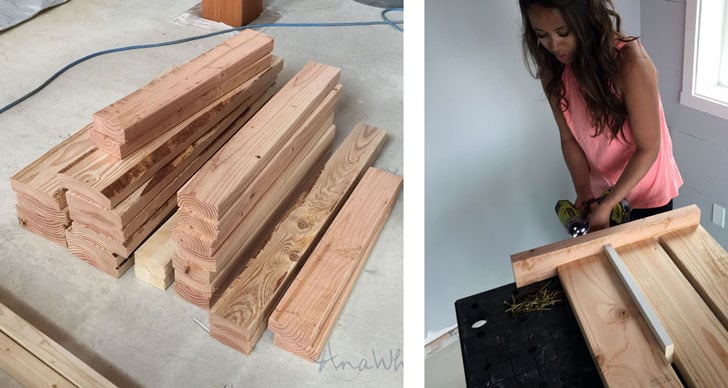
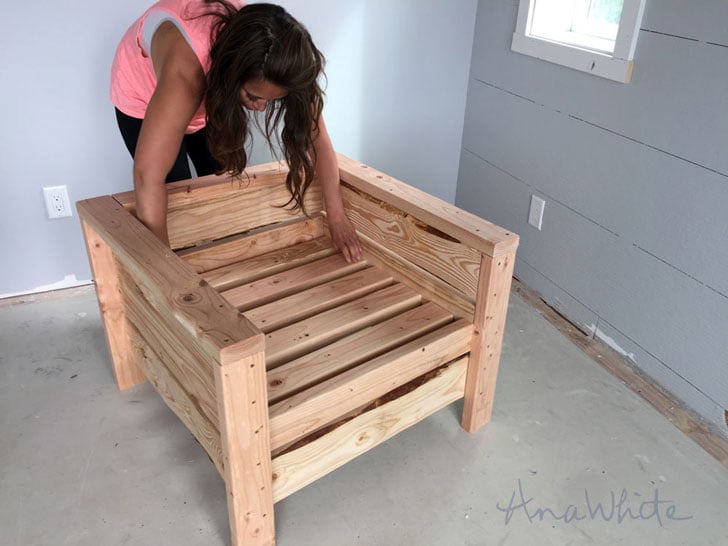
These chairs were so simple and easy to build!!!  All just 2x4 and 2x6 lumber, right off the shelf!

Here's how I built it -


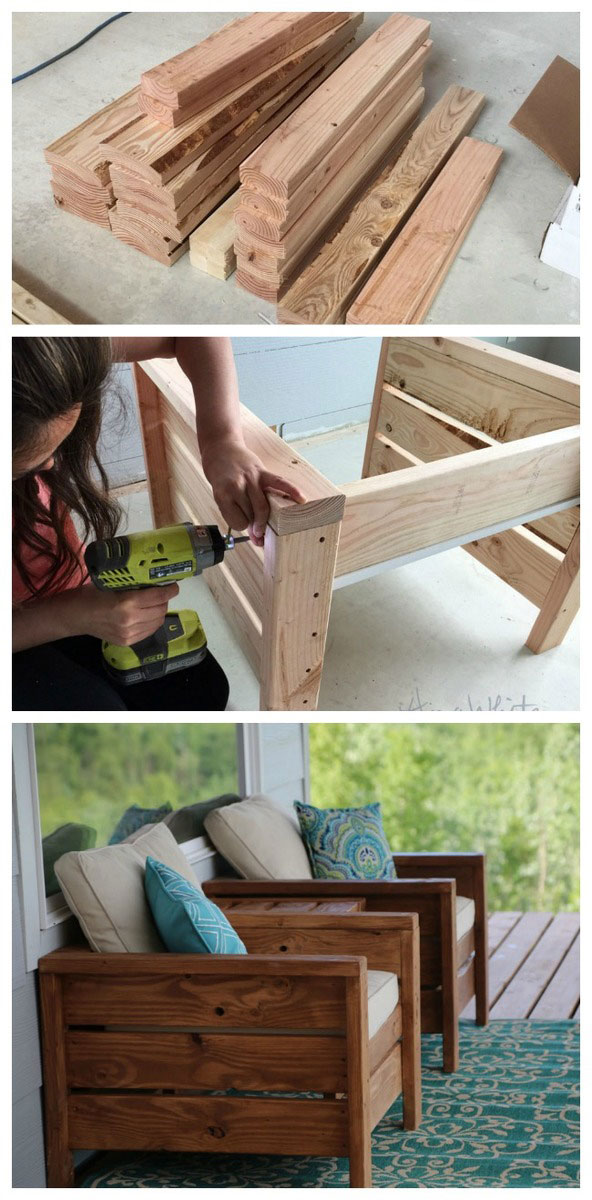
I cut all my boards according to the cut list below using a compound miter saw.  You could also use a circular saw and a square, or even have your local home improvement store cut your boards for you.  Good straight end cuts are very important.

building the modern outdoor chair


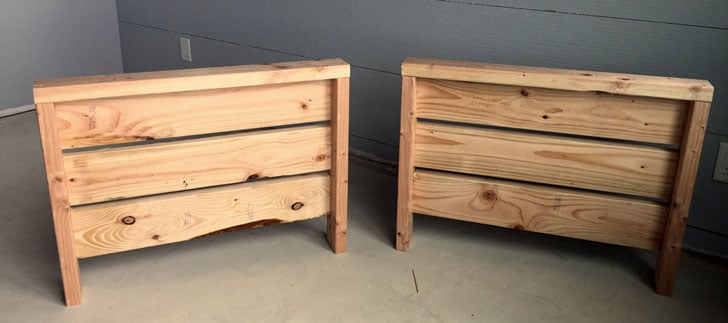
Then I attached the legs to the longer 2x6 boards, using 2-3/4” long deck screws.  Notice the spacer in between the slats – it’s a scrap 1x that measures ¾” thick.


Here’s how it will look with both legs.

arms for the modern outdoor chair


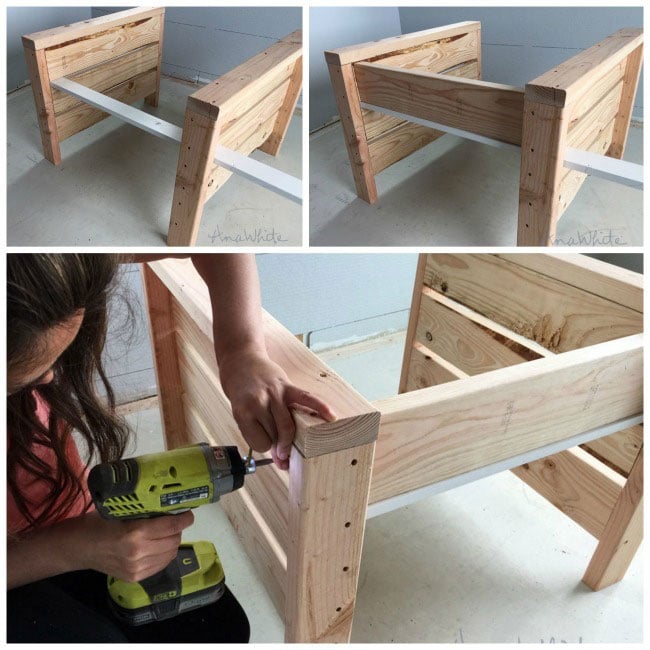
Then add the top armrest piece, and repeat for two arms (for one chair).

simple modern outdoor chair assembly


It’s ideal to have two people to assemble, but if you don’t, I used a board threaded between the slats to support my back boards while I attached.  This is the most challenging step of the entire build.

seat slats, unfinished simple modern outdoor chair


Once the arms are attached to the back and front pieces, two cleats are screwed to the insides of the arms, and seat slats rest on top.  TIP: For added comfort, consider installing the seat at a slight downward angle.

Turned out really well!


simple modern outdoor chair plans

Good luck, and if you build, do share pics (you can add a brag post or tag me on instagram @anawhitediy or #anawhite)  – can’t wait to see how your outdoor chairs turn out!

Plans follow, enjoy and share!

three steps to building your own simple modern outdoor chair


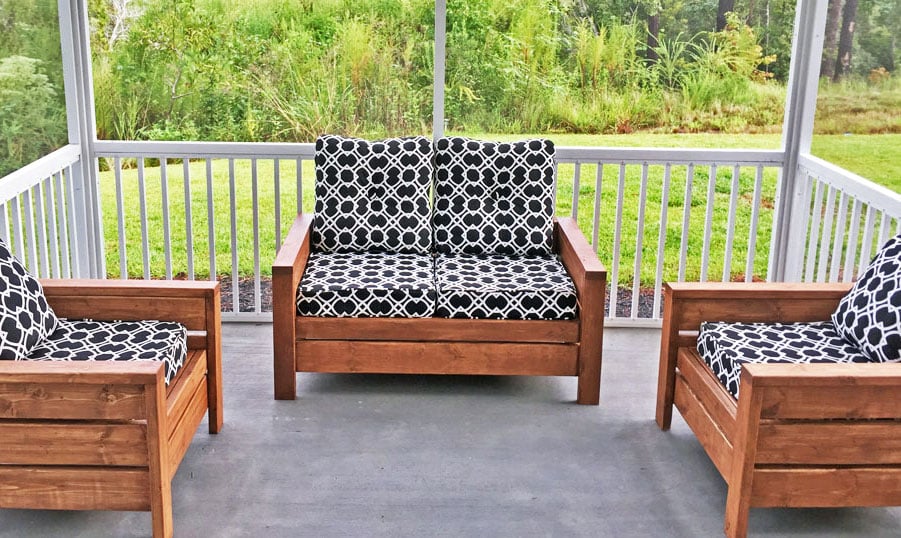
Loveseat Version

After many requests, we have created a loveseat plan version for your convenience.

loveseat version of modern outdoor chair

Reader submitted photo by Joshh81

Thank you for submitting brag posts, it is helpful and encouraging!

Pin For Later! 

Modern Outdoor Chair from 2x4s


from Recent Project Plans https://ift.tt/kASJVcx

2024年5月6日星期一

2024年5月5日星期日

DIY Modern Garden Bench with LED Lights

Welcome to the latest DIY video, where I’ll guide you through the steps to create your own modern garden bench equipped with stylish LED lights for a beautiful nighttime ambiance. Let’s do this.. My Woodworking Plans: https://ift.tt/oTlCfPD Subscribe to my YouTube channel & "RING the Bell": http://bit.ly/1PtWJEd Bench dimensions: (78inL) X (17-1/8inH) X (23 -1/4inW) 🛠️ **Build Your Own:** 1. Cutting & Sanding: Start with precise cuts using a miter saw and smooth edges with sanding. 2. Assembly: Use dowels for a clean, hardware-free look. 3. Staining & Painting: Apply your chosen finishes for durability and beauty. 4. Installing LEDs: Enhance the mood by embedding a strip of LEDs. 5. Final Assembly: Attach all pieces together, ensuring stability and perfection. CHAPTERS: 0:28 - Lumber Preparation Tips 2:01 - Frame Joining Techniques 4:17 - DIY Table Legs 6:58 - Applying Bondo 7:46 - Paint and stain 9:16 - Frame Assembly 9:46 - Installing LED Lighting 10:31 - Attaching Wooden Slats 11:48 - Connecting the Legs 13:25 - Adding Finishing Touches Tools used (Affiliate Links) - Miter saw https://amzn.to/3Unitb0 - Table saw https://amzn.to/44vPfeK - Router Makita & round over bit https://amzn.to/3Wx4guL - Sander https://ift.tt/Q7rXkIs - Dowel jig - Drill - https://ift.tt/EzabOsI - Right angle drill - https://ift.tt/Z9qV2gY - Bar Clamp https://amzn.to/4dtJrX0 - Speed square - Mallet - https://amzn.to/4bh0Fp2 - Hand plane https://amzn.to/4duGJkq Materials used (Affiliate Links) - (-) 2x8x8 Southern yellow pine https://ift.tt/cU0muNO - (1) 2xx12 x8ft Southern yellow pine https://ift.tt/f72weLo - (-) Pocket hole screws https://amzn.to/3UJyoSr - (2) L angle Bracket https://ift.tt/XqSp9cO - (8) 2in - 1/4 in.-20 x 3/4 in. Hex Bolt - (16) ¼in washer(stainless steel) https://ift.tt/eLfF2tD - (8) ¼ wing nuts (stainless steel) https://ift.tt/TDCIK2k - (8) ¼ lock washer (stainless steel) https://ift.tt/R0X8TDN - (12) 1in Exterior screws for the bracket Screws for the bracket - Gloves - https://ift.tt/P36kLoq - Tool belt - https://ift.tt/ndg6ZYb Finish (Affiliate Links) - Paint – Dark gray (Iron Ore) - Stain - https://amzn.to/4blJGSj - Foam roller - https://amzn.to/3woJD9C - Paintbrush - Helmsman spar urethane - https://amzn.to/3UMrhsj - 3/8 dowel - https://amzn.to/3UWKHep - Wood glue - Bondo https://amzn.to/3WAg53c - LED strip https://amzn.to/4b0zJKc - 12-volt Power bank https://amzn.to/3QUDnxt ********** Support my work ********** My Woodworking Plans: https://ift.tt/oTlCfPD Help me make more Video: https://ift.tt/qzaHDFv YouTube: Subscribe & "RING the Bell": http://bit.ly/1PtWJEd Instagram: https://ift.tt/gpazSq8 Pinterest: https://ift.tt/Z0175XK #Woodworking # #OutdoorBench #DiyCreators

from DIY Creators https://www.youtube.com/watch?v=rH61Bd2jeVY