PHOTO SUBMITTED BY KASSIDY_D
from Recent Project Plans https://ift.tt/3z46i82
It's the season of giving! I partnered up with Jaime Costiglio to bring you a brand new free gift plan, every Friday in the 12 weeks leading up to Christmas! Over the years, we've gifted hundreds of plans, many that you can make with scrap wood. Check out the entire Handbuilt Holiday Collection here.
This is our final Handbuilt Holiday plan of 2021, and it's easy enough to be completed by Christmas, and inexpensive enough to leave as a hostess gift. Most anyone would appreciate this one!
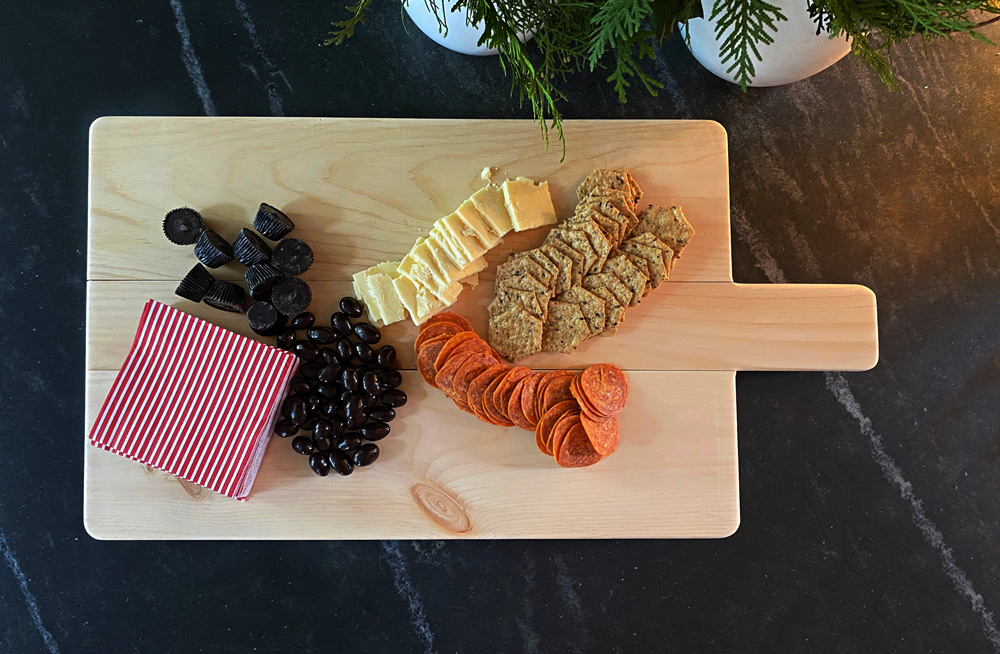
Charcuterie boards are a entertaining staple, the perfect base and backdrop for a gorgeous edible collage. But the charcuterie board itself - the wood board - can be hundreds of dollars! You can build your own using scrap wood for free.
This DIY tutorial walks you through how to piece scrap wood together to make a Charcuterie board.
To tie all the boards together, we added a footed base:
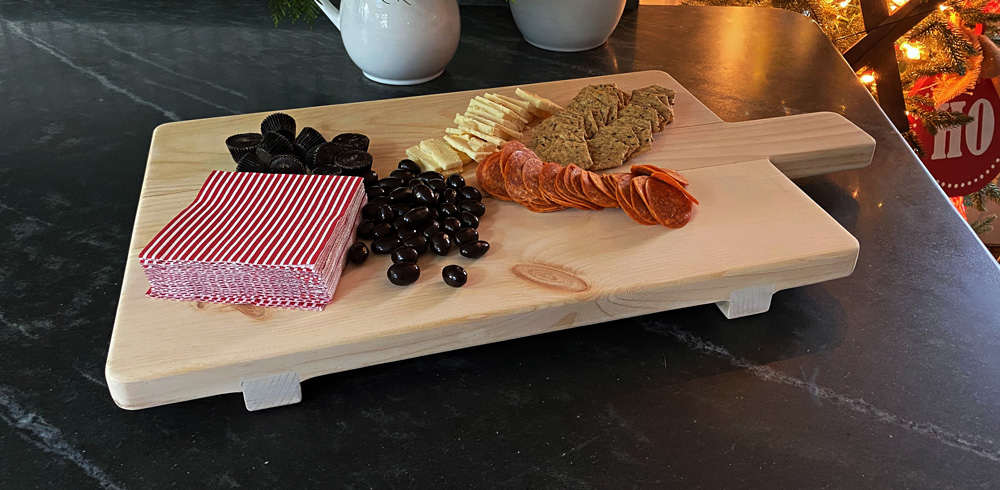
So just cut your boards, lay them out with glue, and attach the boards to the bottom. Super easy!
You can use any combination of 1x thick lumber, but I wanted to give a specific cut list as well (using 1 - 1x2x8 and 1-1x3x8).
Lay out your top boards, with the handle extending outward.
Measure and cut the "foot" board on the bottom.
Nail and glue the 1x2 foot boards to the bottom with 1-1/4" brad nails.
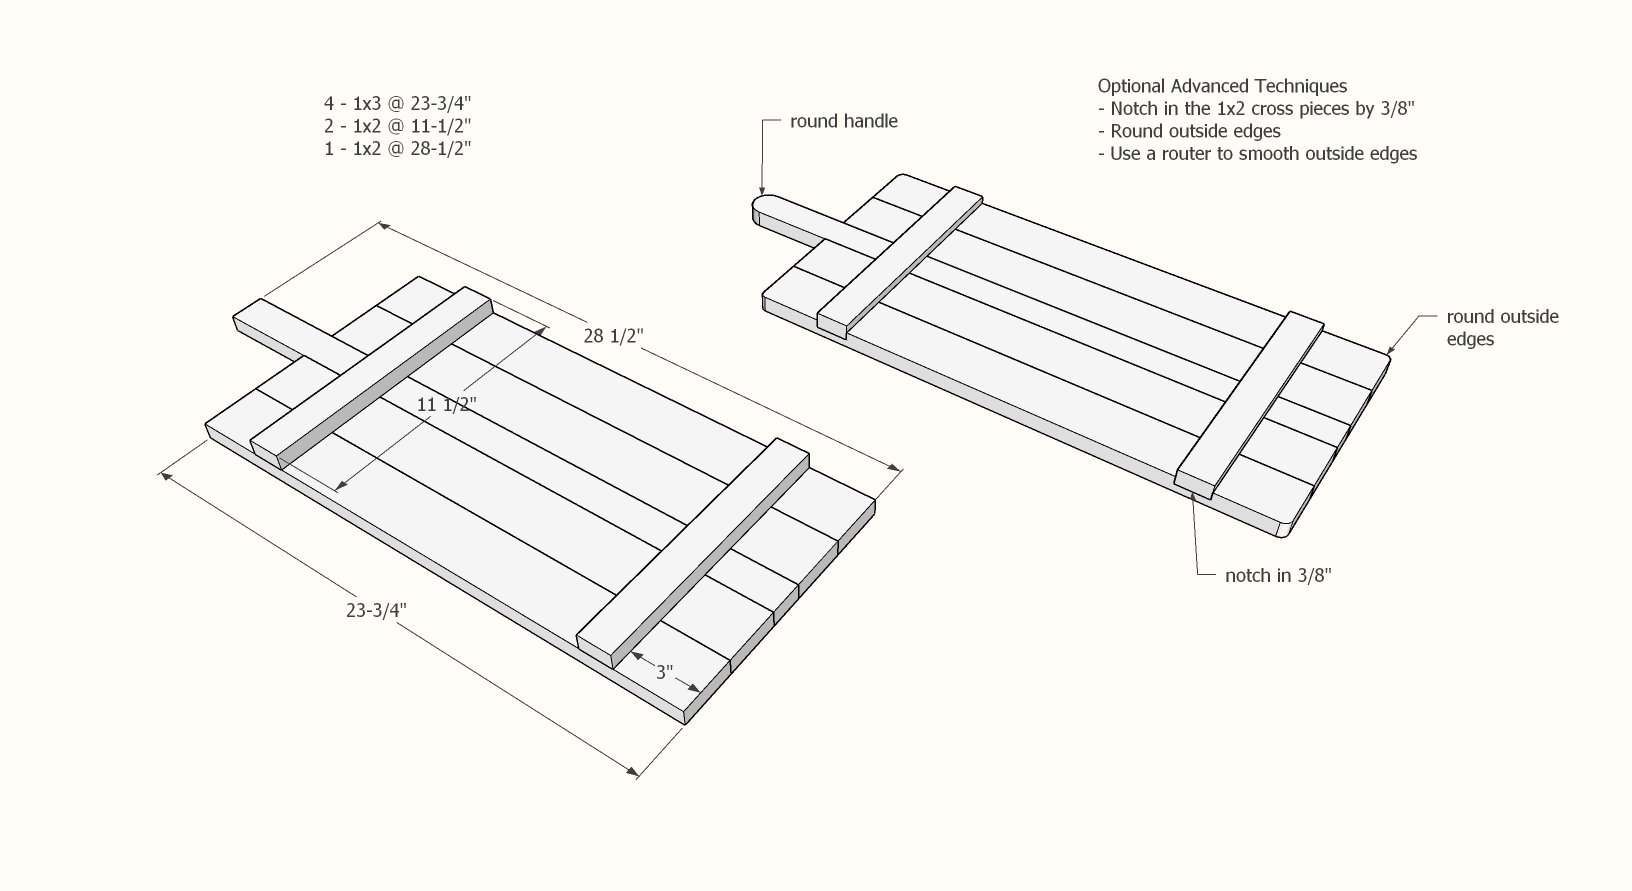 Advanced Method: If you'd like to make your board a little nicer, you can notch the 1x2 into the bottom. For more details, head on over to visit Jaime Costiglio's Build Post.
More photos and build tips at Jaime Costiglio.com
Finish: Use a butcher block finish or other food safe finish.
Do you do home workouts in your living room with the TV?
What do you do with your exercise mat? Where do you store your hand weights and foam blocks and bands?
Do you move your coffee table out of the way every single day? And move it back afterwards?
Not anymore!
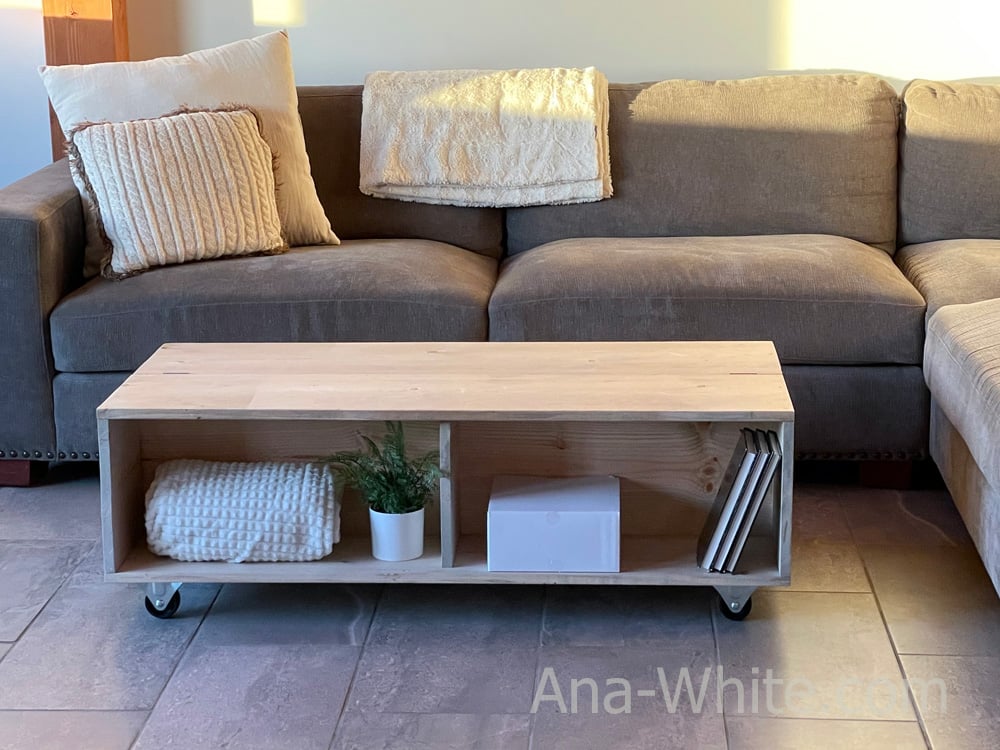
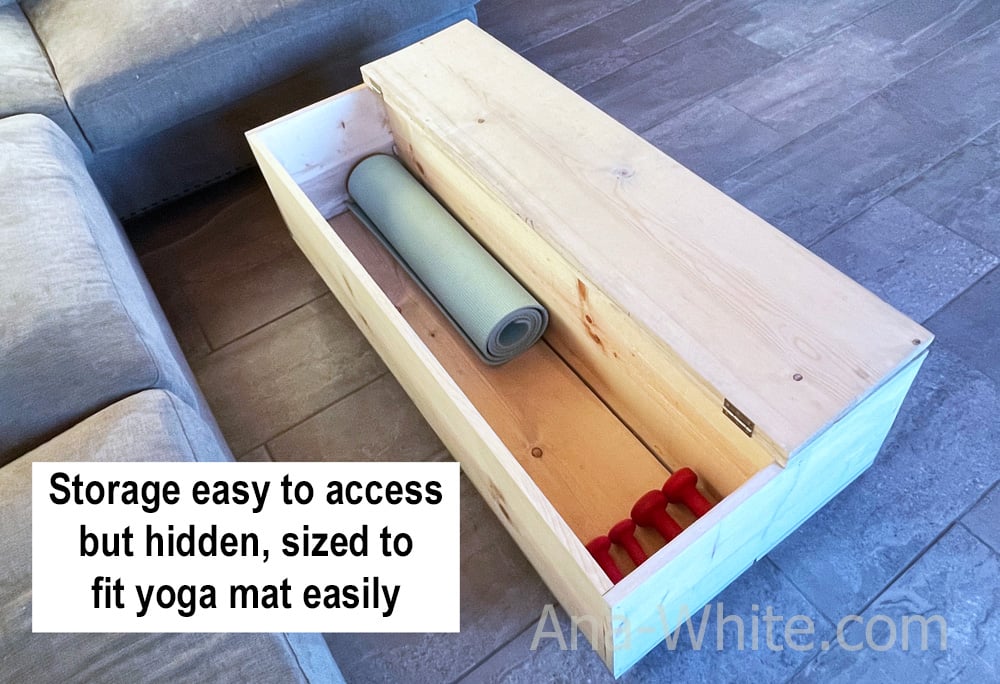
Big, roomy space sized generously for an exercise or yoga mat, foam blocks, exercise bands, hand weights and more - right where you need it.
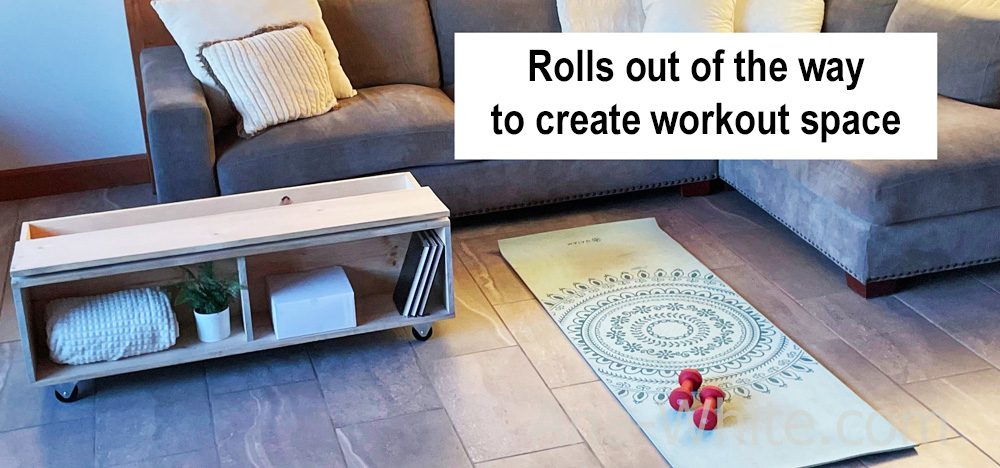
On wheels, it's DESIGNED to roll out of the way to create floor space for working out.
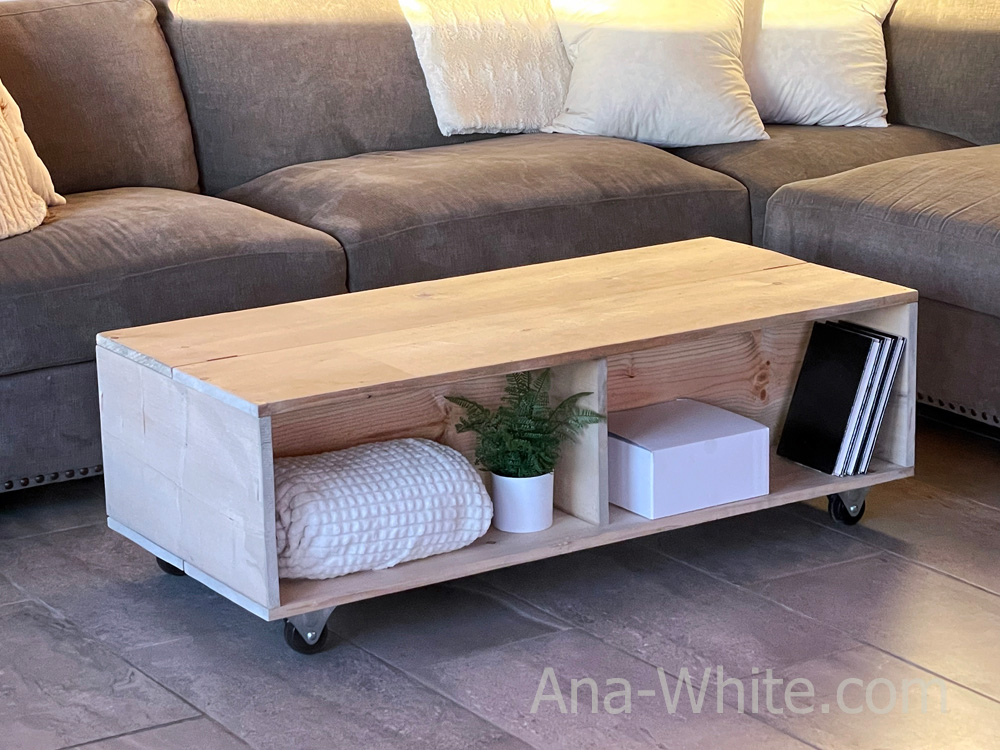 Then roll right back and store the equipment.
It's a home gym hidden right where you need it - in the middle of your living room!
This is an original design that you can't buy - you have to DIY with our free plans. You'll need four 1x12 boards, a drill and a saw to tackle this build. Here's a quick video of me building this project:
Scroll down for the free build plans!
The spare lego pieces are both the best and worst. The best because this is where imaginations come alive. The worst because no one wants to step on a lego, much less pick them up constantly. Lego pieces are getting smaller and smaller. And more of them.
So I decided to build a lego table for my littles to pile their mix matched and leftover legos into.
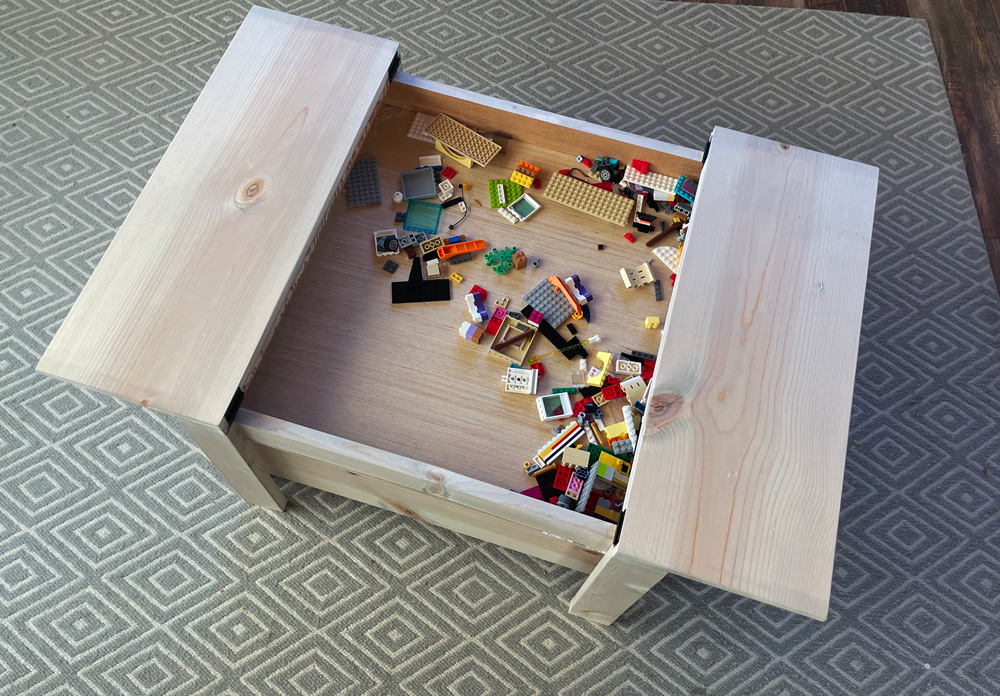
It conveniently hinges closed to hide it all and create a surface for other play -
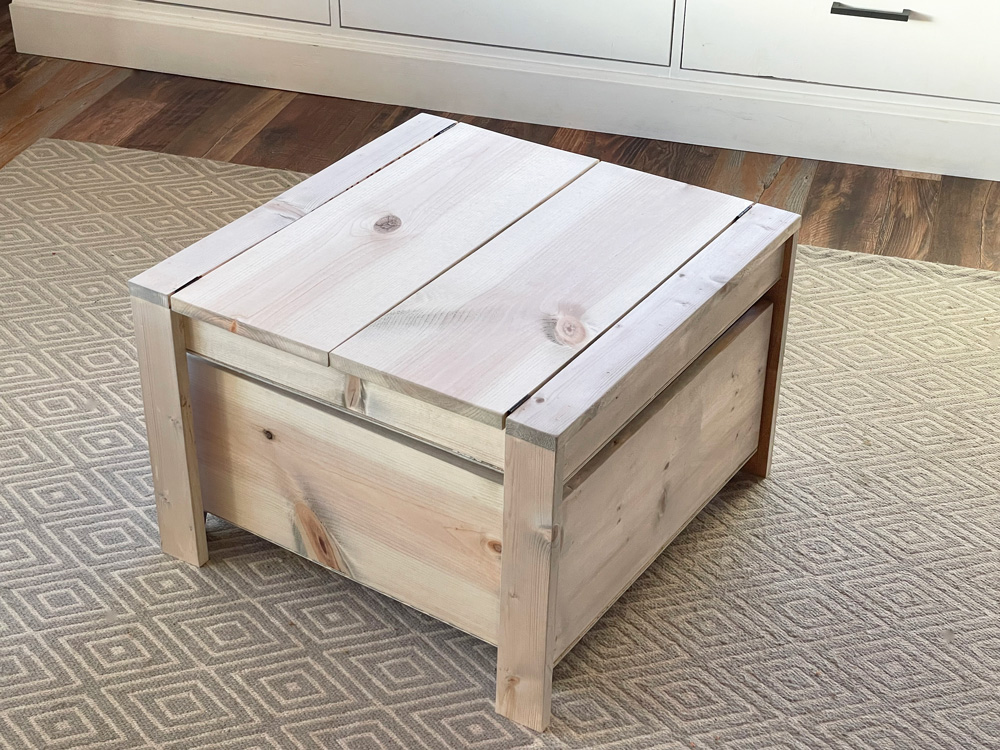
And you can build storage for under it, if you want.
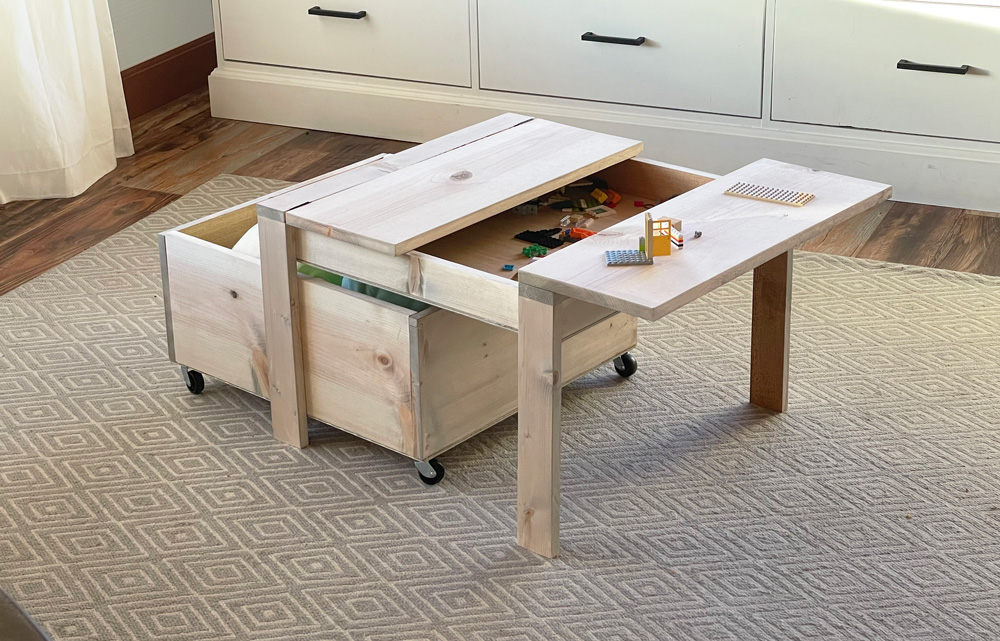
I know this one looks complicated, but it really isn't!
You can build this project with just off the shelf pine boards, some screws or nails, and your basic saws. Nothing fancy needed here!
Skeptical? Watch the build video -
VIDEO COMING SOON
And the free plans follow:
Specific storage makes tidy up a no brainer - especially for toys. Because kids know exactly where to put things away, making toy room clean up easy and decision free.
This week, Jaime Costiglio and I, are sharing a brand new plan to help you with just that!
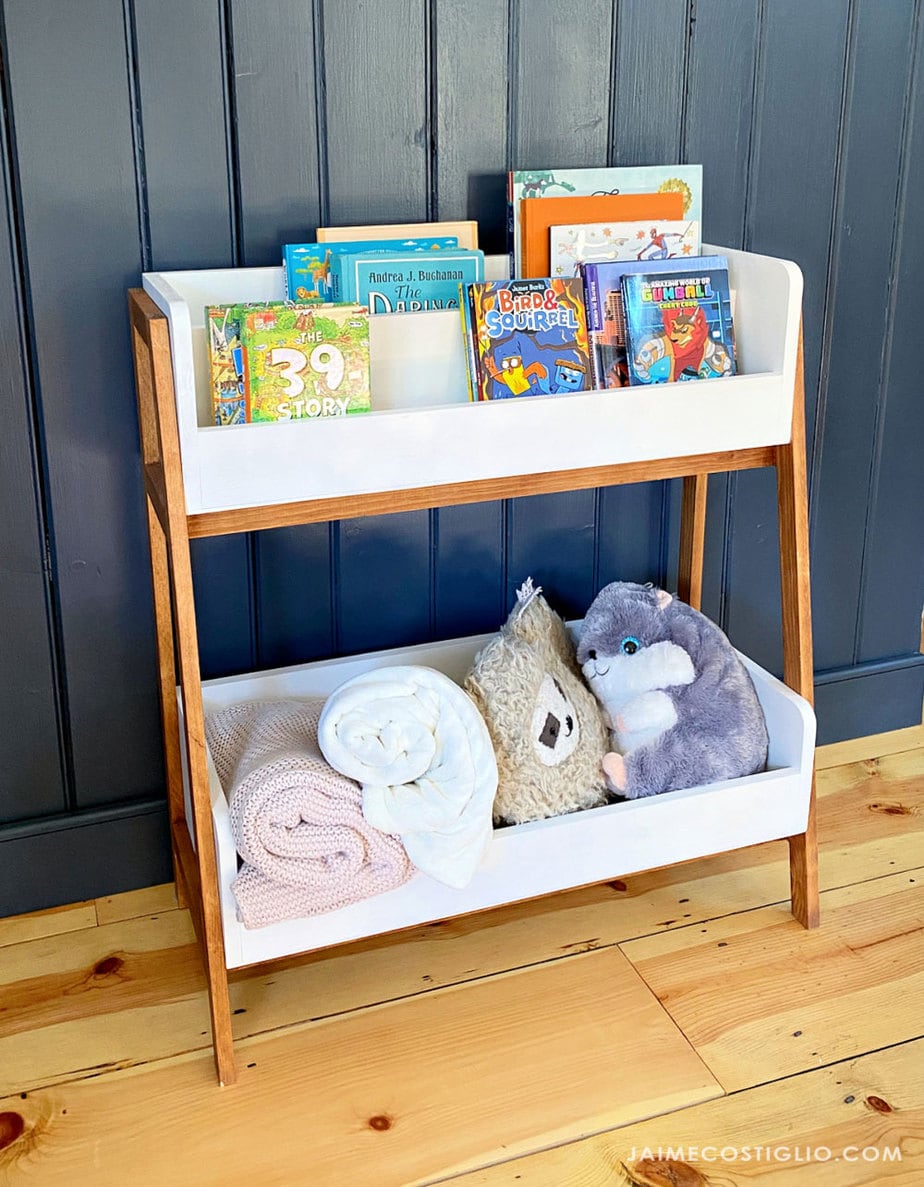
This bookrack features a bin at top for organizing books forward facing, suitable for different sized books. This also displays beautiful book covers facing outward. The bottom is great for larger items like stuffed animals, blankets, or favorite action figures. I love that there is no tabletop surface to accumulate clutter on top of.

It's the season of giving! I partnered up with Jaime Costiglio to bring you a brand new free gift plan, every Friday in the 12 weeks leading up to Christmas! Over the years, we've gifted hundreds of plans, many that you can make with scrap wood. Check out the entire Handbuilt Holiday Collection here.
Want to see this project come together with build photos? Tips and tricks? Lots more finished photos? Jaime puts together a build post on her blog with much more details - please click over and check it out.
CLICK HERE FOR JAIME COSTIGLIO BUILD POST

It's the season of giving! I partnered up with Jaime Costiglio to bring you a brand new free gift plan, every Friday in the 12 weeks leading up to Christmas! Over the years, we've gifted hundreds of plans, many that you can make with scrap wood. Check out the entire Handbuilt Holiday Collection here.
We wanted to add toy barn to our collection of free build plans - as children love playing with horses and farm animals.
There are many different styles of toy barns. For this plan, we went for a less expensive and open option!
With kids spread out over 11 years, it seems like I've had a little at home now for 15 years! One thing I've learned is kids love toys that they can be creative and use their own imagination - they do fall for the plastic light up do this/do that toys in enticing packaging, but it's the simple, basic toys that they can use almost as "tools" that they play with over time.
That's why we do Handbuilt Holiday! Jaime and I both have three kids, and we've built them all projects for over a decade! This year we are working hard to make plans not just great for kids - but easier than every to build!
This farmer's market stand would make the perfect gift!
Before we get to the free plans following, make sure you take a moment to see it built with lots more photos and build photos and tips with Jaime Costiglio's build post.
CLICK HERE FOR MORE PHOTOS AND BUILD TIPS
I refreshed my living room by building a new coffee table and end table (plans coming soon) with a chunky, modern edge.
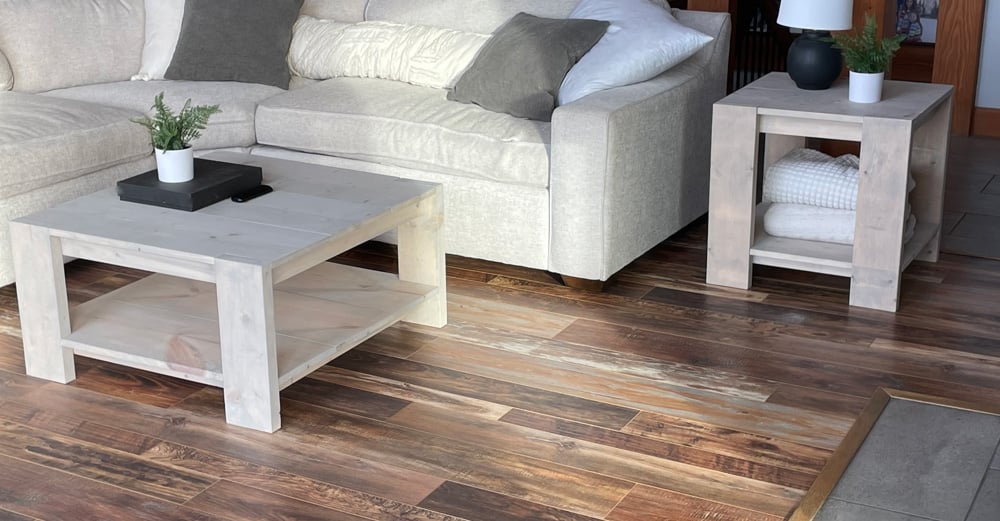
These tables turned out so awesome, and were actually fun and easy to build! I KNOW they are going to be a big hit, so wanted to come through for you with plans for these tables in different sizes.
In this post, I'm sharing the Rectangle Coffee Table. But if follows the same steps as the square coffee table, so please, take a second to watch that build video:
Thank you for using my plans. We are grateful we can share and that you trust us with your builds! Free plans follow!
Save money and add a personal touch to Christmas this year by building your own holiday decor and gifts. I’ve partnered with Jaime Costigilio to bring you dozens of Handbuilt Holiday plans, and we are back for 2021 with a brand new season!
See the entire Handbuilt Holiday plan collection here.
Today, we are thrilled to begin the 2021 season of giving with a brand new free plan!

We love how this turned out! You can personalize and paint any color of your choice! Want to build your own?
Head on over to Jaime Costigilio Blog to see this project built with lots of photos and tips.
This bed is built with 2x6 and 2x4 boards, and is very sturdy and well planned. Please watch the build video of the low loft bed, it is very similar in steps:
Low loft beds are gaining in popularity because they create more floor space for storage underneath, but are still easy to get in and out of an change sheets and make the bed.
I also love the low loft bed for toddlers, since the enclosed mattress has a crib-like feel, keeps pillows and blankets on the bed, and is the perfect height for tucking in littles.
You can save money. There are many options for buying a low loft bed, but by building your own you can save hundreds (even thousands!) of dollars. This low loft bed cost about $50 in lumber to make.
You'll get a more durable end product. Our homebuilt option is VERY sturdy, suitable for even young adults.
You get to customize it. We love that by building it yourself you get to choose your finish and can easily customize the storage options underneath.
And it's pretty easy to build. Most store bought options you'd have to assemble anyway. In this well thought out and tested plan, we make it as easy as possible to build your own low loft bed.
Don't just take my word for it - watch me build this low loft bed! It took me about two hours to cut and build this bed. Painting is definitely the hardest part, but if you prefinish your boards, you'll save a ton of time.
Video coming soon
The big benefit of a low loft bed is the added storage space underneath. We will be adding plans for storage underneath, as well as a bunk bed option.
You can make this bed into a regular height loft bed, but the bottom of the legs will need some supports at the bottom of the legs.
An good entryway or mudroom system is critical for an organized home. You need to know where things are, where they belong, so you can come and go without searching for misplaced items, or wondering where to put things.
There are many ways to organize an entryway - everything from built in cabinetry to eclectic solutions. But this system - what I call our "Essential Entryway System" is one I keep coming back to.
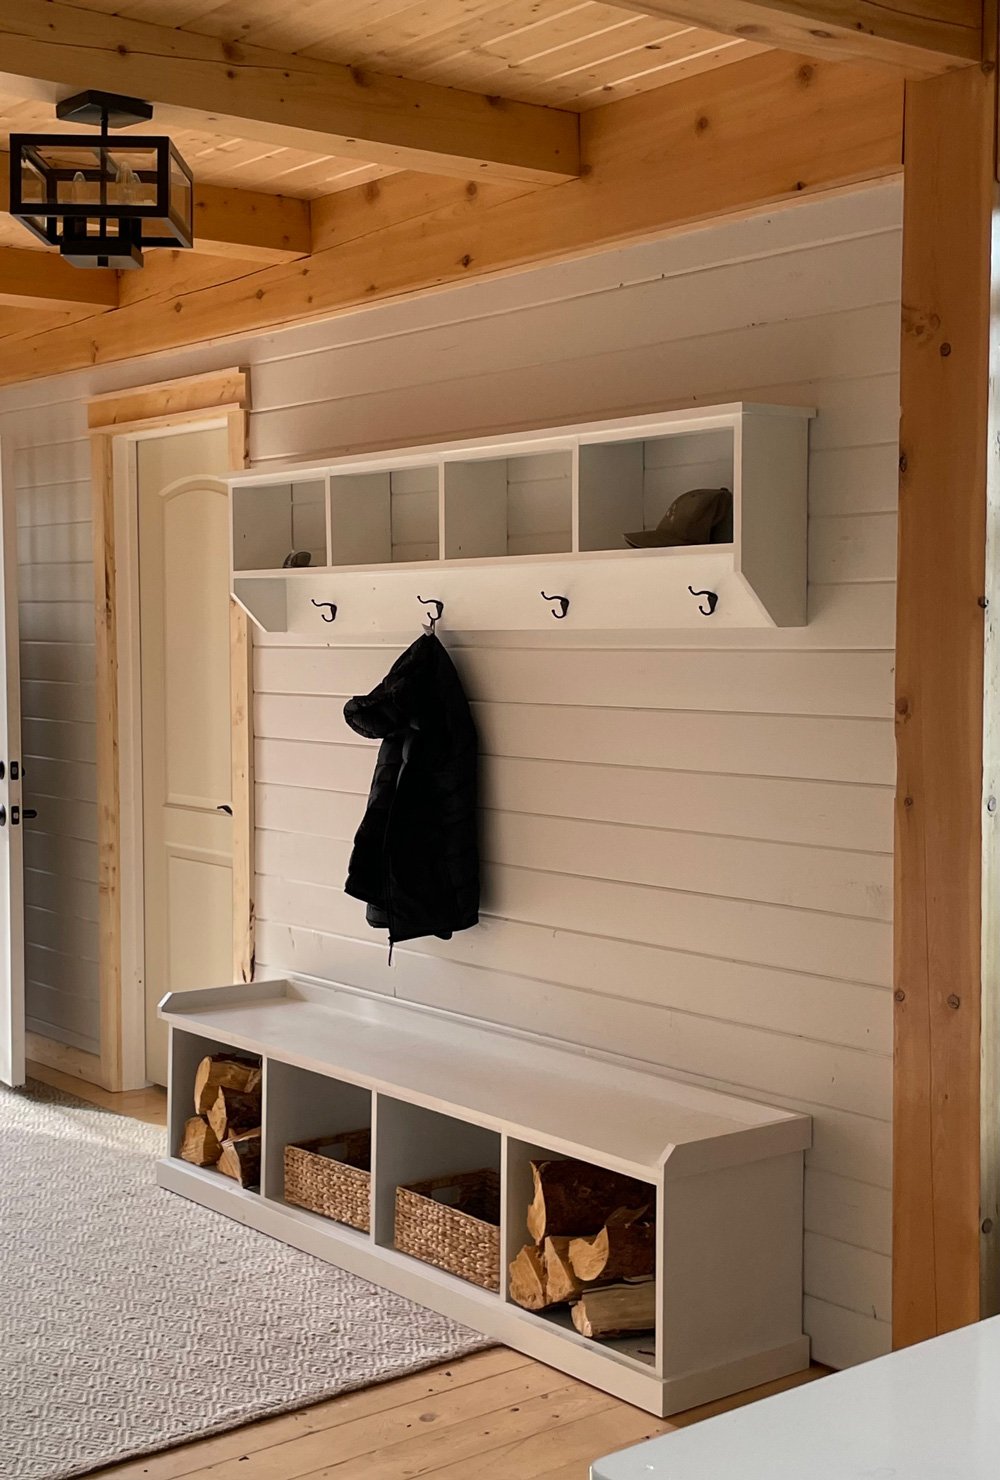
For this space, I thought long and hard about adding a full built-in mudroom solution. You know I do love me some built-in mudroom cabinetry.
But ultimately decided against that, since a built-in system would close off and make the space feel smaller. And since this is the main entryway (not a separate mudroom) I did not want it to feel like a back mudroom entrance.
We took the time to create a video showing how this shelf was built. But in the video, I did not like how the inside supports were added, so I updated this plan to a better method.
VIDEO COMING SOON
This plan is for just the wall shelf with hooks. You can find the matching bench plans here.
This simple farmhouse table is designed to give you all the beautify of real wood, and sturdiness of home built - but without requiring many tools or advanced techniques.
The inspiration behind this table was a request from a friend to create five farmhouse tables for a wedding that were sturdy, could hold up to transporting, lightweight enough to move around easily, and as inexpensive as possible. My husband and I were able to build all five in an afternoon, and my friend stained them up for her wedding
Photo coming soon of tables at wedding
We couldn't have done with with a more complicated plan, and were very pleased with how durable yet beautiful these tables are.
This table can be built for outdoor use too! We recommend swapping the 1x12 boards on top for 1x6 boards (can be 5/4 cedar deck boards for more longevity), you'll need six 1x6 boards (same 72" length) instead of the 1x12s, and leave a 1/4" gap in between the boards when you attach. Also recommend attaching with screws (exterior appropriate, about 2" length), as nails will pull out overtime in an outdoor setting. Also can use treated for the base, for even greater longevity.
Build video coming soon.
The plans for this table follow. Thank you for using our free plans. If you build, please post a "brag post" of your table, we love seeing your finished projects and it helps other readers visualize their projects.
User submitted photo by JTLARSON12
Almost a decade ago, I built this grid mirror.
Over the years, I have become more and more fond of it. I later on went and updated the look by painting it black.
This was such a great project and cost about 1/10 of a similar retail version.
Here is a video tutorial of me building this mirror:
The free plans follow. Thank you for using our plans!
Want to build a custom counter height table for your dining space? In this free tutorial, we show you how to go from hardware store lumber to this beautiful table!
Thank you Jen for the awesome project video and doing such an amazing job on this counter height table!
Ready to build it yourself? The free plans are below.
PS - Here are the stools used.
This entryway bench is one of our favorite pieces for an entryway. It's a hard working piece, that looks great, but is also easy to build and customize in size.
Here is my build video, showing how I built this entryway bench:
VIDEO COMING SOON
And the free plans are below.
I love the simplicity and comfort of a sturdy, well built wood bed frame. But bed frames can easily cost $500-$1000 or more! Why not build your own? For a fraction of this cost, you could have a beautiful, custom solid wood bed frame!
Here is a video tutorial of me building this bed frame.
Ready to build your own? The free step by step tutorial is below.
Thank you for using my plans, we appreciate the support and trust.
Food ... it is a revolving storage and organization challenge that we all deal with. A pantry is a must in new homes. But what happens if you don't have an adequate pantry?
My friend and co-worker Jen, who considers herself a beginner woodworker, solved it by building her own custom sized freestanding pantry!
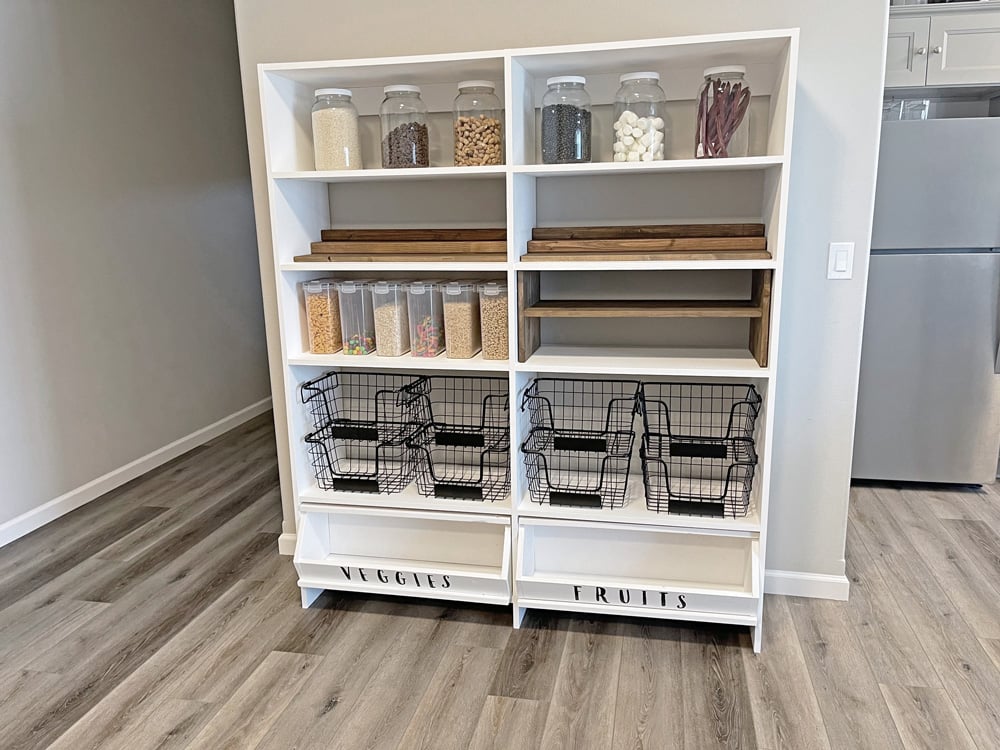
Jen was kind enough to film all the steps, so you can watch how she made this happen. Here's the build video for this custom freestanding pantry:
Ready to tackle your own pantry project? Here's the links for all the different DIYS and containers/bins:
Good luck with your project! And a huge thank you to Jen for making this project happen and taking the time to share each step with us.
Ana
Bookshelves don't have to be boring! By just changing up the front trim (called the "face frame") you can give your storage piece a completely different look!
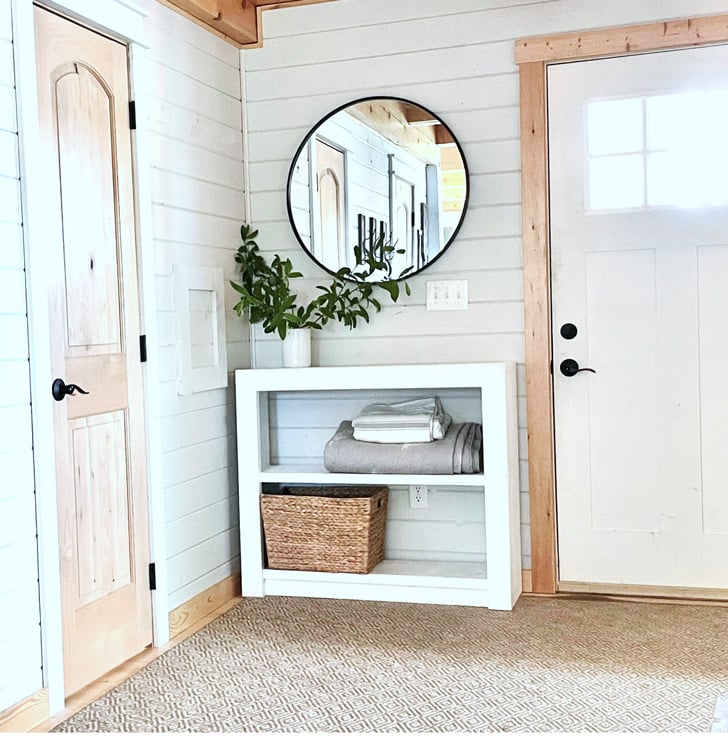
Yes, this is just a simple bookshelf, with a chunkier face frame! It gives this piece a modern but crisp look - so mountain modern!
I built this piece for our cabin in the mountains, where I'm craving a simplified life, with less things to pick up, less details to dust and wipe down, but still looking to be inspired and encouraged by the surroundings. I needed the storage for shoes, hats, gloves, sunglasses - entryway dropzone stuff - but wanted a piece that could also look good empty. I do love an empty shelf. It's an opportunity to put something away.
For my bookshelf, I built a custom size to fit in the space perfectly. If you are building it, you might as well get the right size, tailored for your space.
I love this plan because it is very easy to customize the size in both height and width! You can build just about any size you can think up!
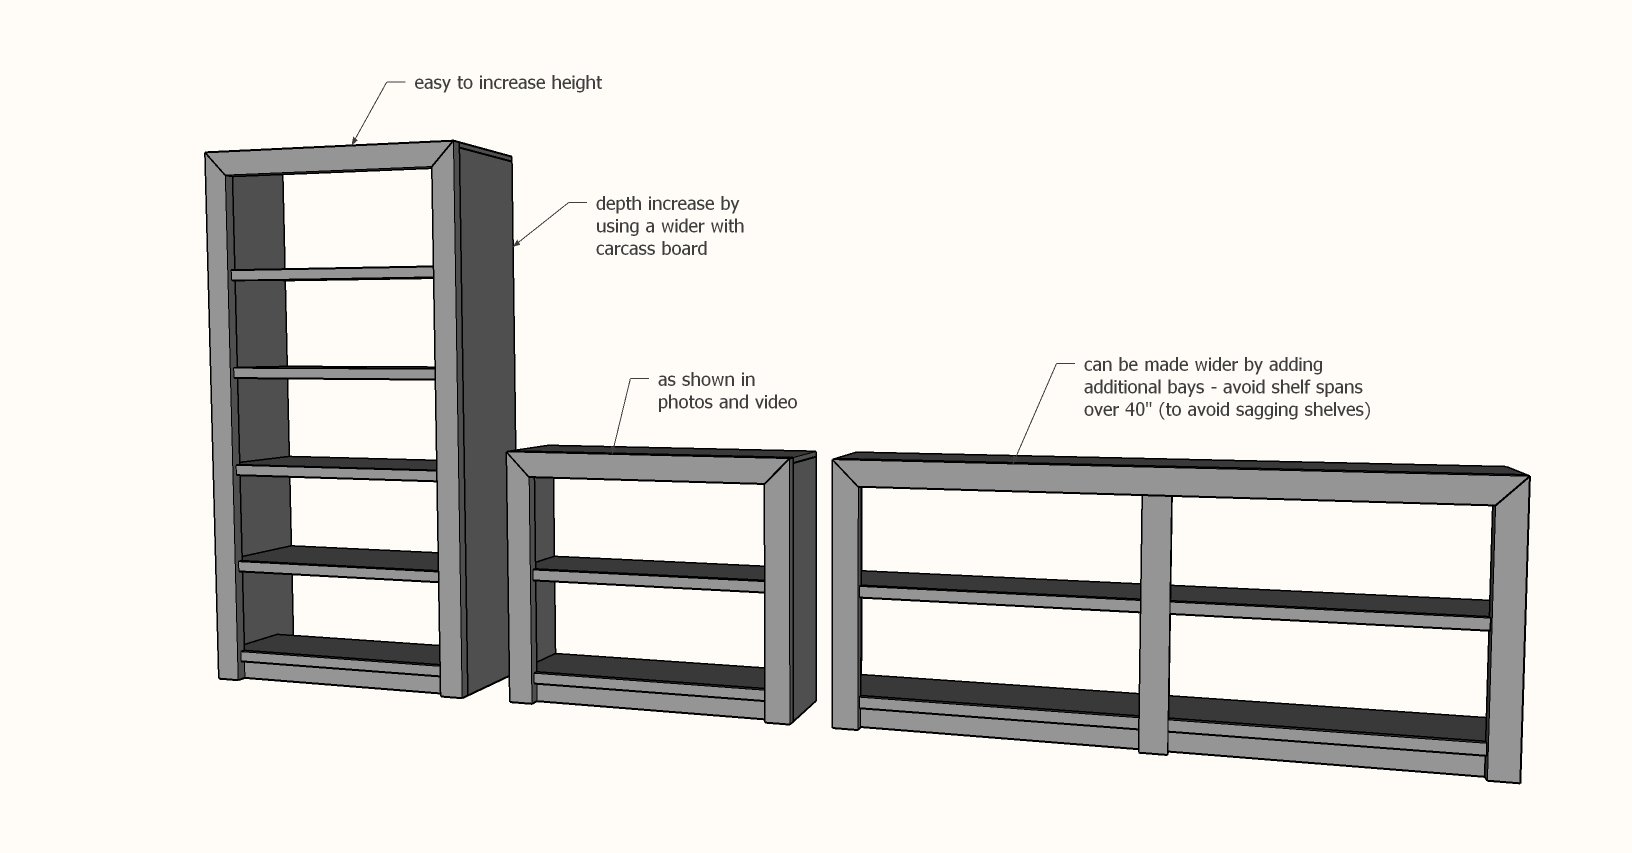
The tutorial below will show you how to size yours just right for your space without doing any crazy math or worrying about making mistakes.
I put together a quick video showing the steps to build this bookshelf. Please watch before you build.
VIDEO COMING SOON
Here are the plans for this bookshelf. I decided to do this one more as a template (so you can customize the sizes) - since getting the perfect fit is so important. It will be easy to come up with a cut list and shopping list once you have your carcass laid out.
Thank you for using our plans, we appreciate the trust and support.
Doors are super important. It is the face of the project.
After a decade of trying and testing many different methods and techniques, here's our process for building professional quality Shaker cabinet doors:
The Shaker Door calculator is a huge deal. It takes the hesitation out of making cuts - I'm always a little scared to start cutting hardwood since it's so expensive. Not anymore.
Since this type of door is a good fit for our Shelf Help calculator, we have the tutorial and calculator over there.
Click here to download my free Shaker Door cut list generator and step by step tutorial
Parson's tables are a classic in modern design. I especially love them in stained wood - because it brings texture to your space, without visually cluttering.
The simple clean lines are not just appealing to the eye. They are comfortable, with no hard corners to subconsiously be aware of and avoid. This makes parson tables a great choice for small spaces and homes with active children.
We choose this collection of occasional tables for our Cabin House Build for these reasons - and because they are easy and quick to build. It's a great option for staging homes too!
Here's how I built the coffee table
The other tables are built in the same method - you can opt to use the 1x4 method as outlined in the plans below - but just changing up your cut lengths. Here's a few standard sizes to make your life easier.
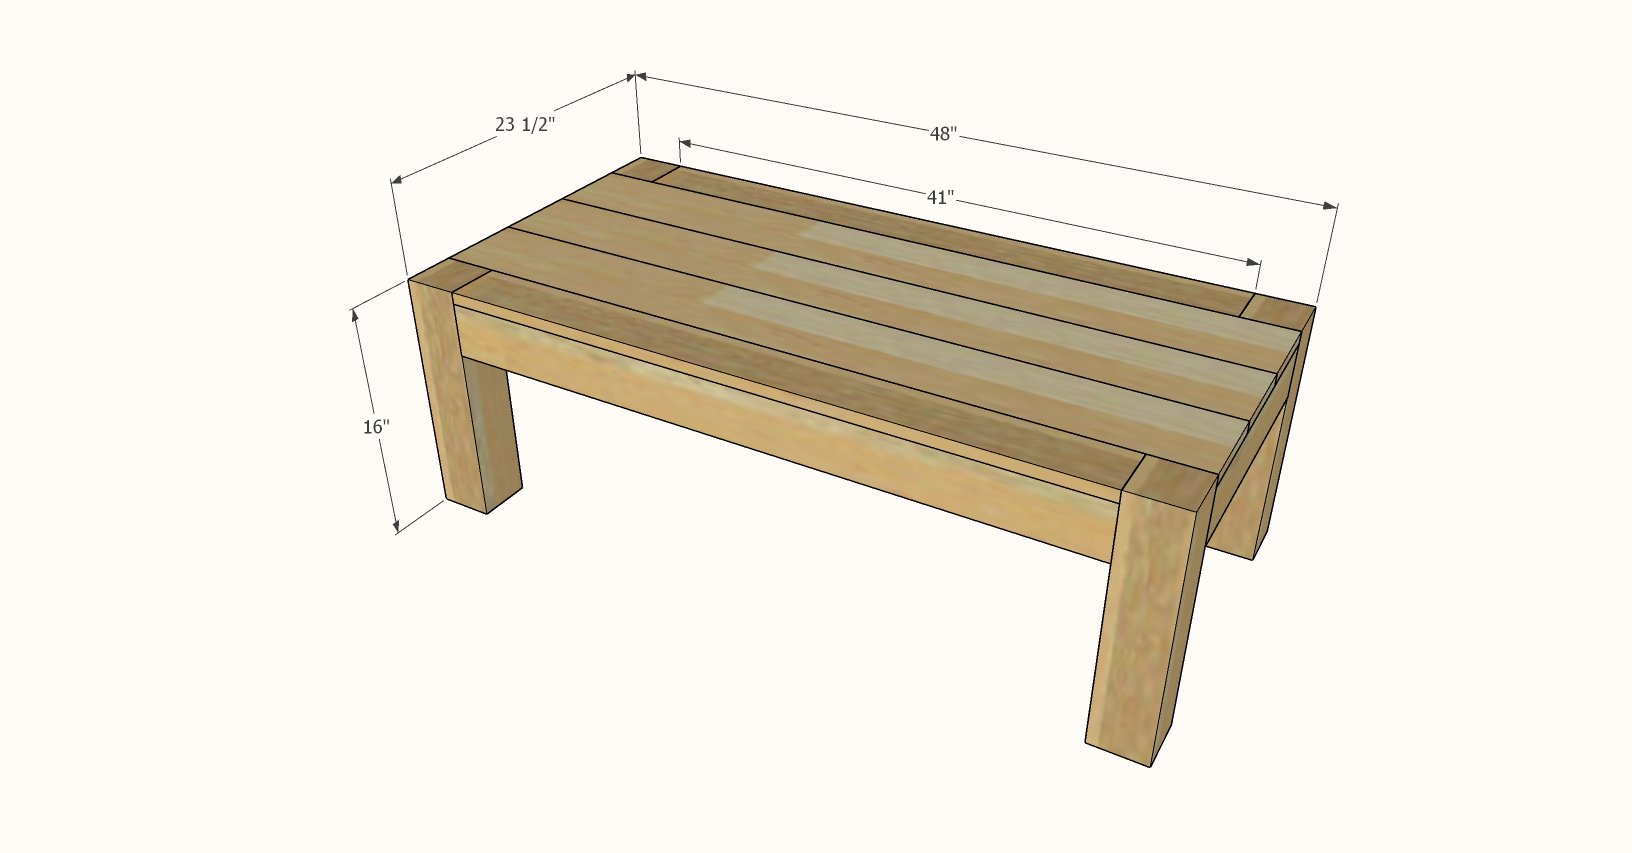
Here's the rectangle coffee table that I built, it's a pretty standard size and works with most standard sofas. It's on the shorter side, so if you want to add a bottom shelf I'd increase the leg length to 18". Notice in this design I used the 1x4s - you can also jigsaw out if you have the tools - the plan will work either way.
Cut list for rectangle coffee table as shown:
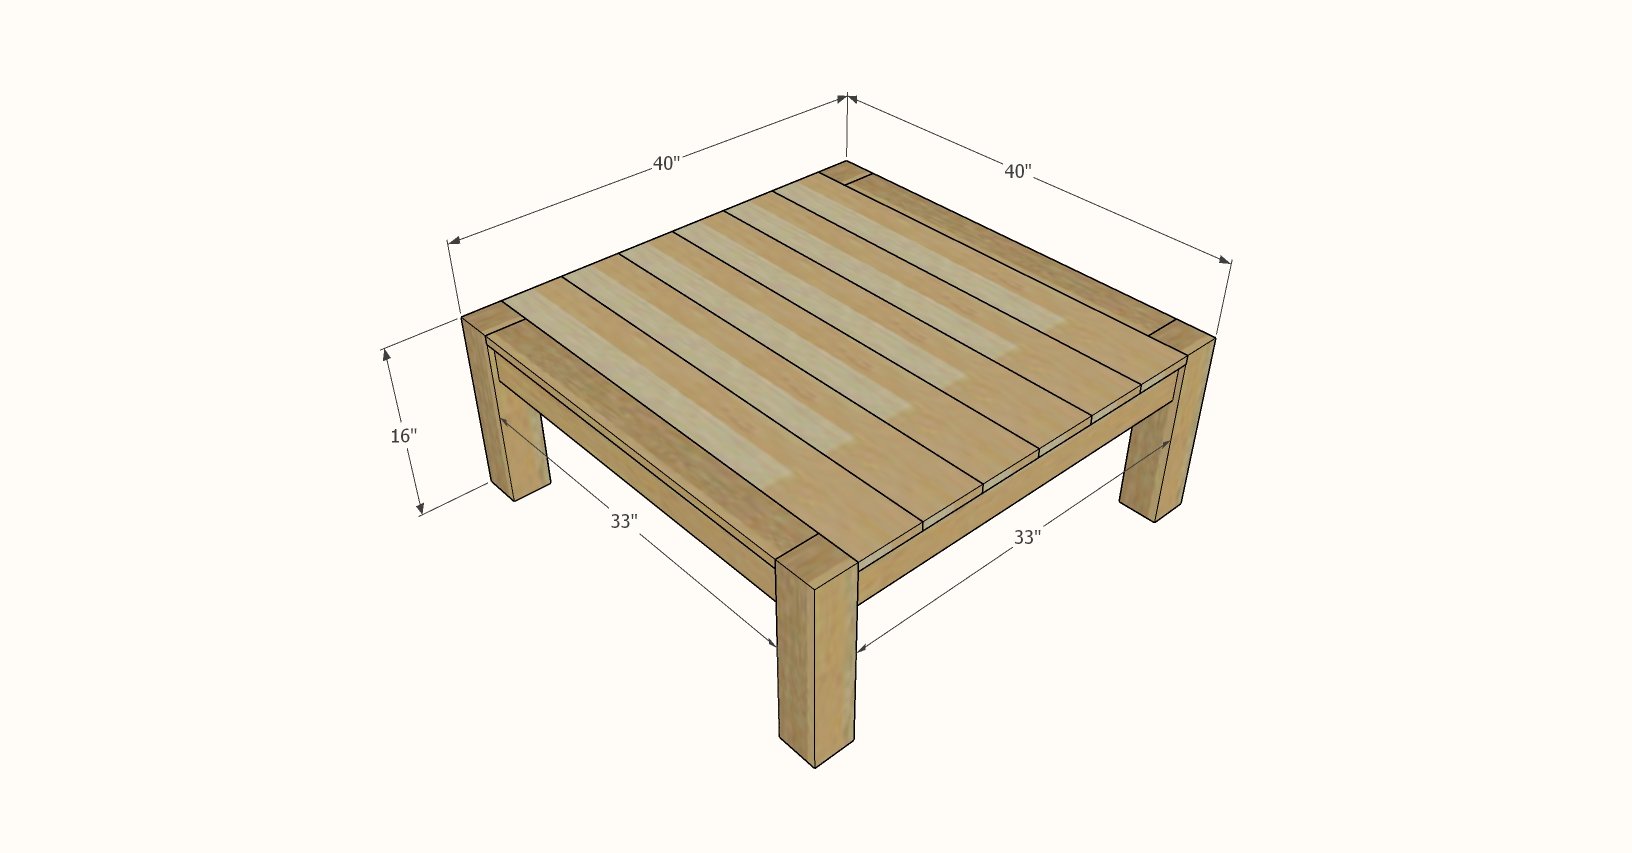
The square version is great for sectionals and larger living rooms with seating on multiple sides.
Here's the cut list as shown for the square coffee table:
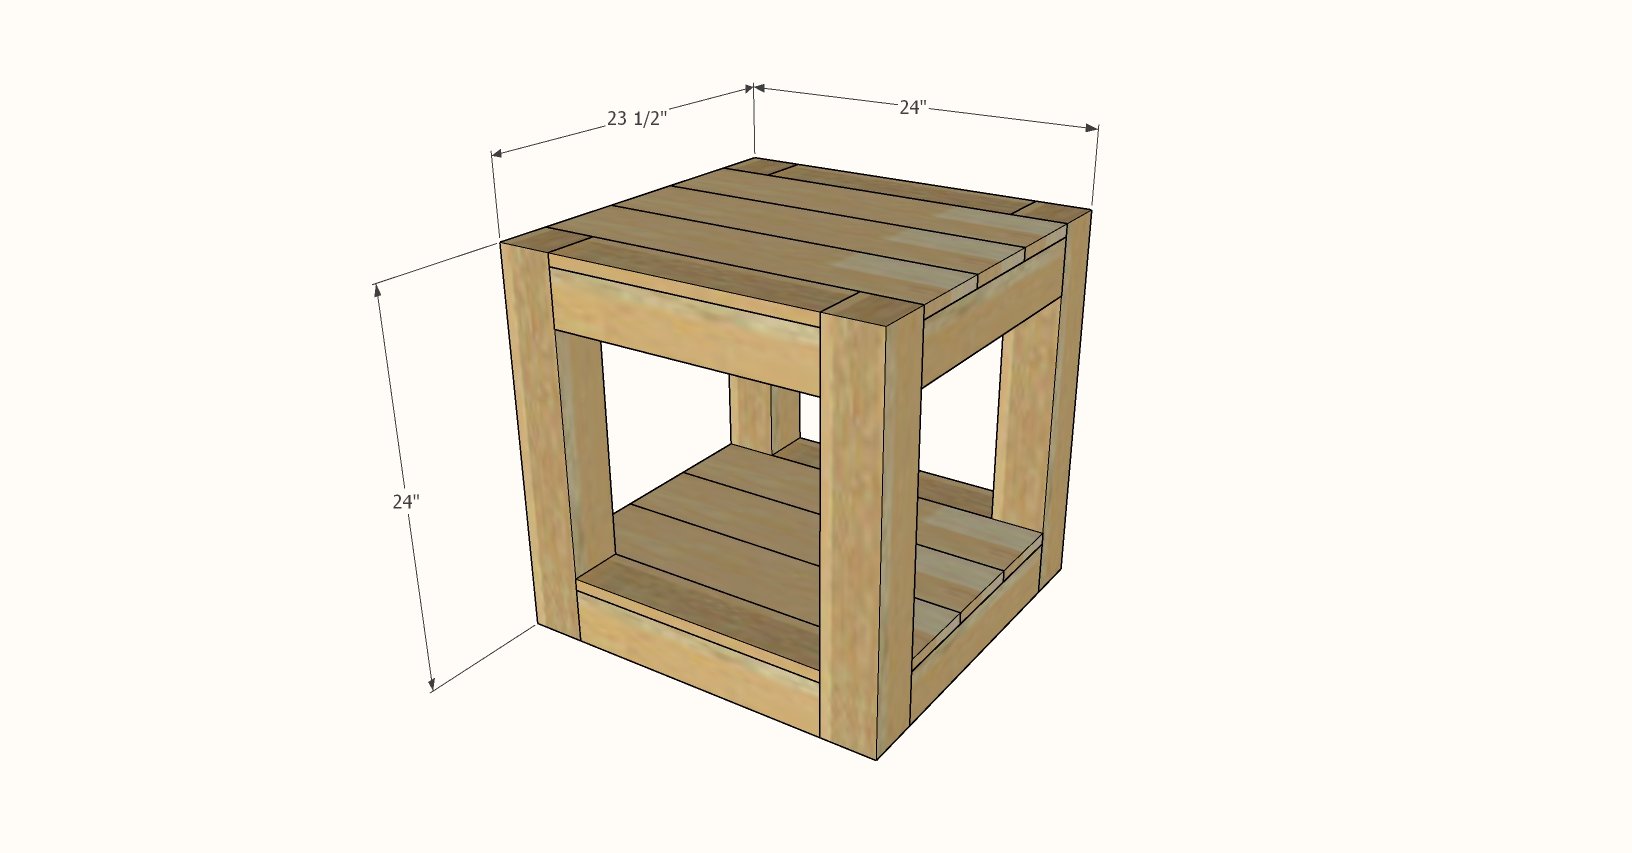
End tables are a little taller, so a bottom shelf will create more function and also support the legs at the base. But the bottom shelf is completely optional.
Here's this end table cut list as shown:
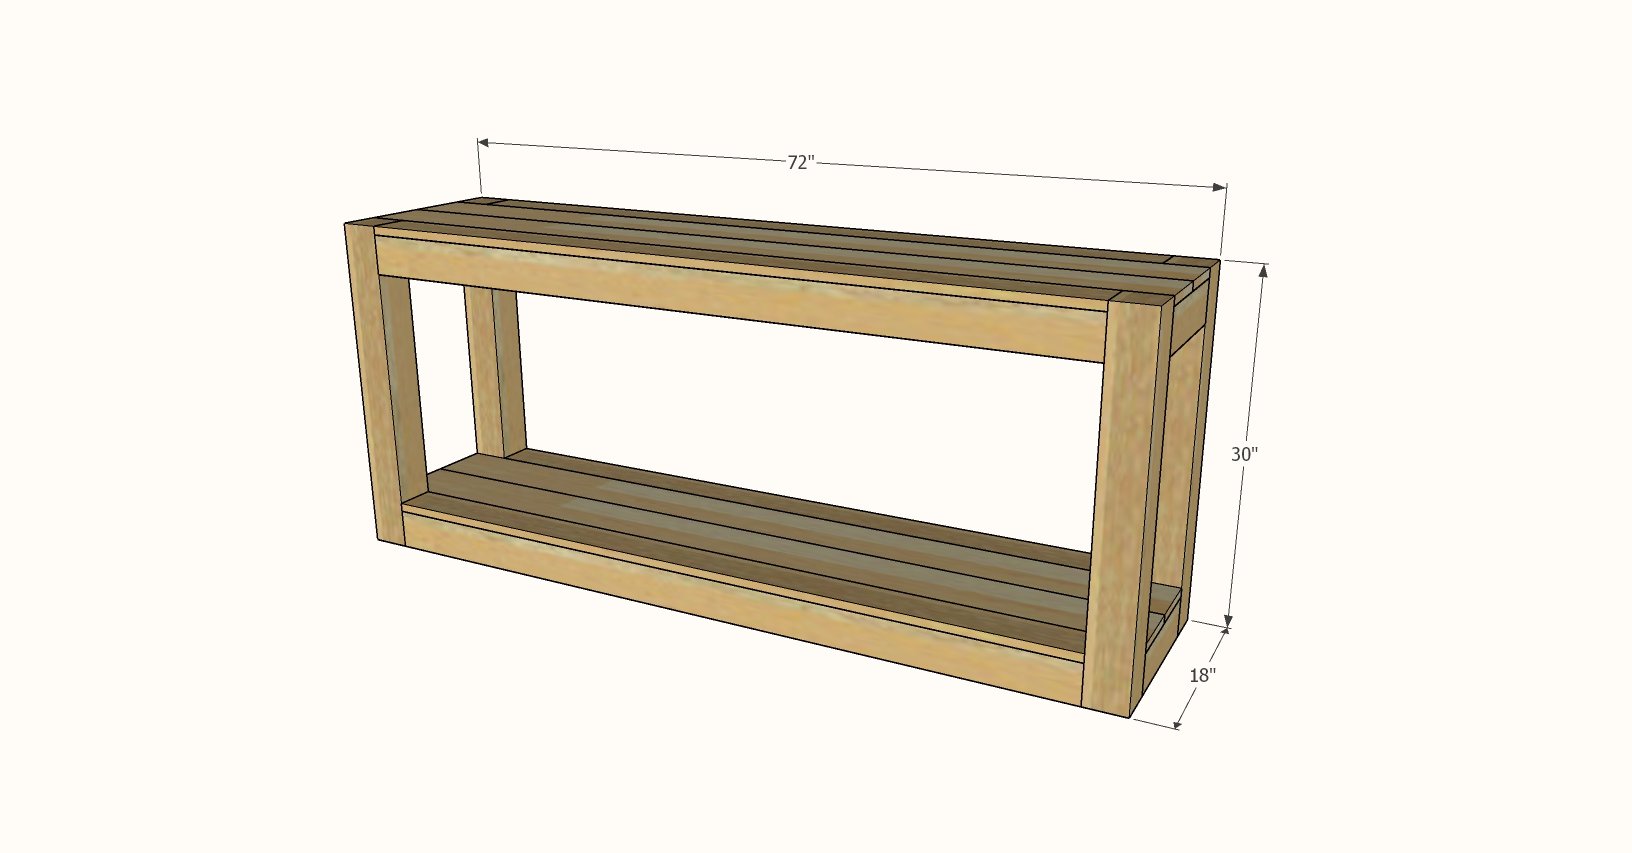
The parsons console table is also ideal for a bottom shelf. I'd love to see it with baskets of shoes, or pillows in blankets in a living room media console setting.
Here's the cut list for the console as shown:
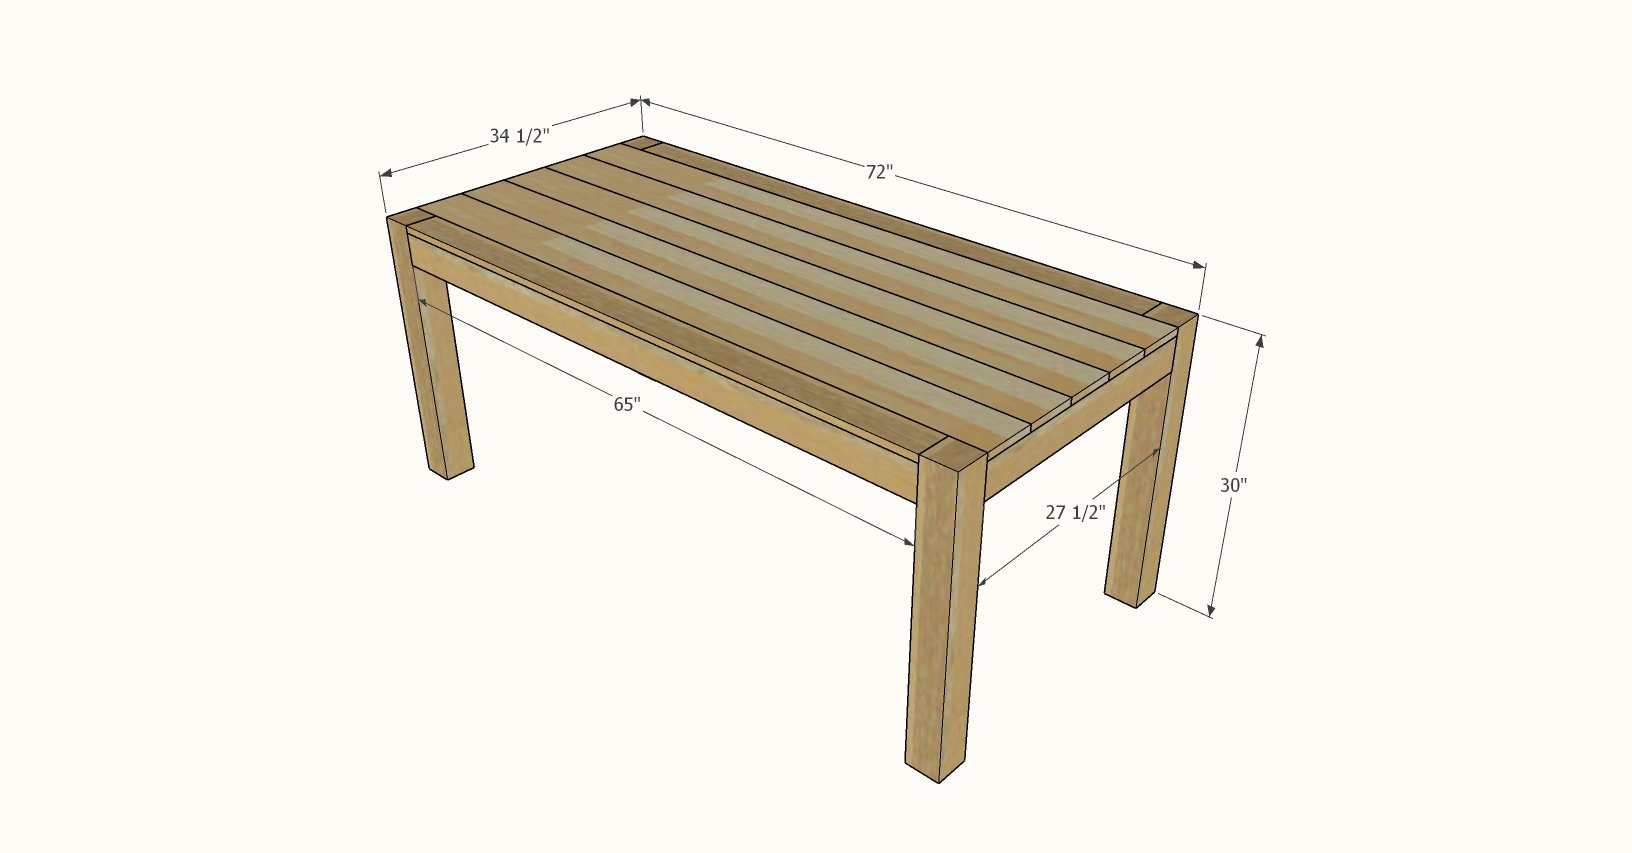
And finally, the dining table! One change is I did use 2x3s for the dining table aprons instead of the 1x3s, to increase support. Also I did 45 supports under the tabletop from apron to apron, also screwing into the legs (this is shown in step 4 of the plans).
This is a good sized table that will easily seat 6. But it feels perfect in a small dining room.
Here's the cut list for this dining table as shown:
Here's the basic steps for building these parson's tables:
My teenage daughter Grace has been asking for more storage in her bathroom for a couple years now. If you wait long enough, the get old enough, and smart enough, to design it themselves .... yes, she did. She went on Shelf Help, designed what she wanted, the pieces showed up in my shop, and then I built it:
It took me a day, working a few hours in the morning and most of the afternoon, to finish this project. It is quite big, and there's alot of drawers - which aren't hard, but do take time.
We used this project for storage in a bathroom, but it could be used in many different rooms in the home:
The plans for this sideboard follow. Of course, this is easy to adjust in size, should you need a custom piece. Please share photos if you build!
We love this playhouse because it is tall inside, so big kids and Mom's under 6 feet can play too.
We love that the windows add natural light.
We love that both doors open up and it feels so giant in there!
And we love how simple this playhouse was to build. Read on - once you get the four walls built on the ground, you just stand them, tie in with some roof rafters, and put plywood on top. It really is pretty simple!
PS - The deck plans are here.
The kitchen island is the heart of the home.
We are building a small, starter home to sell, and of upmost importance is a great kitchen island that does it all, stores it all, while looking beautiful. Here's what we came up with:
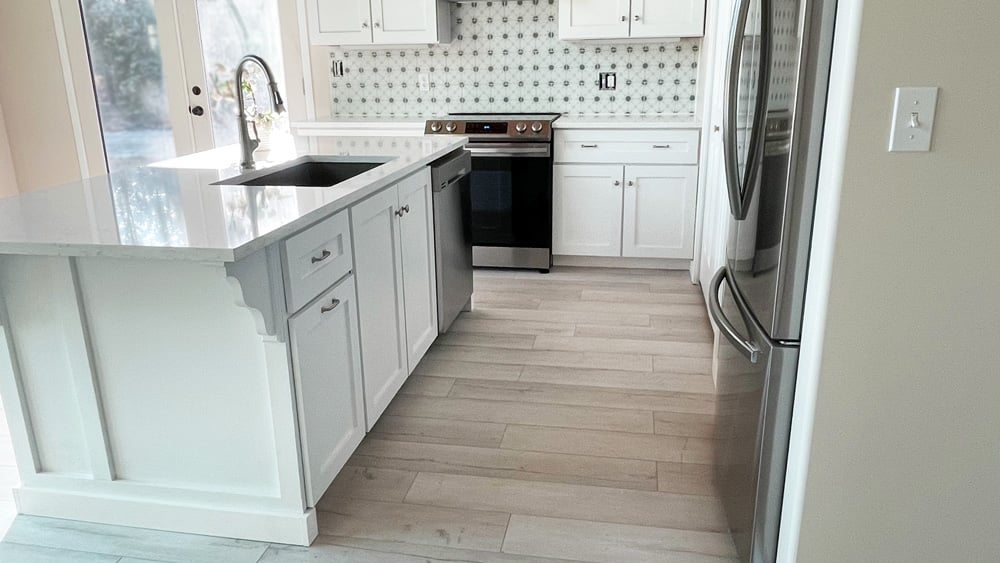
On the "work" side, it features a sink, a pull out trash drawer with a cutting board/knife drawer - so it becomes a prep center - and a dishwasher - so it becomes the dishwashing center.
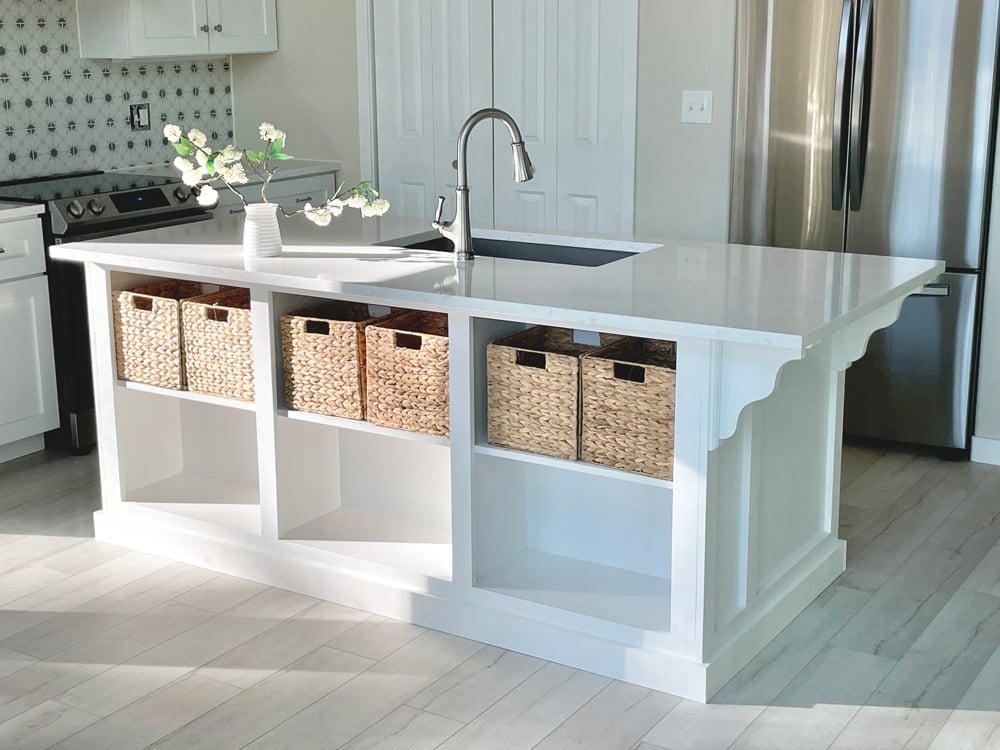
On the seating side, we added open shelving (which also increases countertop space) and keeps stuff off the countertop. This is where you can put everything from serving dishes to board games, charging cords, laptops - even snacks, paper plates, craft items.
We extended the countertop about 6" over the open shelving - so you can still sit and eat there too.
We also added seating on the corbel end, not only creating more seating, but also creating seating at a corner for cozier conversations and less awkward homework helping.
We tried super hard to make this a great island that the new homeowner will love. And we are sharing the free plans, so you can build it too!
We put together a quick video of the build, so you can see the steps happen in action.
VIDEO COMING SOON
And the free plans for this project below. Thank you for using our plans, we very much appreciate your trust.
Design your own furniture with our free configuration tool at Shelf Help.
Reader submitted photo modified in height, see more photos here
Out 2x4 Outdoor Collection is a reader favorite! Since so many of you have built the sofa or sectional pieces, we thought we'd add a side table plan to the collection too.
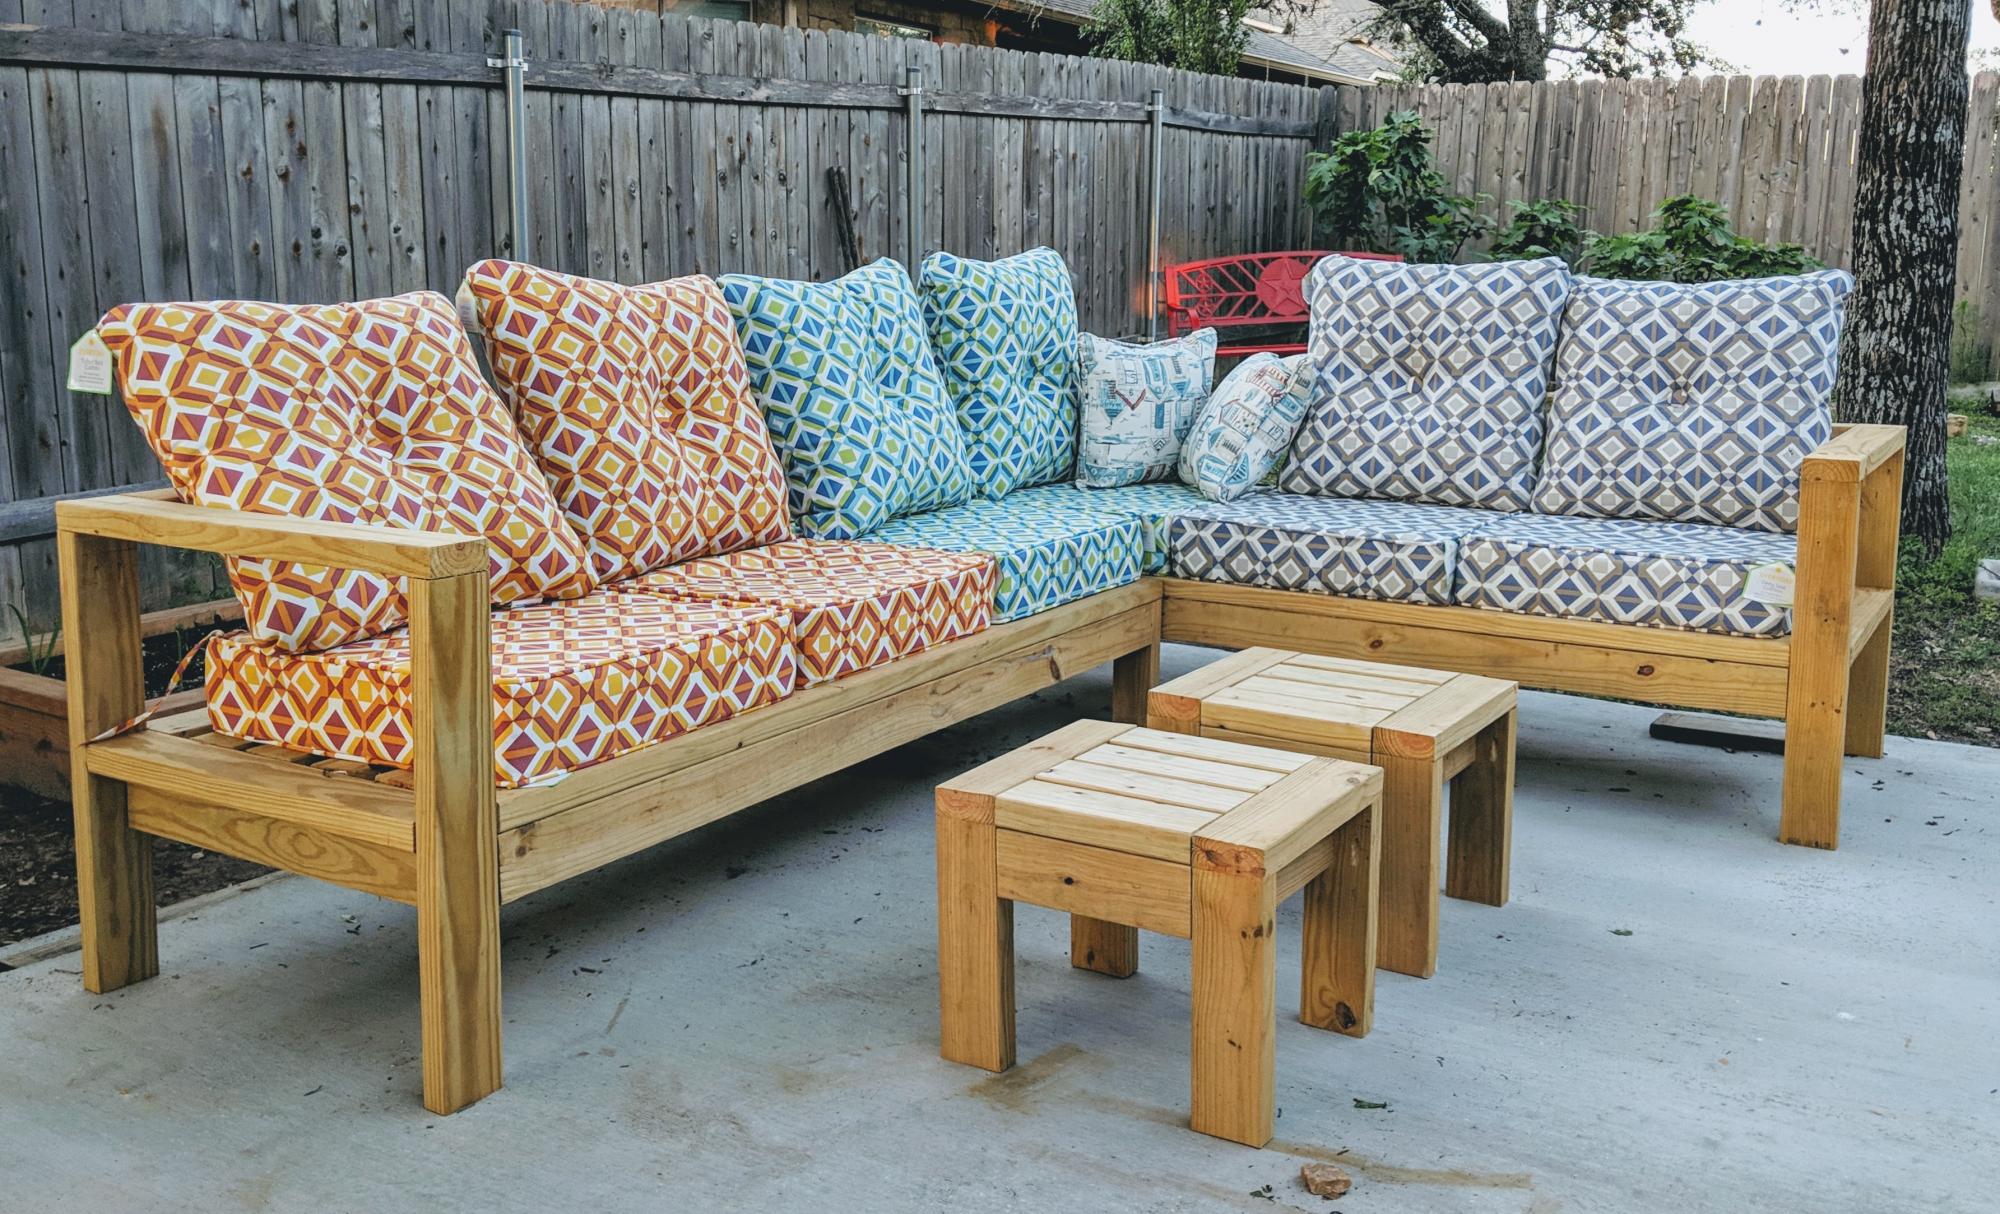
All of the plans in the 2x4 Outdoor Sofa collection are available here.
This collection is so popular because:
We love this little side table, because it's just four 2x4s to build it! It's sturdy enough to hold a plant or even an occasional guest!
Want to see this project built in video? Make sure you take a second to watch us build this 2x4 outdoor table.
And then download the free plans below and get it built!
Thank you for using our plans, we love seeing your projects, so please share when you are done!
This beautiful barn door entertainment center does it all while looking good too! It is a HUGE project - up there with a kitchen build - but with the simplified step by step plans, not hard to do. It took us two days to build and finish and cost us about $1000.
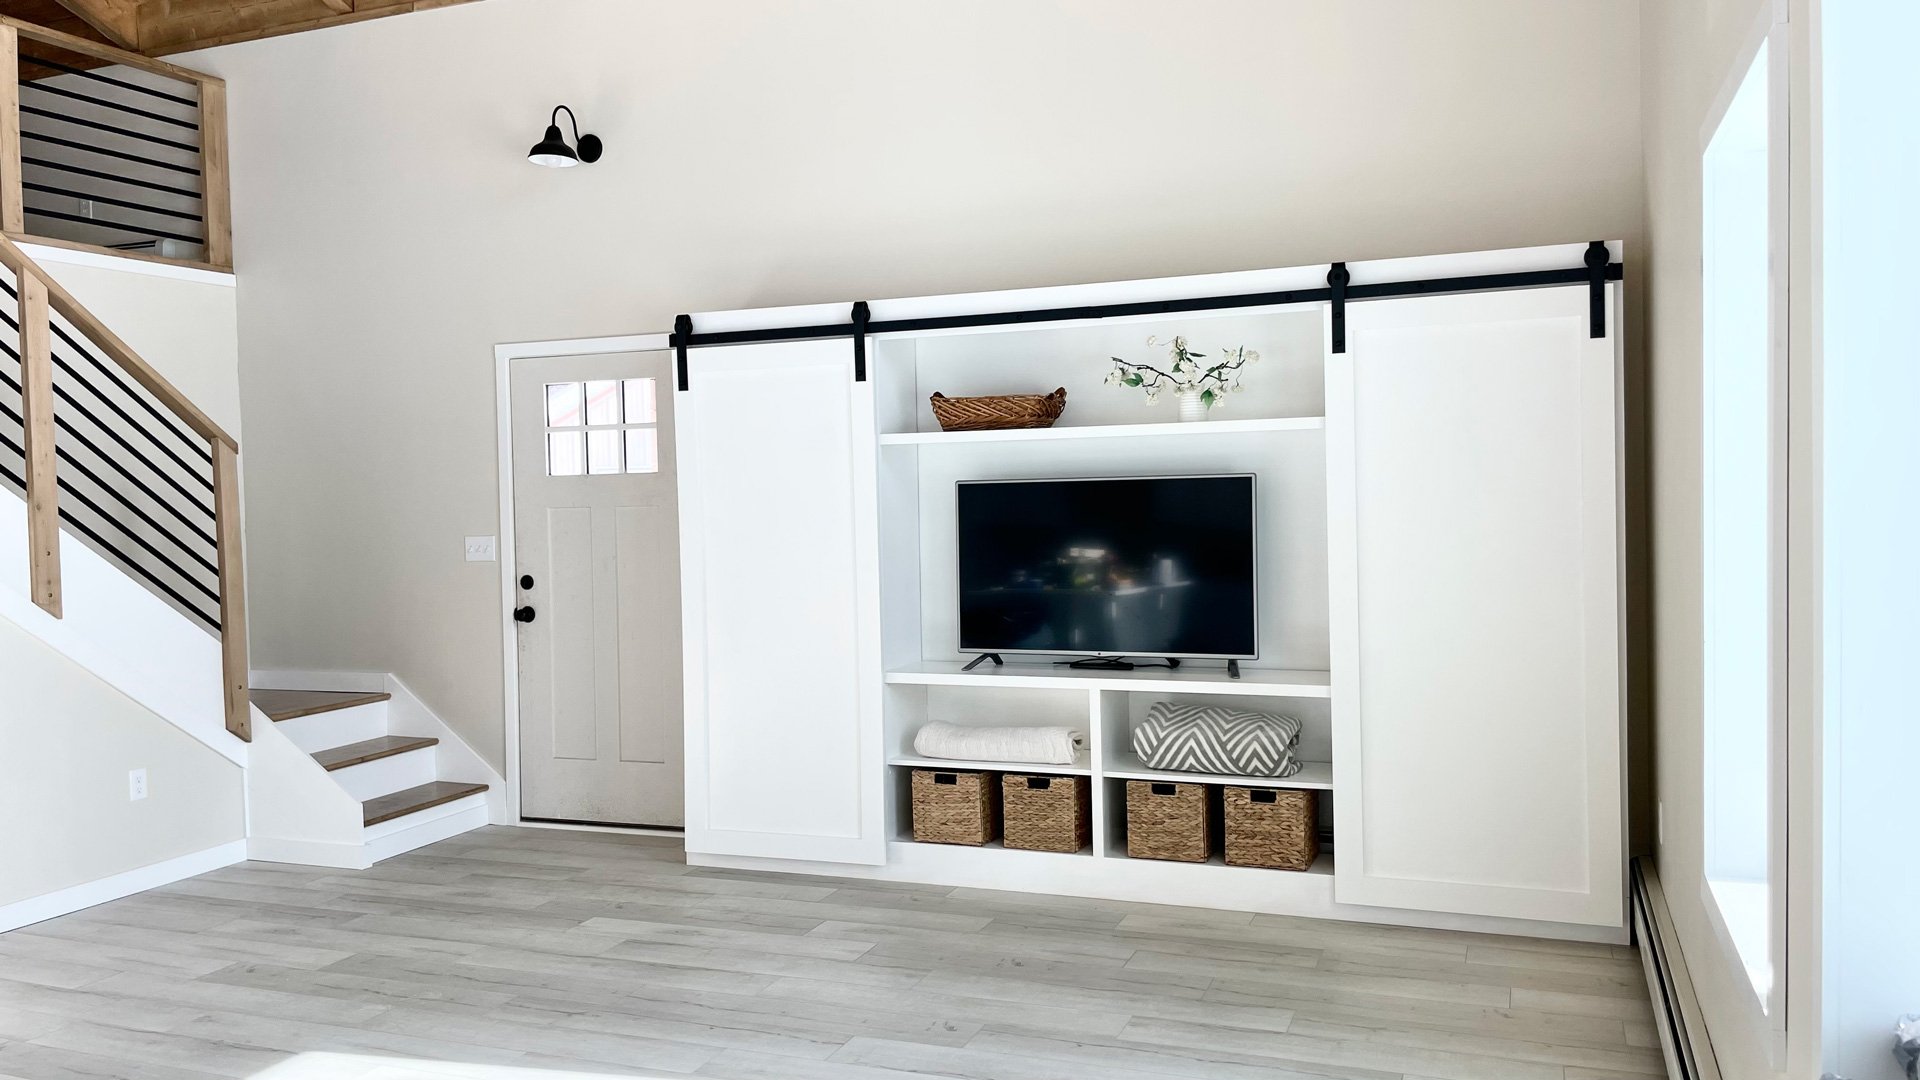
If you are interested in building this piece, please watch our video, as it will help explain many of the steps.
As a member of both Ana's community and The Handyman Club of America, I get a lot of inspiration for my projects. I happened to find inspiration in the latest issue of Handy Magazine and the raised planter box that they feature. They do list the plans for the planter, however, it requires the use of special tools like a router table, chisels and large pipe clamps. Those may not seems like "special" tools to some of you, but I don't have them so I'm labeling them special. :-) They used pocket hole joinery in their plans, but only in a small part. Why not use them everywhere and make life a bit simpler? I decided to take on the project myself and "re-write" the plans for our community. Reader submitted photo.
The inspiration piece is built out of cedar, if you use a different species of wood and plan to use this outside as intended, make sure you take steps to weather proof your piece of furniture! :-)
Do you want to upgrade your closet storage systems to something that is durable and custom to your needs? In this tutorial, I'm going to show you how we tackled a small reach-in closet, adding shelving and multiple hanging storage options.
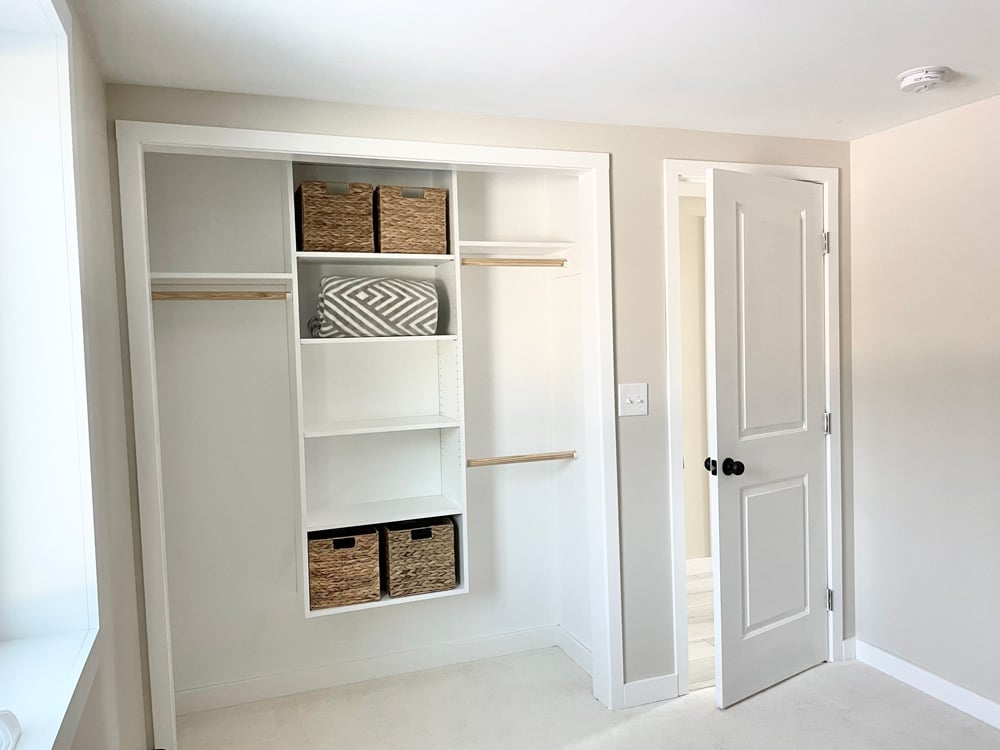
Towers are such a great way to break up closet spaces. The days of one long hanging rod are over - it is so much more functional to break up hanging space to sort items, and to increase folding space.
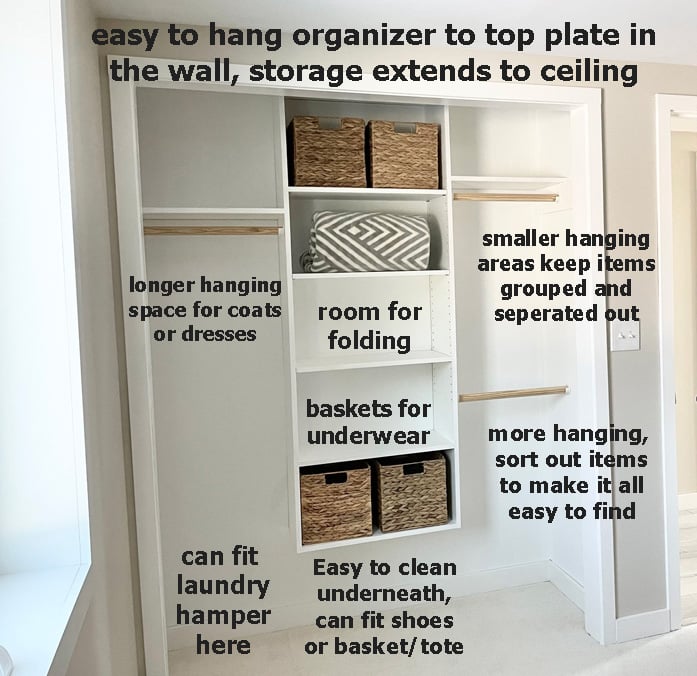
We did a fun video on this closet build that you can watch here.
And also created a plan to help further explain the steps. The plans follow (scroll down). Thank you for watching and using our plans, please share photos of your completed projects, we do love seeing your work!
We are building a cabin style house in Alaska to resale. It is very small, every square foot is extremely valueable.
A pantry is a must have on any house I build. I design my kitchens to hold tools (dishes, mixing bowls, pots and pans, cutting boards, etc) and spices and coffee. That's it. Everything else goes in the pantry. Yes, everything. If it regularly rotates out, it needs to be on open shelving in the pantry. That way you don't end up with expired cans in deep drawers or moldy bread at the back of the shelf. Or maybe worse, you can't access and inventory what you have quickly and easily.
Even though this house is small, we made sure to include a pantry right in the middle of the kitchen.
This week, we are tackling the pantry shelving. We want to put the right shelving in that can last a lifetime and won't need to be ripped out or changed later. You might as well do it right the first time, it saves you time and money in the long run.
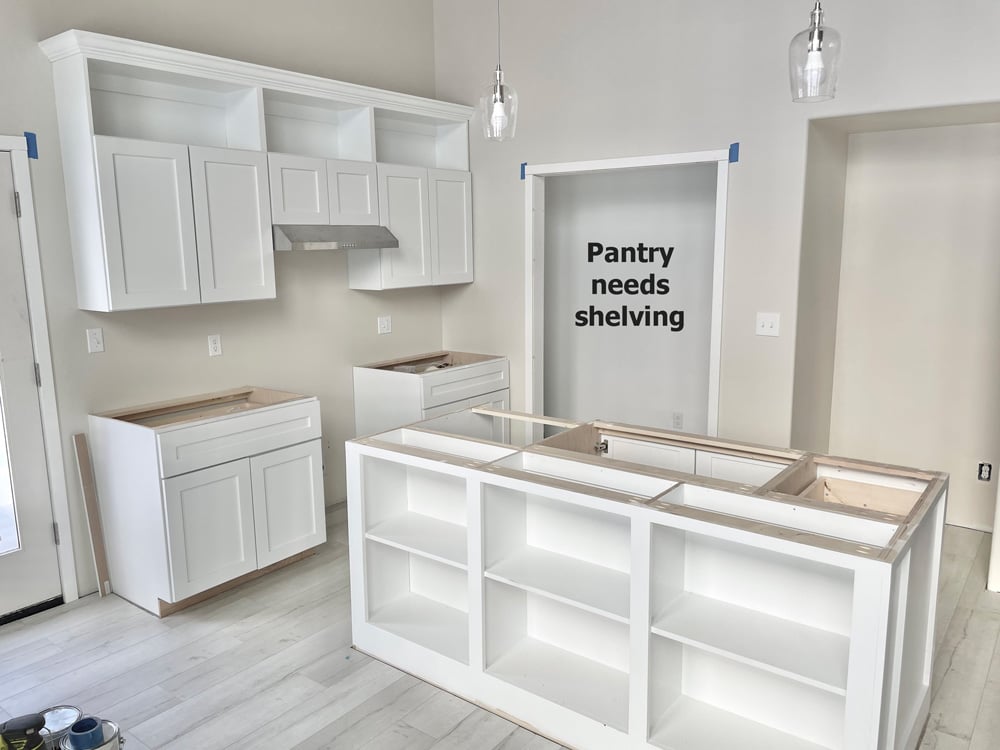
Related: Want to see this kitchen get built? Check out our other Cabin House Build posts.
Here's what we came up with as a final result:
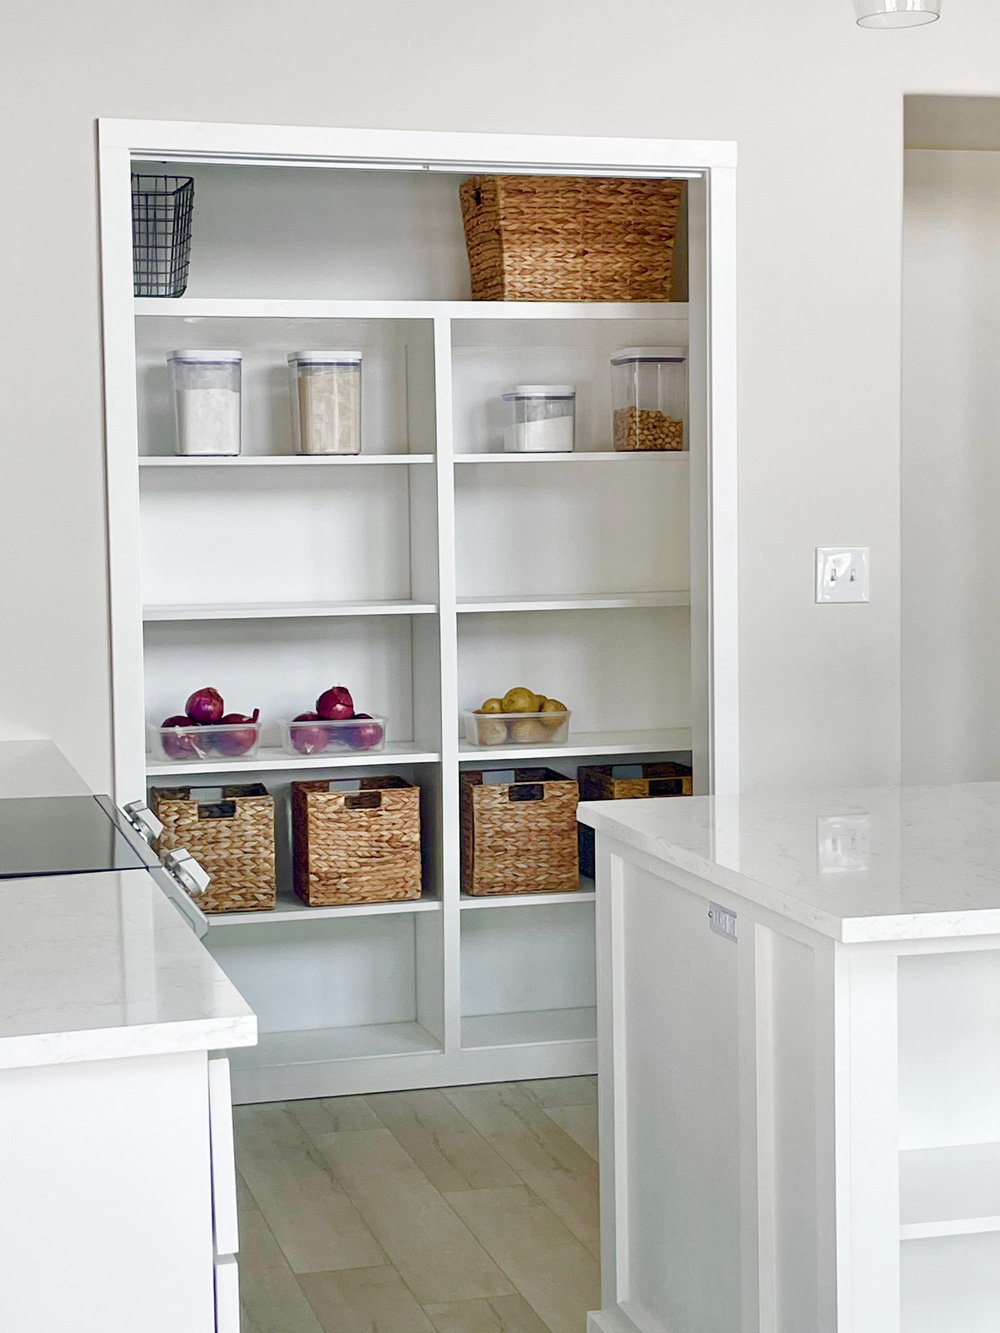
And an inside look.
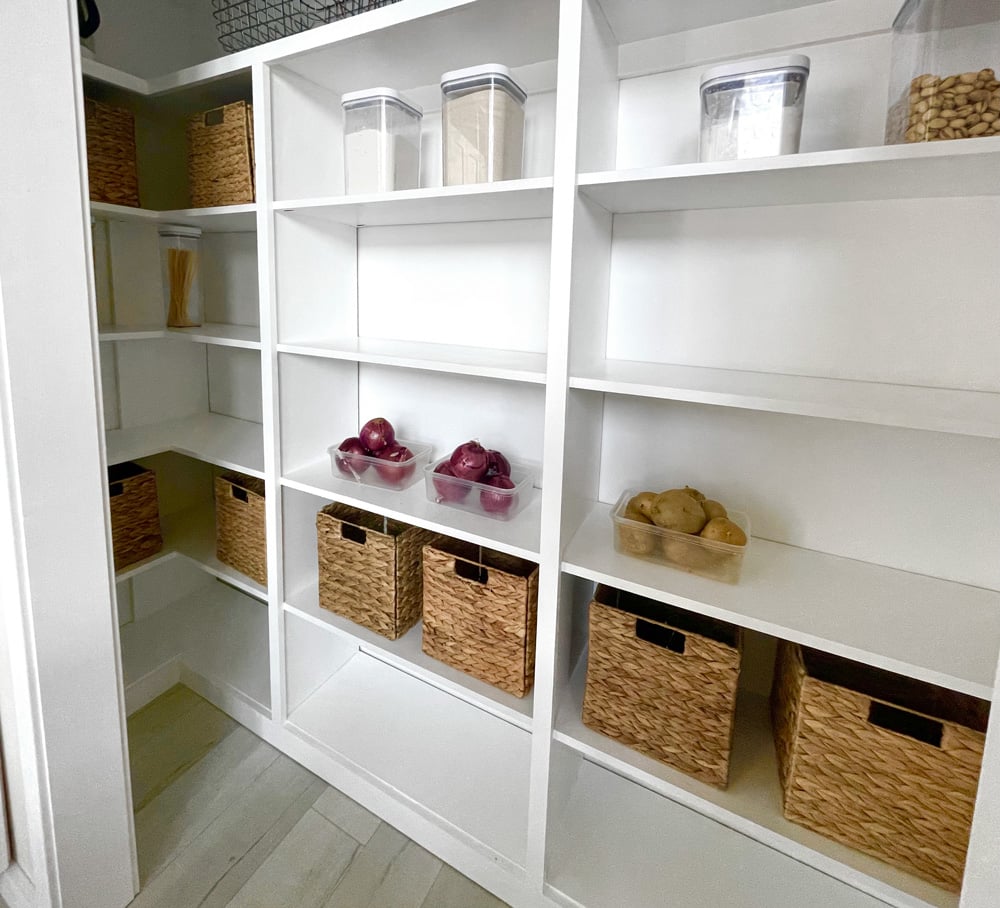
It was some work to add the corner, but it was worth it for the more accessible storage.
We did a build video on this pantry:
Video coming soon
And the free, easy to customize (for yes, YOUR space) is here using our Shelf Help Configurator.
Let us know what you think of this project and if you love it, build it and share a photo!
Thanks!
Ana
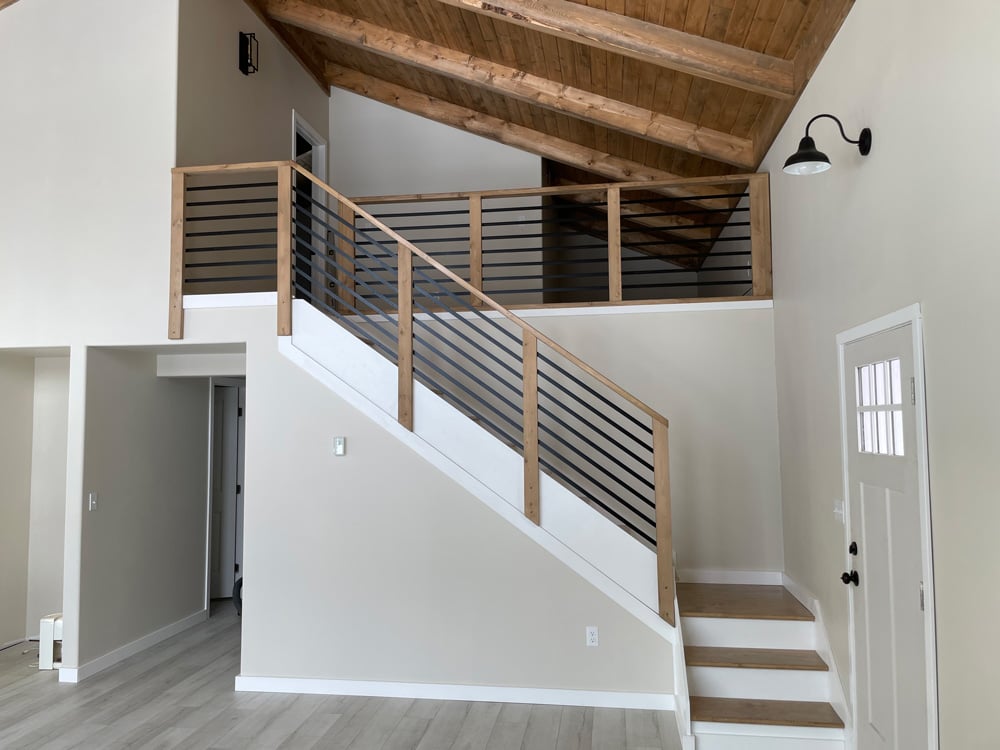
Would you believe me if I told you that of all the stair railings I've done over the years, this one was the simplest, fastest, cheapest and easiest to build? And we do kinda love the modern farmhouse railing look too!
First, we started with some 2x4s.
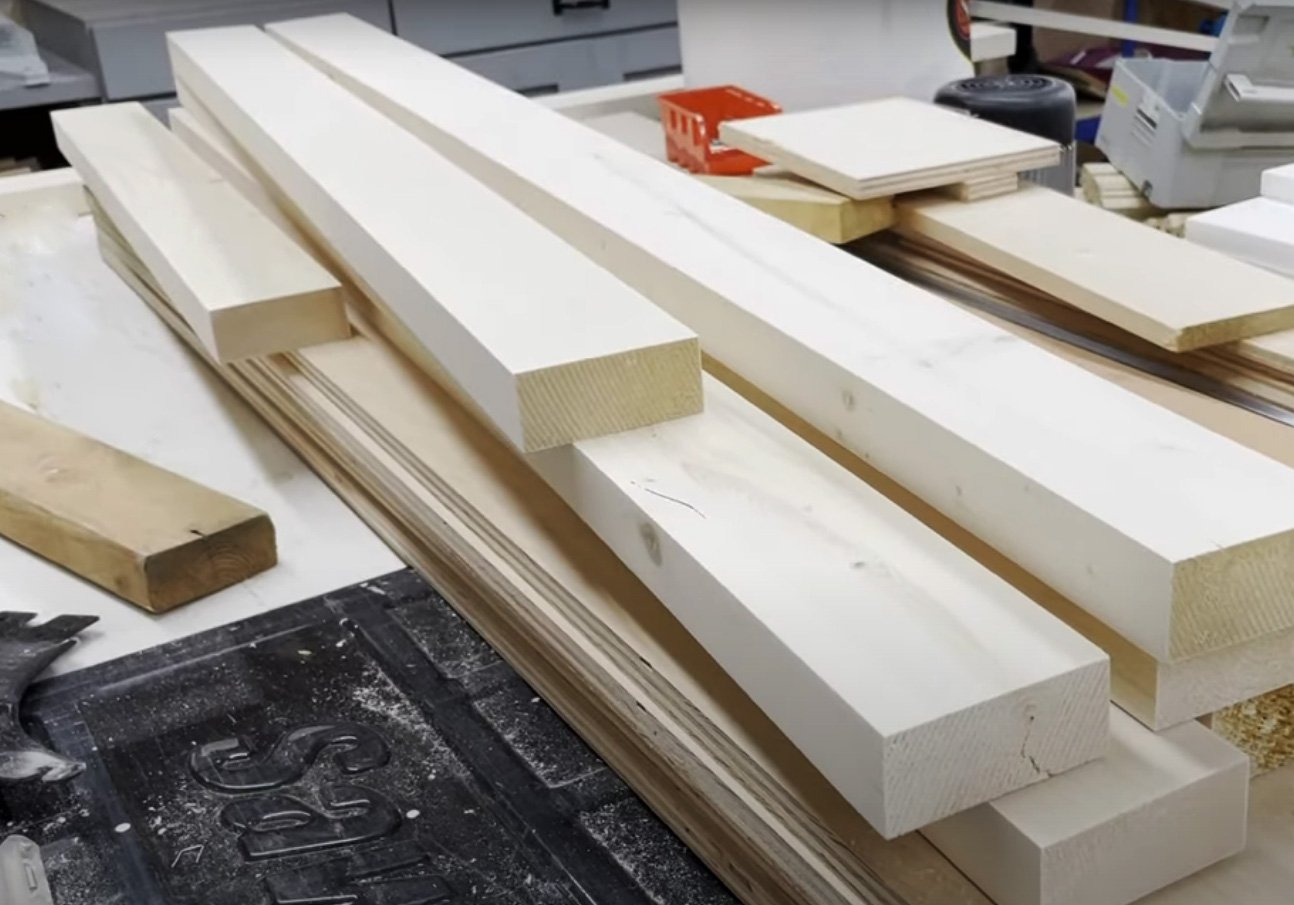
We sanded and stained and cut into 48" long pieces for the post. We also cut pieces for the top cap, again too long so we can trim in place.
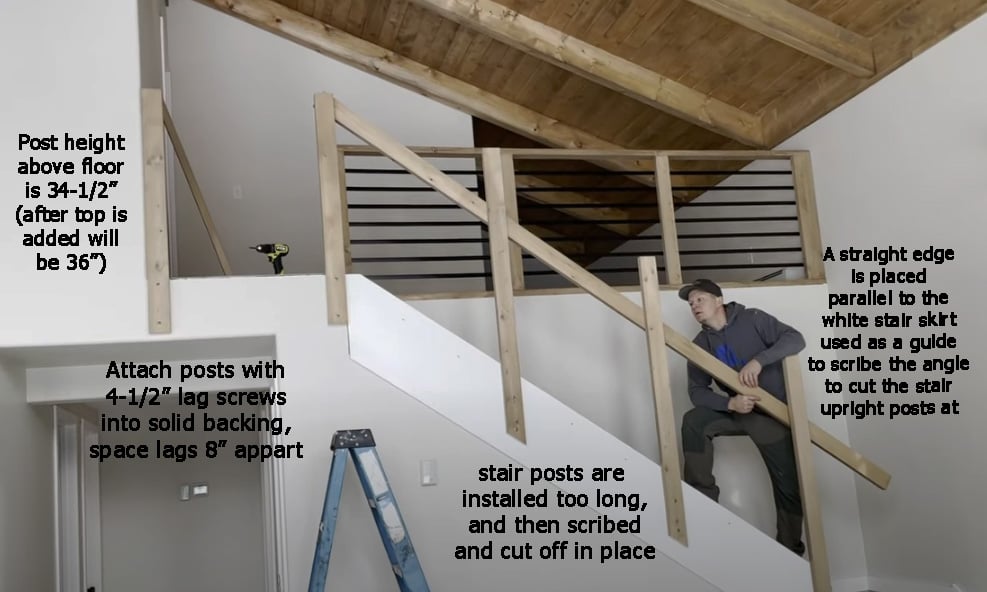
We used 4-1/2" lag screws to attach to solid backing, spacing about 3-4 feet appart. On the stairs, we ran the 2x4s longer, so we could cut them off as needed.
To get the angle to cut the stair posts off right, we held up a straight edge (we used the 2x4 cap to be installed in the next step) so it was parallel with the stair skirt. Then we penciled in the overlap of the straight edge on the posts.
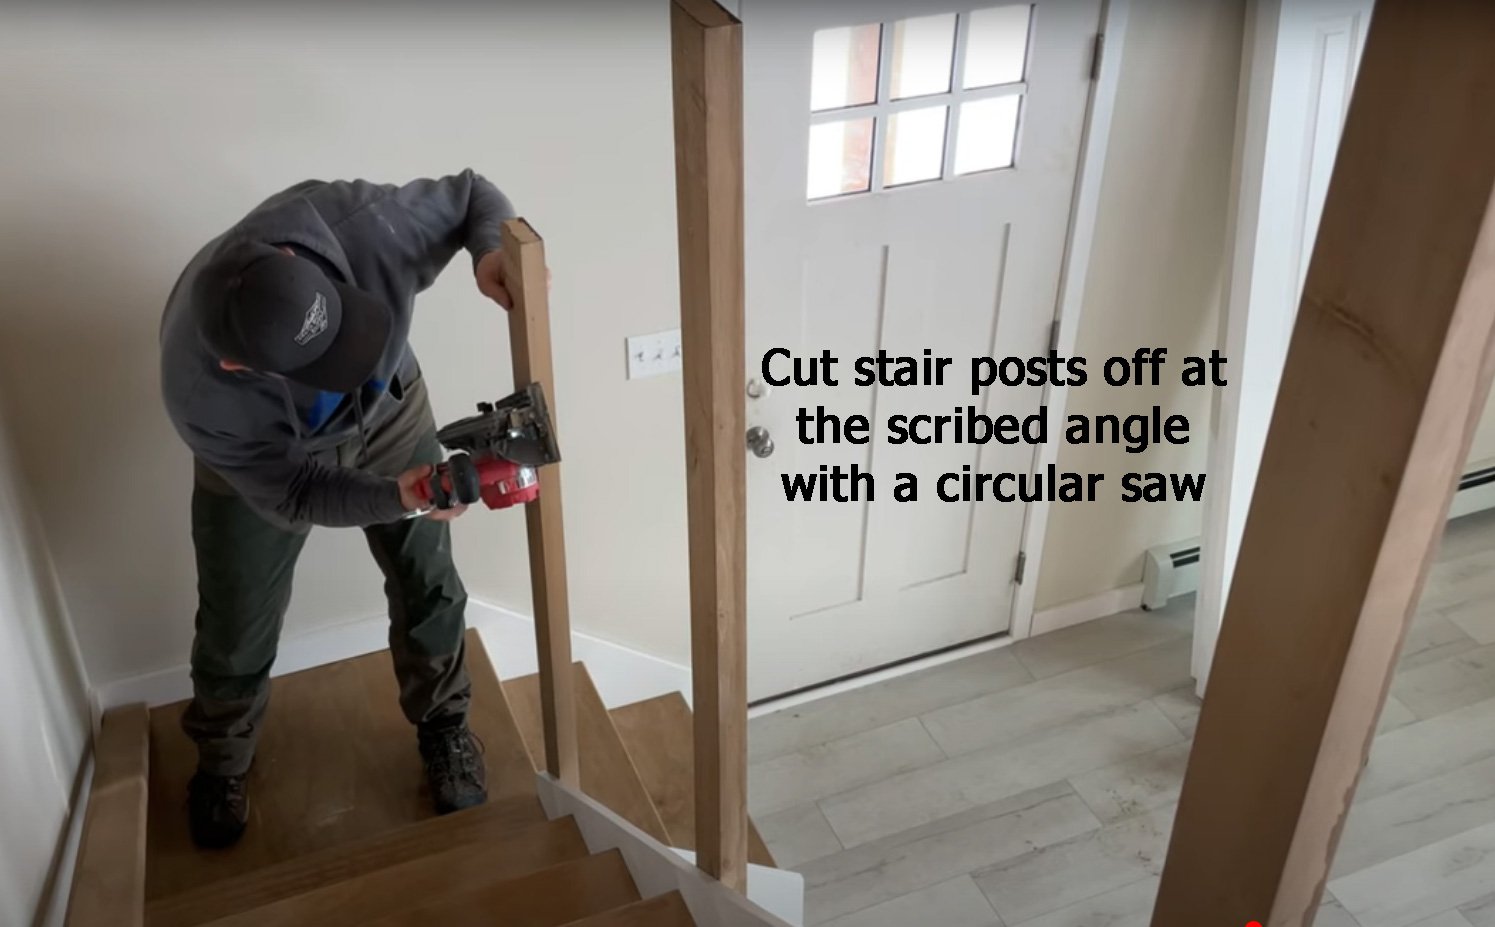
Then we cut the stair posts off at the pencil lines.
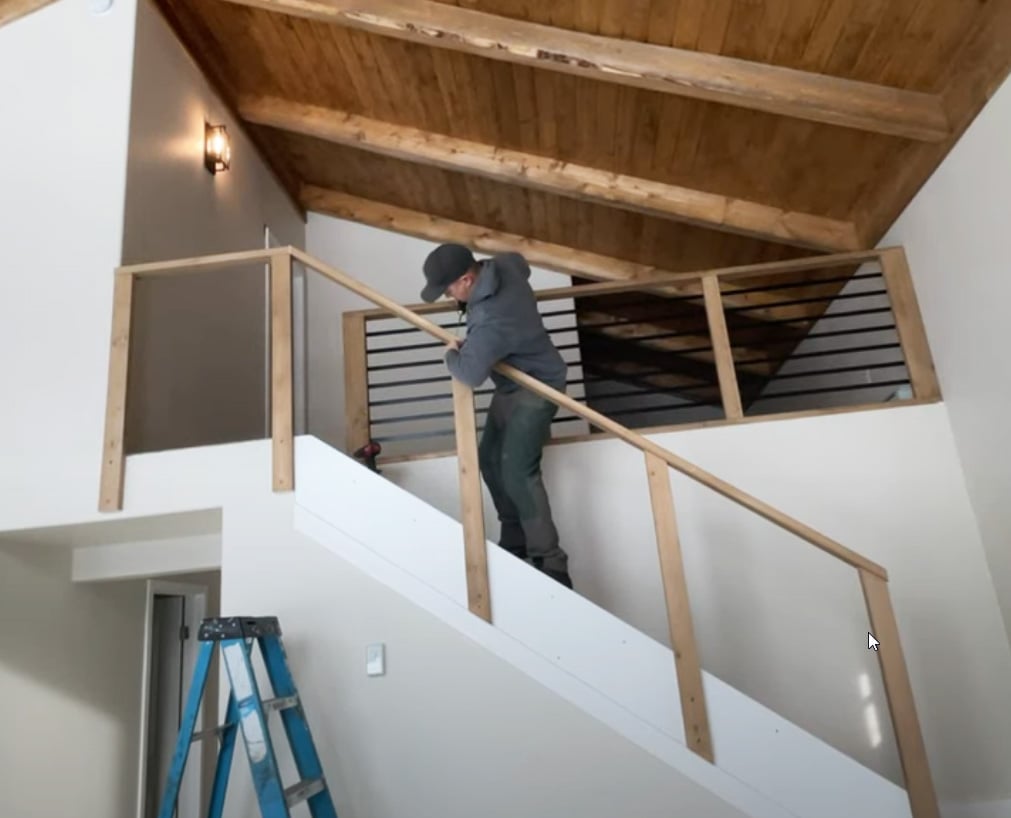
To finish the wood framing for the stair handrail, we attached a cap to the top. To get the cap end angles right, we again held it in place, and traced where it overlapped the other parts of the stair framing. To attach the cap, we used 3" wood construction screws.
Ok, now here's where we cheat.
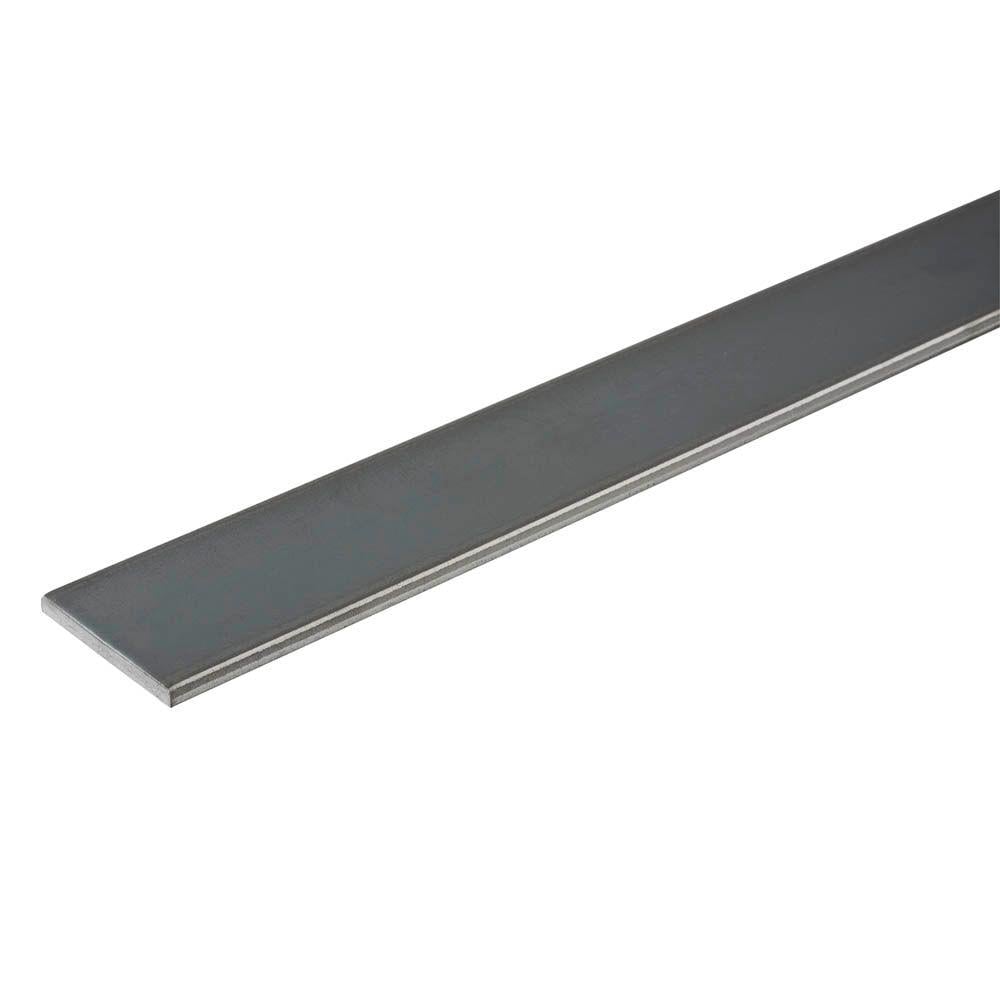
We purchased metal flat bar in 1" width (you can get 20' pieces from a specialty metal store, this entire handrail system was about $170 in metal) and simply cut it with a metal blade and screwed it to the back side of the 2x4 uprights with a 1-1/4" screw.
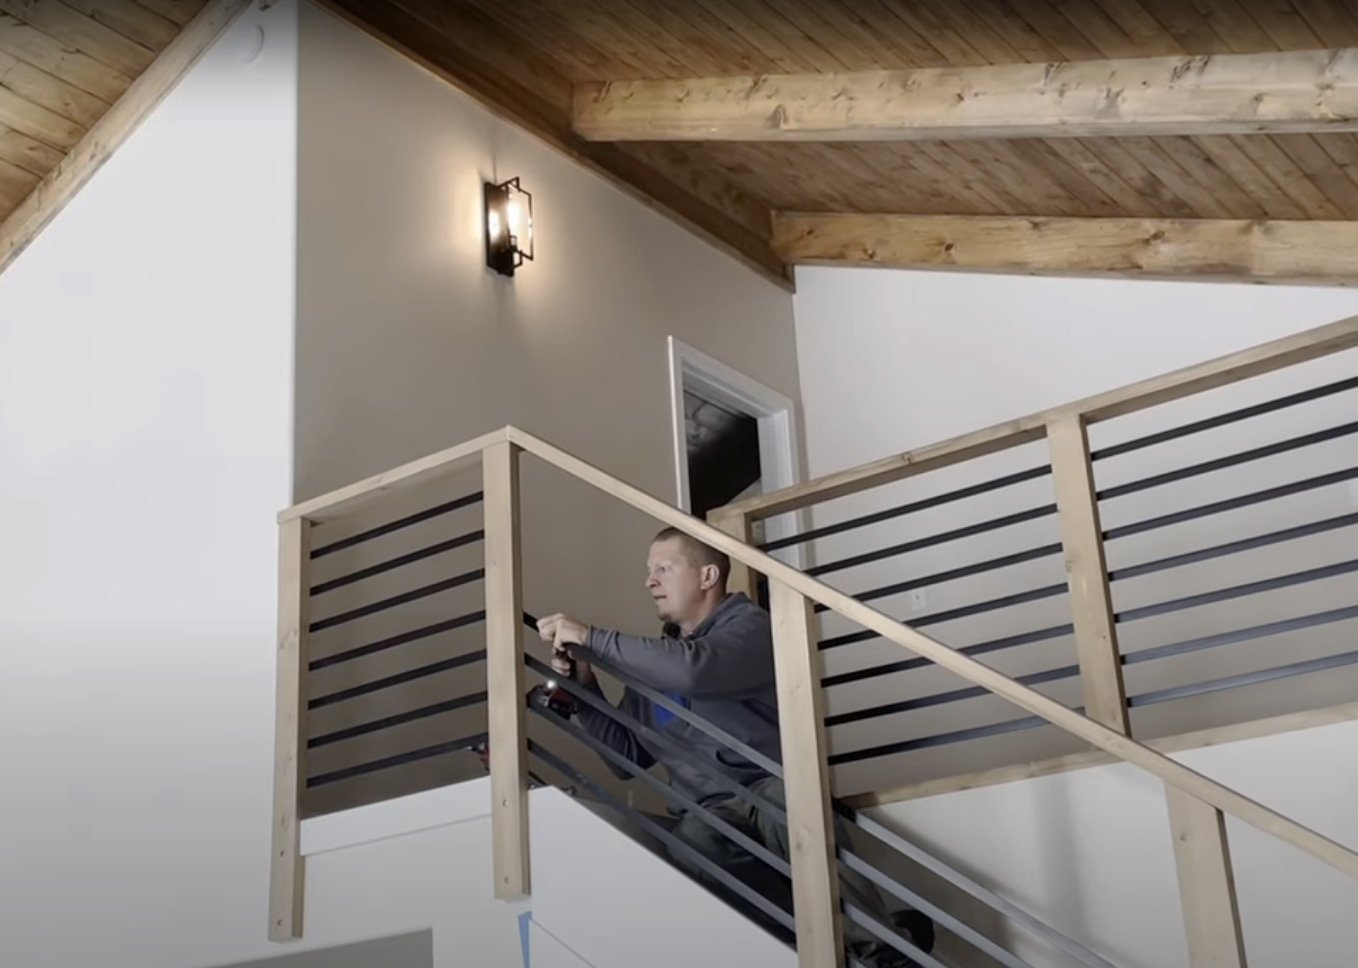
Standard code requires less than 4" openings in railings. So we did a little math and figured out how many rows we'd need and how far apart and marked the straight section of railing, cut the metal flat bar and screwed it to the inside of the 2x4. We just used one screw per post.
This gave us a starting point for the stair railing runs. And then we just eyeballed to make sure the metal was running parallel to the top cap and the skirt and screwed it to the post.
Here's what it looks like from the back.
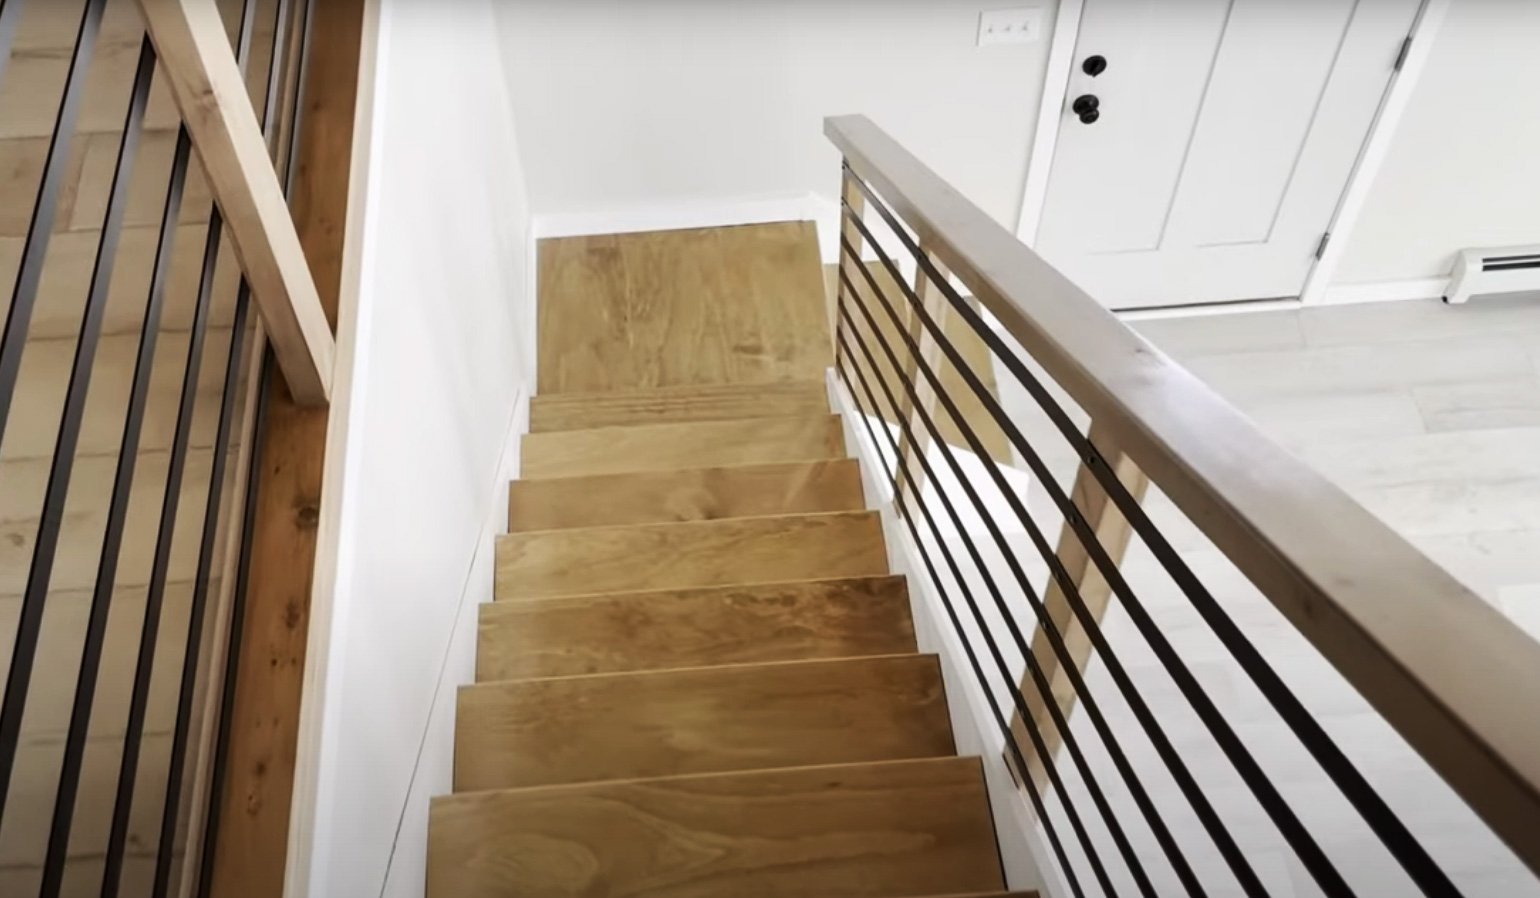
You probably noticed the loft railing. This was even easier to build, but we do recommend using the same method as the stair railing with the outside mount posts for increased strength.
Thank you for using our tutorials. We hope you use it, and share a photo! You can add a brag post or tag me on Instagram #anawhite or @anawhitediy
XO Ana
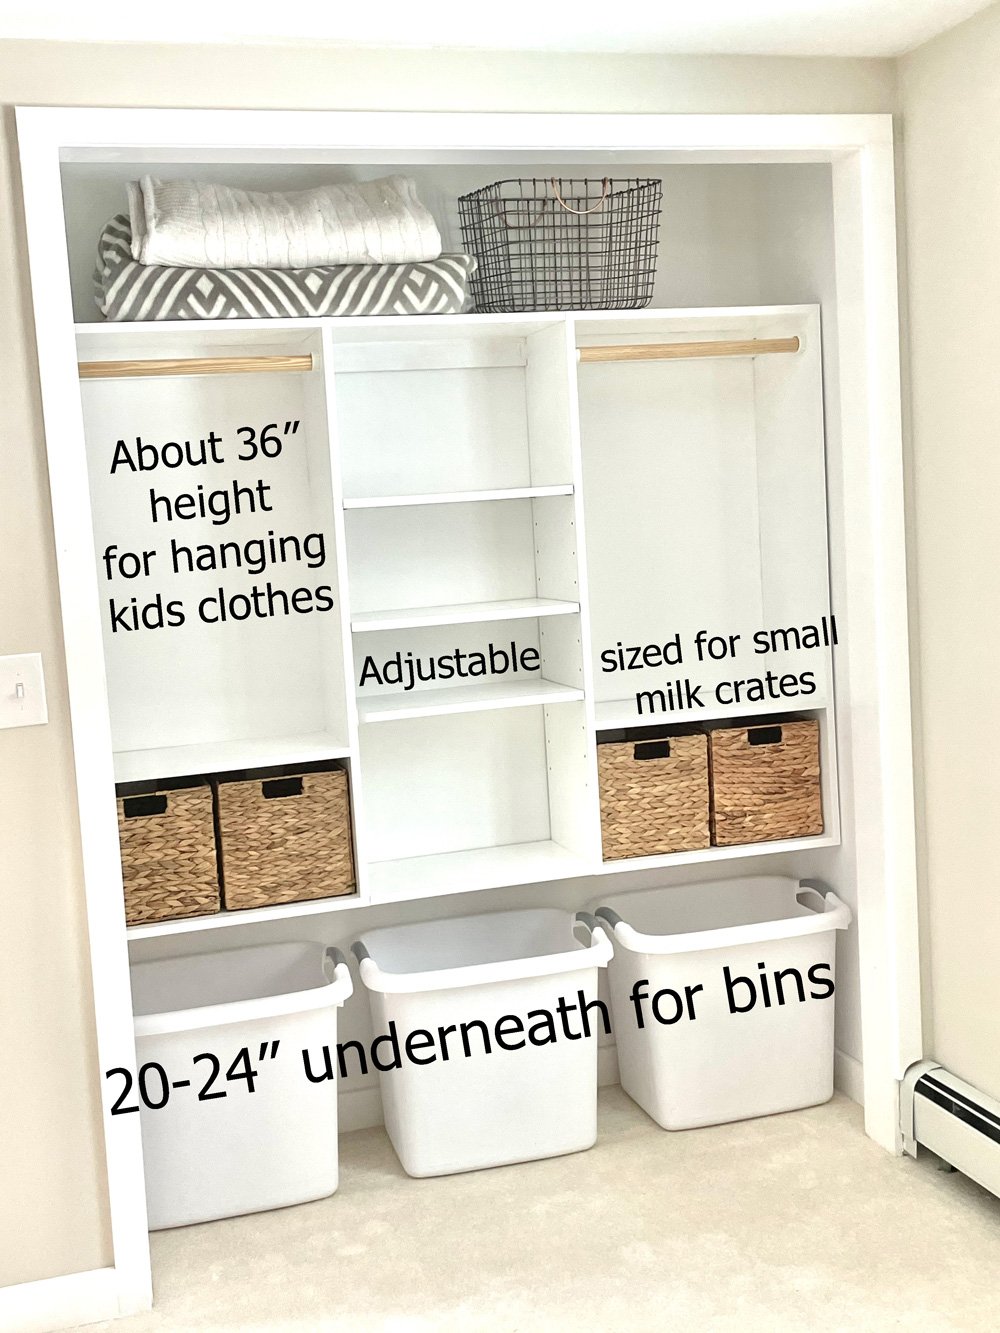
This closet was actually super easy to tackle and install!
We have the free template (with easy to use configurator!) on our sister site Shelf Help. Head on over to download the diagrams and start configuring your own closet.
Cascading flowers or strawberries? Yes, please!
We are sharing plans for a tiered planter, that we only spent $10 on!
The secret to this tiered planter is we made it out of cedar fence pickets!
The first steps are pretty straight forward - just build the three boxes (we used staples but you can also use brad nails or screws). Here's a trick for adding the lower boxes:
The spacer came in handy to help keep the boxes evenly spaced and I didn't have an extra hand, just another step to simplify the process.
Gotta say I love this Staple Gun. Once I made the supports flush to the top I shot them in and viola, I had the stand attached!
Then I flipped this baby over and stood back to admire and couldn't believe how something so simple could make me so happy!
Be sure to drill holes in the bottom to allow drainage.
Time to get this baby planted, all hands on deck kiddos. They were so happy to help!
We decided to keep the cedar natural so the step that usually takes the most time, the finishing, didn't even need to happen. The final result is a beautiful planter that is so versatile. I thought herbs would be nice, or instead of 2 traditional planters on each side of the sidewalk, two of these would be fun and give a different look. If you do decide to finish it, paint or stain goes a long way. A simple project with many options, that's what I'm talking about!