2025年2月25日星期二

Small Wood Planter with Tall Back

Why I Built this Project

I wanted to add a planter to my entrance to create more curb appeal and I also liked the idea of adding solar lights to help shed more light in the dark months to our front door area.

The address numbers are a nice custom touch!

Why We Love this Small Privacy Planter

  • Easy to build privacy planter
  • Built using basic tools and materials
  • Change out plants for every season
  • Fun and festive addition for the holidays
  • Modify for different size pots


Build the Full Size Privacy Planter

A few years ago, we made plans for this full size privacy planter!  It has been a big hit, and this smaller planter is inspired by it.  Get the free plans for the large privacy planter here.


Privacy planter


How I Built this Project

Cut 2x4's according to the cut list and assemble using 2.5" screws and build the 2 legs.

leg

leg


leg

leg

leg

Build both legs in mirror as seen here. Measure and cut your cedar fence pickets to close in each side. 

sides

side

legs

Lay the legs flat and add the front and back slats. This part makes it easy to modify for size, measure and cut as desired or follow the cut list!

front

front

planter

For the back, cedar fence pickets can vary in width quite a bit. I suggest cutting and laying them out with a slight gap. I ended up pushing them tight and had a space at the top on one of the planters, the second planter came out with the pickets hanging a little over, so I just ripped the pickets to fit at the top.

back

back

gap

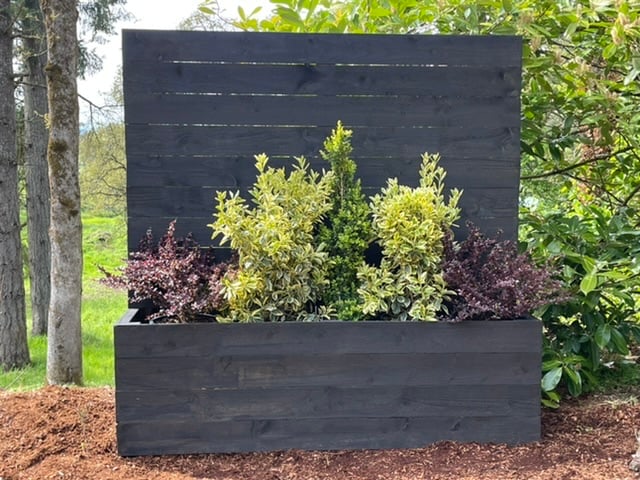
I added solar barn lights and our house number to dress it up. I love the result!!!

done

done


Watch!  Build Video for This Project

if applicable, embed video here


Free Plans to Build Your Own Small Privacy  Planter

Ready to build this yourself?  Here's the free plans, enjoy!


from Recent Project Plans https://ift.tt/hlDcpCU

2025年2月11日星期二

Free 8-Foot Garage Shelving Plan – Sturdy, Affordable, and Easy to Build

Why Choose Wood Shelving Over Metal?

Wood shelving isn't just about looks—it’s about functionality, flexibility, and sustainability. Here’s why wood is the better choice:

✔ Easily Customizable – Want to add hooks, brackets, or accessories? Simply screw them in! Need to modify a shelf? A saw and drill make it easy.

✔ Environmentally Friendly – Wood is a renewable resource and much more sustainable than metal or plastic.

✔ Biodegradable & Upcyclable – Unlike metal shelving that sits in a landfill forever once it breaks, wood can be repurposed, upcycled, or even composted.

✔ Strong & Durable – With proper construction, wood shelving can hold just as much weight as expensive metal alternatives.


What’s Included in the Free Plan?

  • Complete Shopping List – Know exactly what to buy.
  • Cut List – Minimize waste and make precise cuts.
  • Step-by-Step Instructions – Easy-to-follow diagrams for every step.
  • 3D Diagrams – Visual guides to help with assembly.


Why Build This Garage Shelving?

✔ Affordable & Minimal Waste – The design is optimized to use materials efficiently.

✔ Strong & Sturdy Design – Holds heavy items with ease.

✔ Simple DIY Build – No complicated joinery, just straightforward assembly.

✔ Fits Most Spaces – A standard 8-foot width makes it ideal for garages, basements, and workshops.


Perfect for DIYers of All Levels

Even if you’re new to woodworking, this plan makes it easy to build custom-quality shelving at a fraction of the cost of store-bought options. No special tools required—just basic materials from your local hardware store!

garage shelving 8' free plans


Free Plans to Build Your Own Garage Shelving

Here is the free plans to tackle this garage shelving.  Thank you for using our free plans.  


from Recent Project Plans https://ift.tt/4gkmOoM